The Contact Overview provides comprehensive customer intelligence that enables data-driven decisions about subscriber engagement and helps optimize your marketing effectiveness through detailed behavioral insights. This centralized view of individual contact activity significantly improves campaign targeting by providing engagement metrics, purchase history, and interaction patterns that help you create more relevant, personalized communications.
You can leverage these detailed customer insights to improves marketing effectiveness by identifying high-value customers, tailoring messaging based on engagement levels, and managing subscriber lifecycle more strategically.
It helps you understand the contact's engagement with your emails, products, or services at the individual level without having to click through multiple pages or tabs. You can also manage the contact in various lists by adding or removing the contact to the lists and subscribing or unsubscribing the contact from the lists.
The Tickets tab and ticketing metrics on the Overview tab are visible only with the Maropost Service Cloud subscription.
Viewing a Contact Overview
For quicker access to the overview of a specific contact, use the Contact Search widget on the Dashboard (For more information, see the Contact Search section in the Dashboard Walkthrough article). The overview for each contact is also available from the contact list and can be accessed as follows:
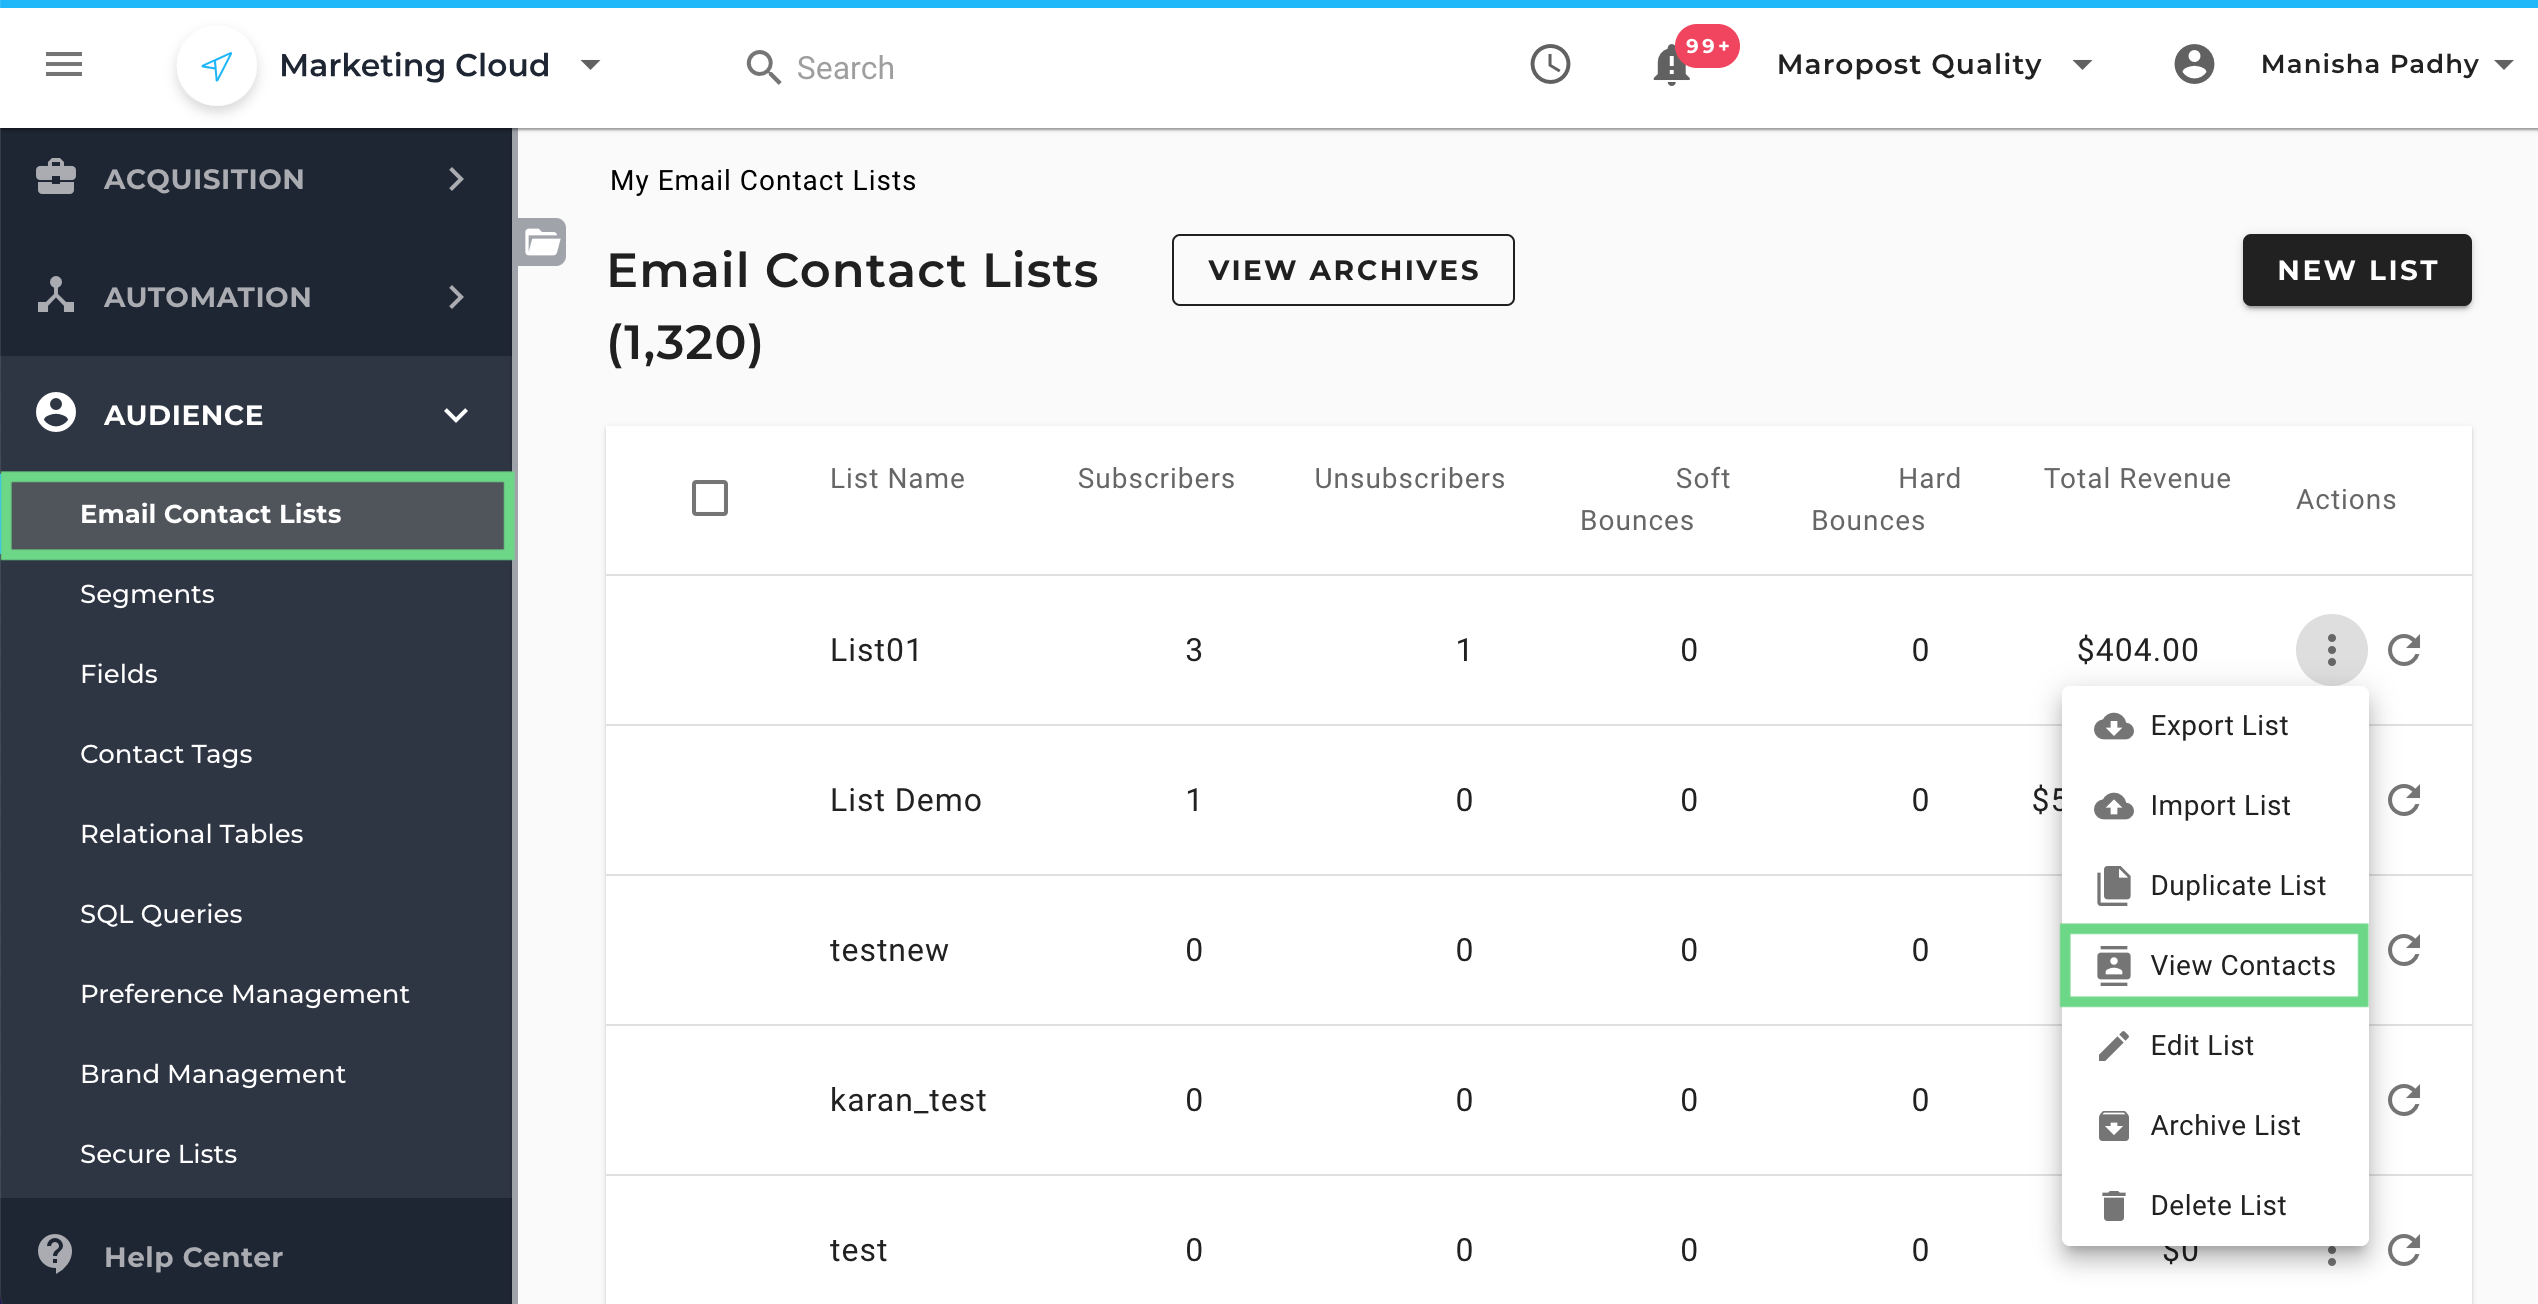
- In the Navigation, go to AUDIENCE, and then select Email Contact Lists. The Email Contact Lists page shows all the lists of contacts for your account. To see all the contacts in a specific list, from the Actions drop-down menu, select View Contacts.
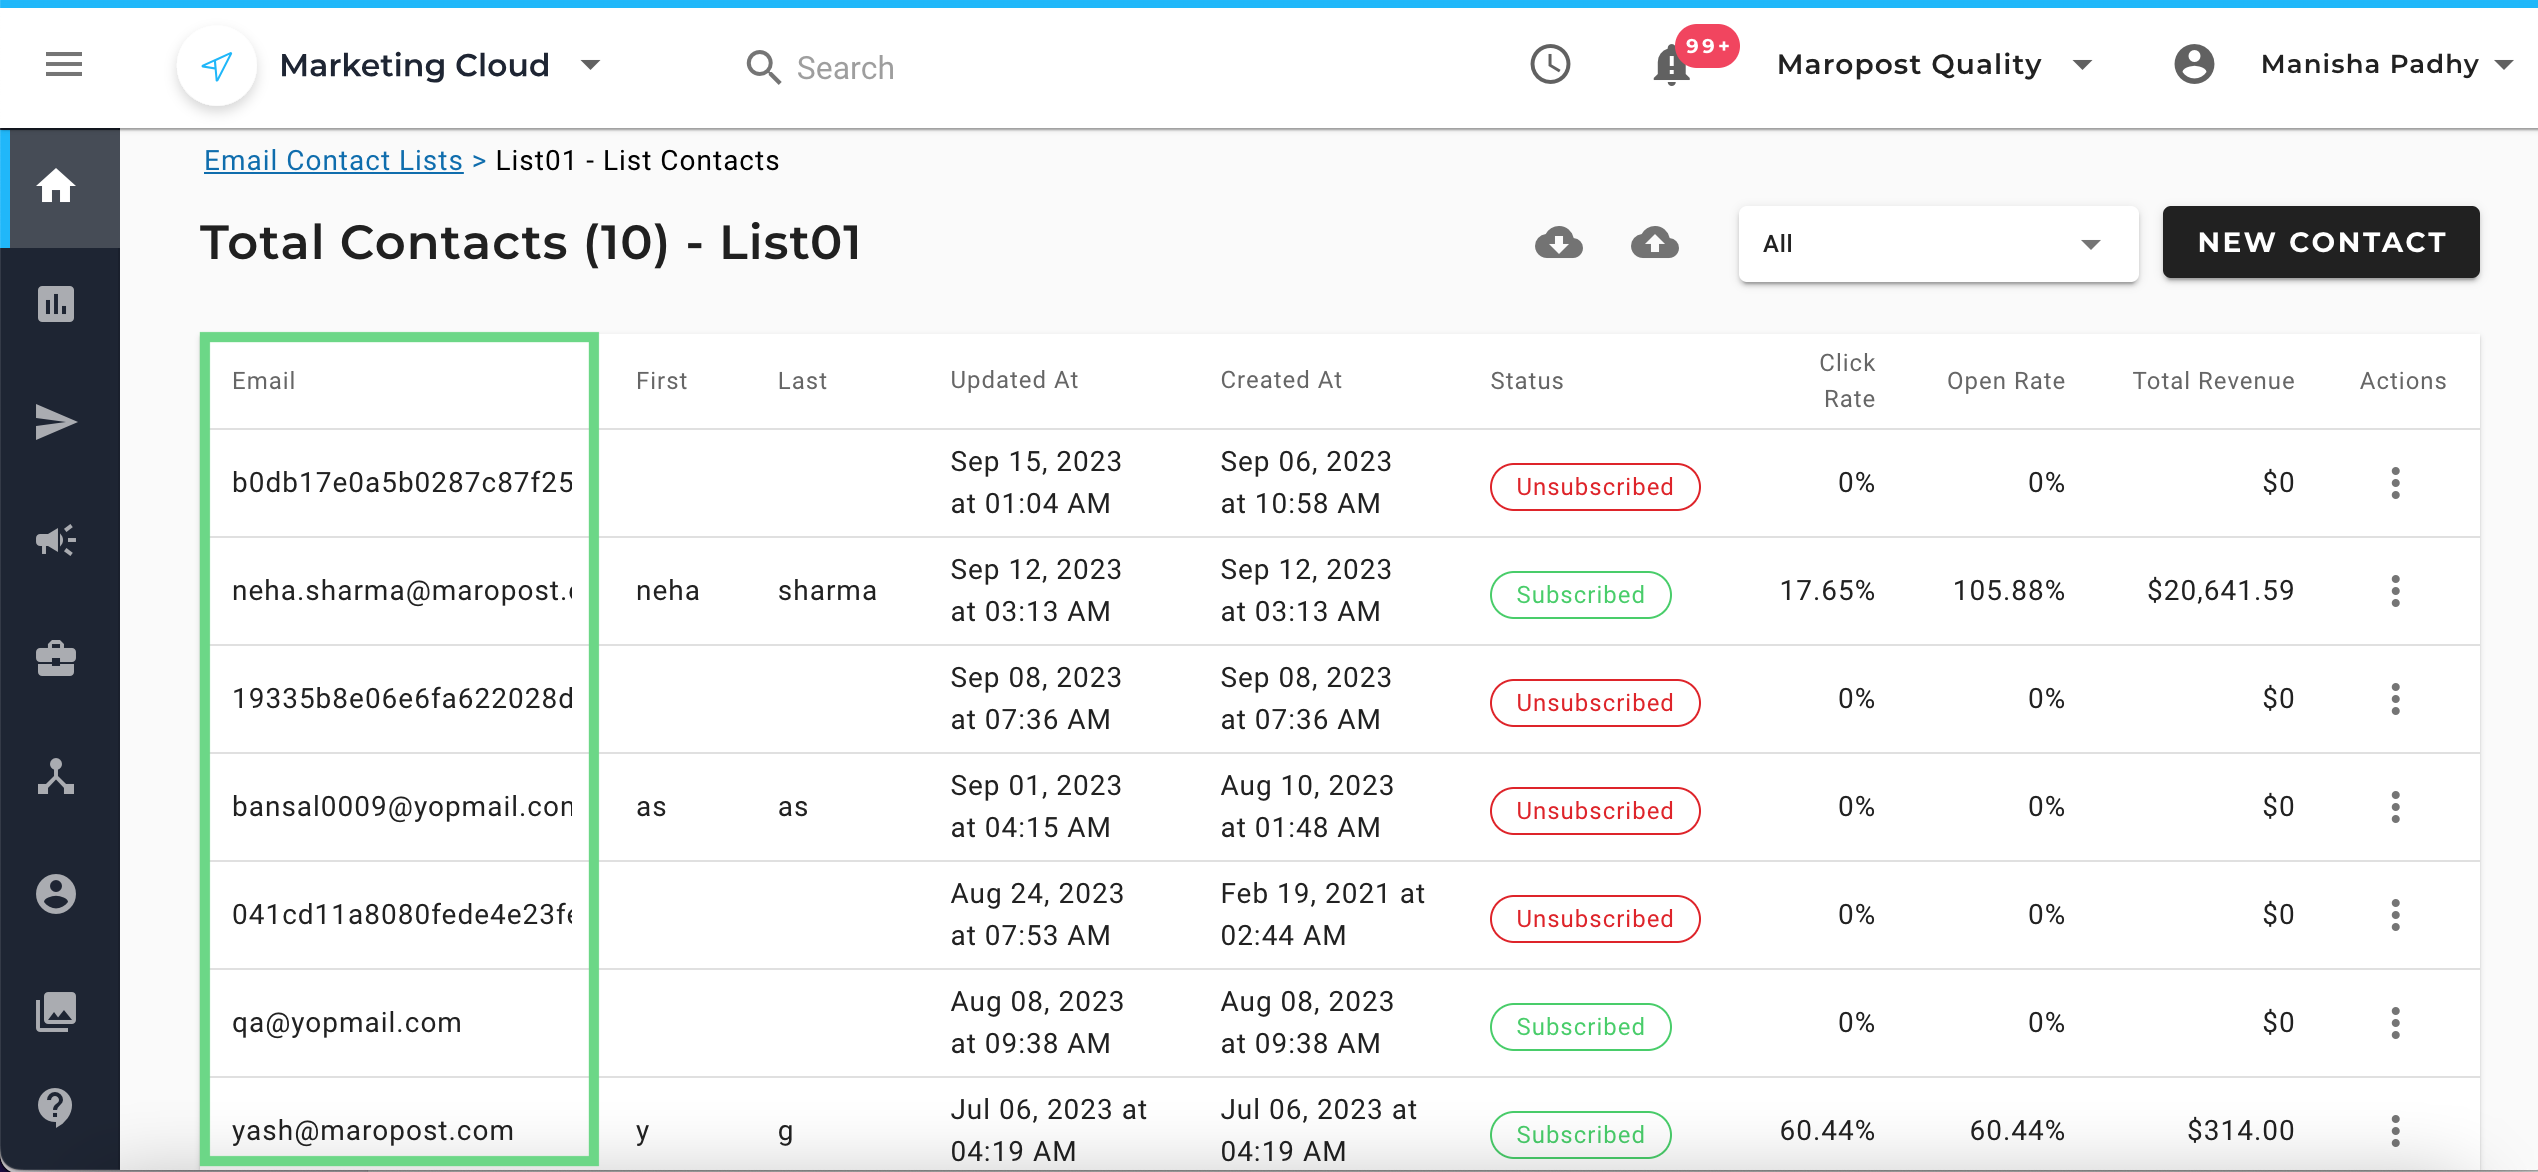
- The Total Contacts page shows all the contacts in the list. You can then click the email address of the contact to see an overview of the contact.
Breakdown of Contact Overview Information
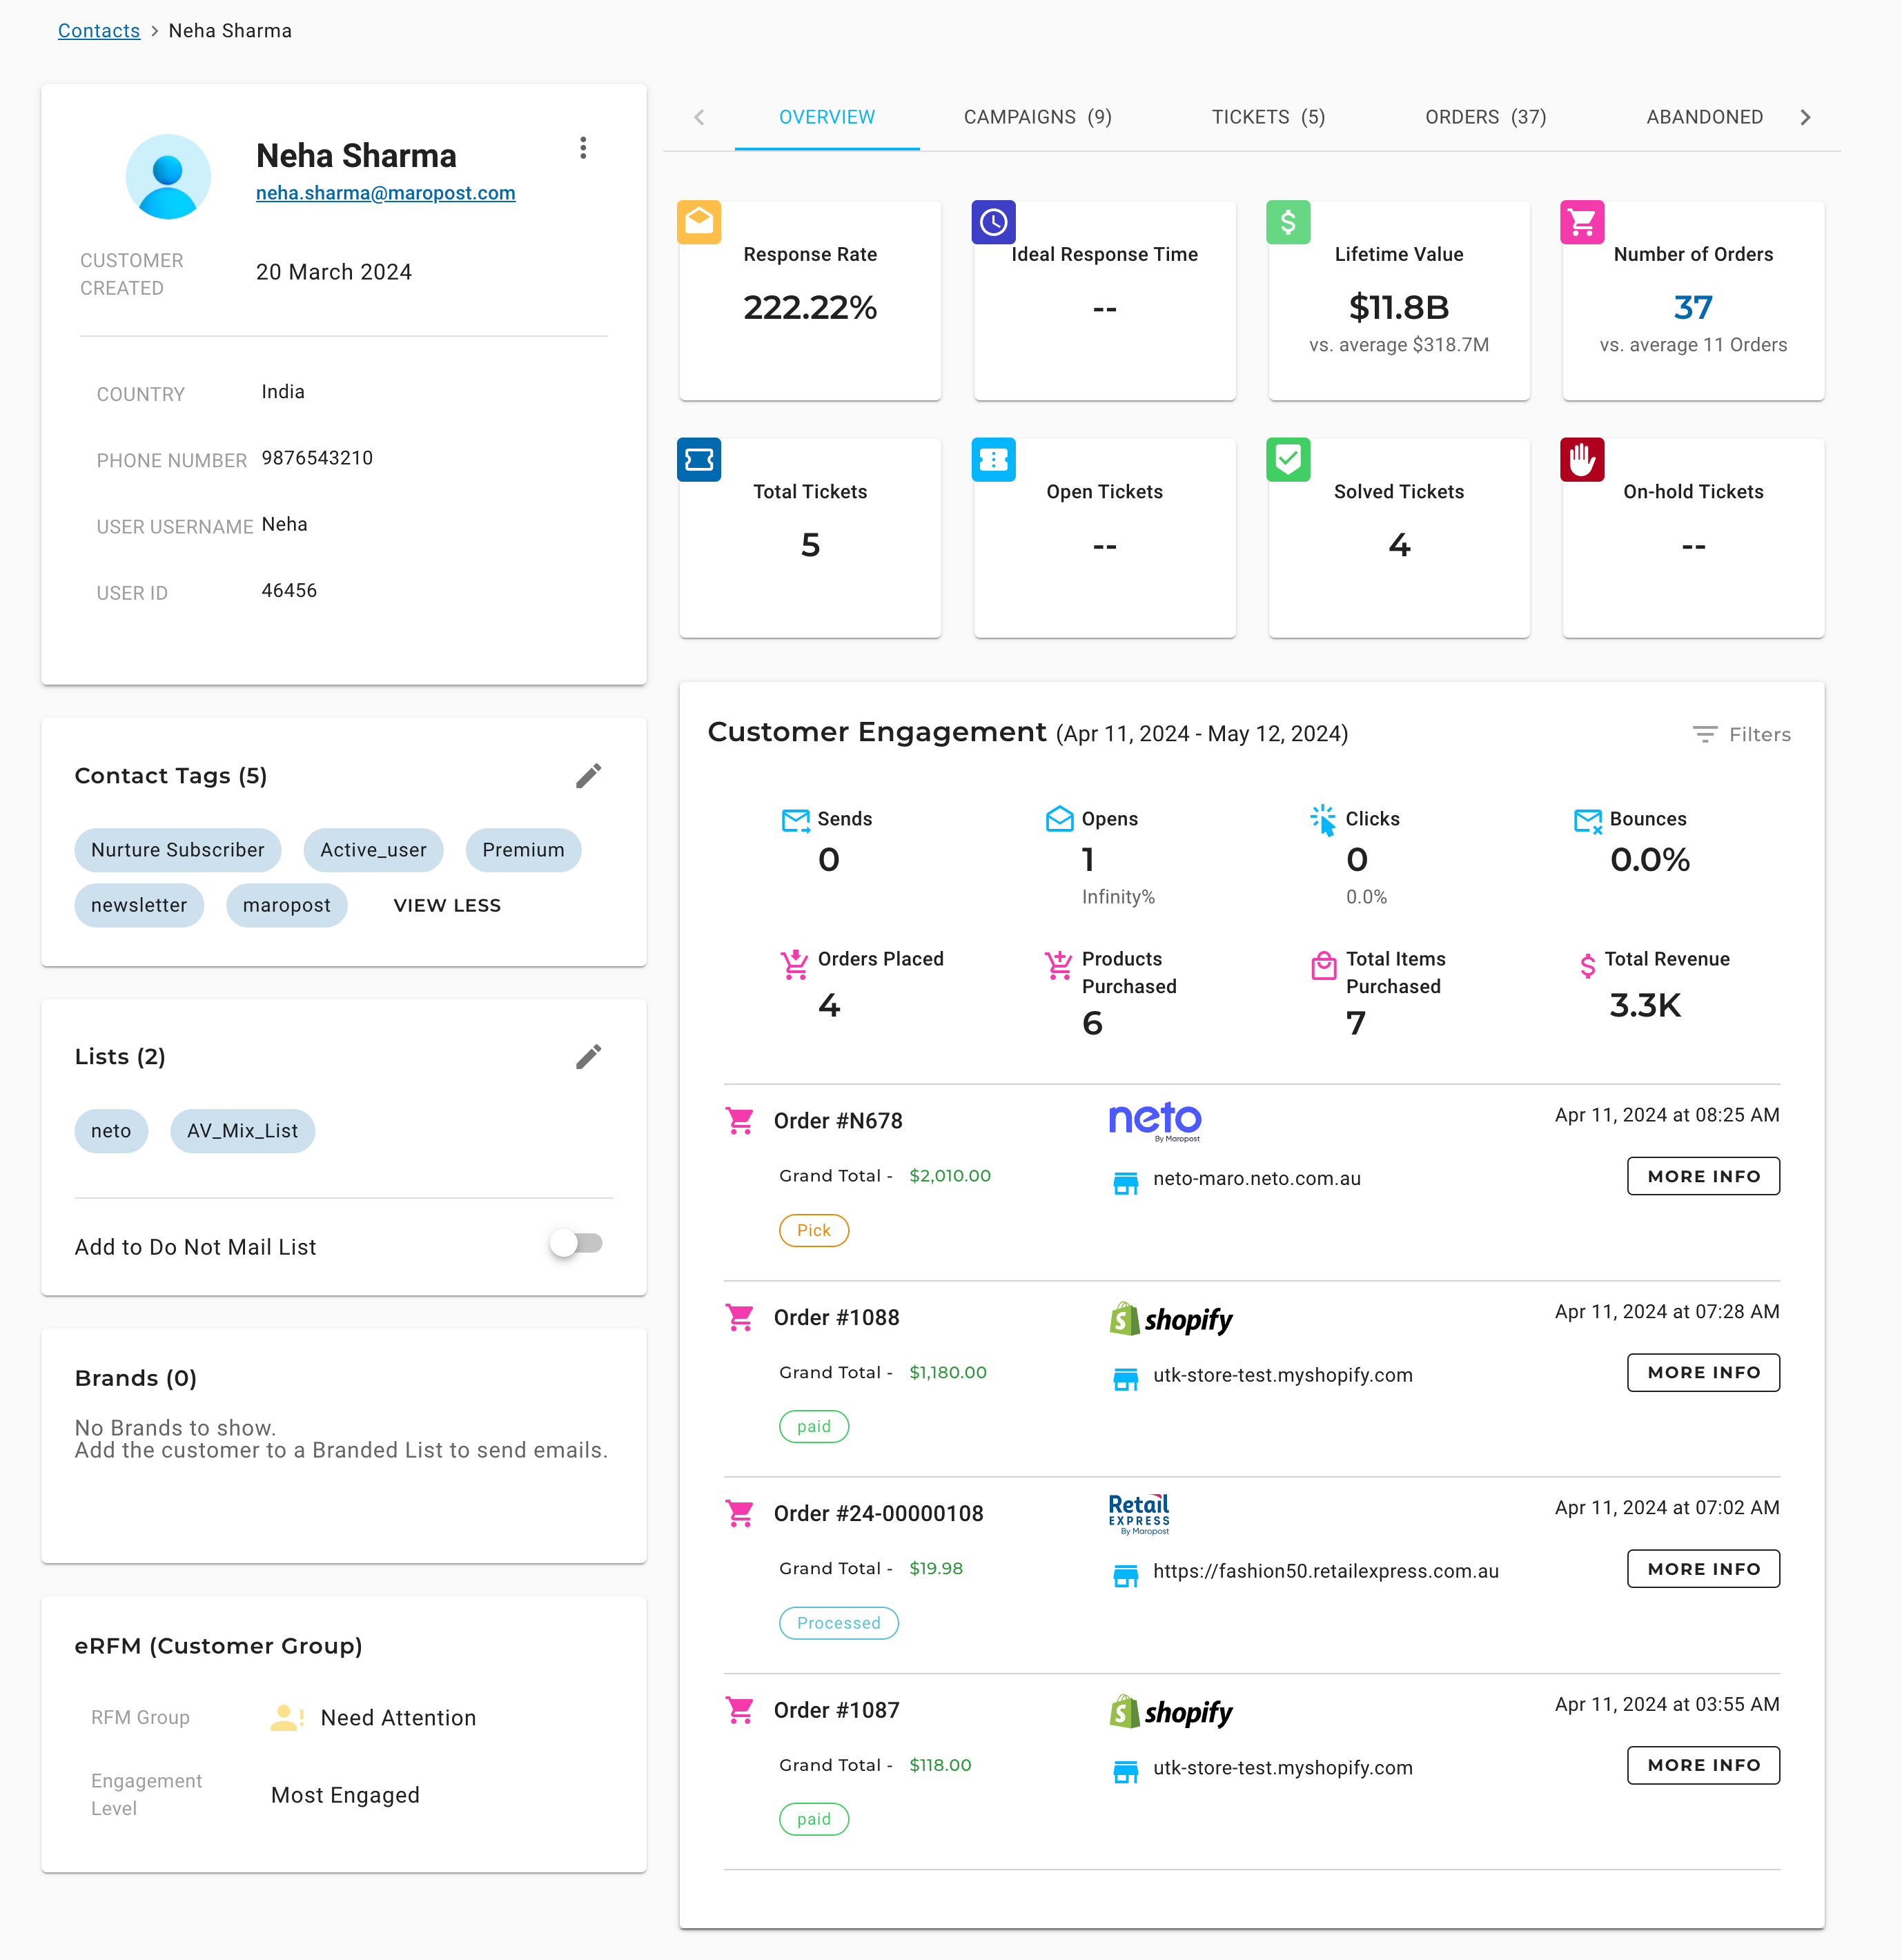
Contact Card
The contact card shows all associated attributes of the contact at a glance. You can use the action menu to edit and delete the contact.
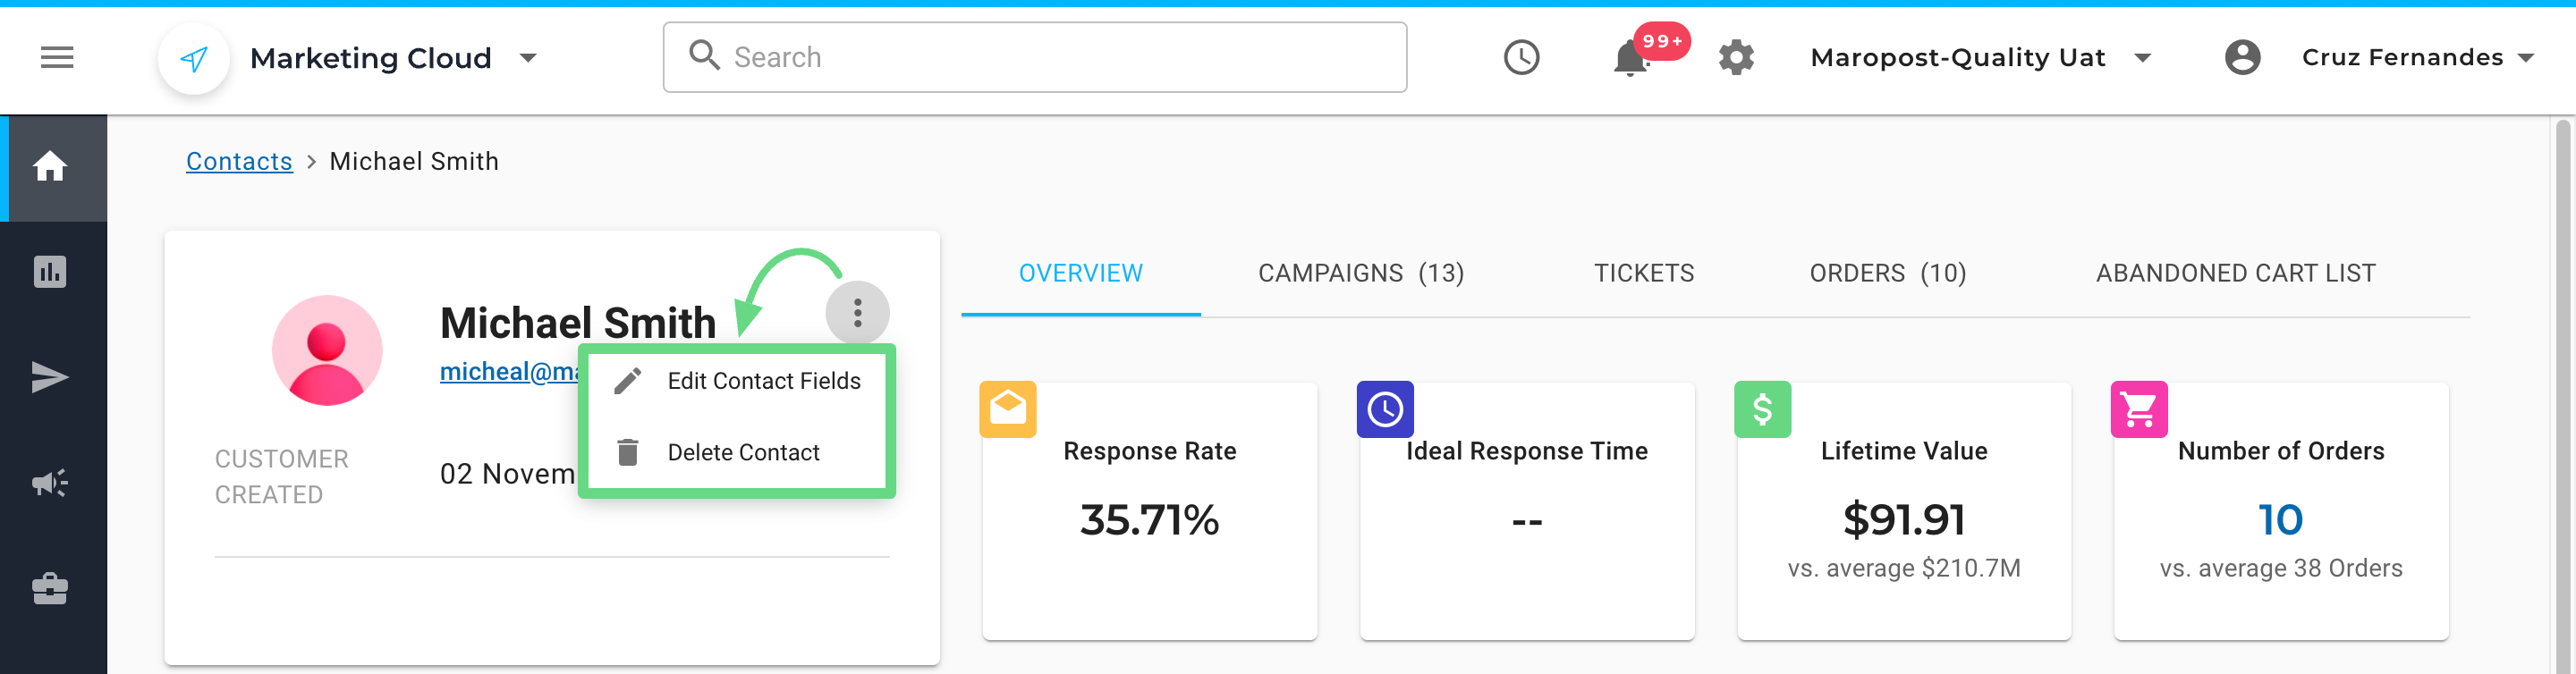
While editing your contact details, you can show or hide the default and custom contact fields and rearrange their order. Any changes made to the contact field arrangement are applied to all the contacts.
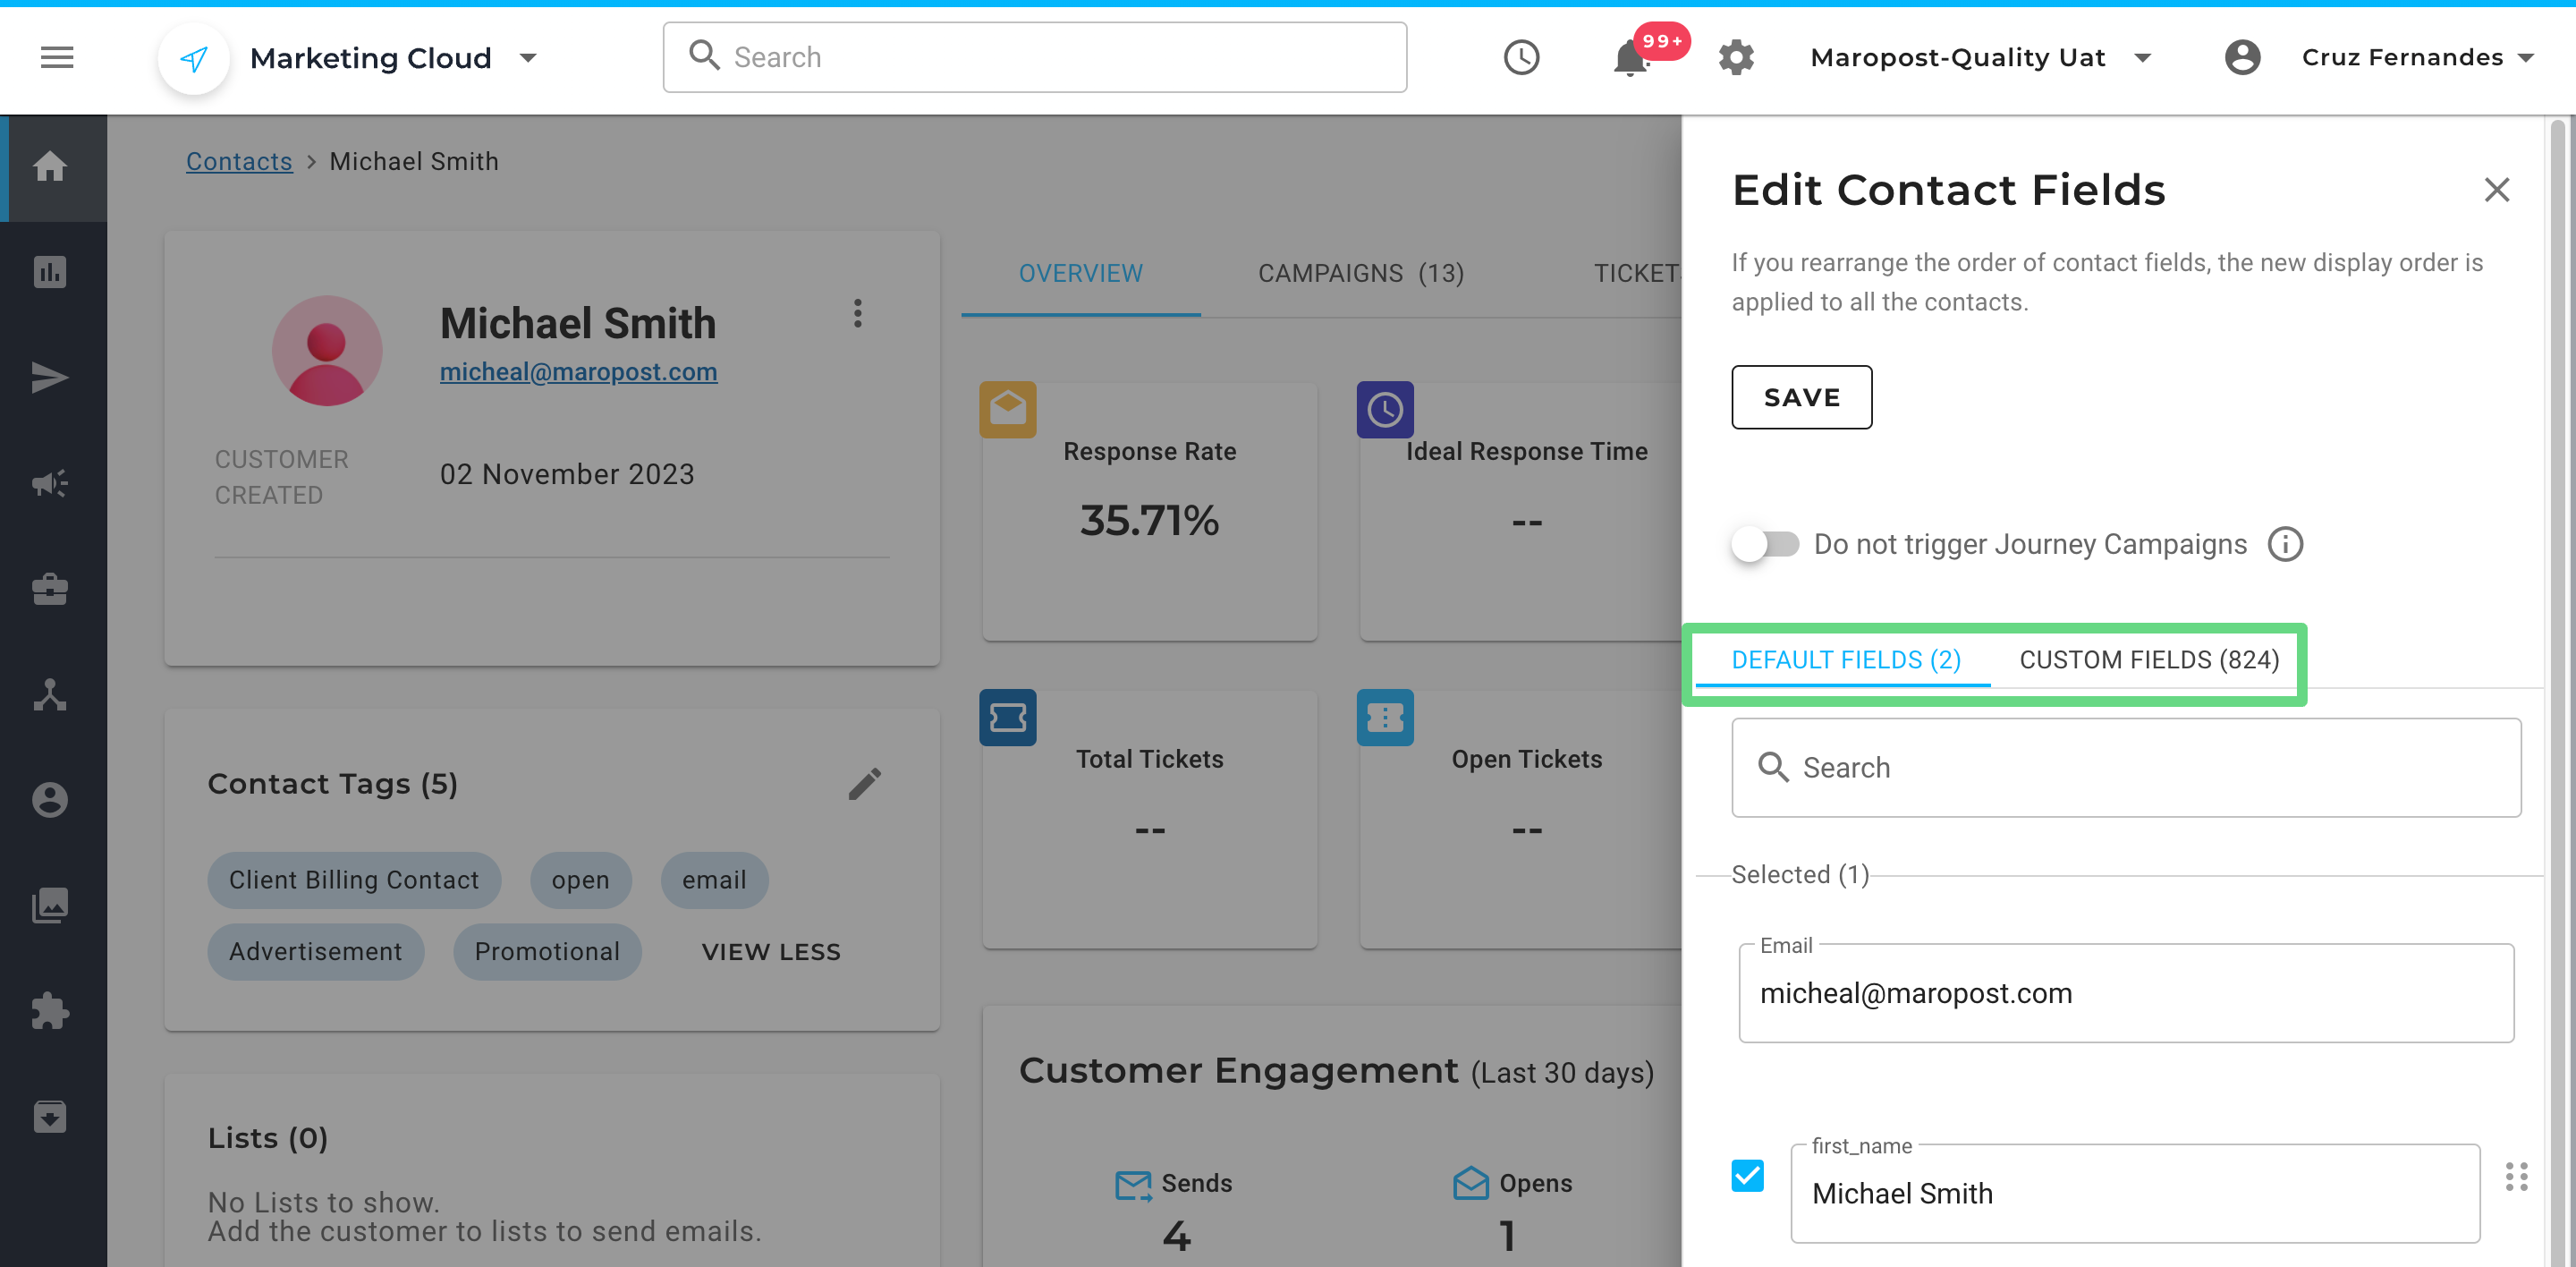
The "Email" field is a mandatory section. It can only be edited and is displayed by default under the contact's name.
Customer Engagement Cards
The engagement cards on the Overview tab provide quick insight into the contact's interactions with your brand through the following metrics:
- Response Rate: Frequency with which the contact opens the email campaigns.
- Ideal Response Time: Ideal time taken by the contact to open the email campaigns.
- Lifetime Value: The total spending of the contact. Also, displayed is the average of the total spending by all your contacts.
- Number of Orders: Number of orders placed by the contact. Also, displayed is the average of total orders placed by all your contacts.
 You can click the order count to view the Order Details page which displays the details of all the orders placed by the contact. The order details include the order number, order status, total order value, order date, and the source from which the order details were captured.
 You can find the drilled-down information for the metrics on the specific tabs for Campaigns and Orders. On the Campaigns tab, you can see all the campaigns sent to the contact.
The Tickets tab is visible only with the Maropost Service Cloud subscription.
 And on the Orders tab shows all the orders placed by the contact. The order information includes the order items details, order total, and shop URL. For the Neto and Shopify orders, you also have the option of quickly navigating to the store to view the order.
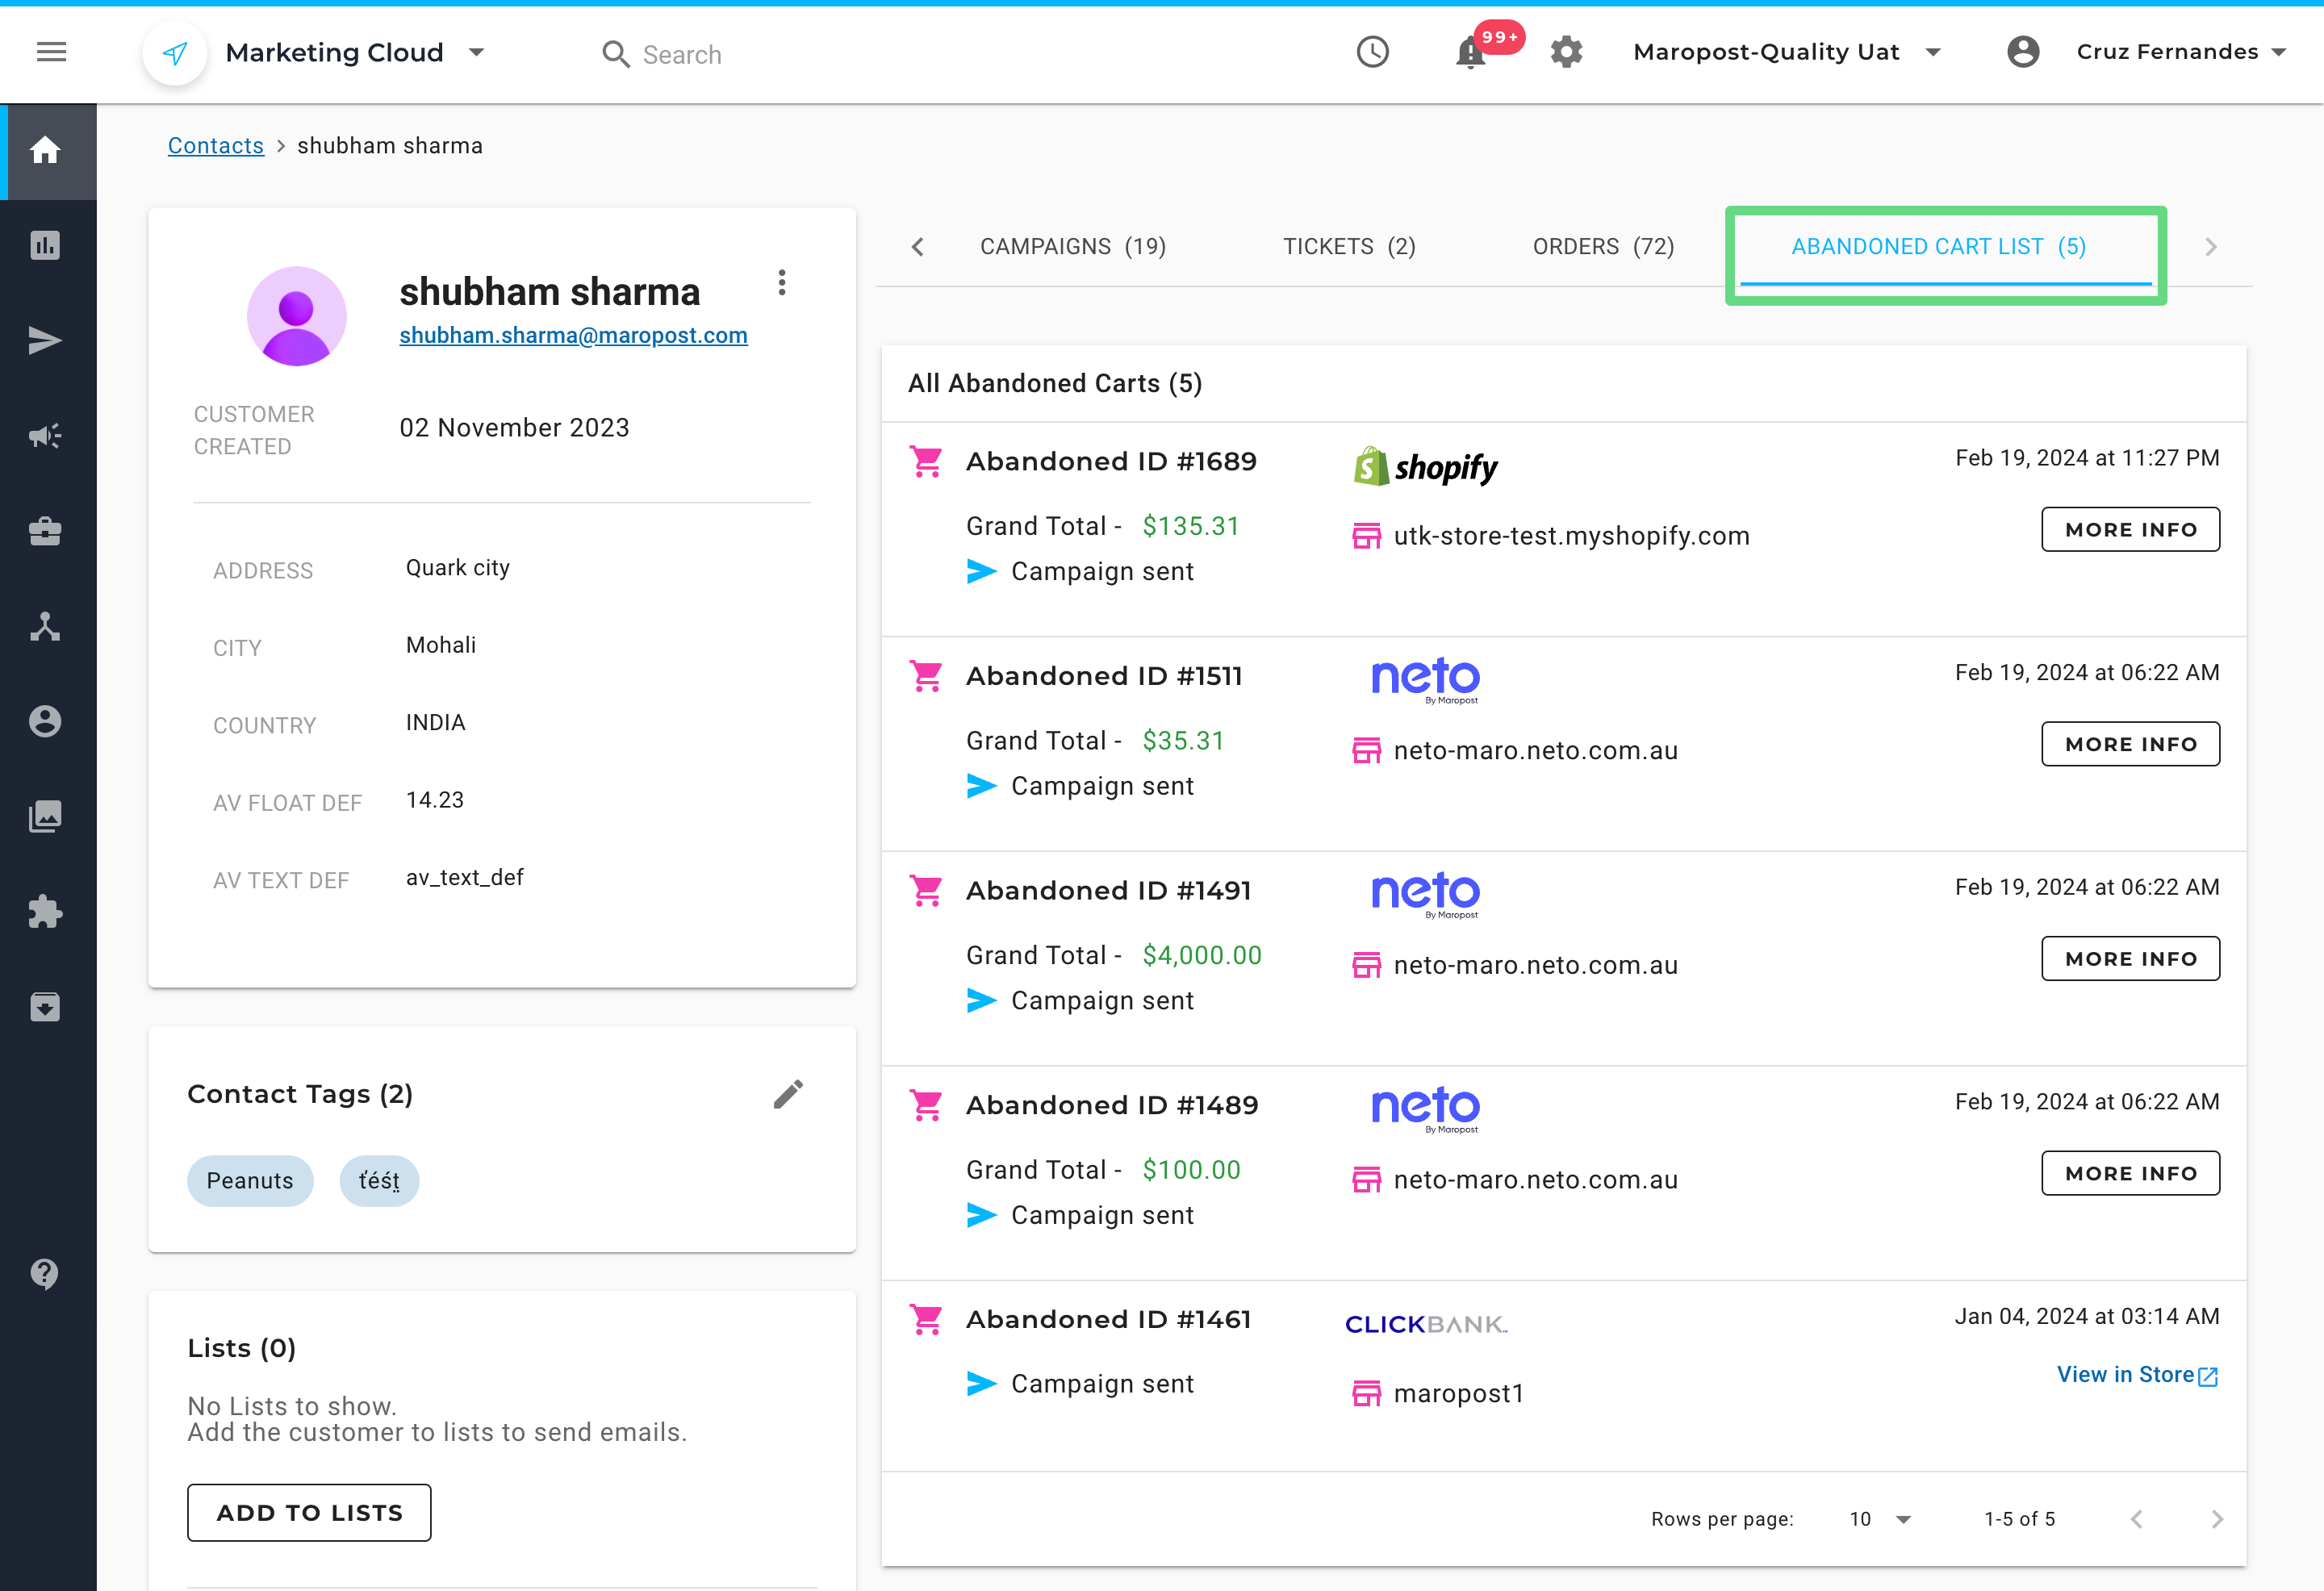
 If you own either a Marketing Cloud account or both (Marketing + Service Cloud), you can access the Abandoned Cart List section to view a list of carts currently abandoned by customers on your Shopify, Neto, and ClickBank stores. It includes information such as the cart ID, store name and its website URL, cart value, and the date and time at which the cart was abandoned.
To acquire Abandoned Cart information from your Neto, Shopify, and ClickBank stores, kindly integrate your store accounts with your Maropost Marketing Cloud accounts. To learn more about integrations, kindly visit and read our Neto, Shopify, and ClickBank Integration articles.
For Neto and Shopify accounts, click on the More Info tab to see the various products, their quantities, and pricing details for a particular cart. To view cart details for a ClickBank account, you'll need to click on the store URL link to directly view the product information.
 We have also made provisions to send timely reminders to customers via campaigns whenever they leave their cart before checkout. Make sure to create an abandoned cart journey template from your Marketing Cloud account to initiate such campaigns. Once the campaign is sent, you'll see its highlighted status below the cart value. More importantly, if the campaign is not sent, you'll see its status being greyed out.
 To learn more about creating such journeys, visit and read the Abandoned Cart Journey Template article.
Customer Engagement Journey
The customer engagement journey gives detailed accounts of each interaction this customer has had with your campaigns or brand, listed in chronological order from newest to oldest. The following information is covered in the contact's engagement journey:
- Campaigns: The name, date, and status of the campaign are displayed. You can click the DETAILS button to see the campaign details.
- Journeys: The journey name and trigger date are displayed. You can click the DETAILS button to see the journey details.
- Orders: The order name, the total cost of the order, the products purchased, and the order date are displayed.
- Web tracking: The website visits and web sessions are displayed.
This section also dynamically shows a "Re-send Campaign" button, enabling you to resend the campaign to the contact with a simple click.

📋
Please note that the resend option will not be available, if
:
- The campaign gets hard-bounced
- The campaign is sent through Journey
- The contact has added themselves to the DNM list
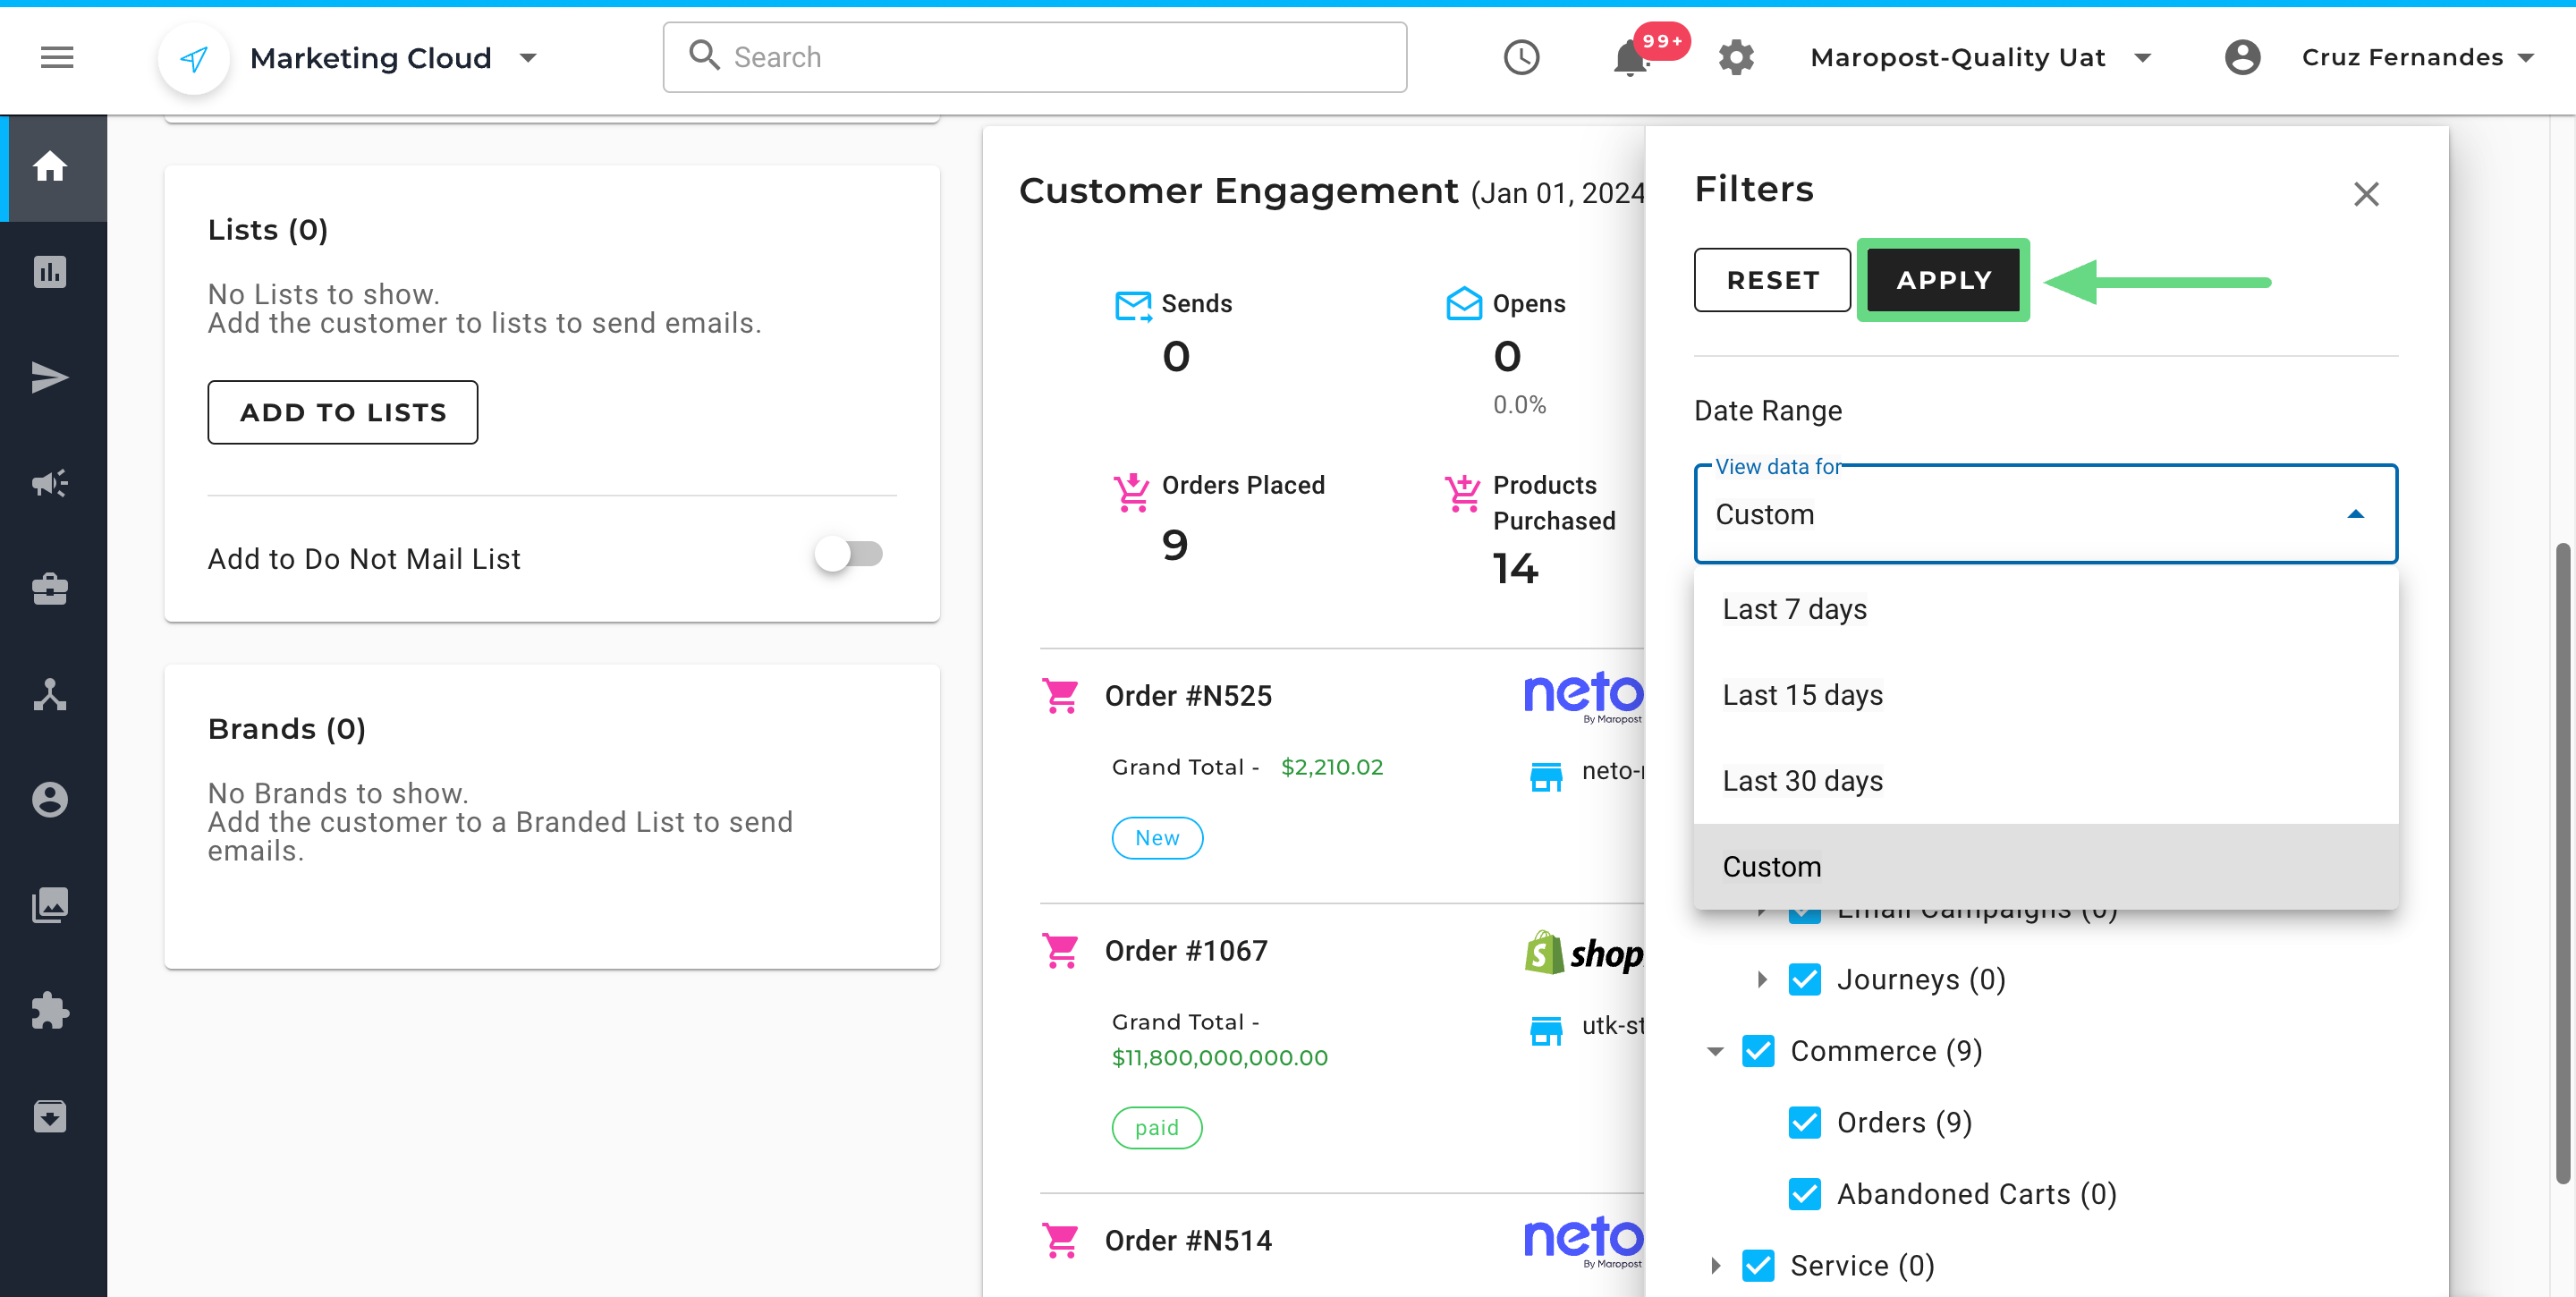
You can use the Filters to see specific engagements based on your selection.
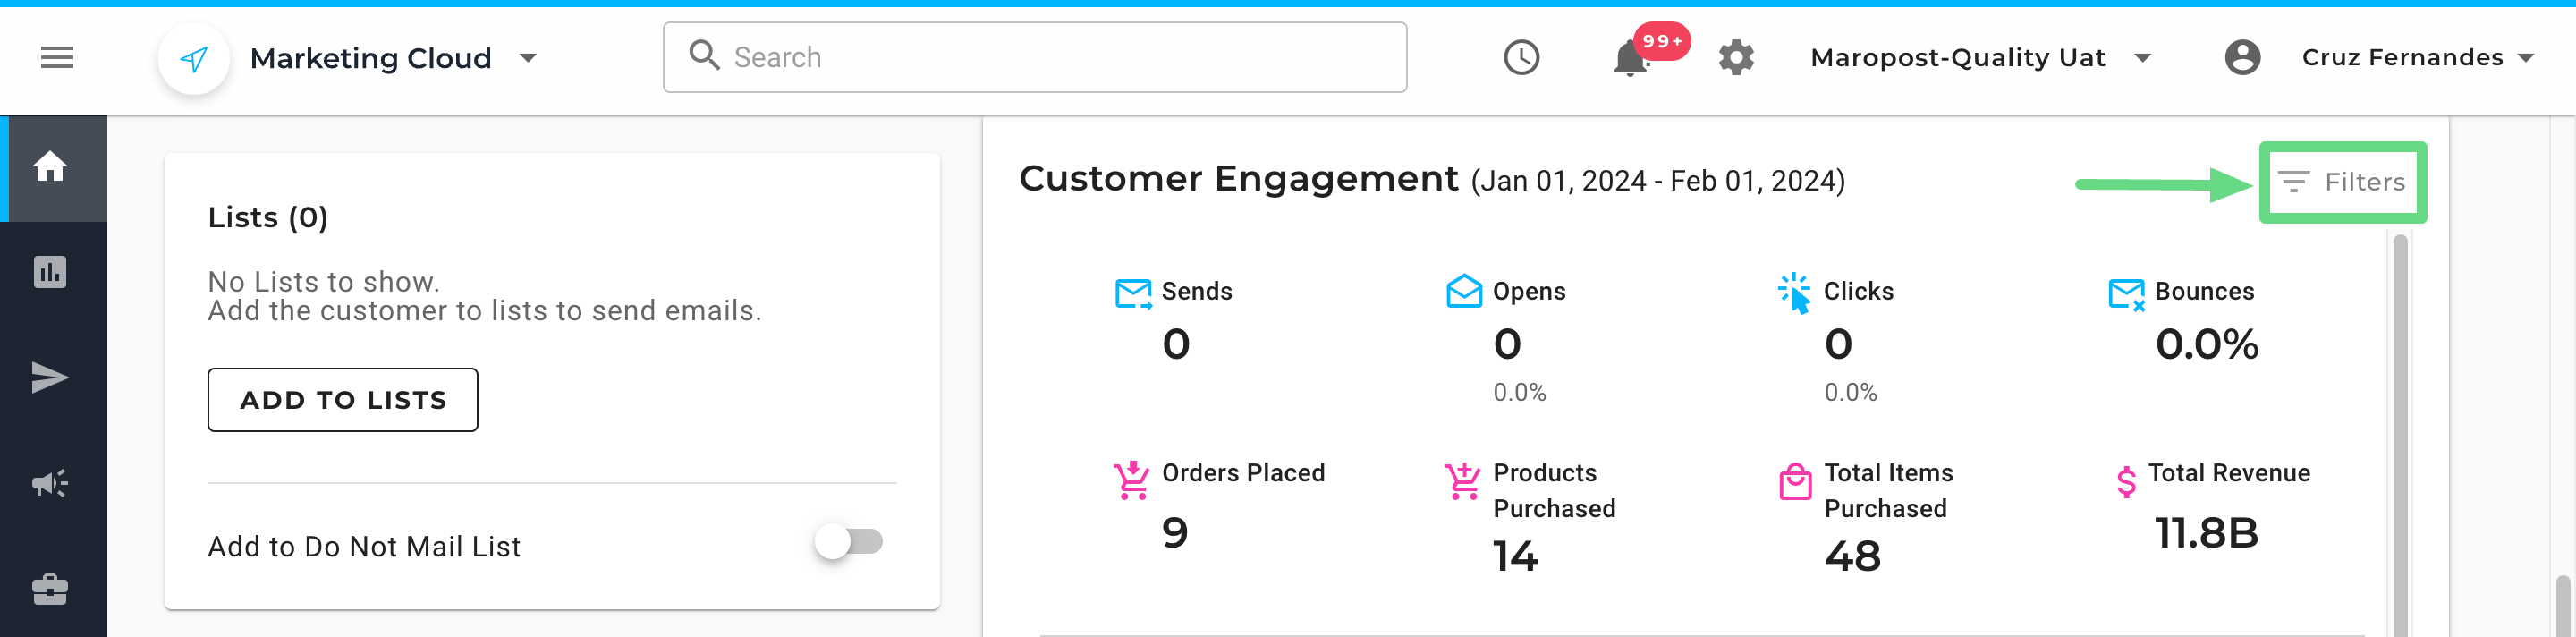
The filters enable you to view engagements for a specific date range and you can select or deselect the engagement types as per your requirements. Click on Apply, to save the changes made.
List Management
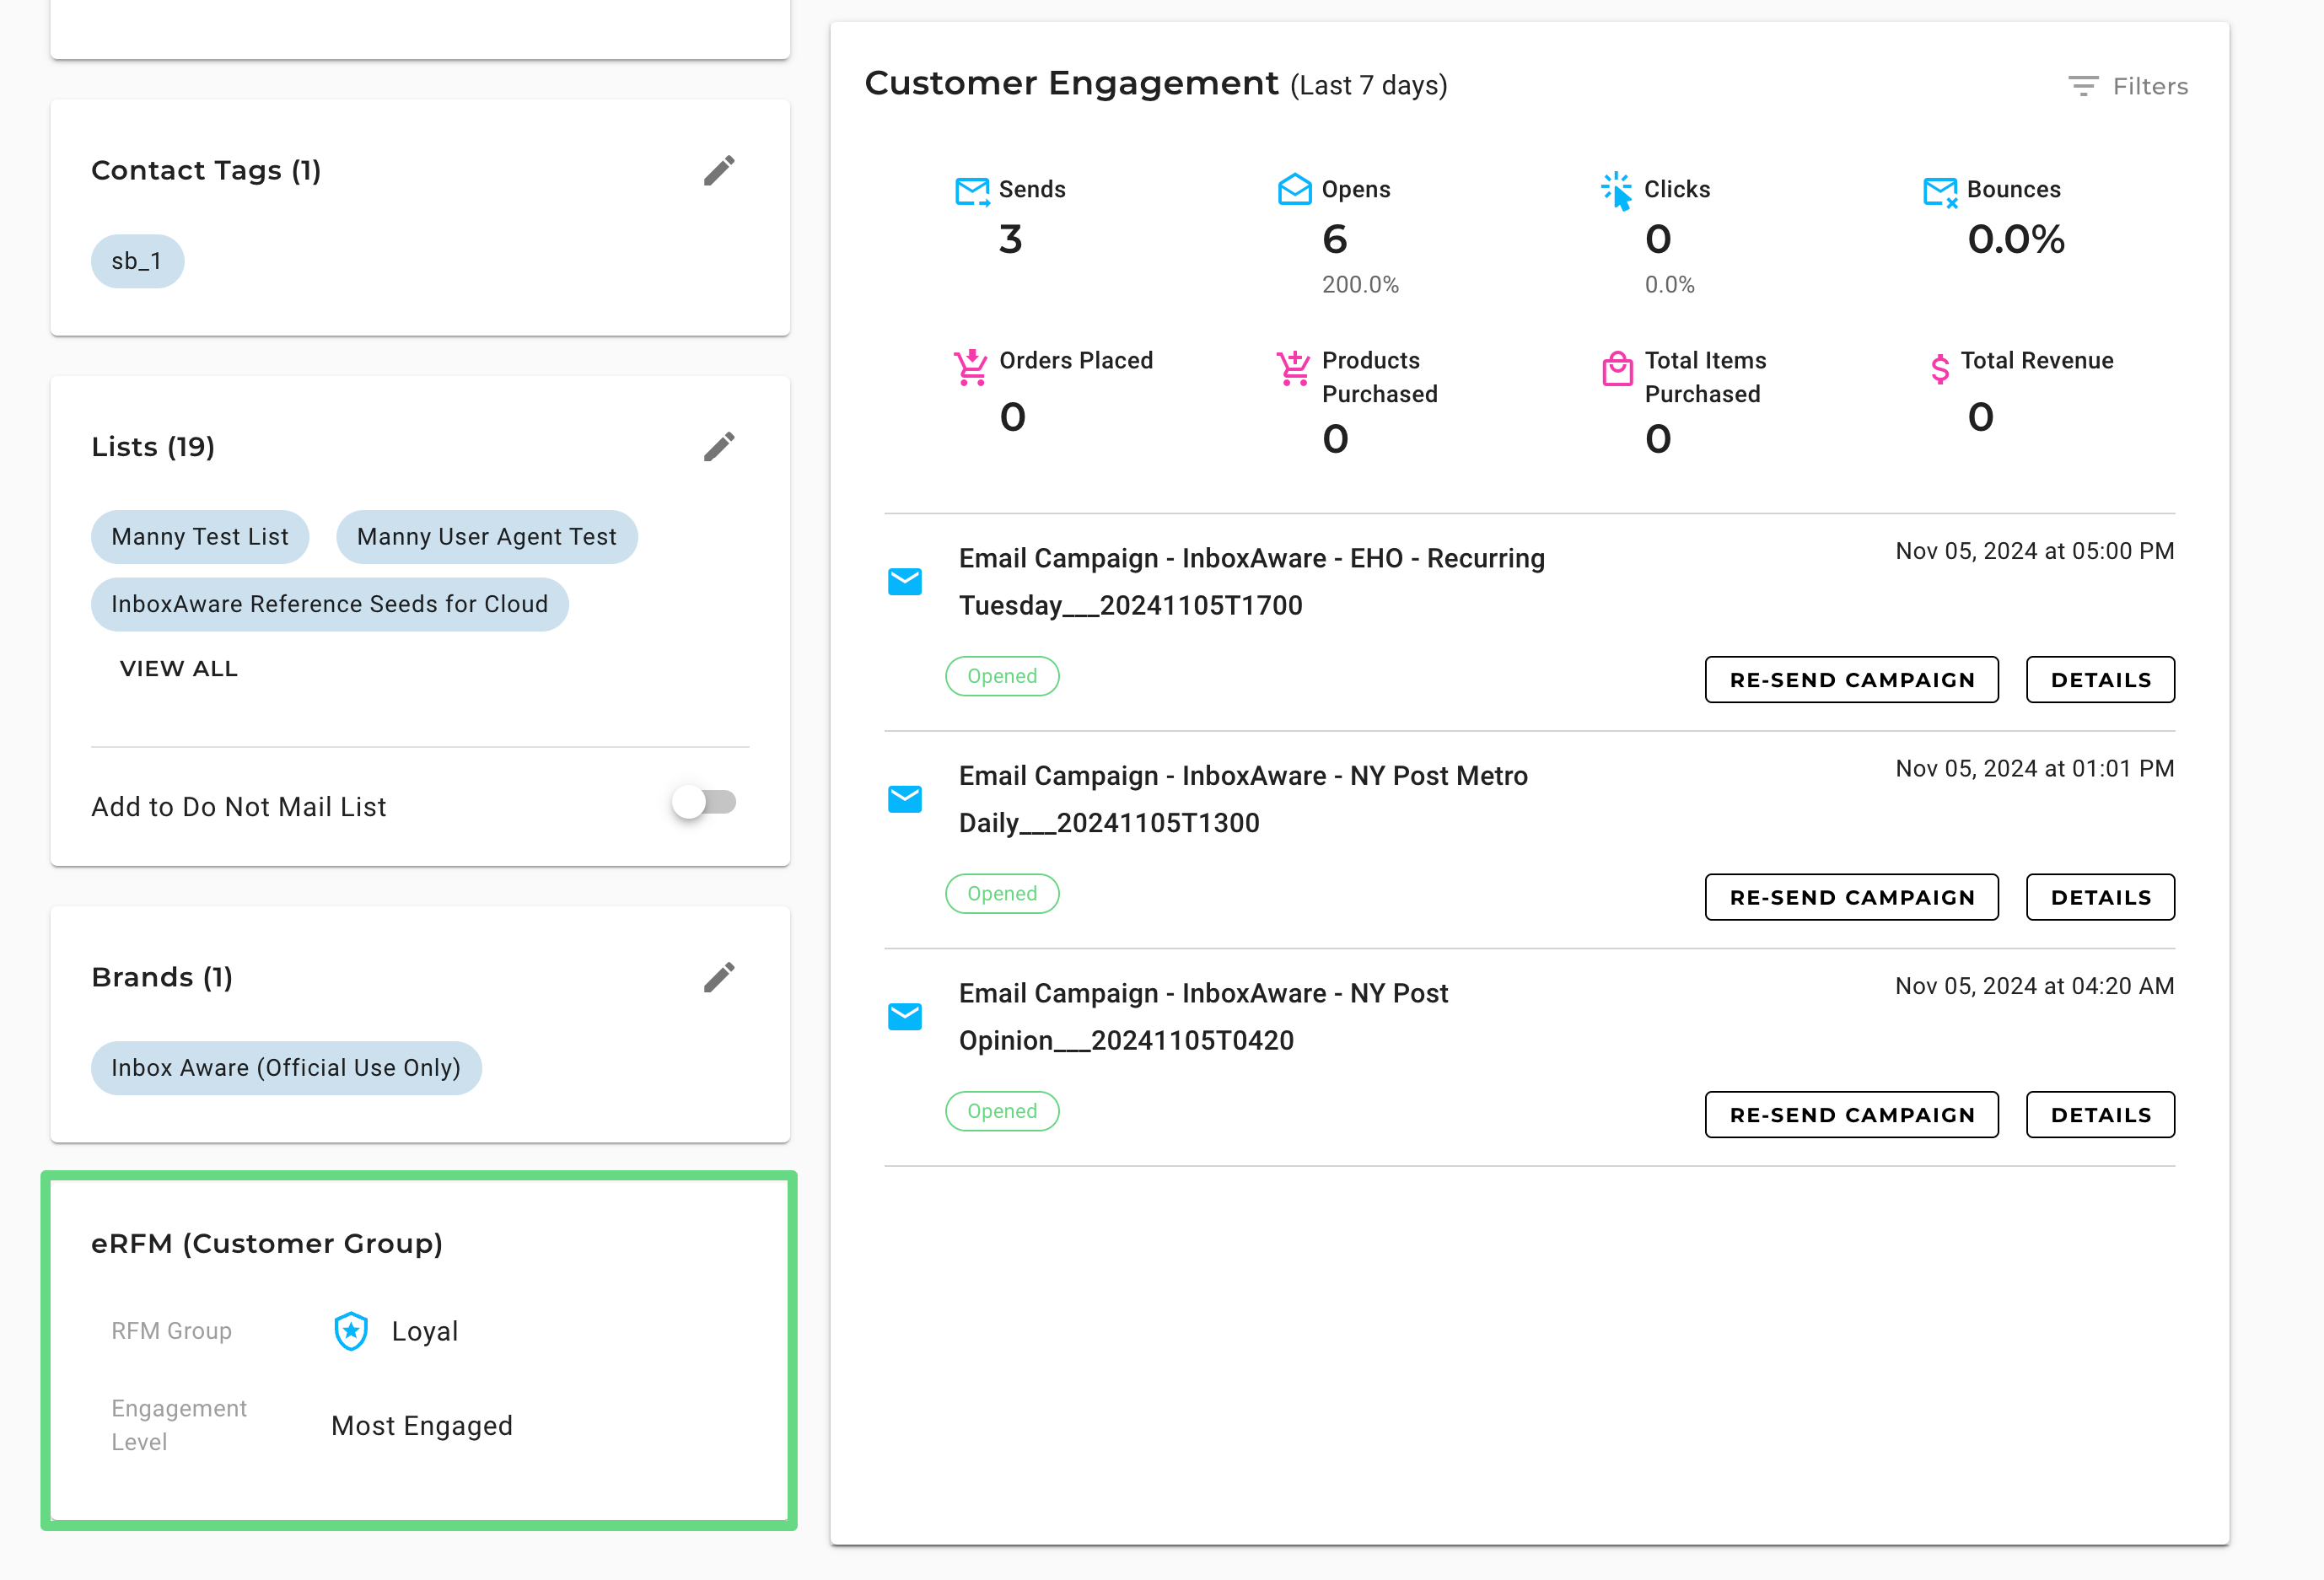
In the Lists section, you can see the lists to which the contact is added or subscribed. You can add or delete the contact in multiple lists and manage the contact's subscription to the lists.
The following steps show how to manage the contact in lists:
- On the Contact Overview page for a contact, click the Add to Lists button (if the contact is not added to any list) or the edit icon (if the contact is added to at least one list) in the Lists section.
- On the Manage Contact Lists dialog box, you can do the following:
- Under the UNSELECTED LISTS tab, select the lists to which you want to add the contact. The selected lists are moved under the SELECTED LISTS tab.
- Under the SELECTED LISTS tab, deselect the lists from which you want to delete the contact. The deselected lists are moved under the UNSELECTED LISTS tab.
- Under the SELECTED LISTS tab, use the toggle button to subscribe or unsubscribe the contact in a list.
You must first add a contact to a list before you can subscribe the contact to the list.When you add the contact to a list, the subscription toggle is turned on by default.
- Click Save.
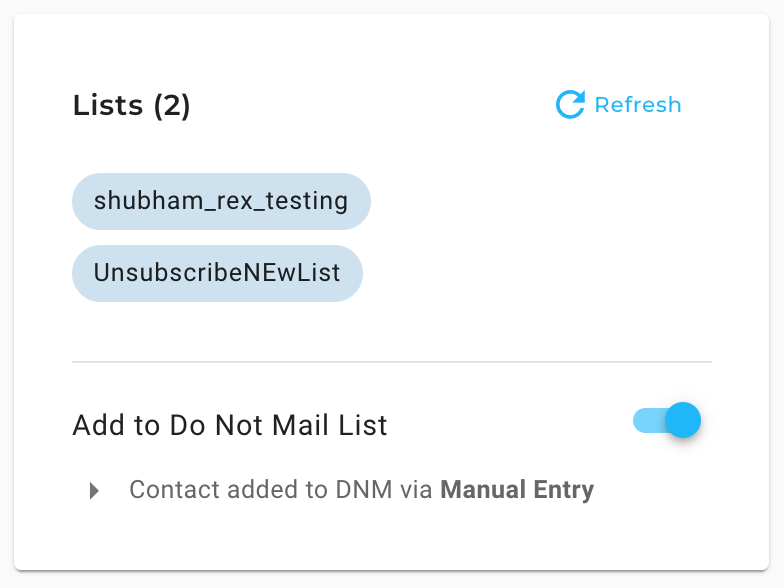
In the Lists section, you can also add the contact to the Do Not Mail list (DNM) by using the Add to Do Not Mail List toggle button. For contacts added to the DNM list, you can see the reason/method by which the contact has been added to the DNM list. For example, if the contact was added to the DNM list using the toggle button, the reason is displayed as Manual Entry.
eRFM Analysis
In the eRFM section, you can see the RFM (recency, frequency, monetary) group under which the contact is currently present. The 'RFM Group' status depicts the contact's importance in terms of purchase history and monetary contribution to your overall business, while the 'Engagement Level' shows the degree of a contact's activity with your campaigns, page clicks, journeys, notifications, etc. Maropost updates both the RFM and engagement status for each contact on a daily basis.
To learn more about such analytics-based reporting, read our Unlock Customer Insights with eRFM Analysis article.