You can create well-organized contact lists to enable more relevant messaging through strategic audience segmentation and improve subscriber engagement by tailoring campaigns to specific subscriber groups. This helps optimize marketing effectiveness by allowing you to send targeted content to the right audiences while maintaining organized subscription management and brand consistency across your email campaigns.
When properly configured with the appropriate list types, subscription preferences, and e-commerce integrations, contact lists serve as the foundation for automated workflows and personalized customer journeys that drive better campaign results.
Contact lists are used to store multiple contact information to create campaigns, segments, journeys, acquisition forms, and so on. You can add the contacts by manually adding or importing them in bulk.
To learn more about contacts and how to manage various aspects of them, read the Contact List Overview article.
Follow the steps shown below to create a contact list:
- From the Navigation panel, go to Audience and select Contact List.

- The Contact List Index page displays all the contact lists that have been previously added to the account. The index page consists of these sections:
Name: It displays the name of the contact list.
Email Subscribers: It mentions the number of contacts in the list who are subscribed to your newsletters and email campaigns.
SMS Subscribers: It mentions the number of customers in the list who are subscribed to your SMS notifications.
Revenue: It displays the overall earnings generated by contacts in a list towards your business.
Actions: It allows you to export, import, duplicate, view, edit, archive, and delete a contact list. To avoid any discrepancies in the list count, you can also refresh the count by clicking on the Refresh icon next to the Actions menu icon.
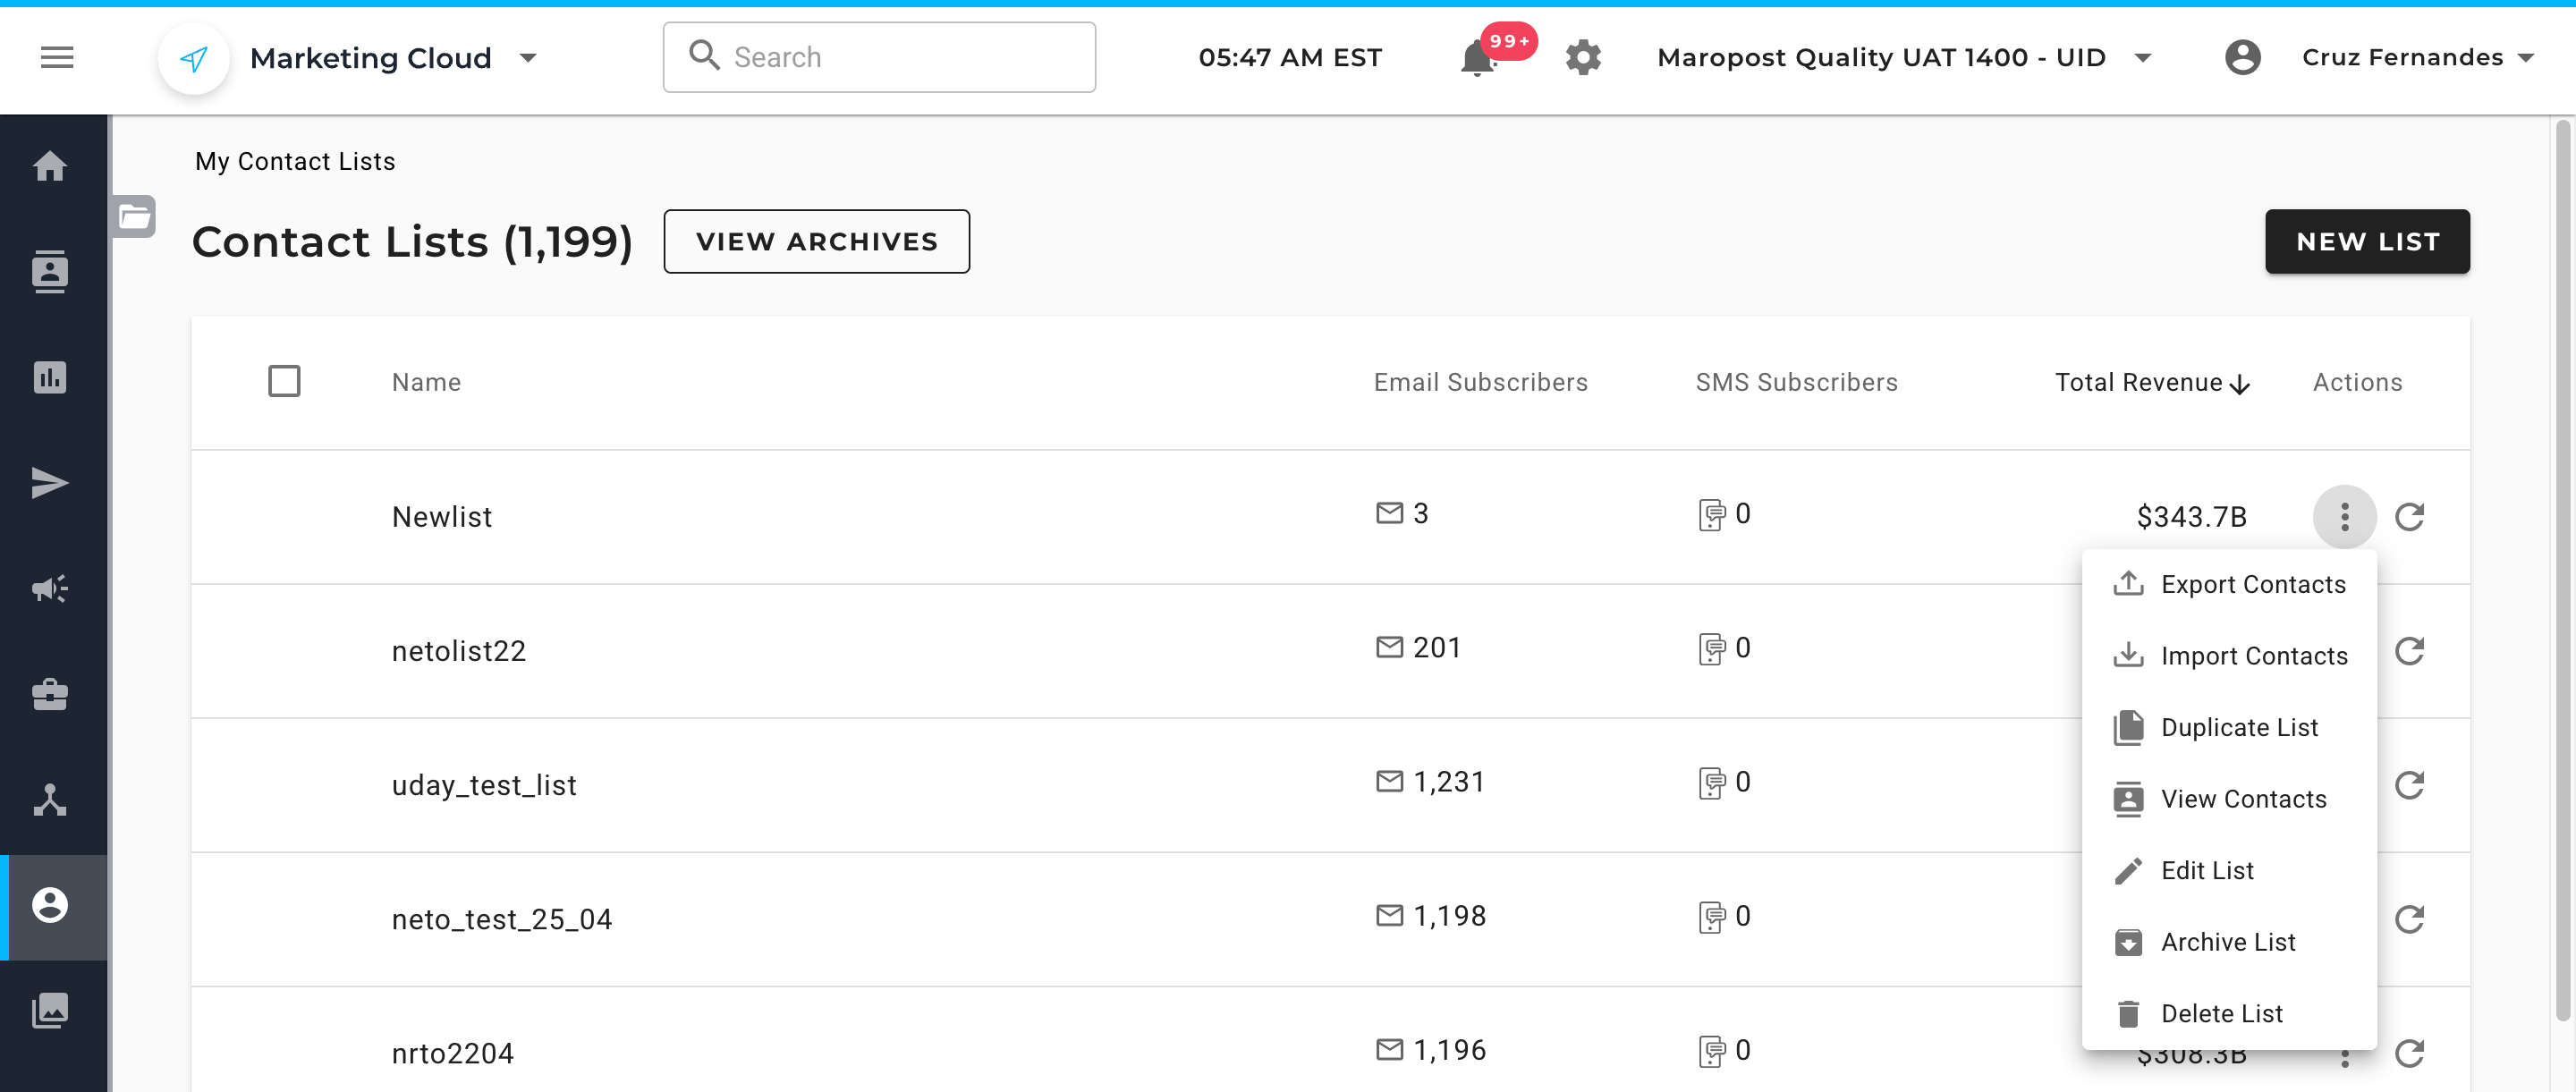
- To create a contact list, click on New List.

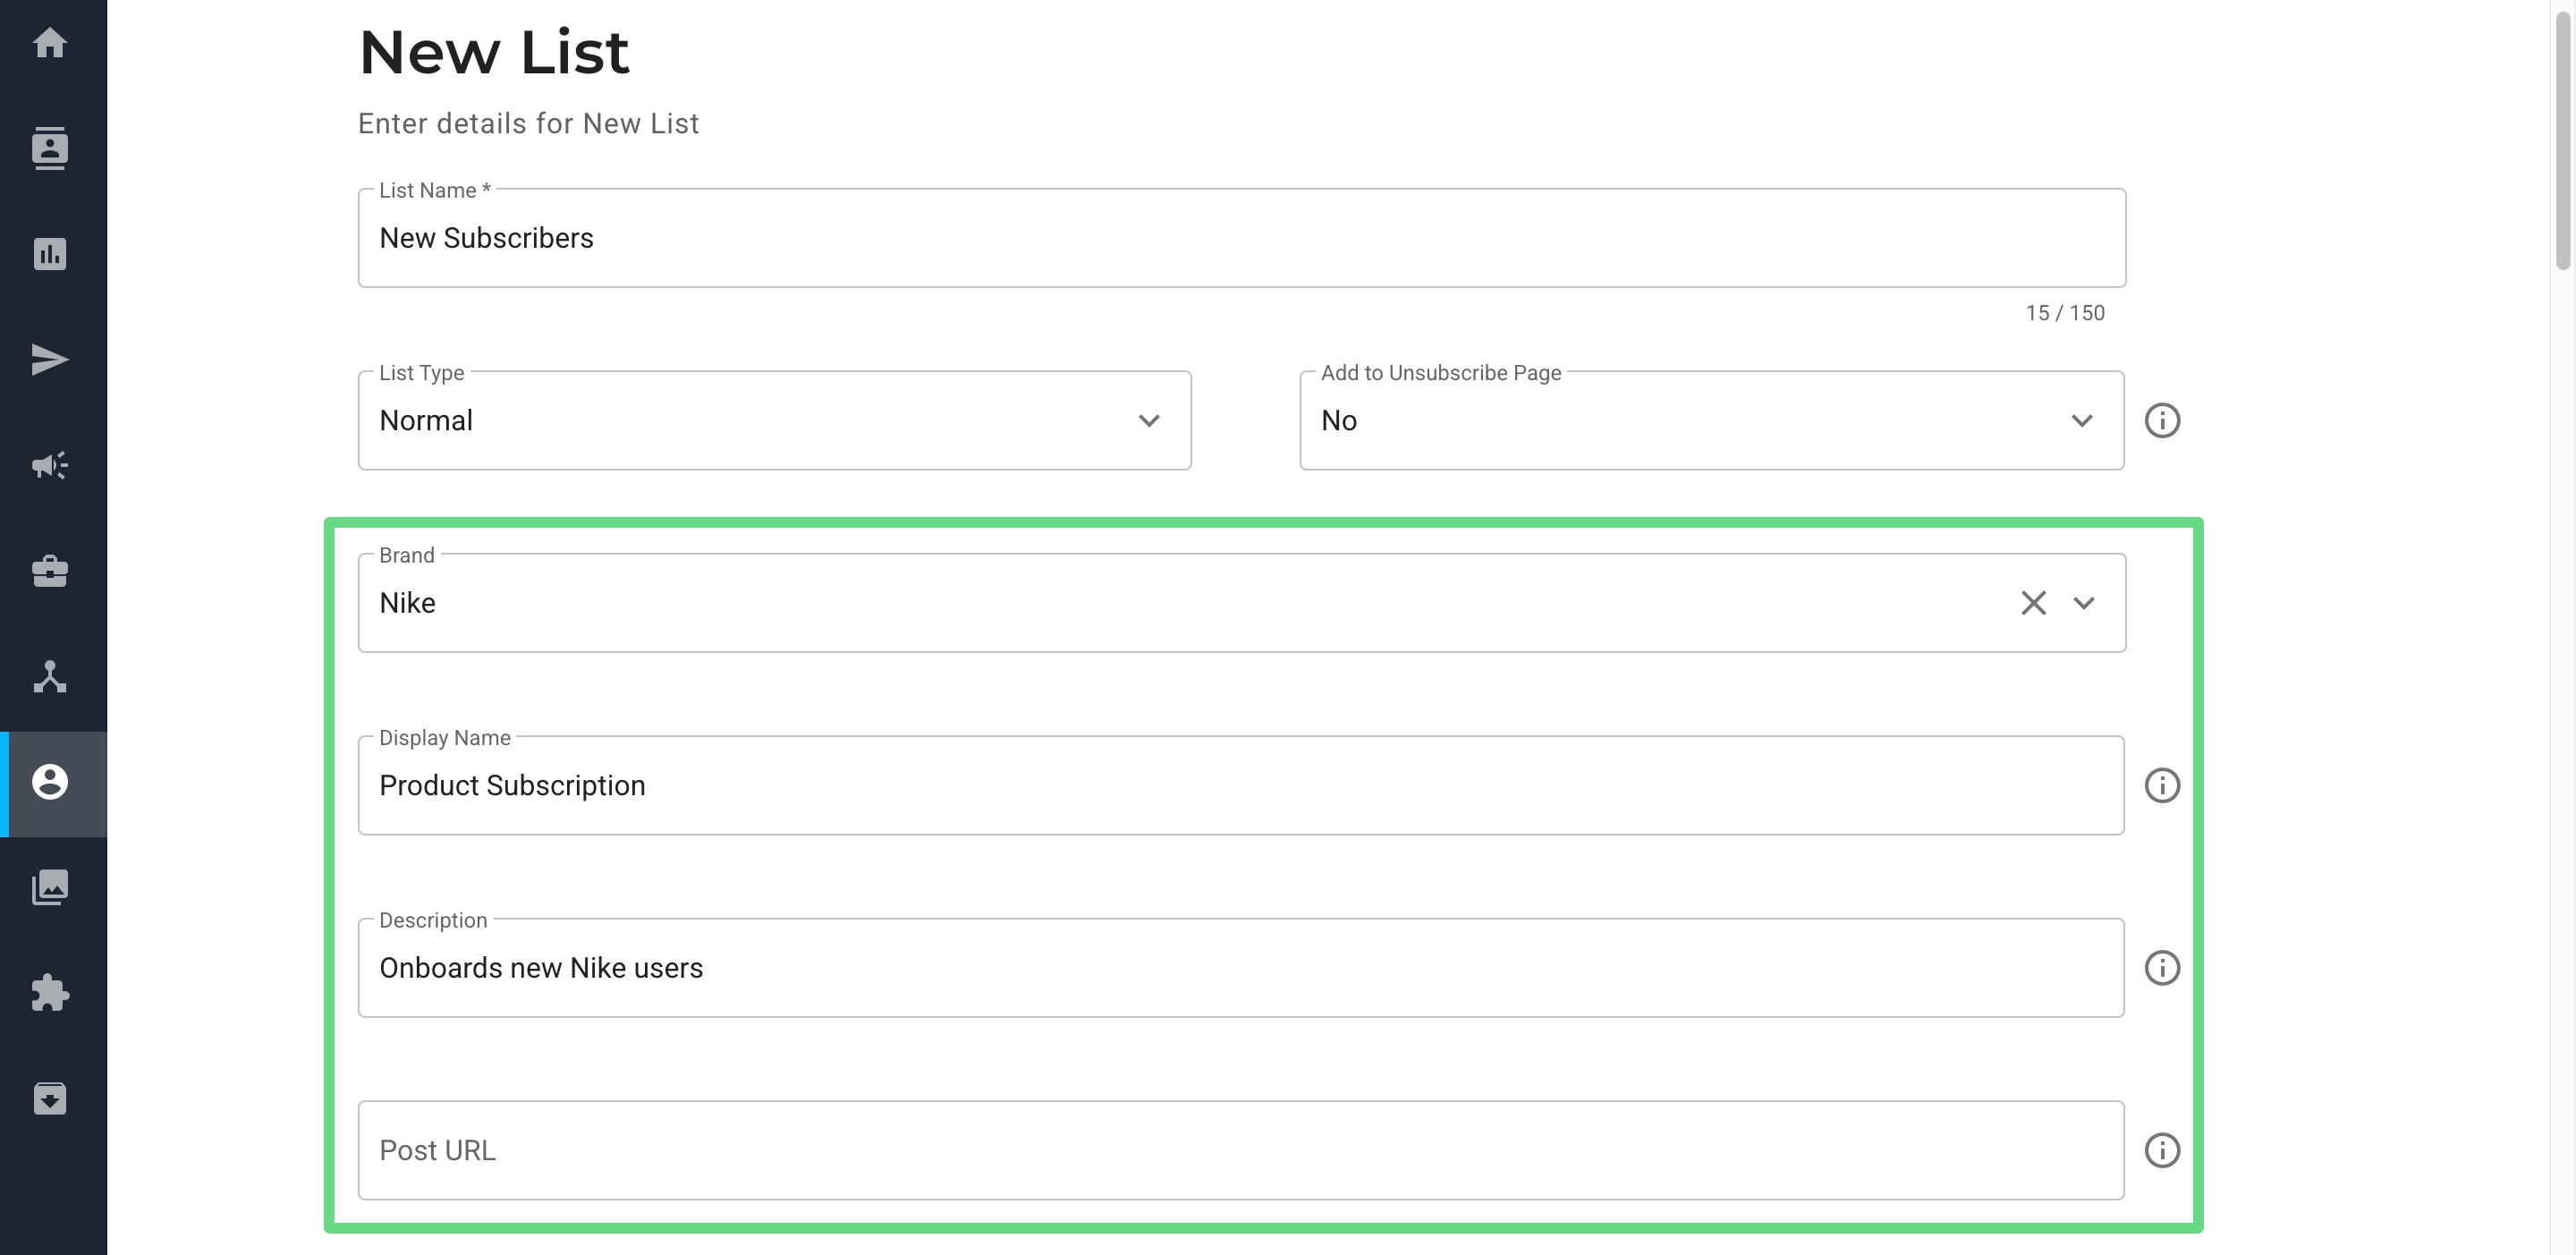
- To begin with, enter a name for your contact list that will be shown on the index page after creation. This field is mandatory.

- Select the list type as "Normal" or "Suppressed." A "Normal" list includes all contacts subscribed to this list as the campaign's target audience, whereas a "Suppressed" list excludes contacts subscribed to this list from receiving the campaign.

- Next, choose whether you want the list to appear on the Manage Subscription page of a campaign. If you have chosen "Yes," it implies you have given the contacts the option to either subscribe or unsubscribe from the list they are currently in.

- Below are the additional details you can enter in a list:
Brand: It associates the list with a Brand. When you select a brand in the campaign builder, all lists that are related to the brand get pre-selected by default. If a contact selects the "unsubscribe from all lists" option of a branded campaign, then the contact will be unsubscribed from all lists that are associated with the same brand.
Display Name: It's the list name that is shown on the manage subscription page.
Description: Gives meaningful information about the list that is shown on the manage subscription page.
POST URL: It's a webhook that initiates each time a contact's subscription status to the list changes. The platform will send a JSON-formatted payload to an API endpoint that you provide.
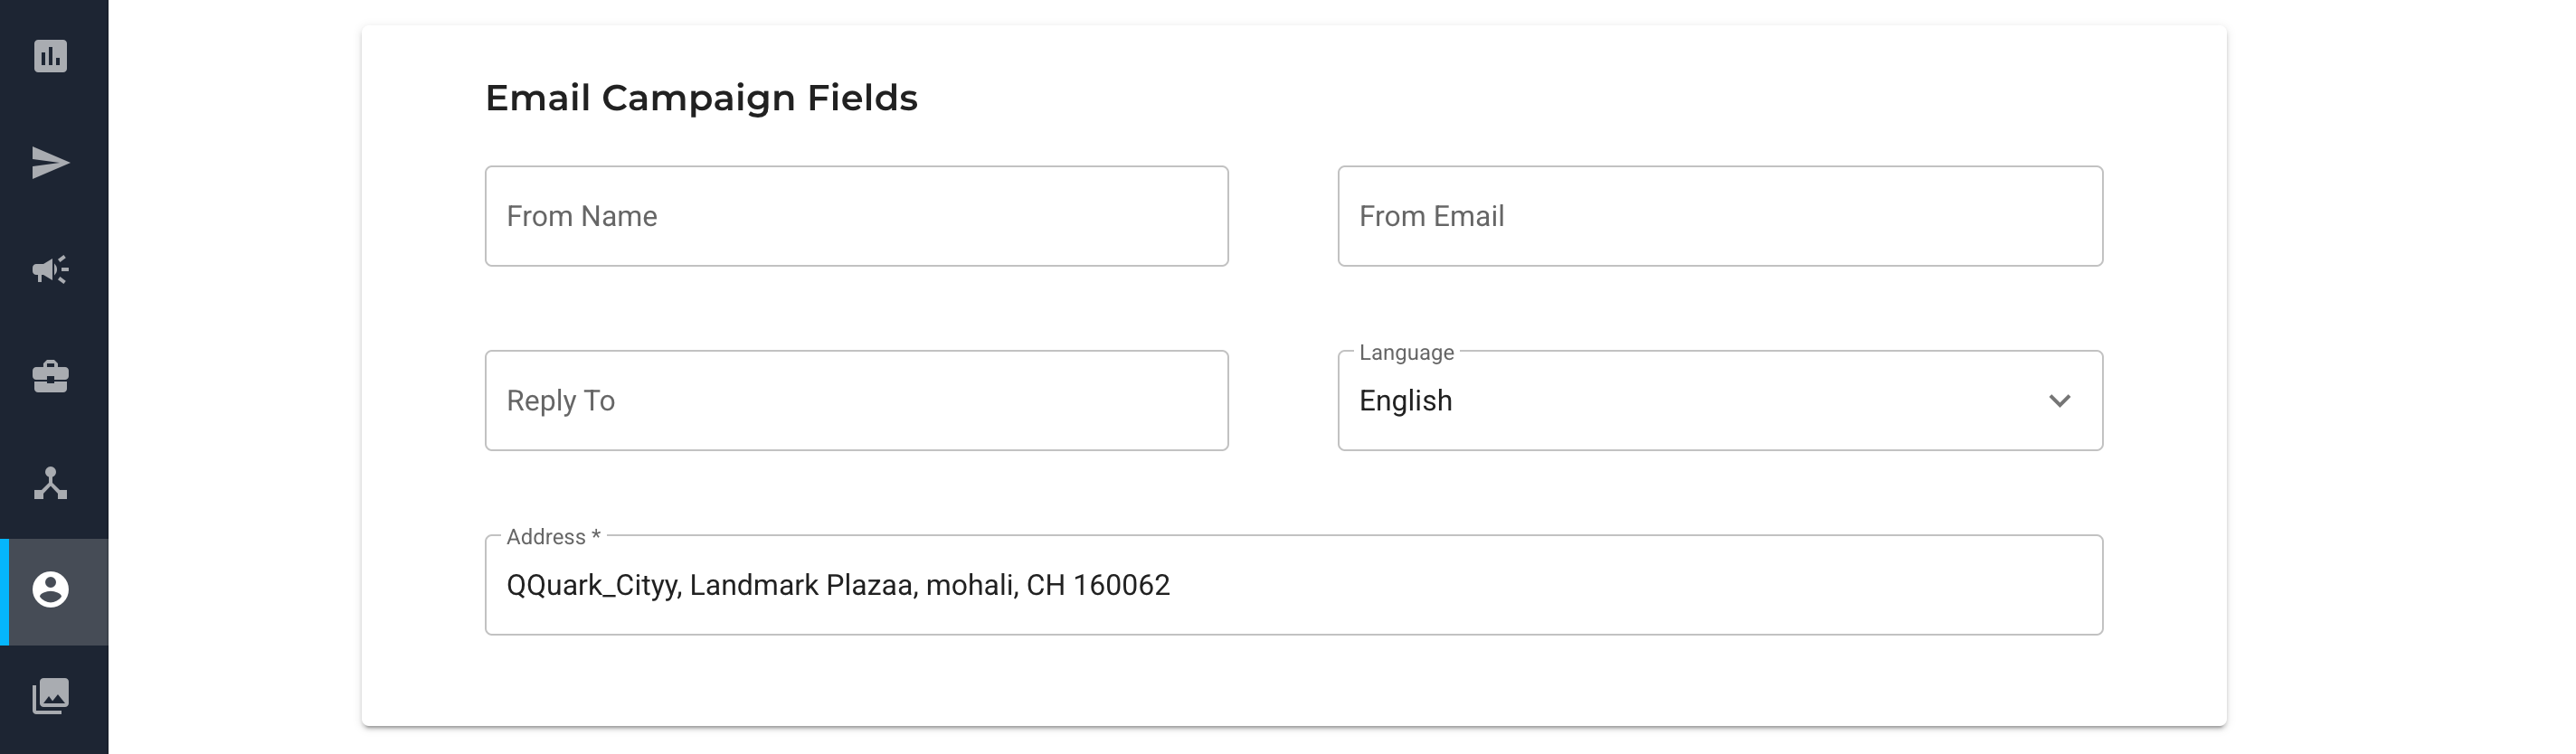
Note:The webhook won’t trigger if a contact’s profile field values change. If you want your system to be notified whenever a contact’s field values change, then you must set up a webhook for theHTTP Post URLon the Settings page. - Additionally, you can enter details in the Email Campaign section. The fields present in this section are as follows:
From Name: It represents the default From Name in the campaign that is using the list.
From Email: It represents the default From email address in the campaign that is using the list.
Reply To: It represents the default reply-to email address for the campaign using the list.
Language: It allows you to set a default language for system-generated links in the campaign that is using the list.
Address: This is a mandatory field wherein you have to insert a default postal address in the campaign that is using the list.
- Optionally, if you have any 3rd-party e-commerce platform integrated into your Maropost account, you can link the contacts in the list with a product or any other entity of the e-commerce platform. In the Carts section, select the platform and then enter the integration link. Finally, click Save.
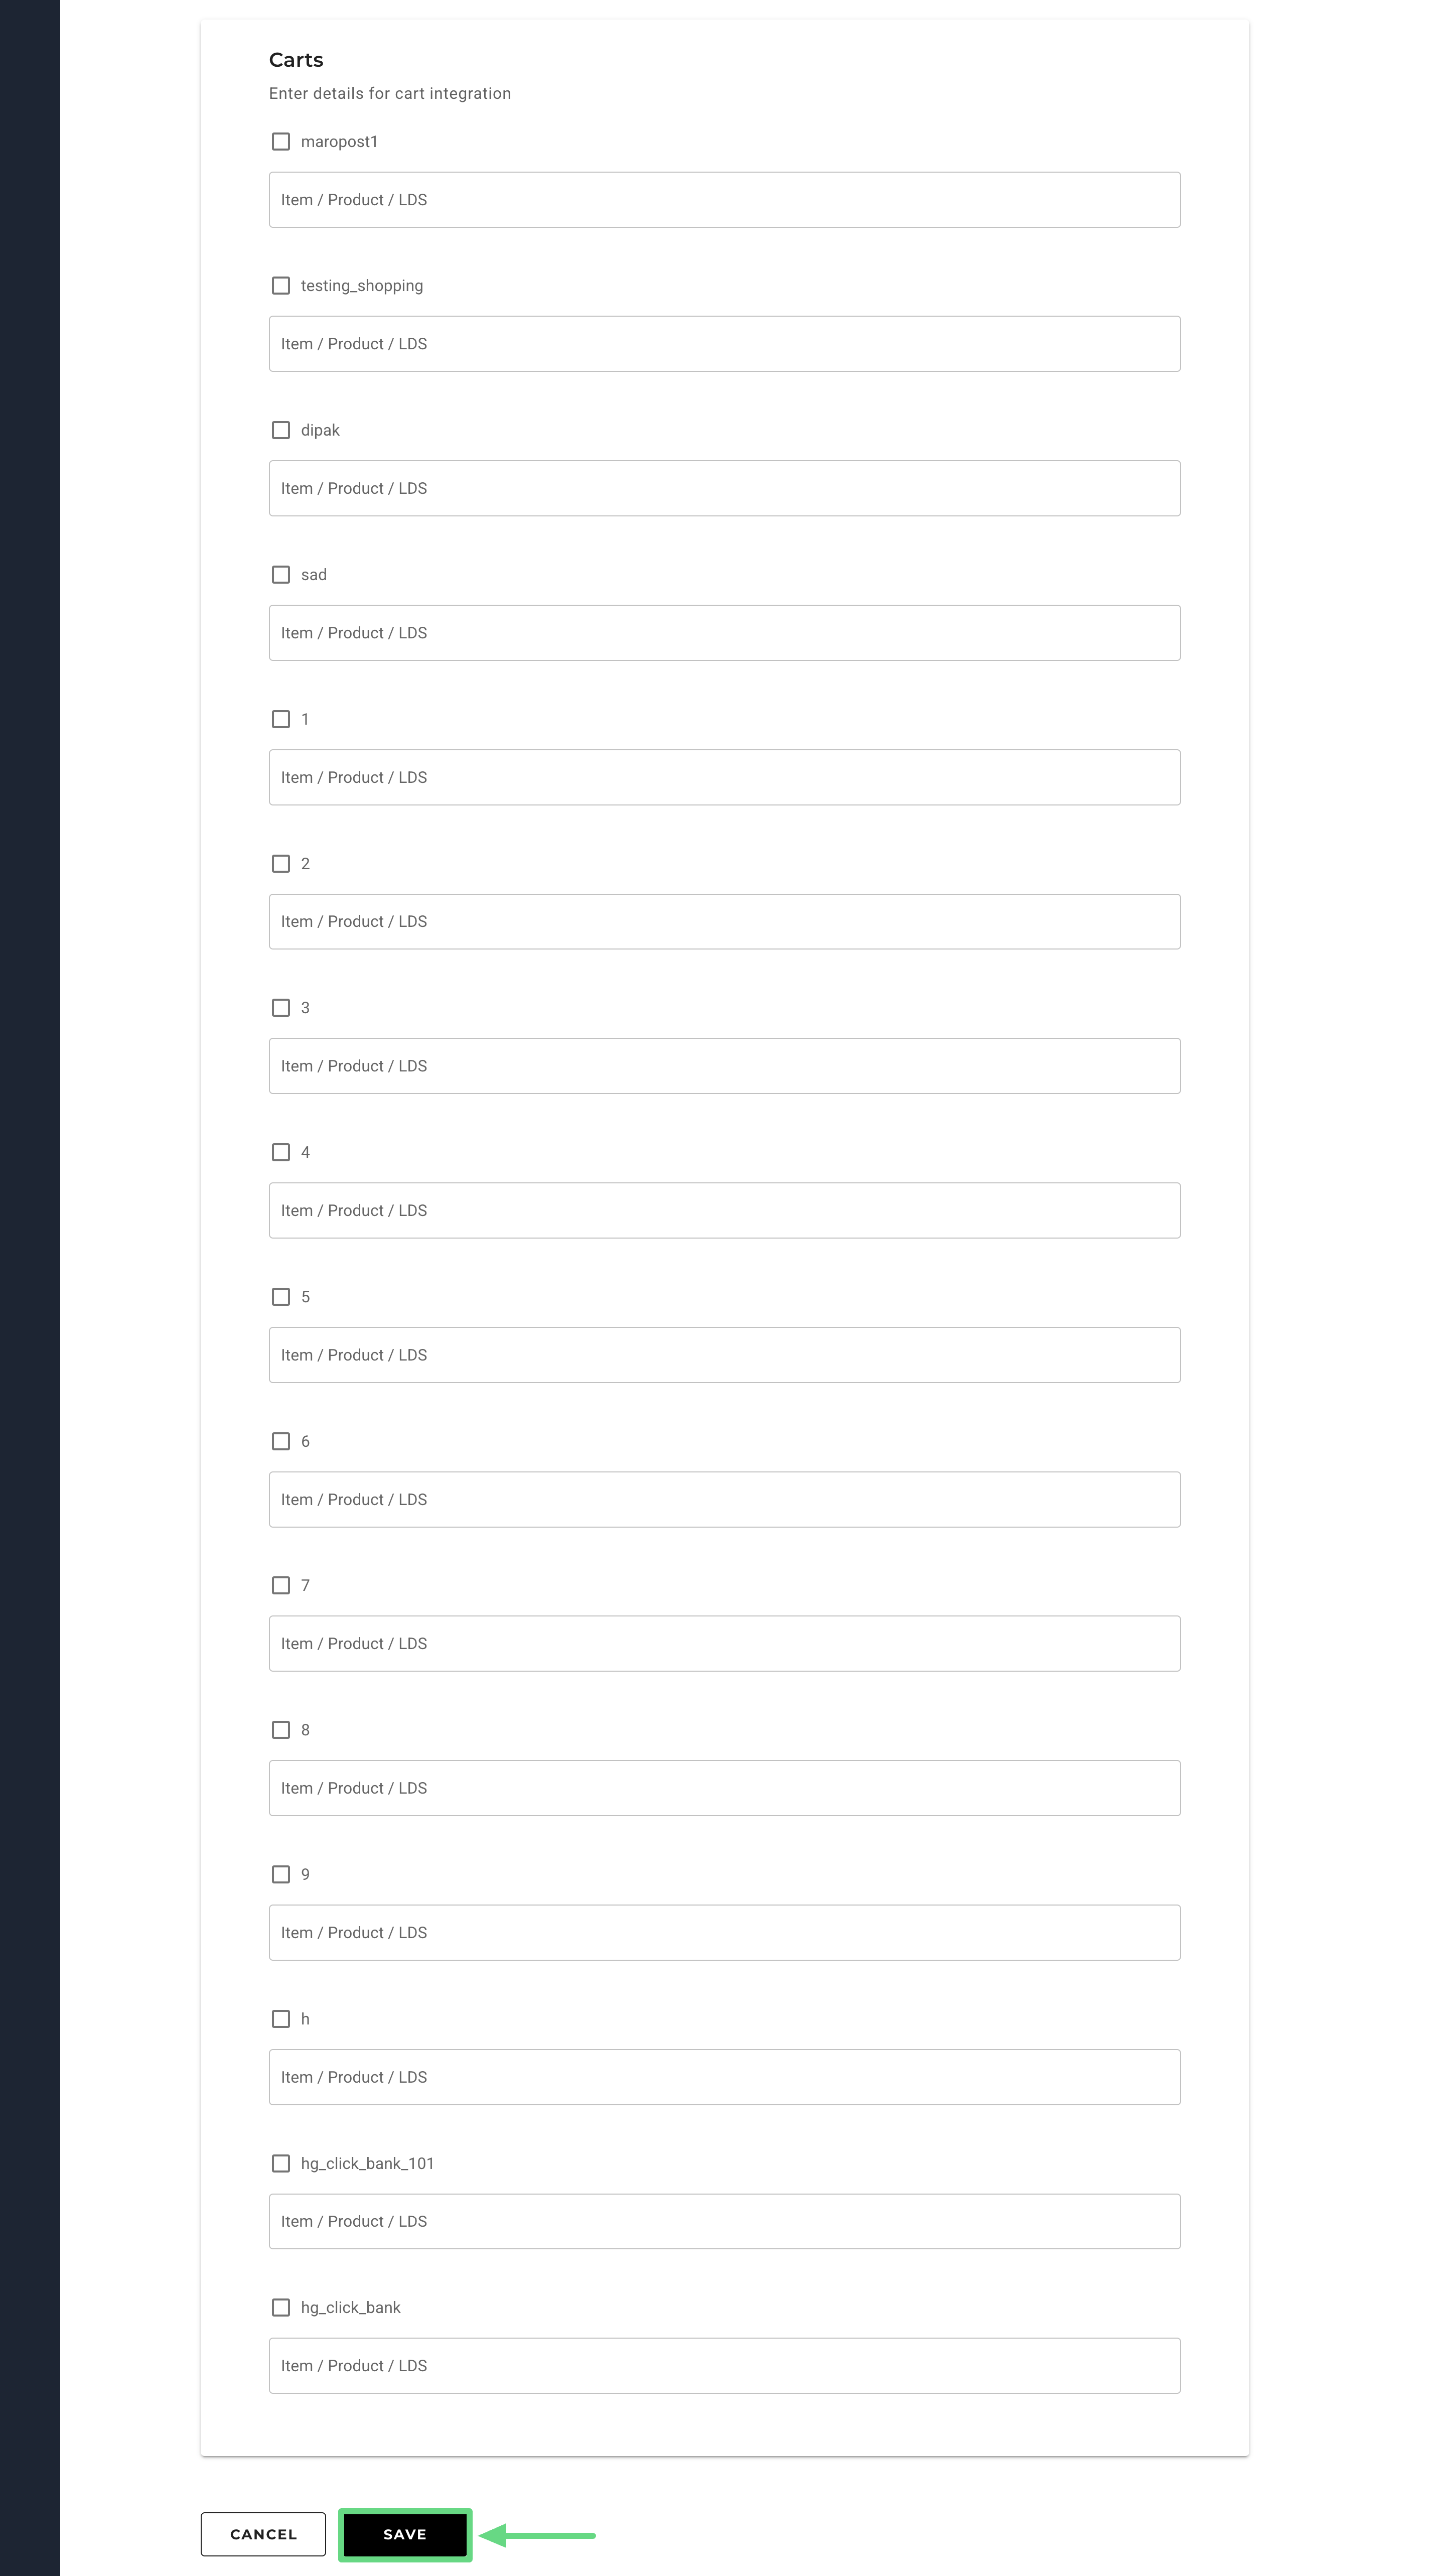
Note:TheCartssection is displayed only if you have any third-party e-commerce platform integrated with Maropost. This feature is useful for tracking orders and sending out notifications in case of abandoned carts. You may also link the list to a product and then use it to trigger an email or journey when a particular item is purchased.
After successfully creating a list, you can add contacts to it by manually adding them or importing them in bulk. To learn more, see Email Contact Lists: Overview and Importing Email Contact Lists.