A Passkey is a digital cryptographic credential allowing users to sign in to apps or websites without the use of a password or one-time OTP authentication mechanism. Here, users normally approve the sign-in process in the same way they unlock their devices via biometrics, facial/fingerprint recognition, PIN, or pattern.
Since passkeys are encrypted, they are resistant to phishing and remote cyberattacks. Plus, with passkeys, there are no passwords to steal, and no sign-in data can be used to initiate an attack, thus making it a convenient login option.
Benefits of passkeys:
- Achieves higher sign-in success rates.
- Faster time to sign in.
- A safer and more trustworthy alternative to a traditional sign-in method.
- Supports a cross-device authentication ecosystem.
- Prevents malicious activity across numerous passkey-supported accounts.
How to Log In
Below are the steps to log in via passkeys:
1. If you wish to log in without using a password, click on the “Use Passkey” link. Do remember that to create a passkey, you must first log in to your account by entering your email and password, after which you can visit the Identity application to generate a new passkey. To learn more about this, read Configuring Passkeys from the Identity Application topic.
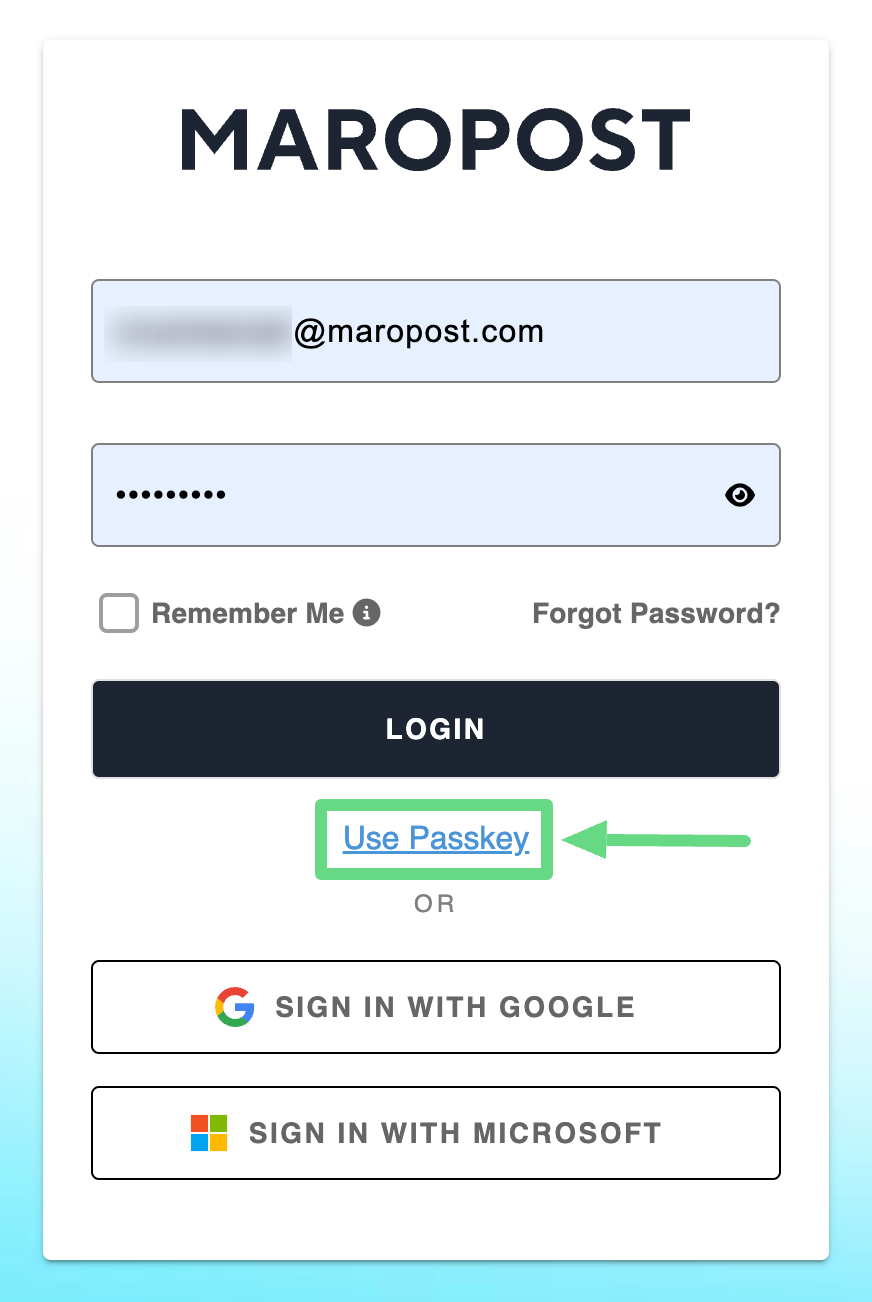
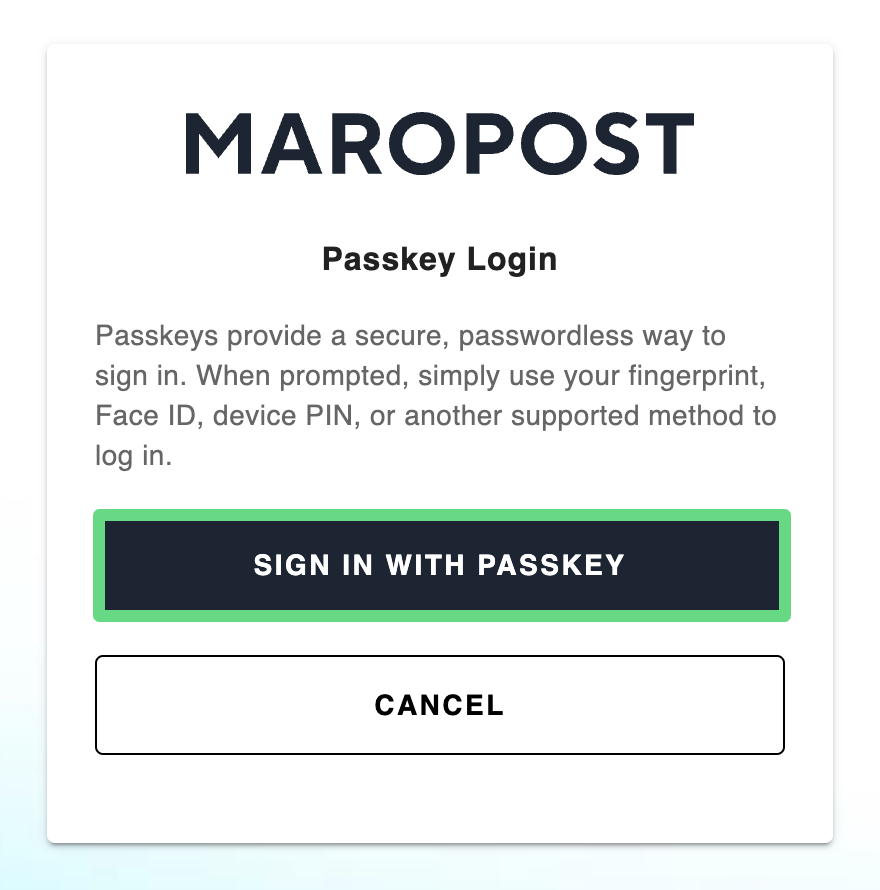
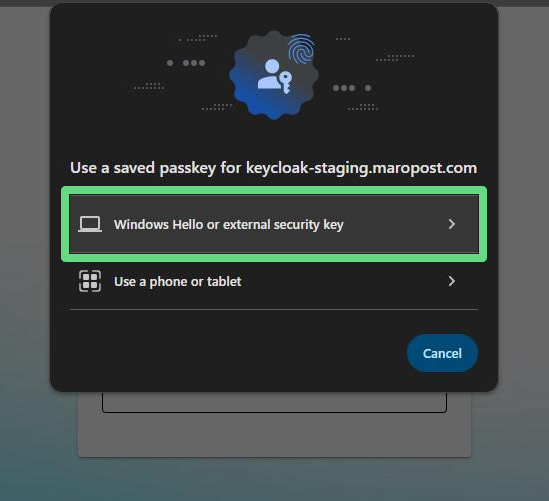
2. Passkey is a secure login choice without the need for a password or authentication OTPs. Here, the system prompts you to sign in with a passkey either via your main device, a smartphone or tablet, or with the help of a USB security key.
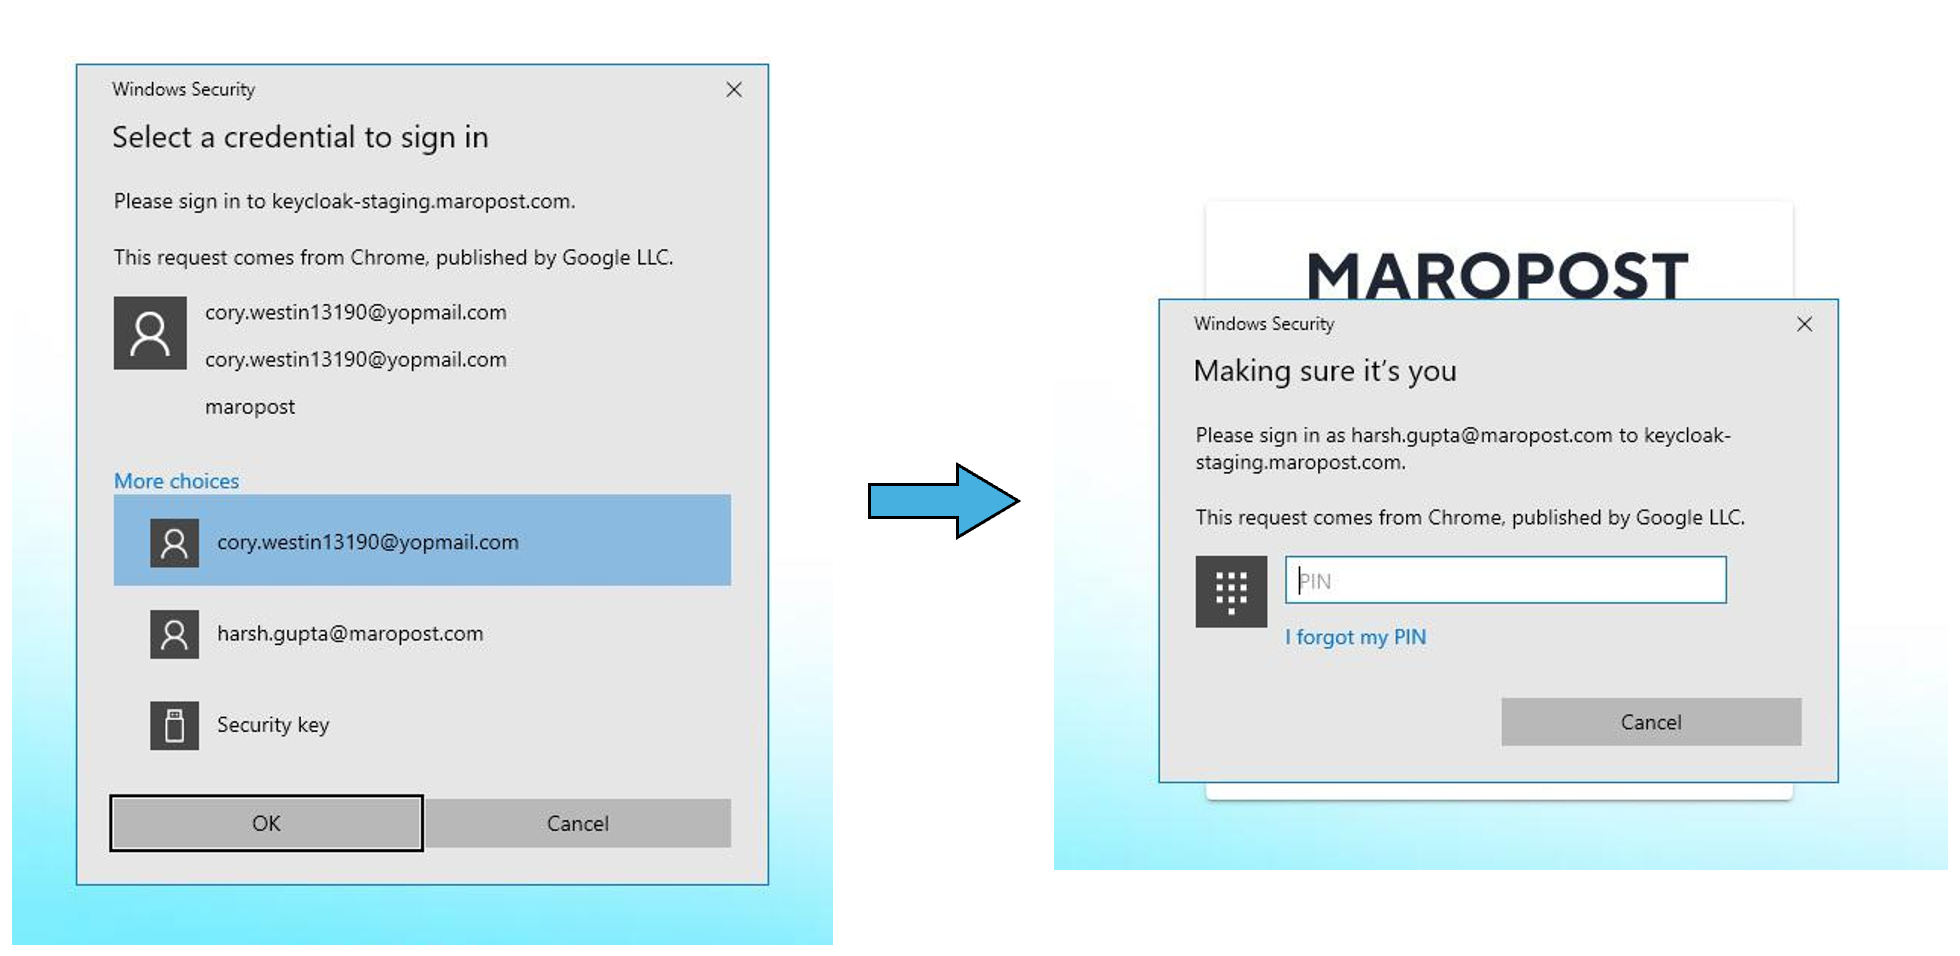
3. If you’re using a Windows device with Windows Hello set up, the system displays it as the default passkey login option. Here, you must enter a six-digit PIN in the Windows Hello dialog box to access your account.
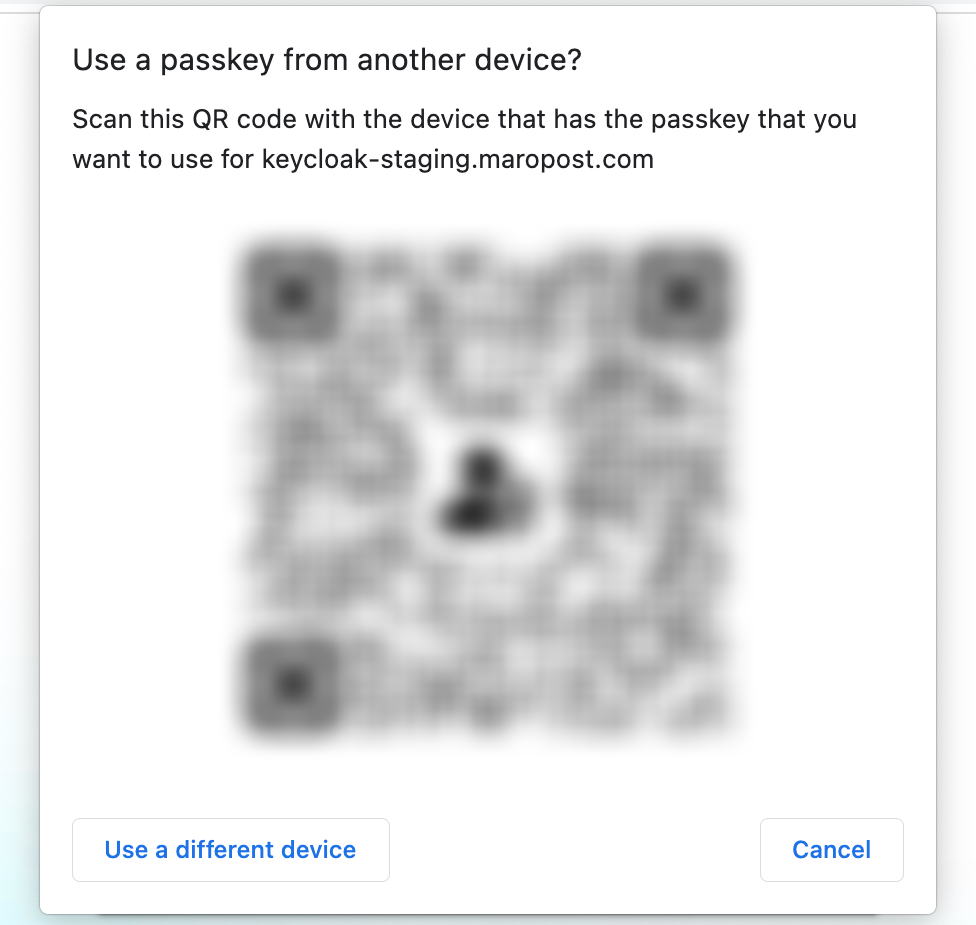
4. In other scenarios, the system may prompt you to enter the passkey saved on the device you’re logging in with. If you prefer, click the “Use a different device” tab to utilize other options.
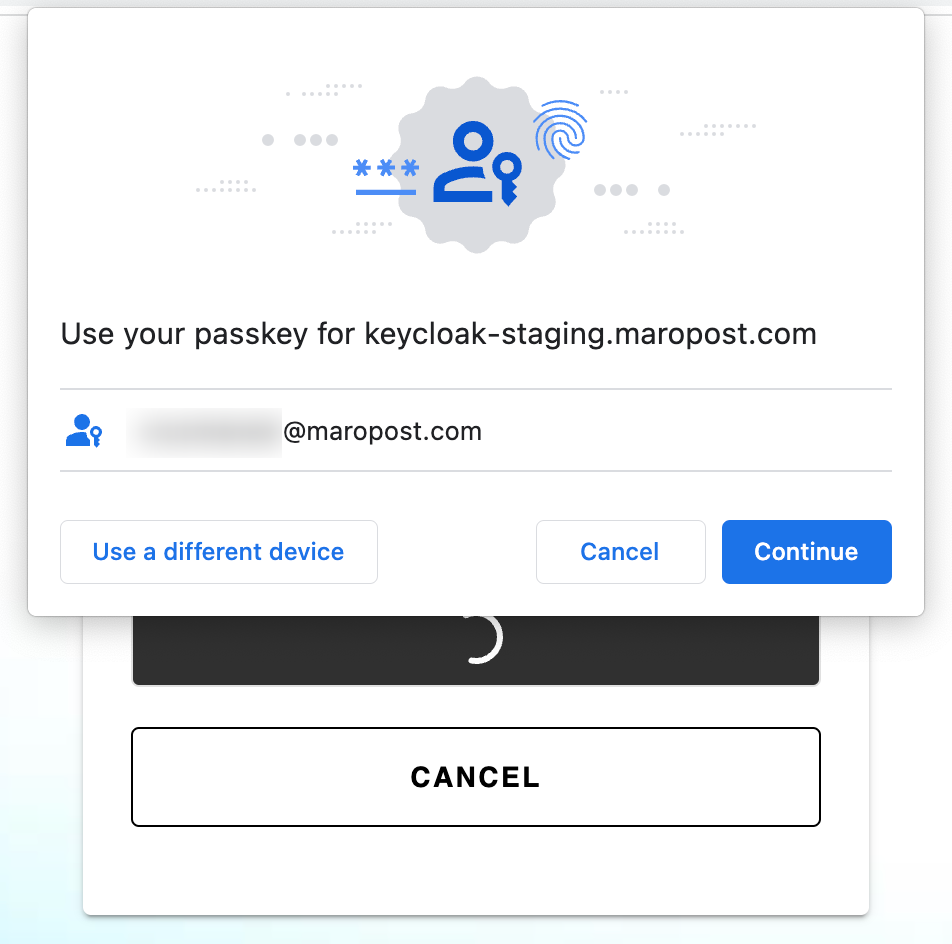
5. If you have saved the key on another device, choose the “Use a phone or tablet” option and scan the QR code using a smartphone or tablet that contains the passkey.
6. You can also opt for an external security key that contains the passkey for logging in.
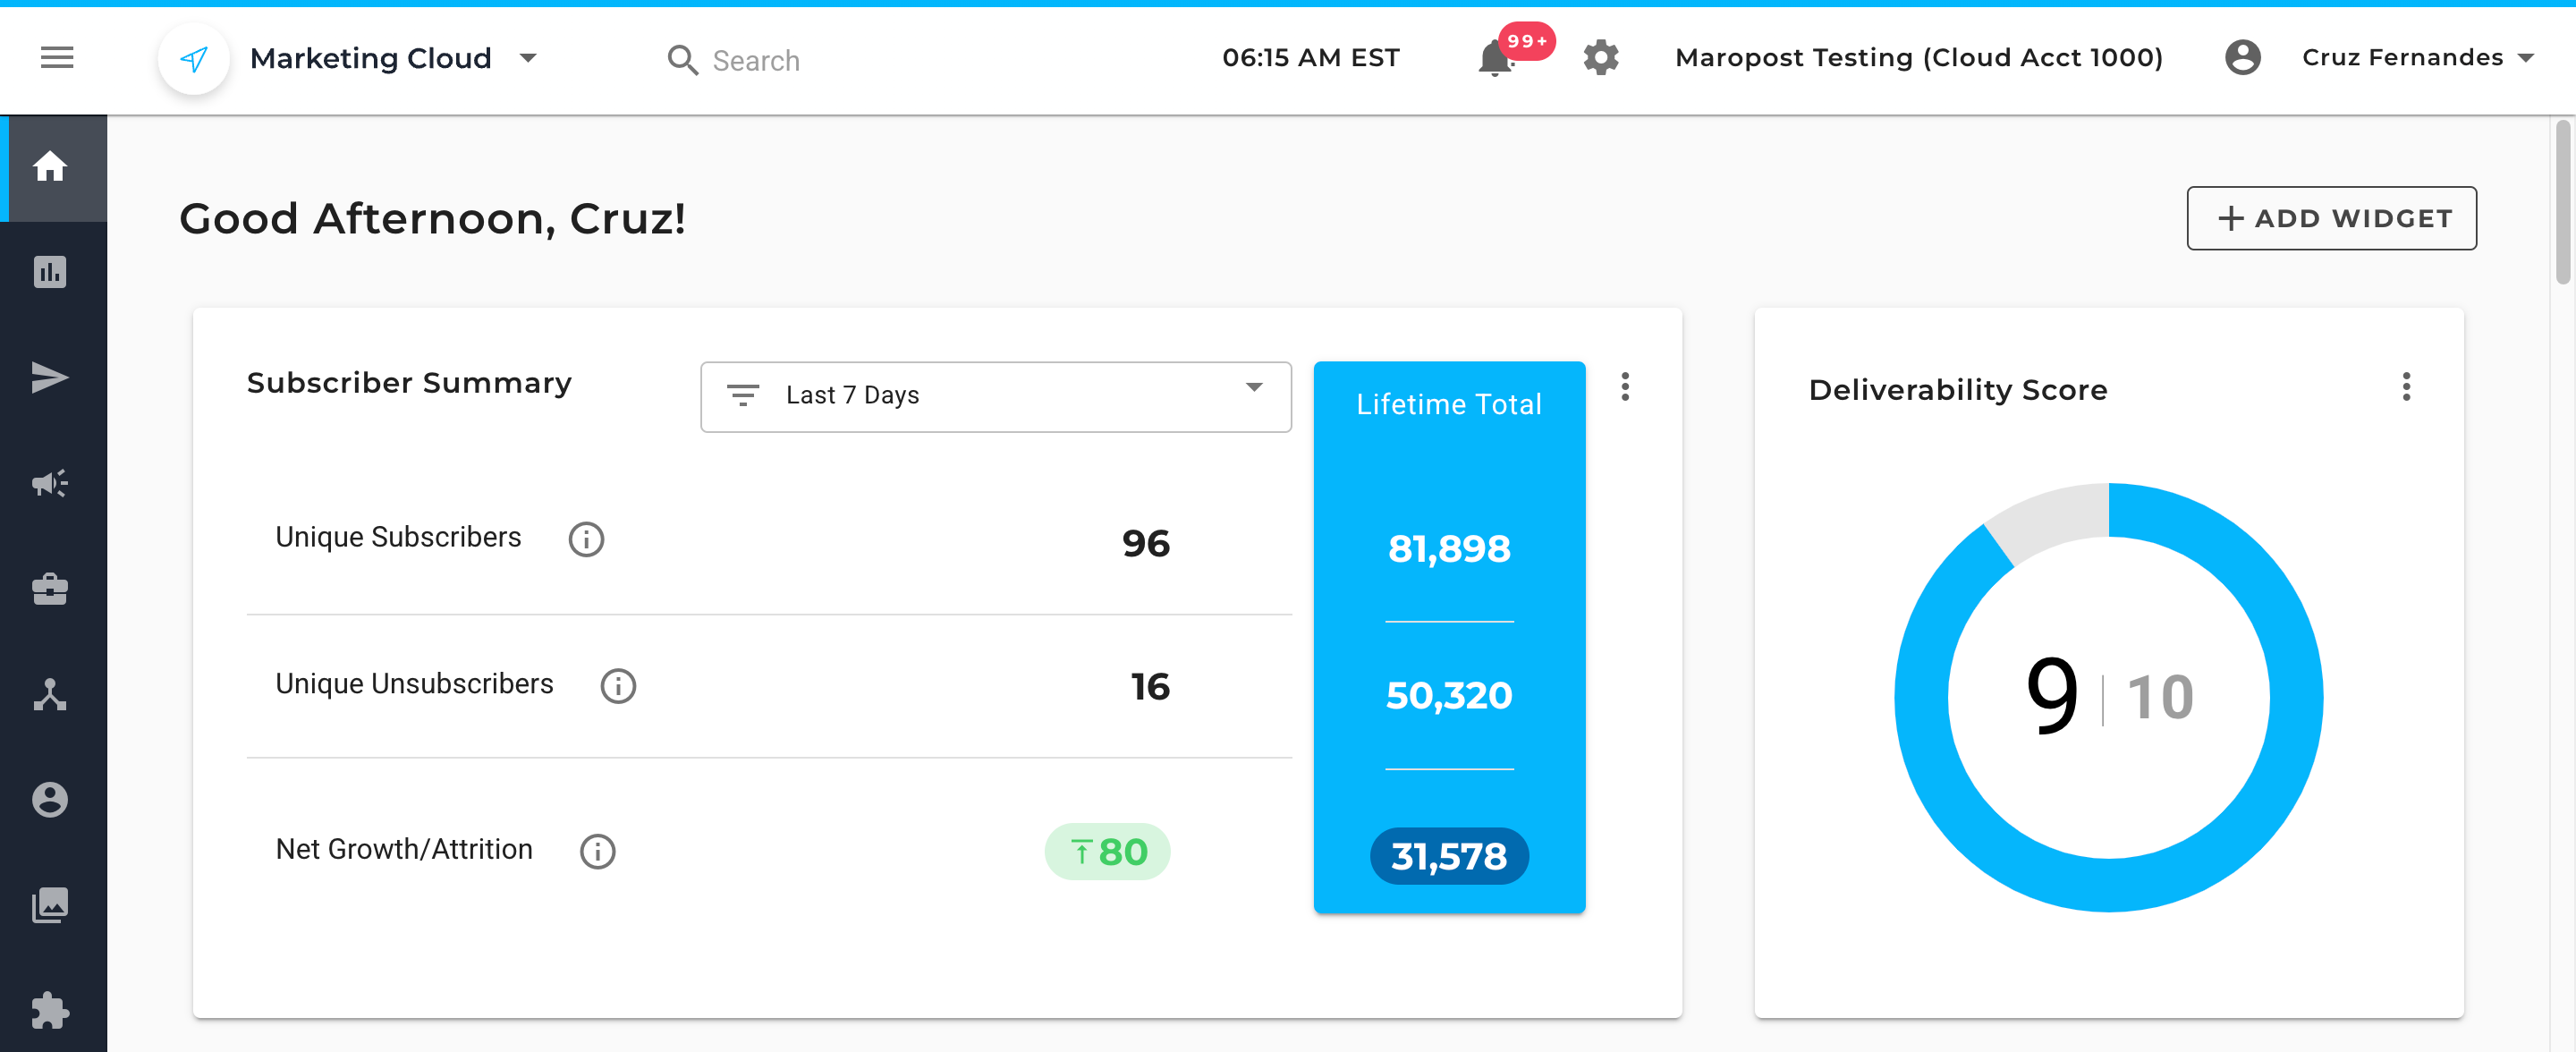
After you complete the login process, the system will redirect you to the Marketing Cloud’s Dashboard if you own an account or have been added to one.
Important: If you aren't linked to an account, you’ll be redirected to the Marketing Cloud’s Identity application after you log in. To gain access to your account, kindly contact your system administrator.
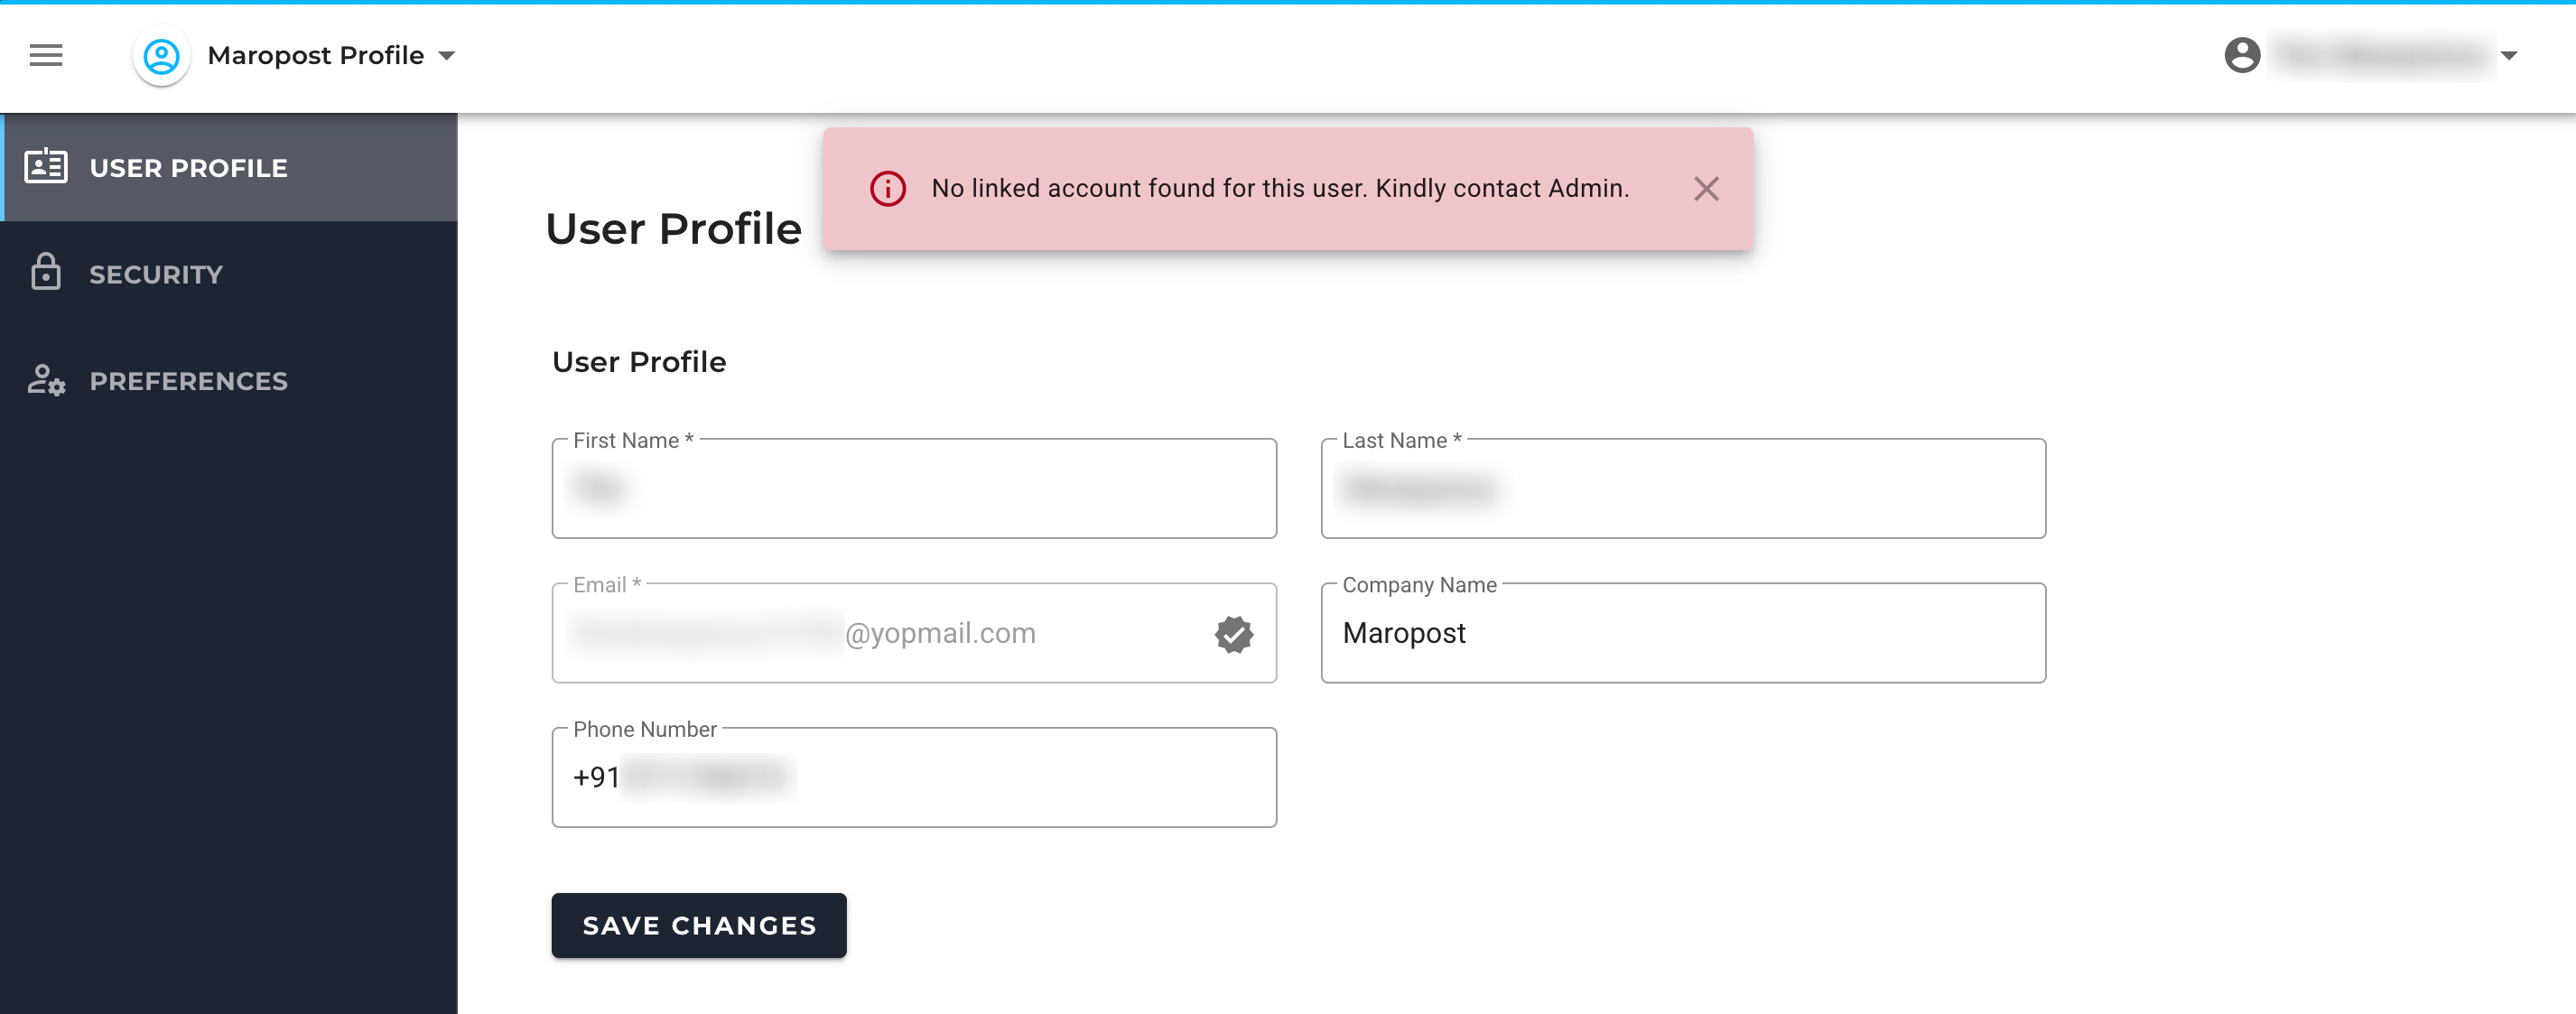
Once the administrator grants you account access, log in to your account and start using the application.
Configuring Passkeys from the Identity Application
Along with updating your account’s password, you can also set up a new passkey from the security section present in the Maropost Identity (https://id.maropost.com/) application. Such a method is a suitable way to access your account without the hassle of remembering your usernames and passwords all the time.
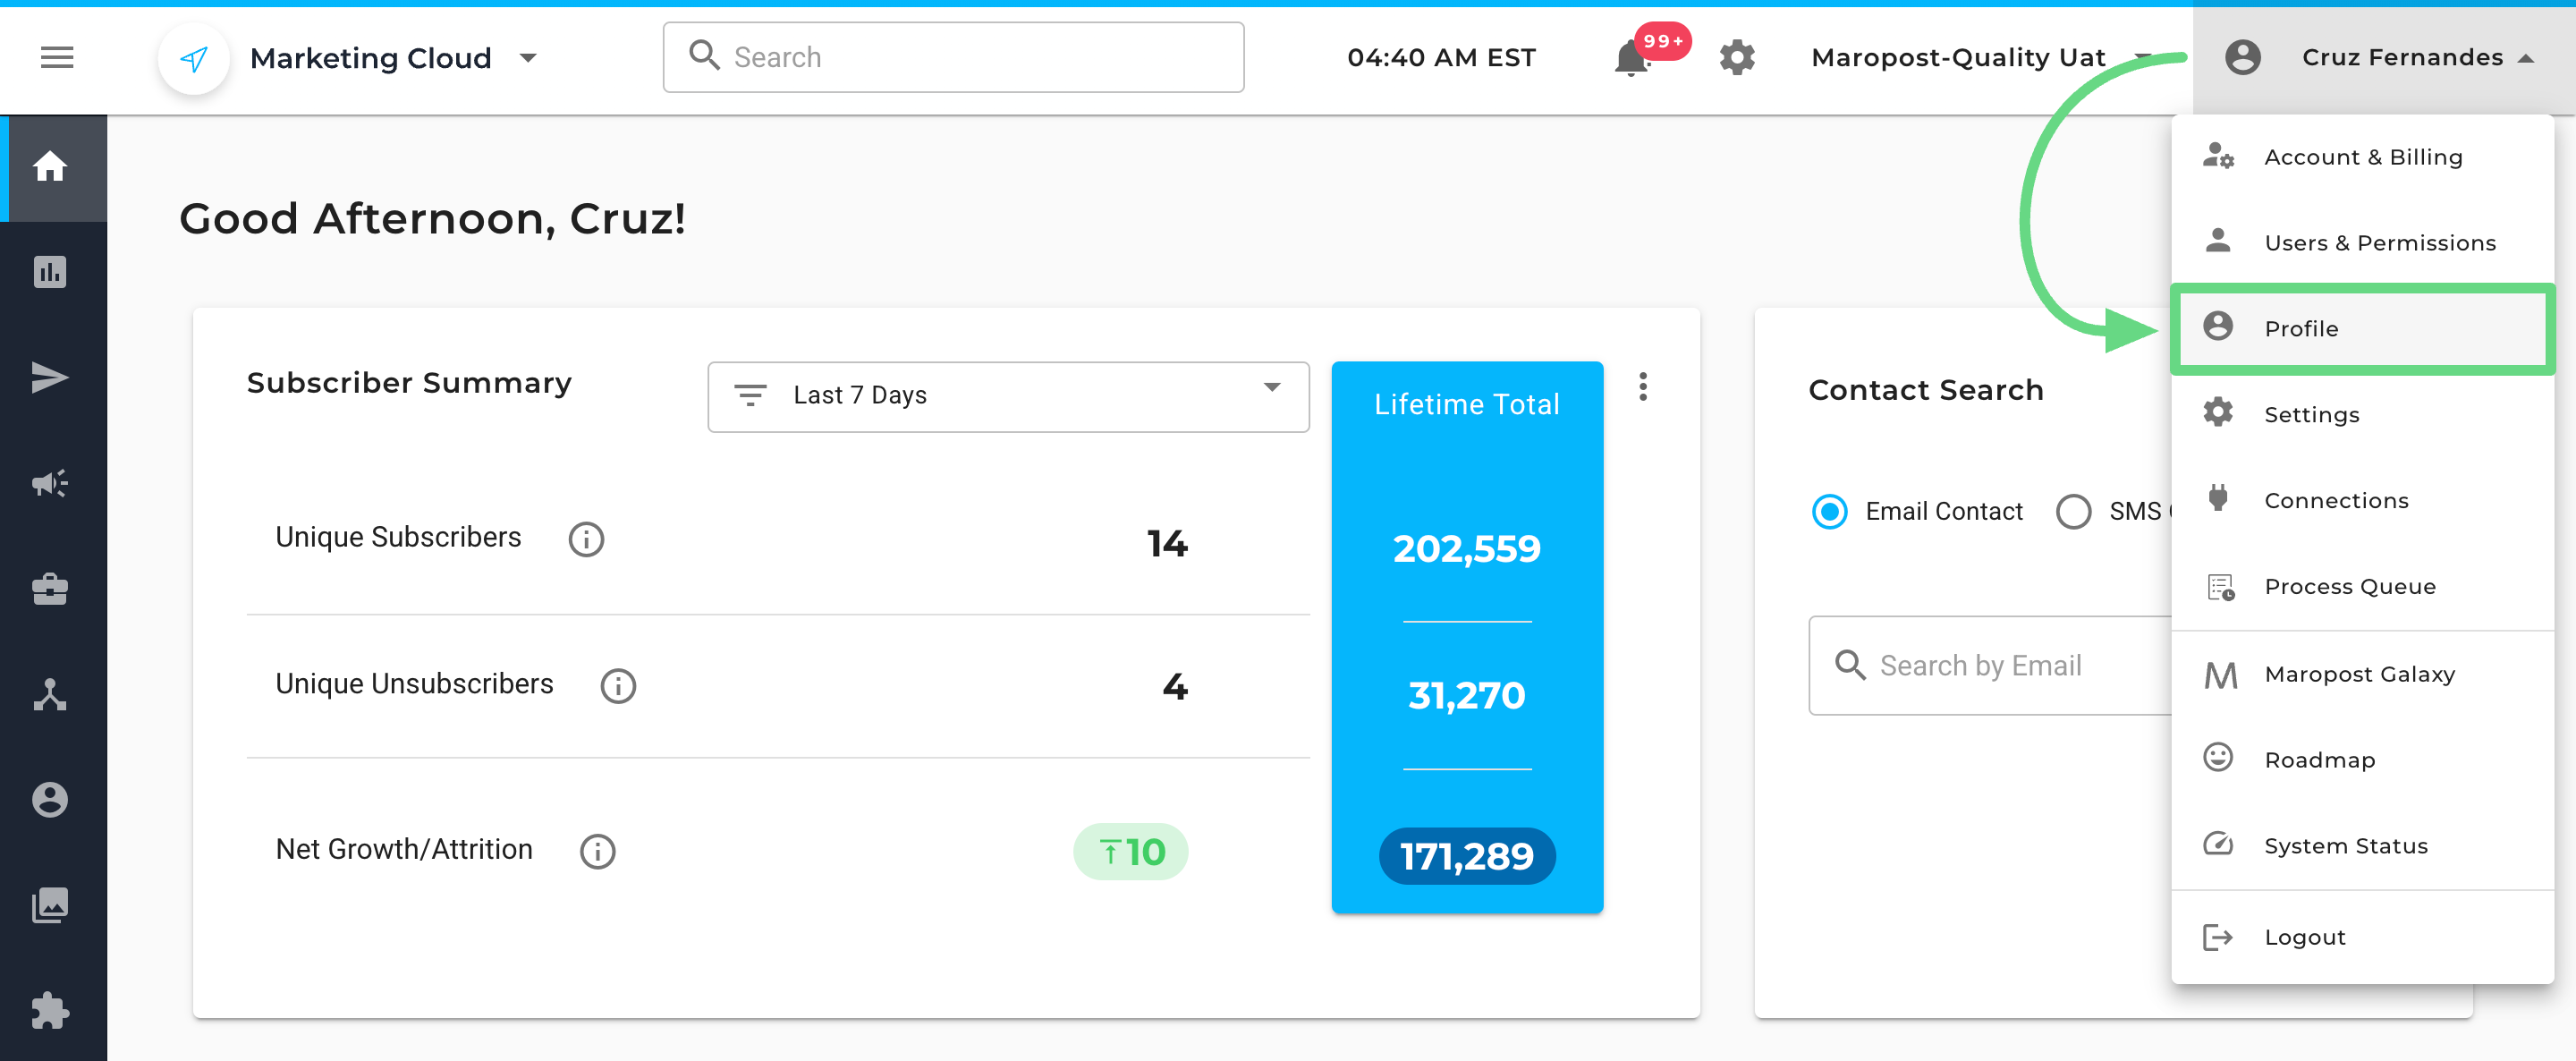
1. From the Marketing Cloud account, click on your username in the top right corner of the application. Then, click on Profile.
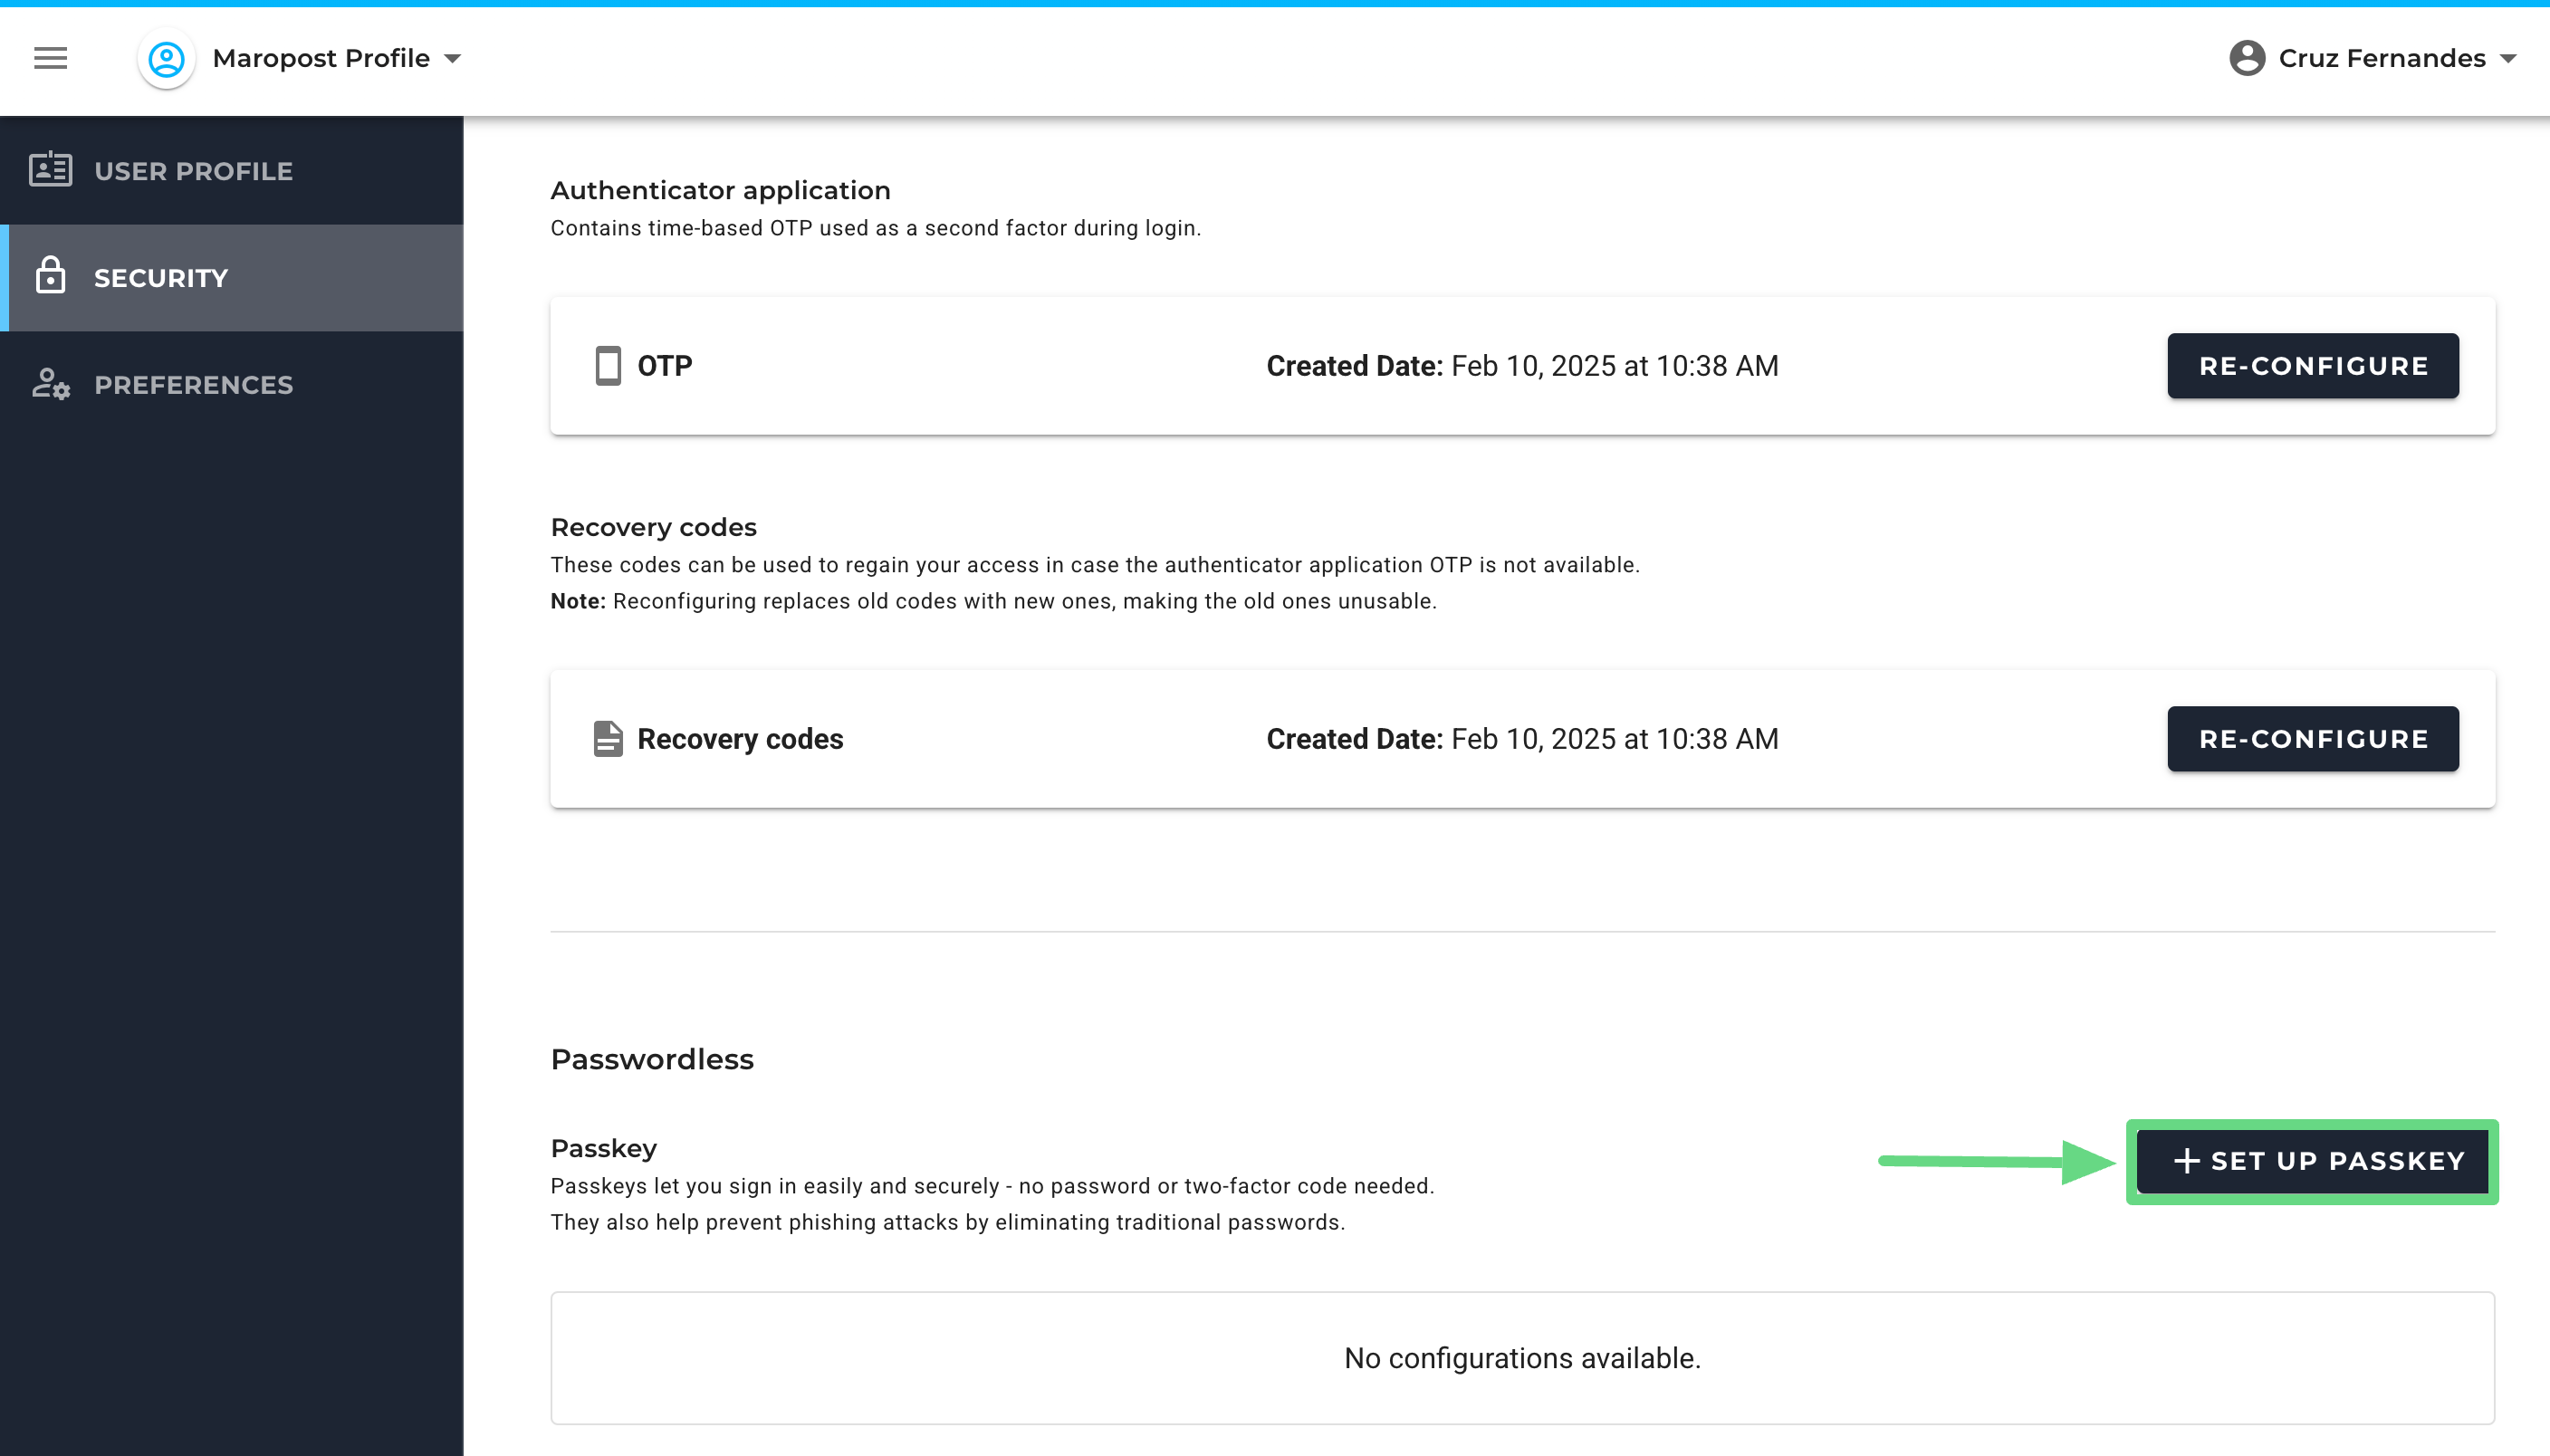
2. You’ll be redirected to the Maropost Identity (https://id.maropost.com/) application. To configure your new passkey, visit the Security section, and under Passwordless (Passkey), click on Set Up Passkey.
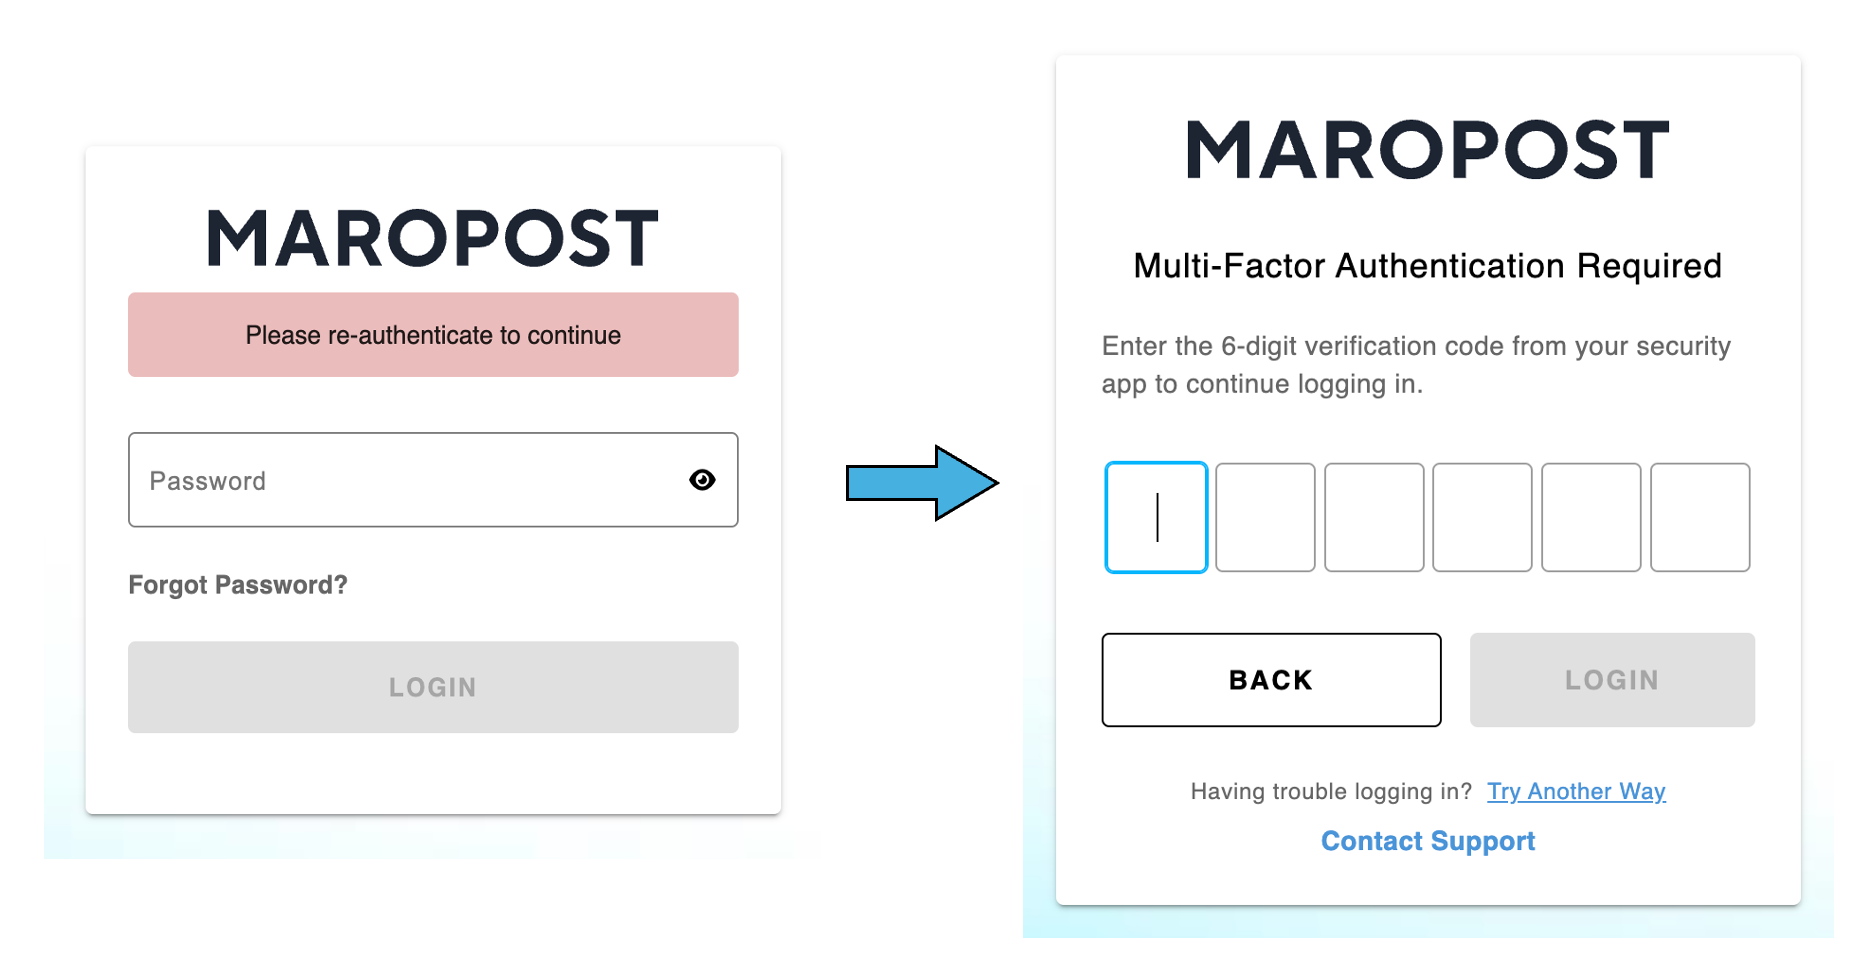
3. If you’ve been logged in for a while, you will need to re-authenticate again by entering your account’s credentials and submitting a one-time OTP before setting up your account’s passkey.
4. However, if you’re setting up a passwordless credential immediately after logging in, you will be redirected to the Passkey Registration page and be asked to register a new passkey.
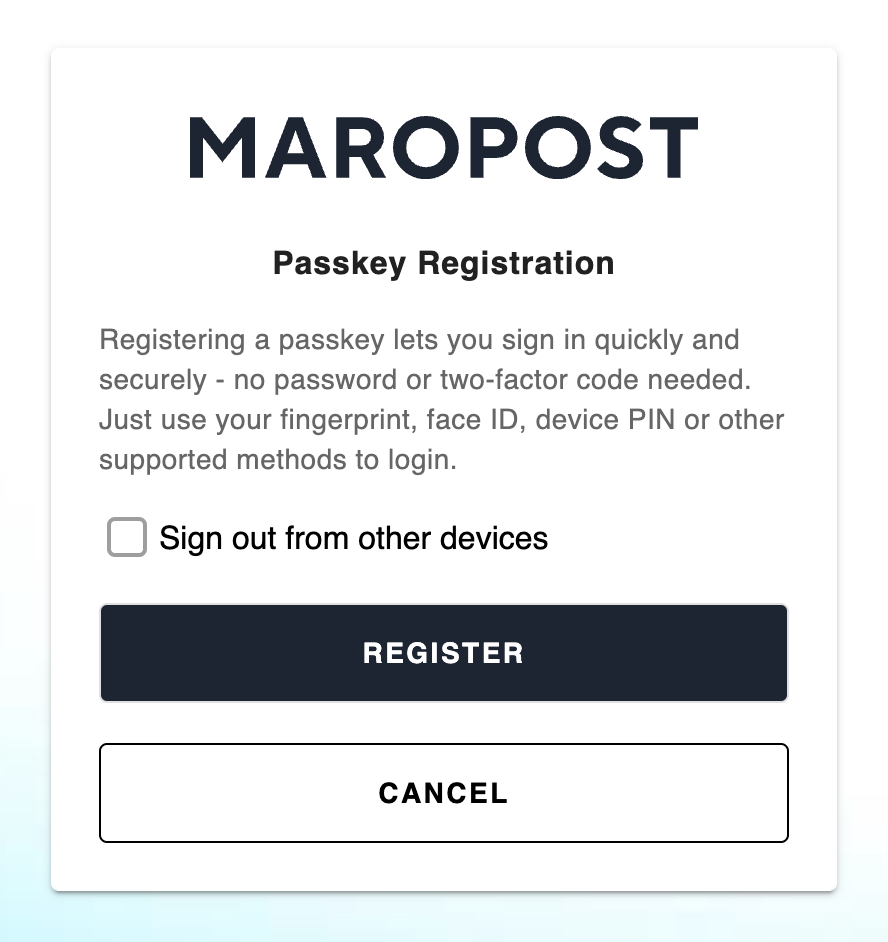
5. Upon clicking “Register,” a dialog box appears, prompting you to confirm the method by which you wish to create the passkey. If you’ve configured your Windows Hello setup with the latest updates and have installed it on your Windows device beforehand, the system displays it as a default passkey registration option.
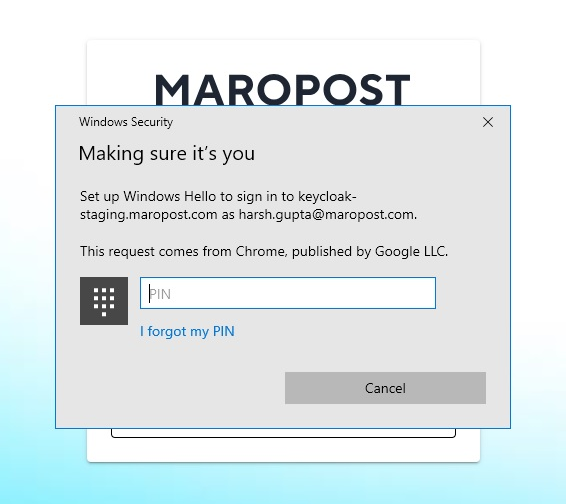
If Windows Hello isn’t available or configured on your device, options such as Mobile Bluetooth and USB Security Key will be the primary choices.
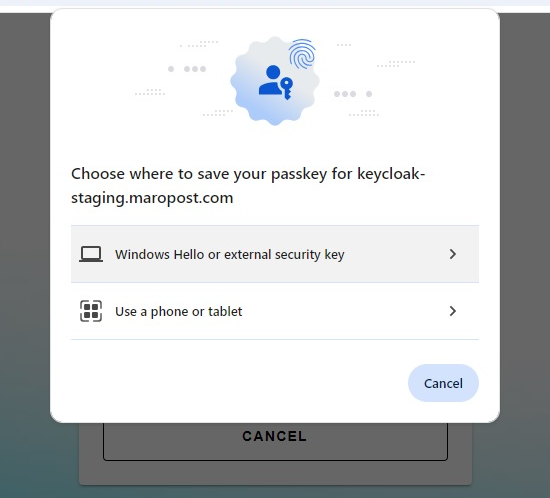
Passkey setup variations on other web browsers:
- If you've already signed in to Chrome with your Google account, you can save the passkey in the Google Password Manager on your Chrome browser.
- In Firefox and Safari browsers, there are only three options for saving passkeys. They are, namely, Mobile Bluetooth and USB Security Key.
Configuring passkeys using the 1Password application:
If you are unable to create and save passkeys by following steps 5 & 6, there is another alternative in the form of 1Password encryption security:
- First, install the 1Password application on your Windows device, then add its extension to your Chrome and Microsoft Edge browsers.
- Create an account in 1Password and register the passkey.
- Now, use this passkey to access your Maropost account. Recognize that the 1Password application does not work in Incognito mode in either Chrome or Microsoft Edge.
- Remember to keep your 1Password account active at all times, as you won’t be able to use your passkey via 1Password if the account is frozen due to subscription lapses, account cancellation, or expiration of the trial period.
6. Next, add a label that helps you identify the passkey more easily. This is beneficial if you’re handling multiple accounts that require a passkey to gain access to. Click on Submit to save the newly created passkey.
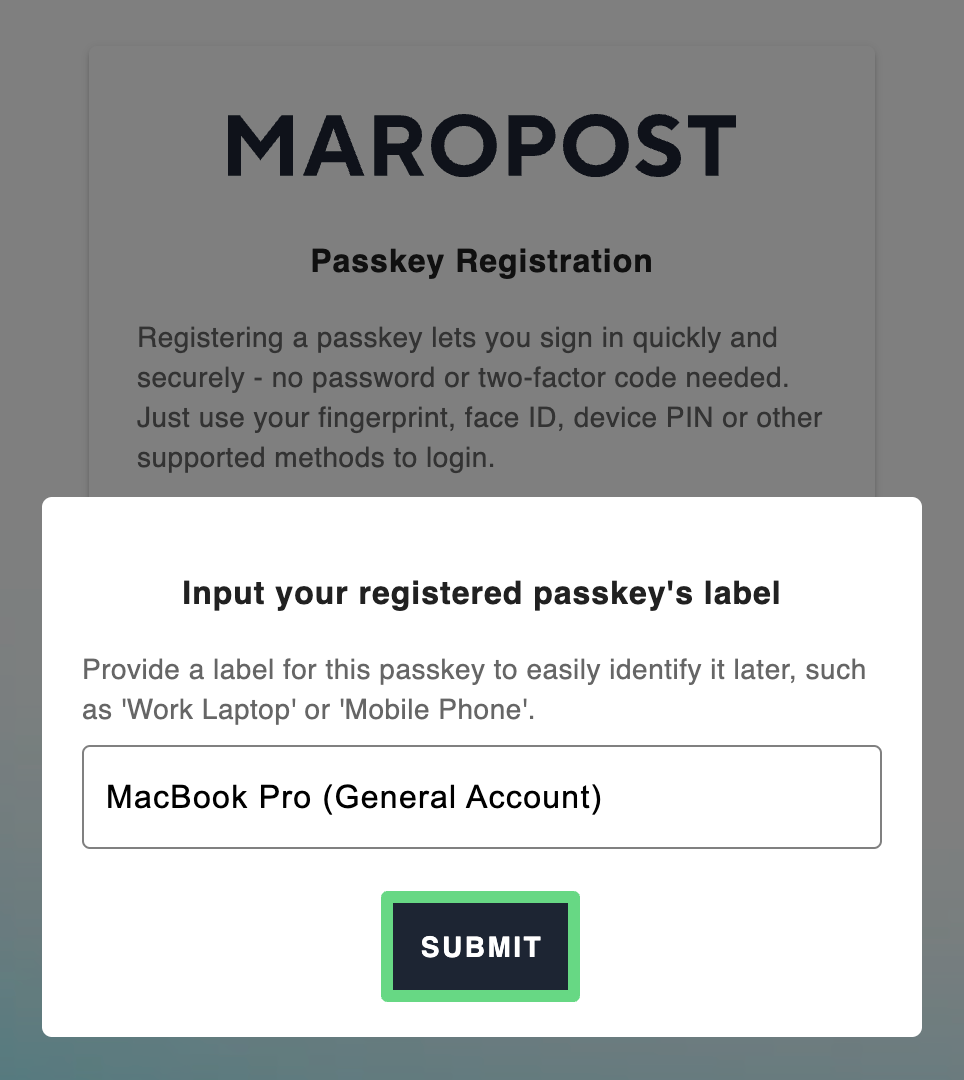
The passkey gets generated and is saved in your account’s Identity application.
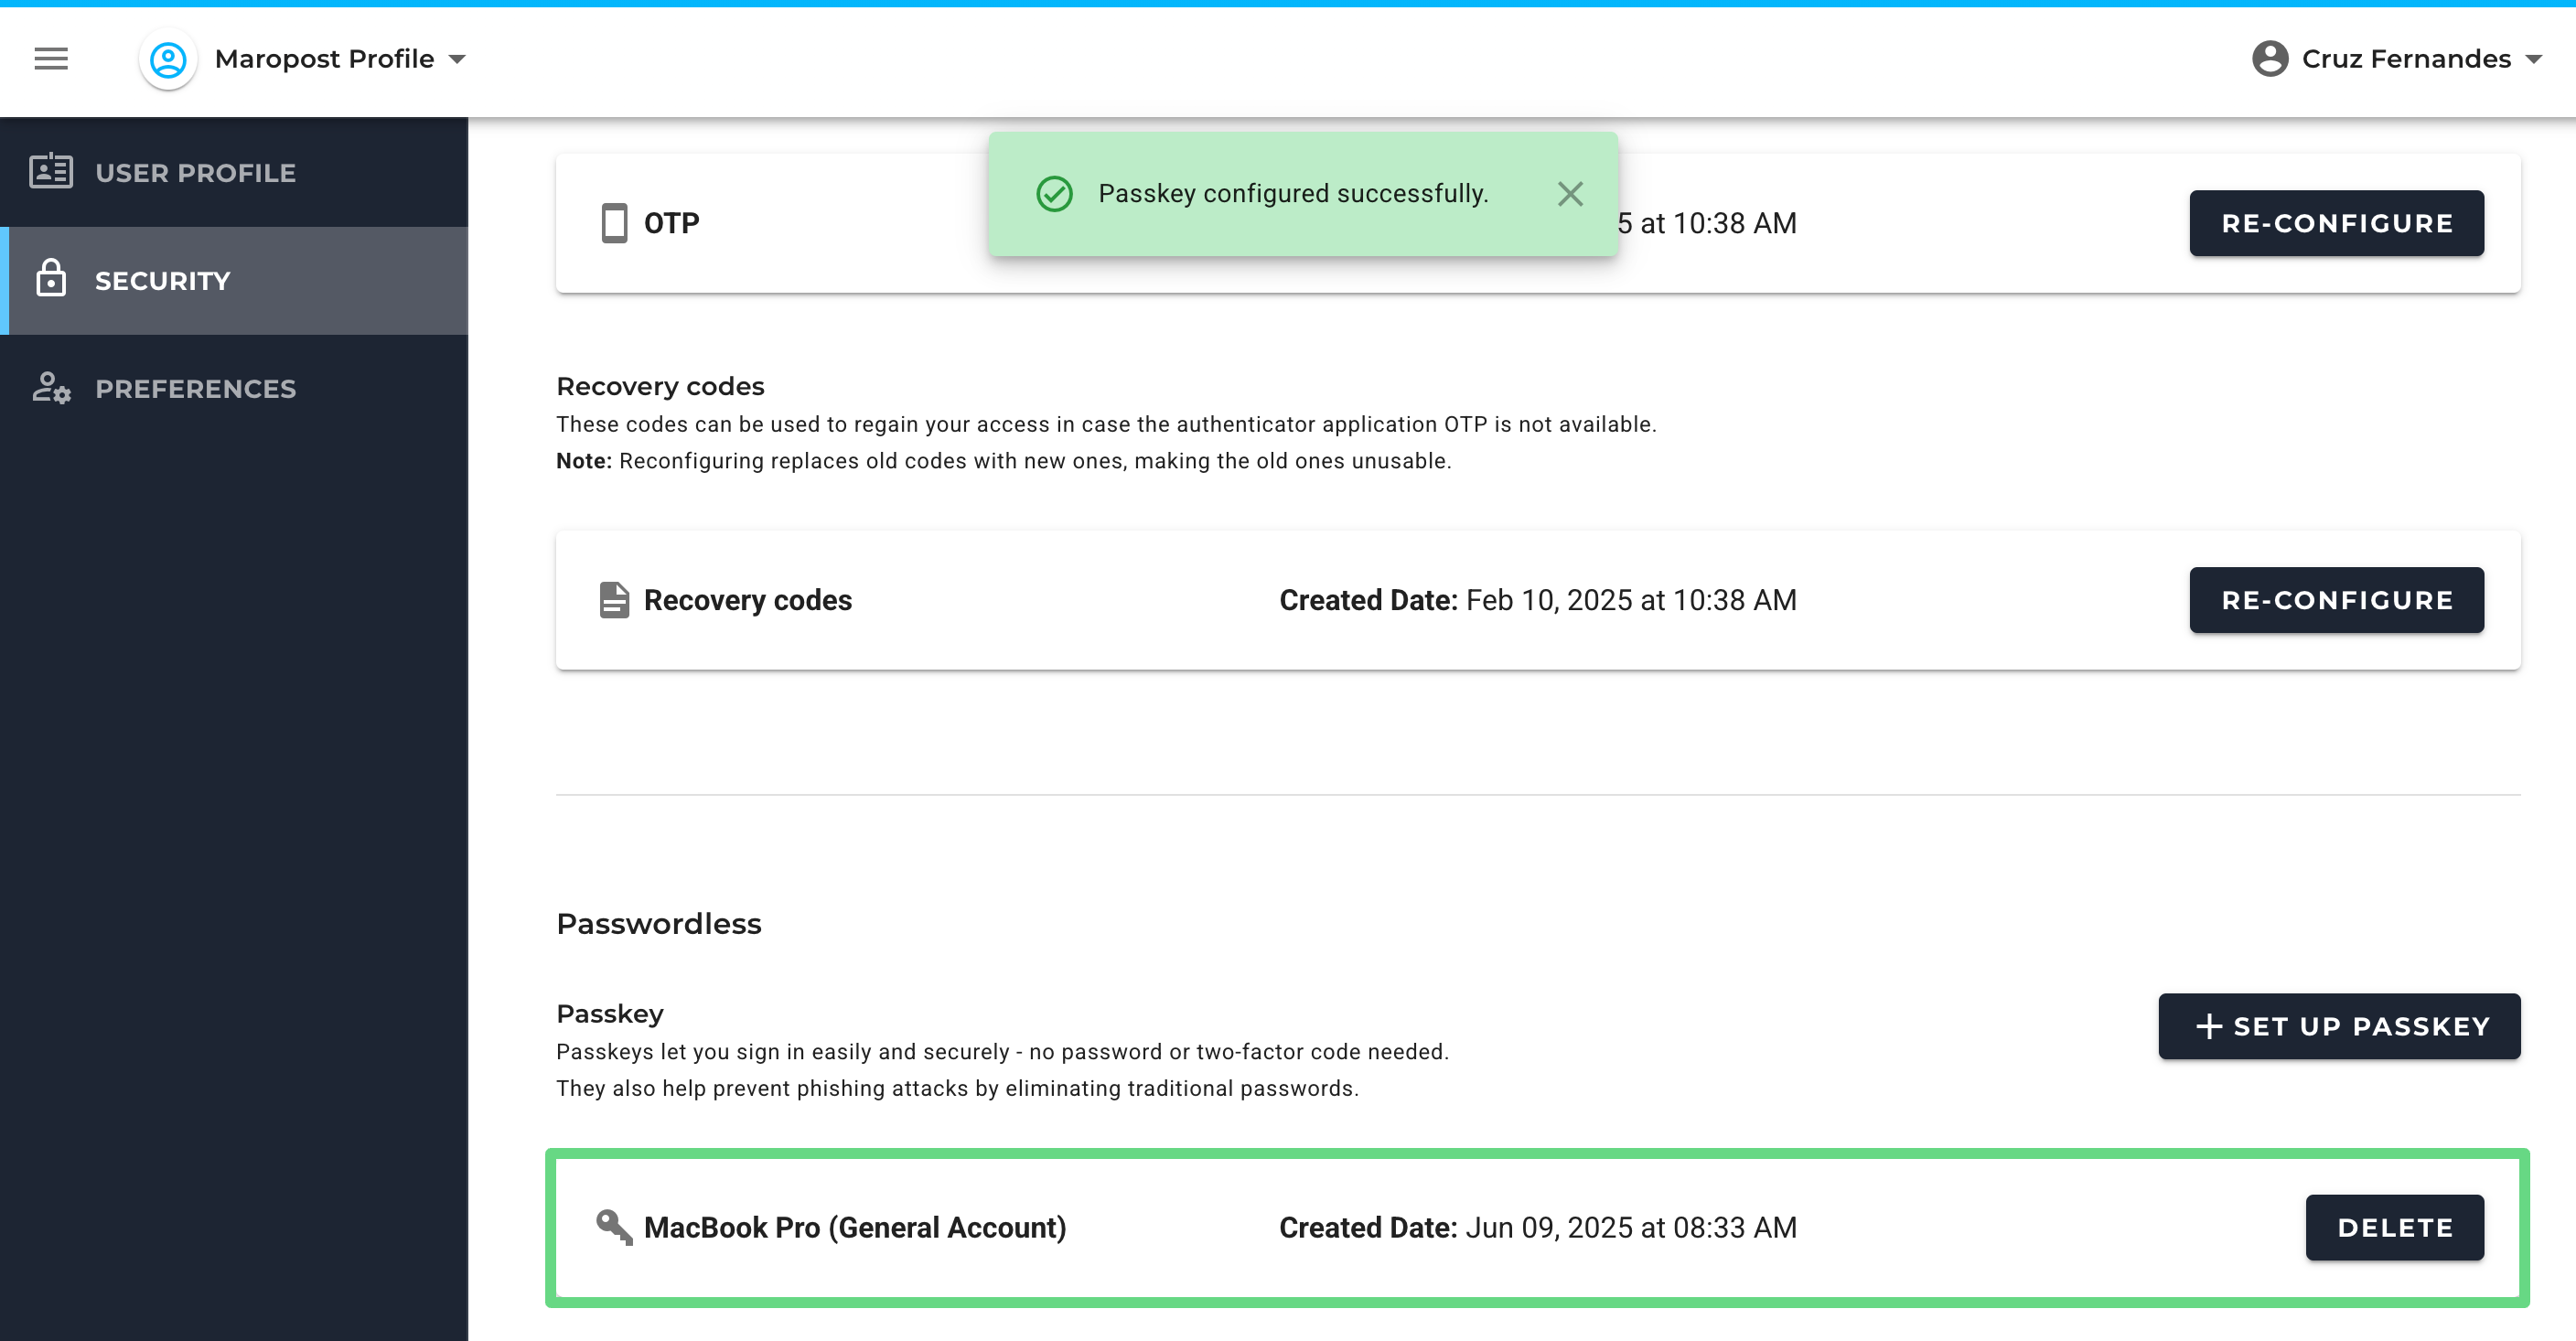
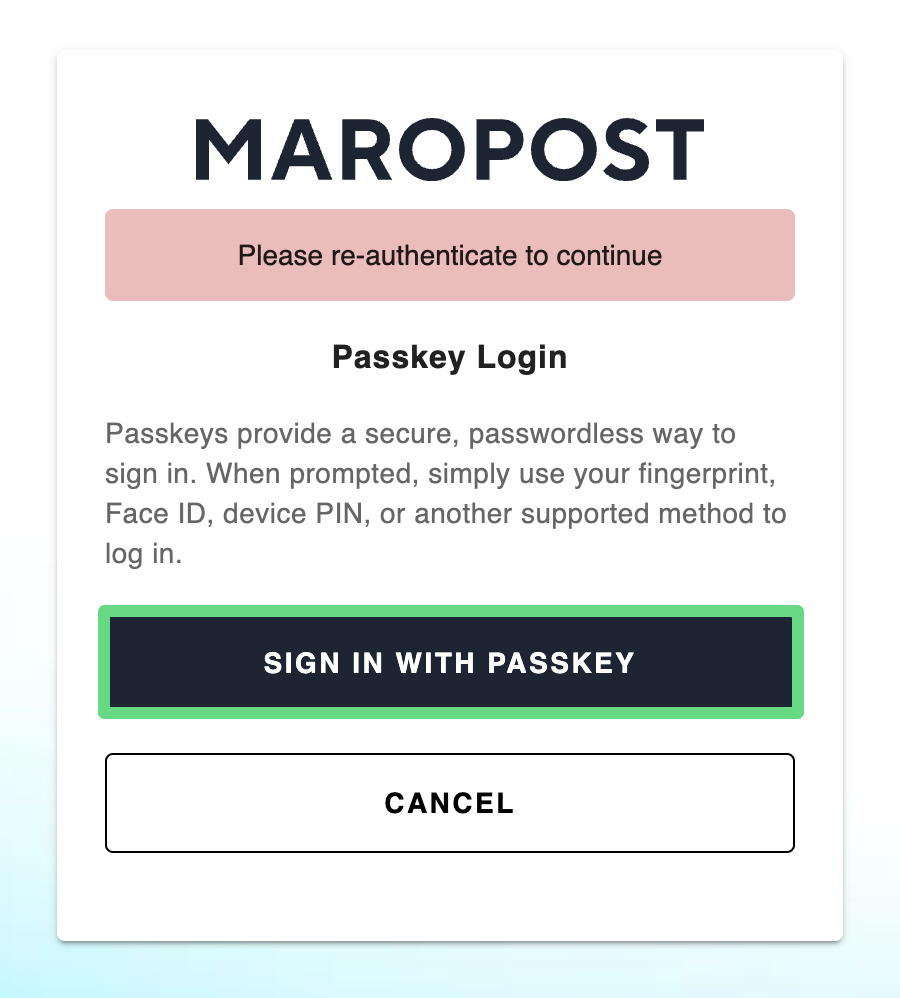
7. If you no longer require the passkey in the future, simply click on Delete, which takes you to the passkey sign-in page. However, if you've logged in for a while, you might need to re-authenticate before proceeding with removing a passkey from your account.
8. After confirming the deletion request, your passkey is removed from your account.
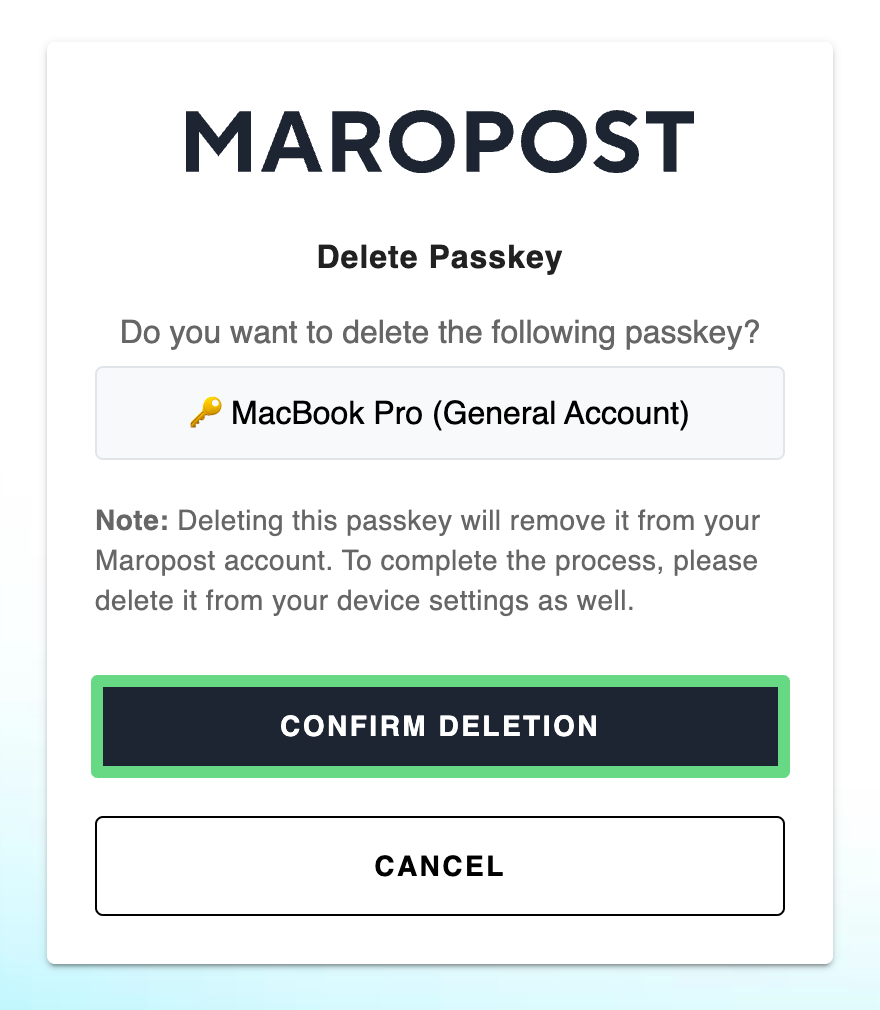
Note: If a passkey is deleted from Maropost Identity, it must also be deleted from the system; otherwise, the deletion process remains incomplete.
Related Articles
Contact Management:
Campaign Management:
Analytics & Reporting: