Lapsed Buyer Journey templates can be used to create journeys for sending promotional content and sales-driven campaigns to customers who haven’t purchased a product from your business for a while.
Usage Scenario
At times, you may encounter customers who might have bought items from your store or website a while back (over 6 months ago) and haven’t bought any since then (the last 90 days). To bring them back into the marketing and sales funnel, try sending enticing or appealing campaigns to them by offering referral coupons, sale offers, or discounted products.
If a customer responds to your email and makes a purchase, send a “Thank You” email along with a coupon or discount code for their next purchase. This encourages customers to have a glimpse at your store offerings in the foreseeable future. The journey should not be re-triggered for such customers until they stop purchasing for a period of over 90 days.
If a customer hasn't purchased anything from your store yet, continue to incentivize them with vouchers, highlight your best-selling product available at a cheaper rate, or explain the product in depth and why it should be bought. Your primary goal is to establish and maintain a positive relationship with your customers for as long as possible without pressuring them to buy something.
To understand how to update your store’s product catalogs and create product feed templates that are to be included in your email campaigns, read our Product Recommendations article.
Before You Begin
In order to use the Lapsed Buyer Journey template, you must already have:
Segment: This action will trigger the journey for specific customer groups who have previously purchased an item from your store but have not made another purchase since. To learn more about the segmentation process, read our Next-Gen Segment Builder article.
Email Content: These are the customizable messages or content used within the email campaigns to trigger the journey. To learn about email content, see Content Builders: Overview.
Step-By-Step Process
The Lapsed Buyer Journey template consists of two parts. The first is to configure the journey settings, and the second is to set the trigger, filter, and the email content to be sent.
Configure Journey Settings
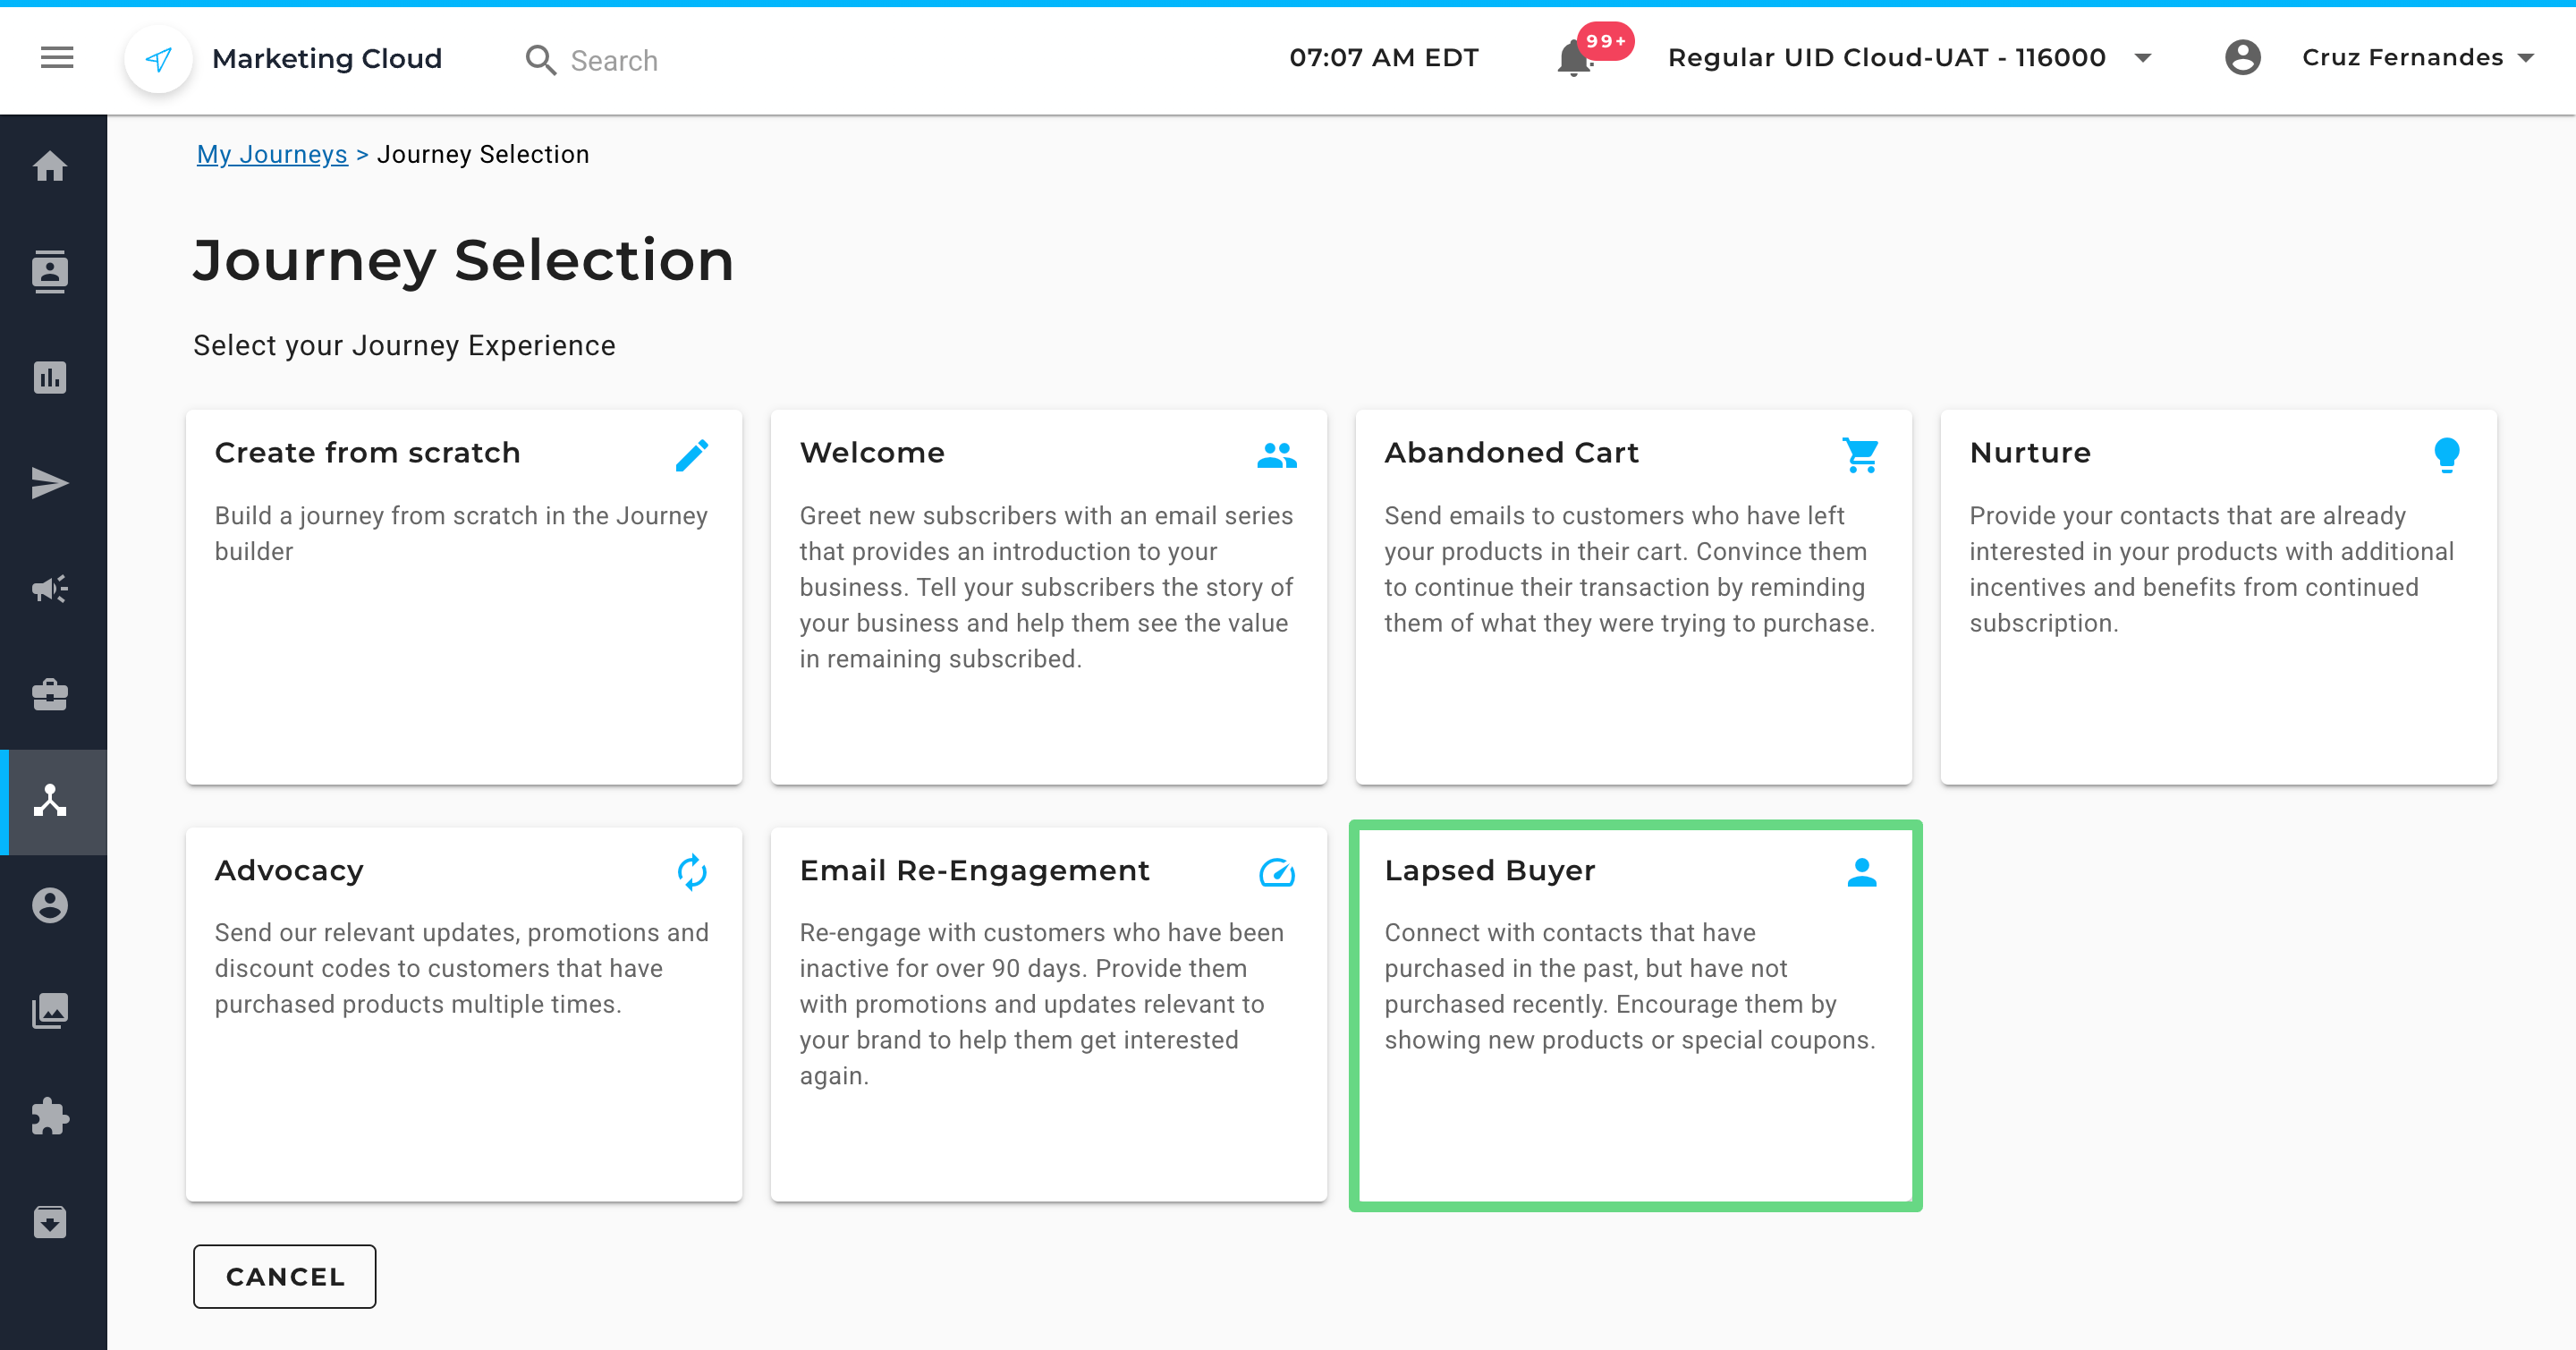
1. On the Journey Selection page, select Lapsed Buyer.
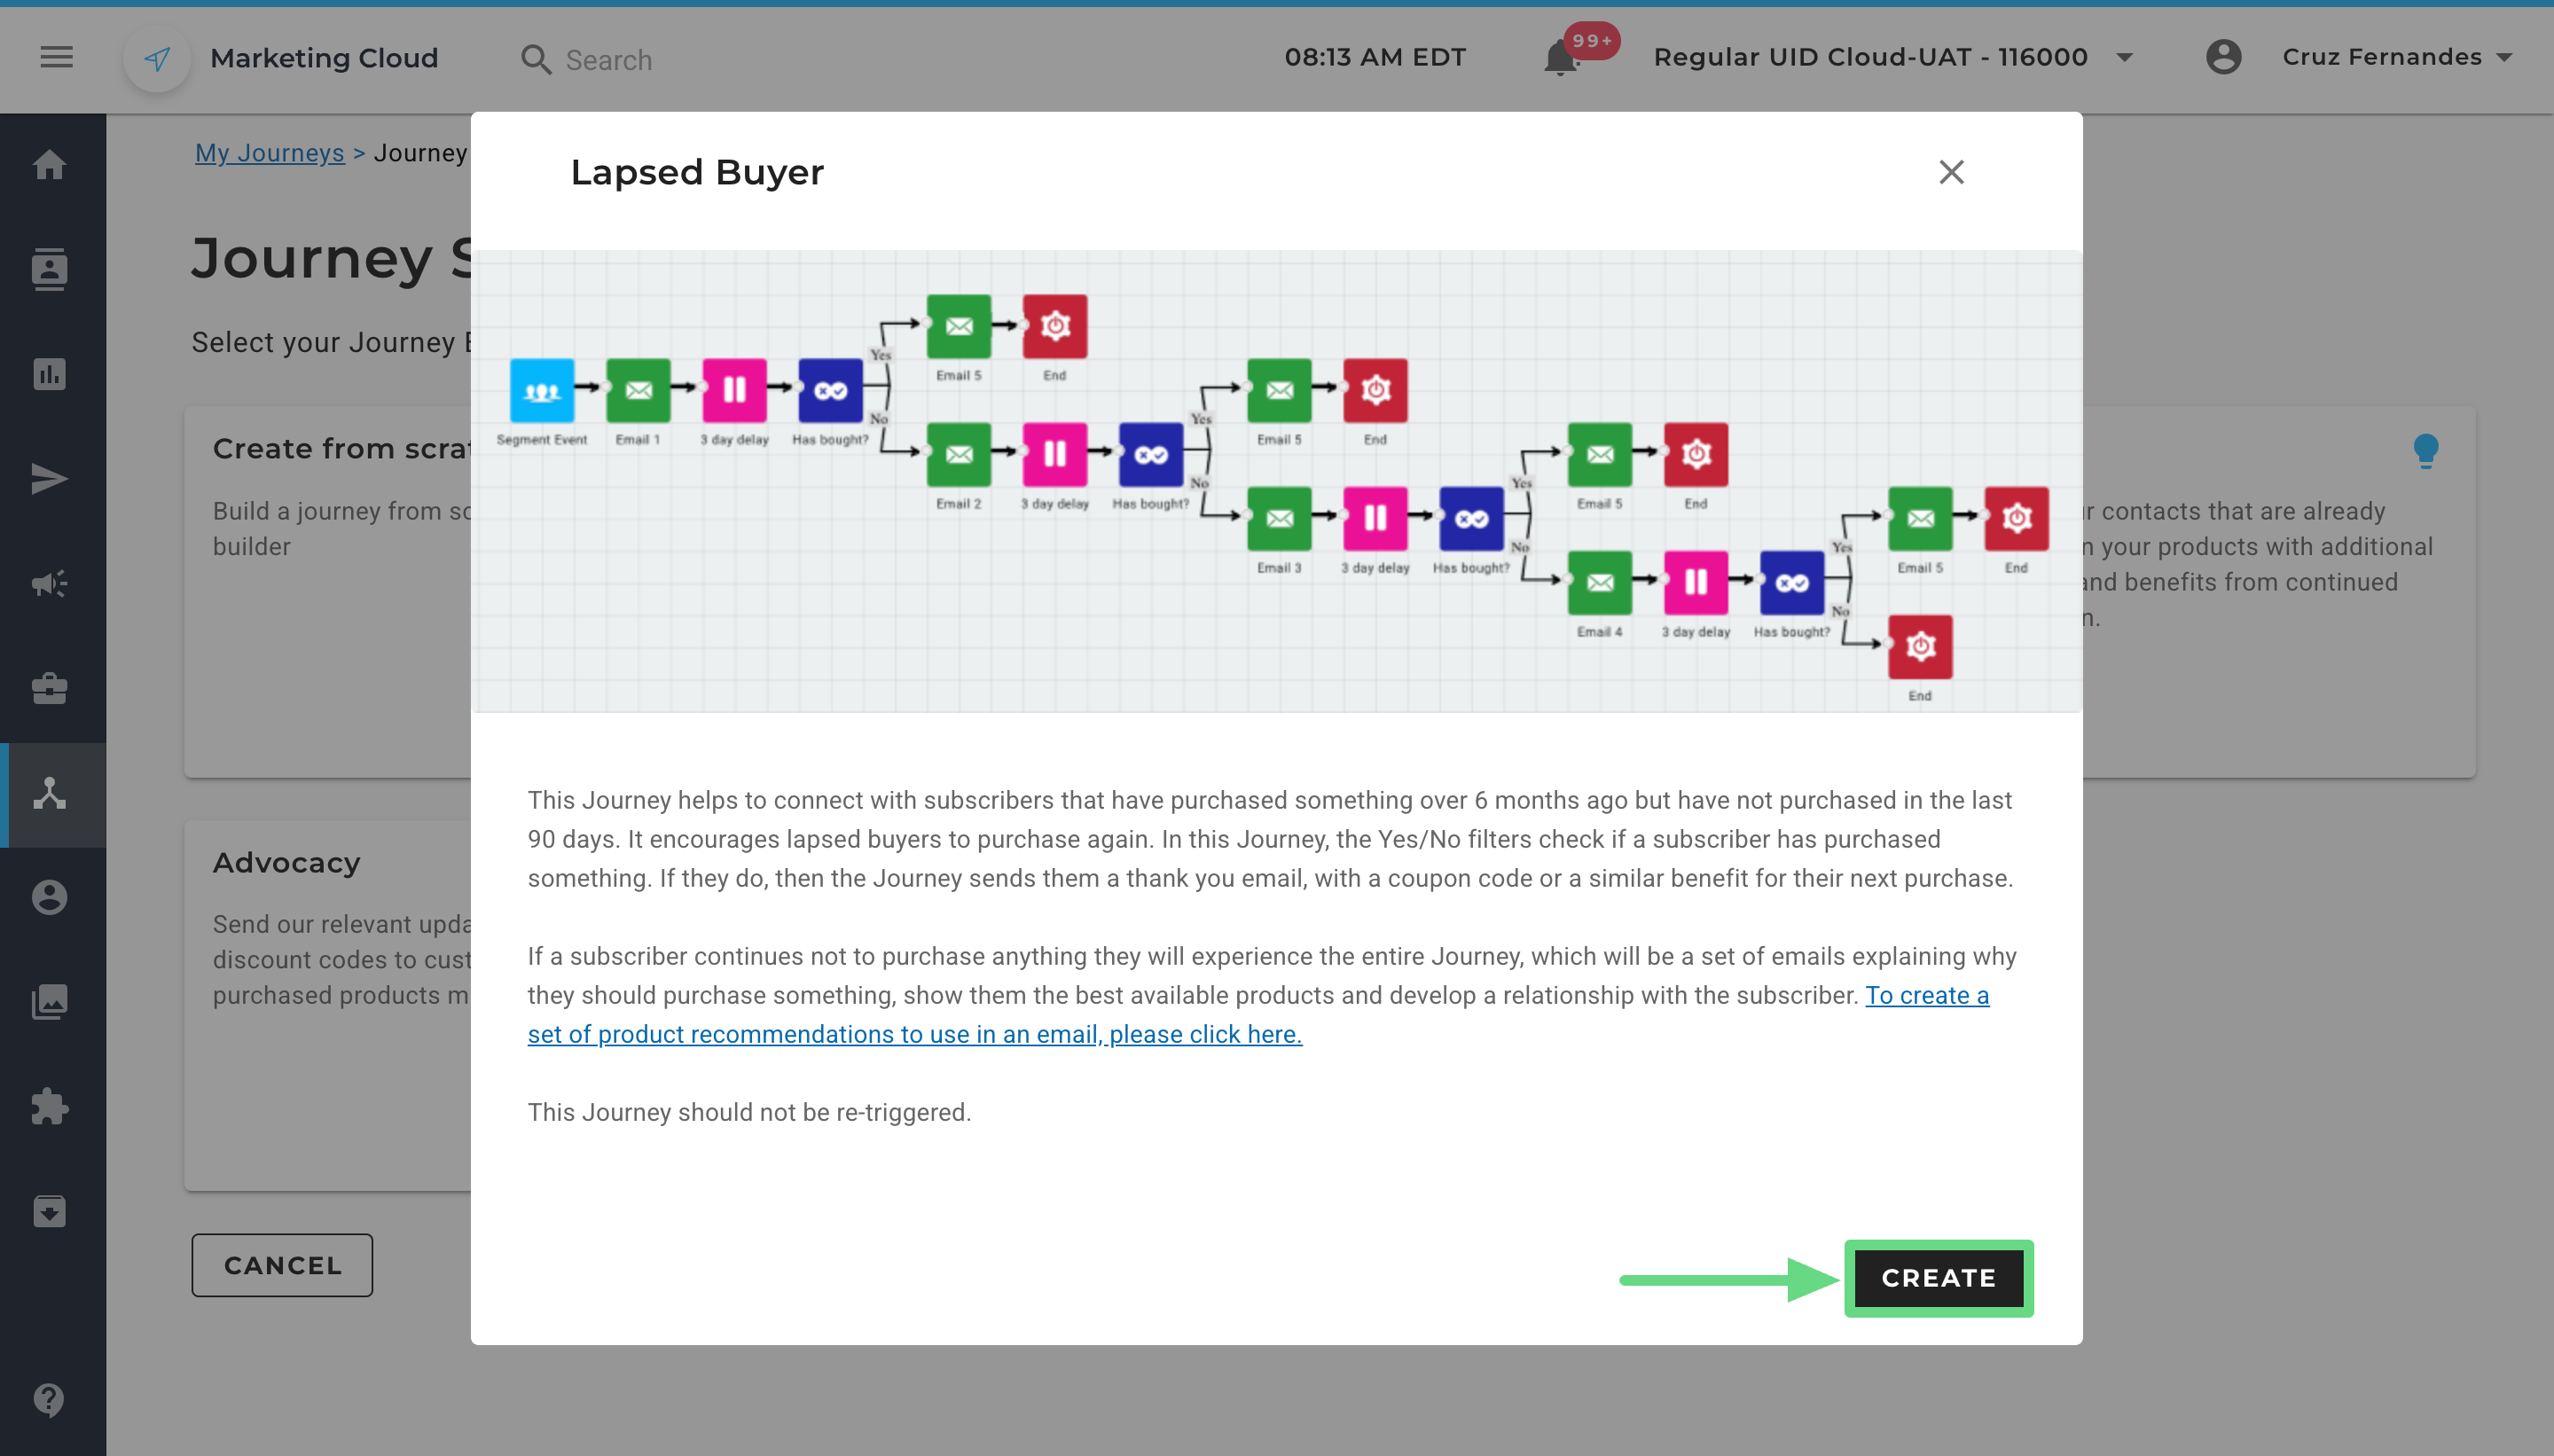
2. Click on Create.
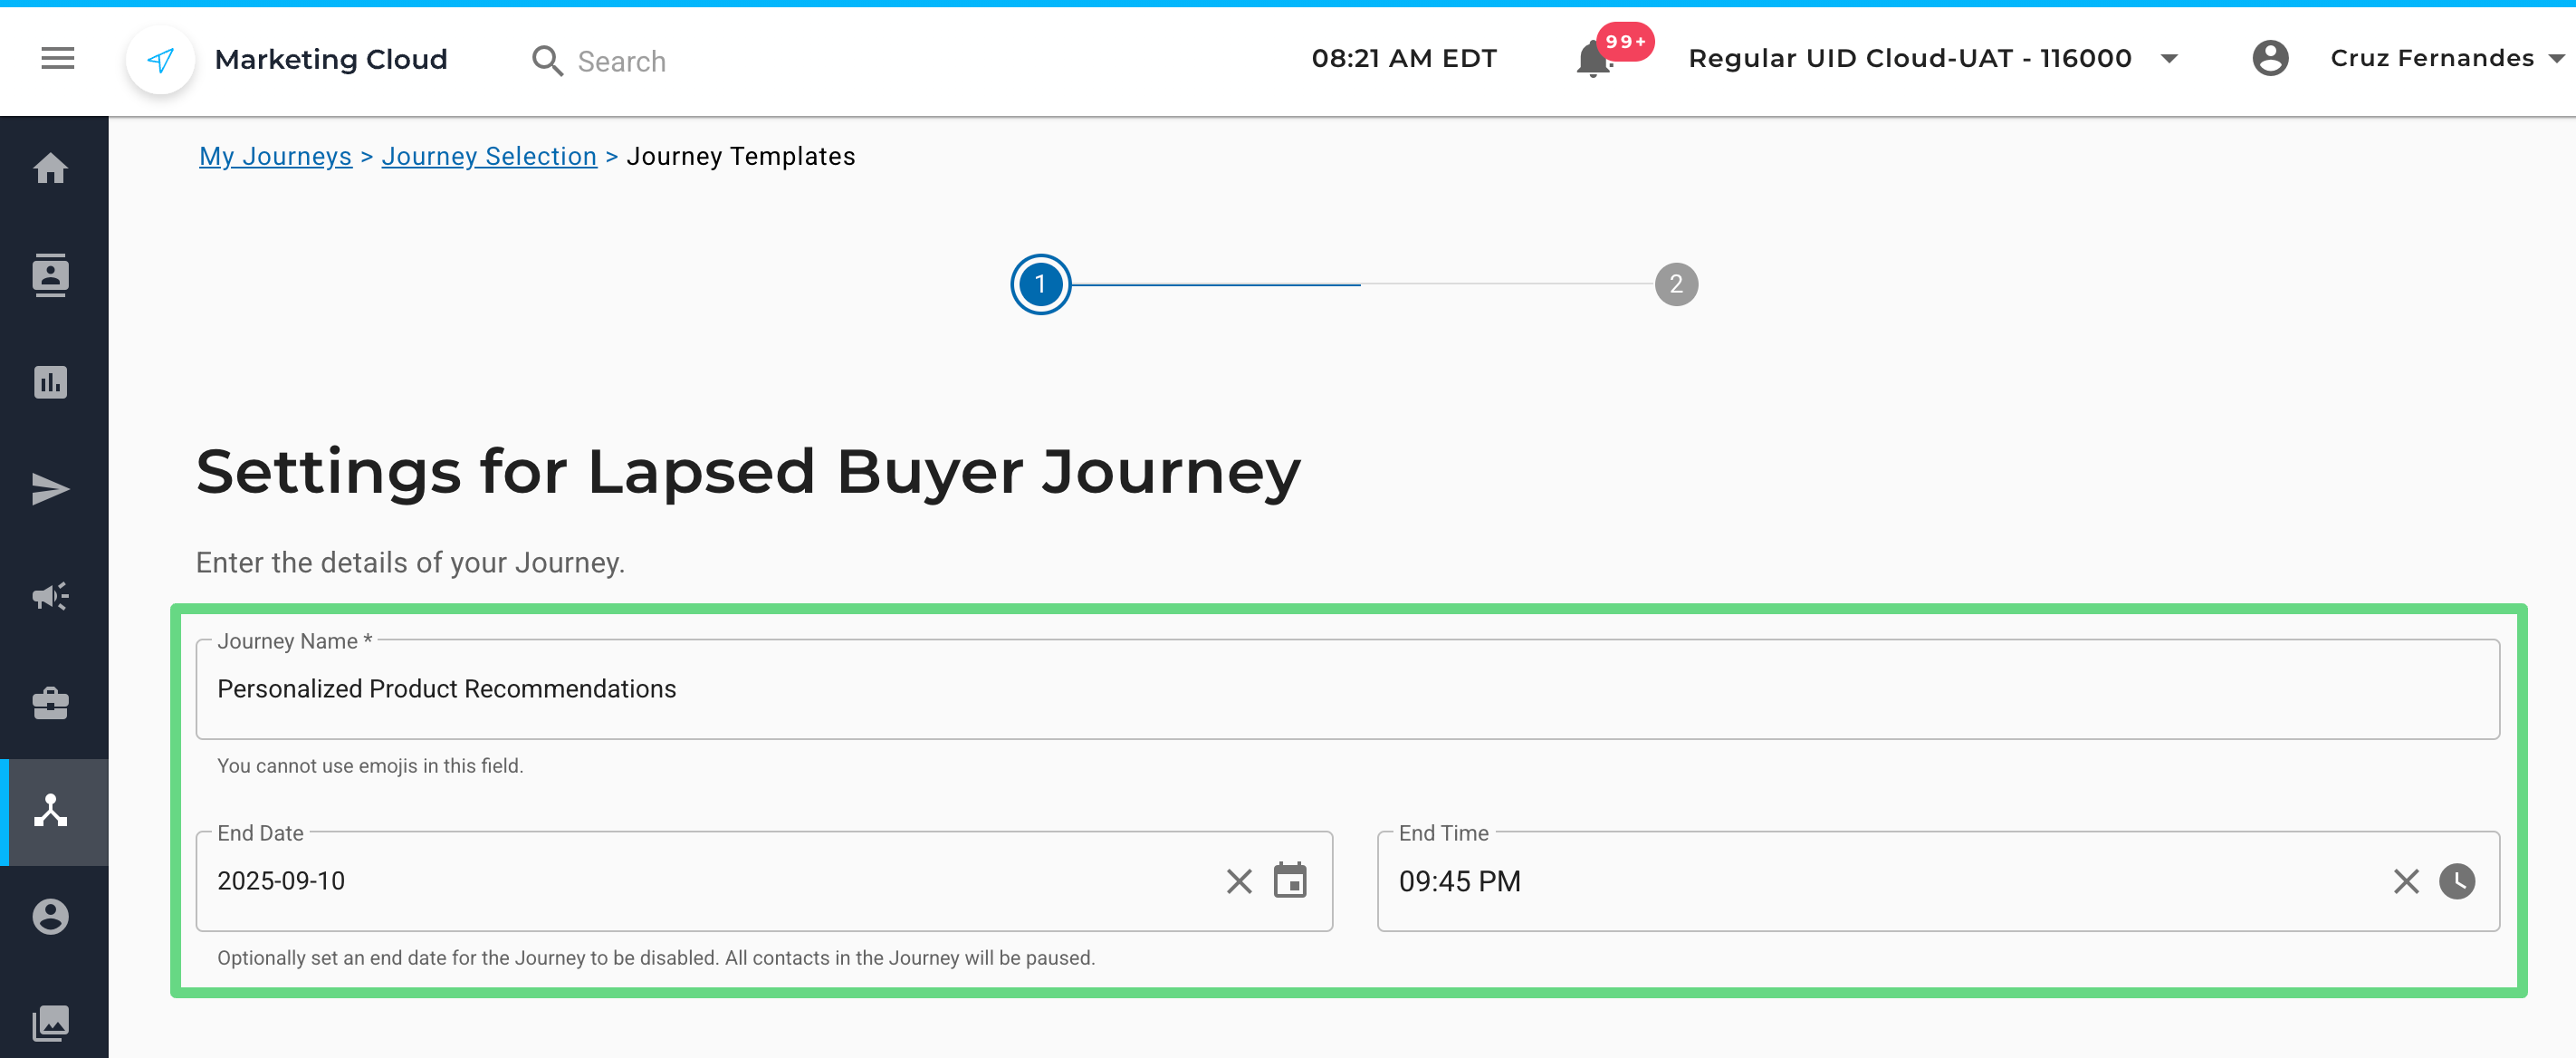
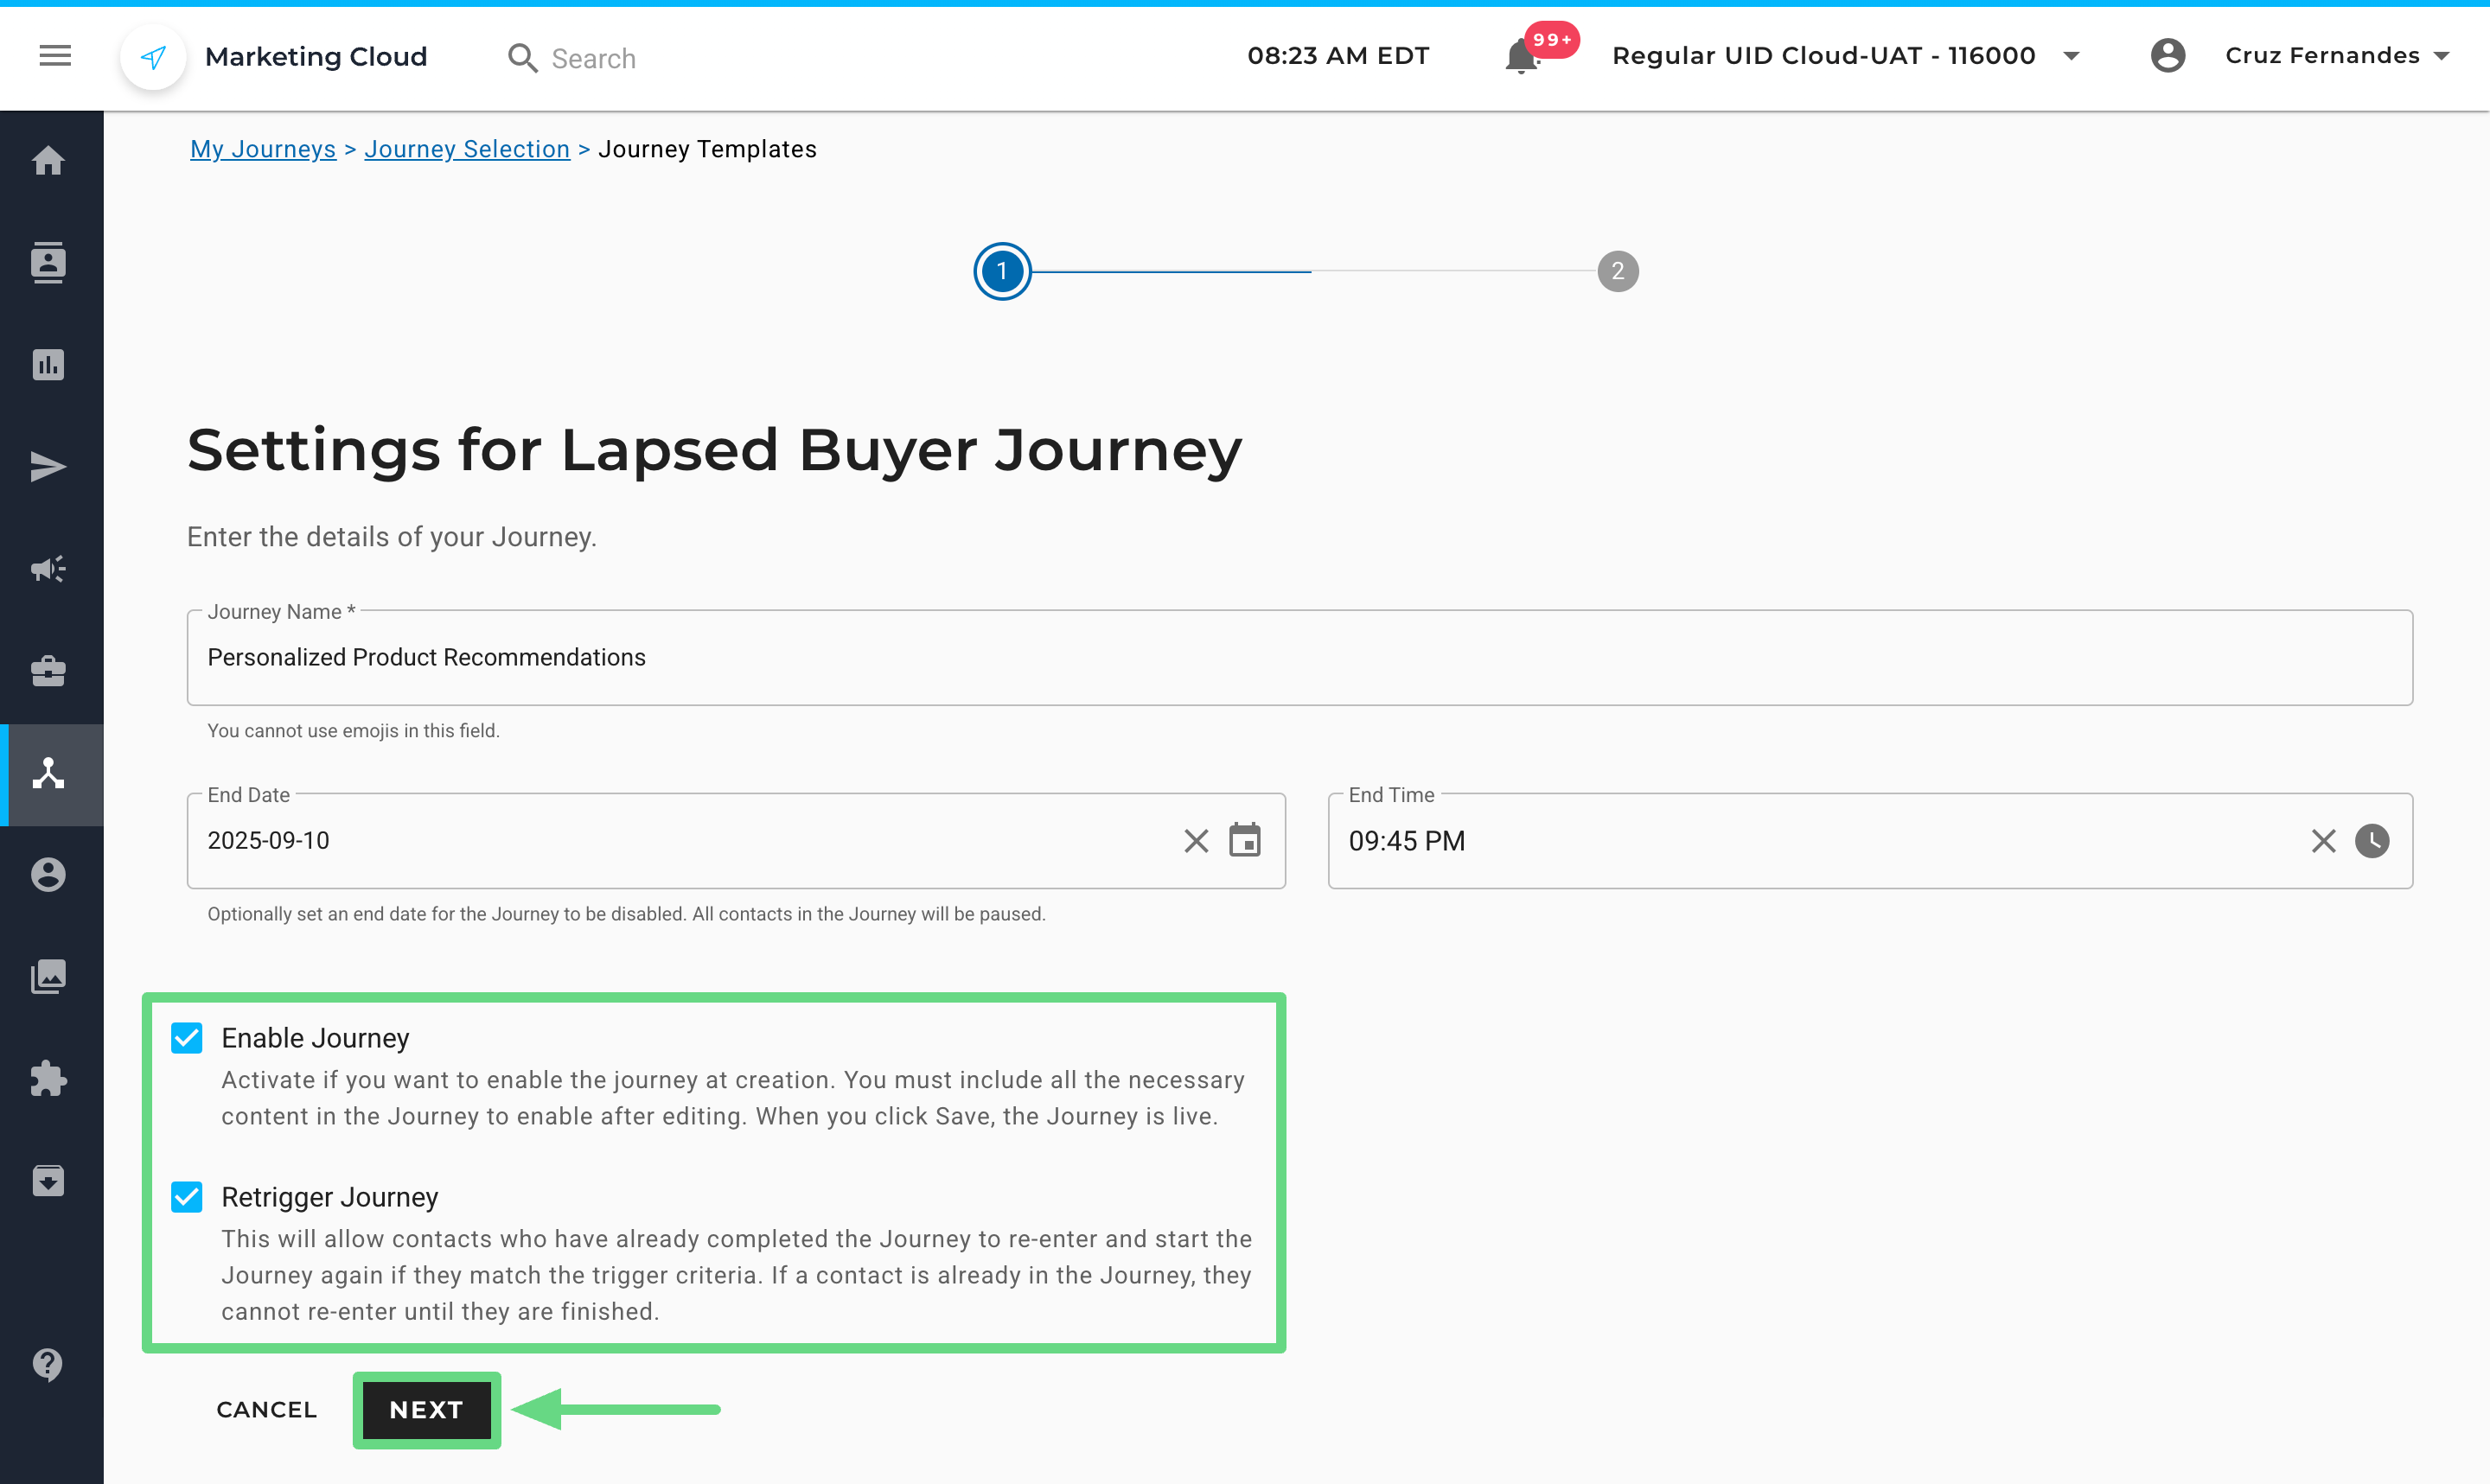
3. Firstly, enter a unique journey name. If you wish to deactivate the journey, mention the end date and time for the journey in the End Date and End Time fields, respectively. Once the journey reaches the mentioned date and time, the contacts within the journey will stop receiving new campaigns until further notice.
4. Optionally, you can enable the journey upon creation by selecting the Enable Journey checkbox. If you want contacts who have already finished the journey to re-enter again by meeting the trigger criteria, you can enable the Retrigger Journey checkbox. Click on Next to proceed ahead.
Set Up Lapsed Buyer Journey
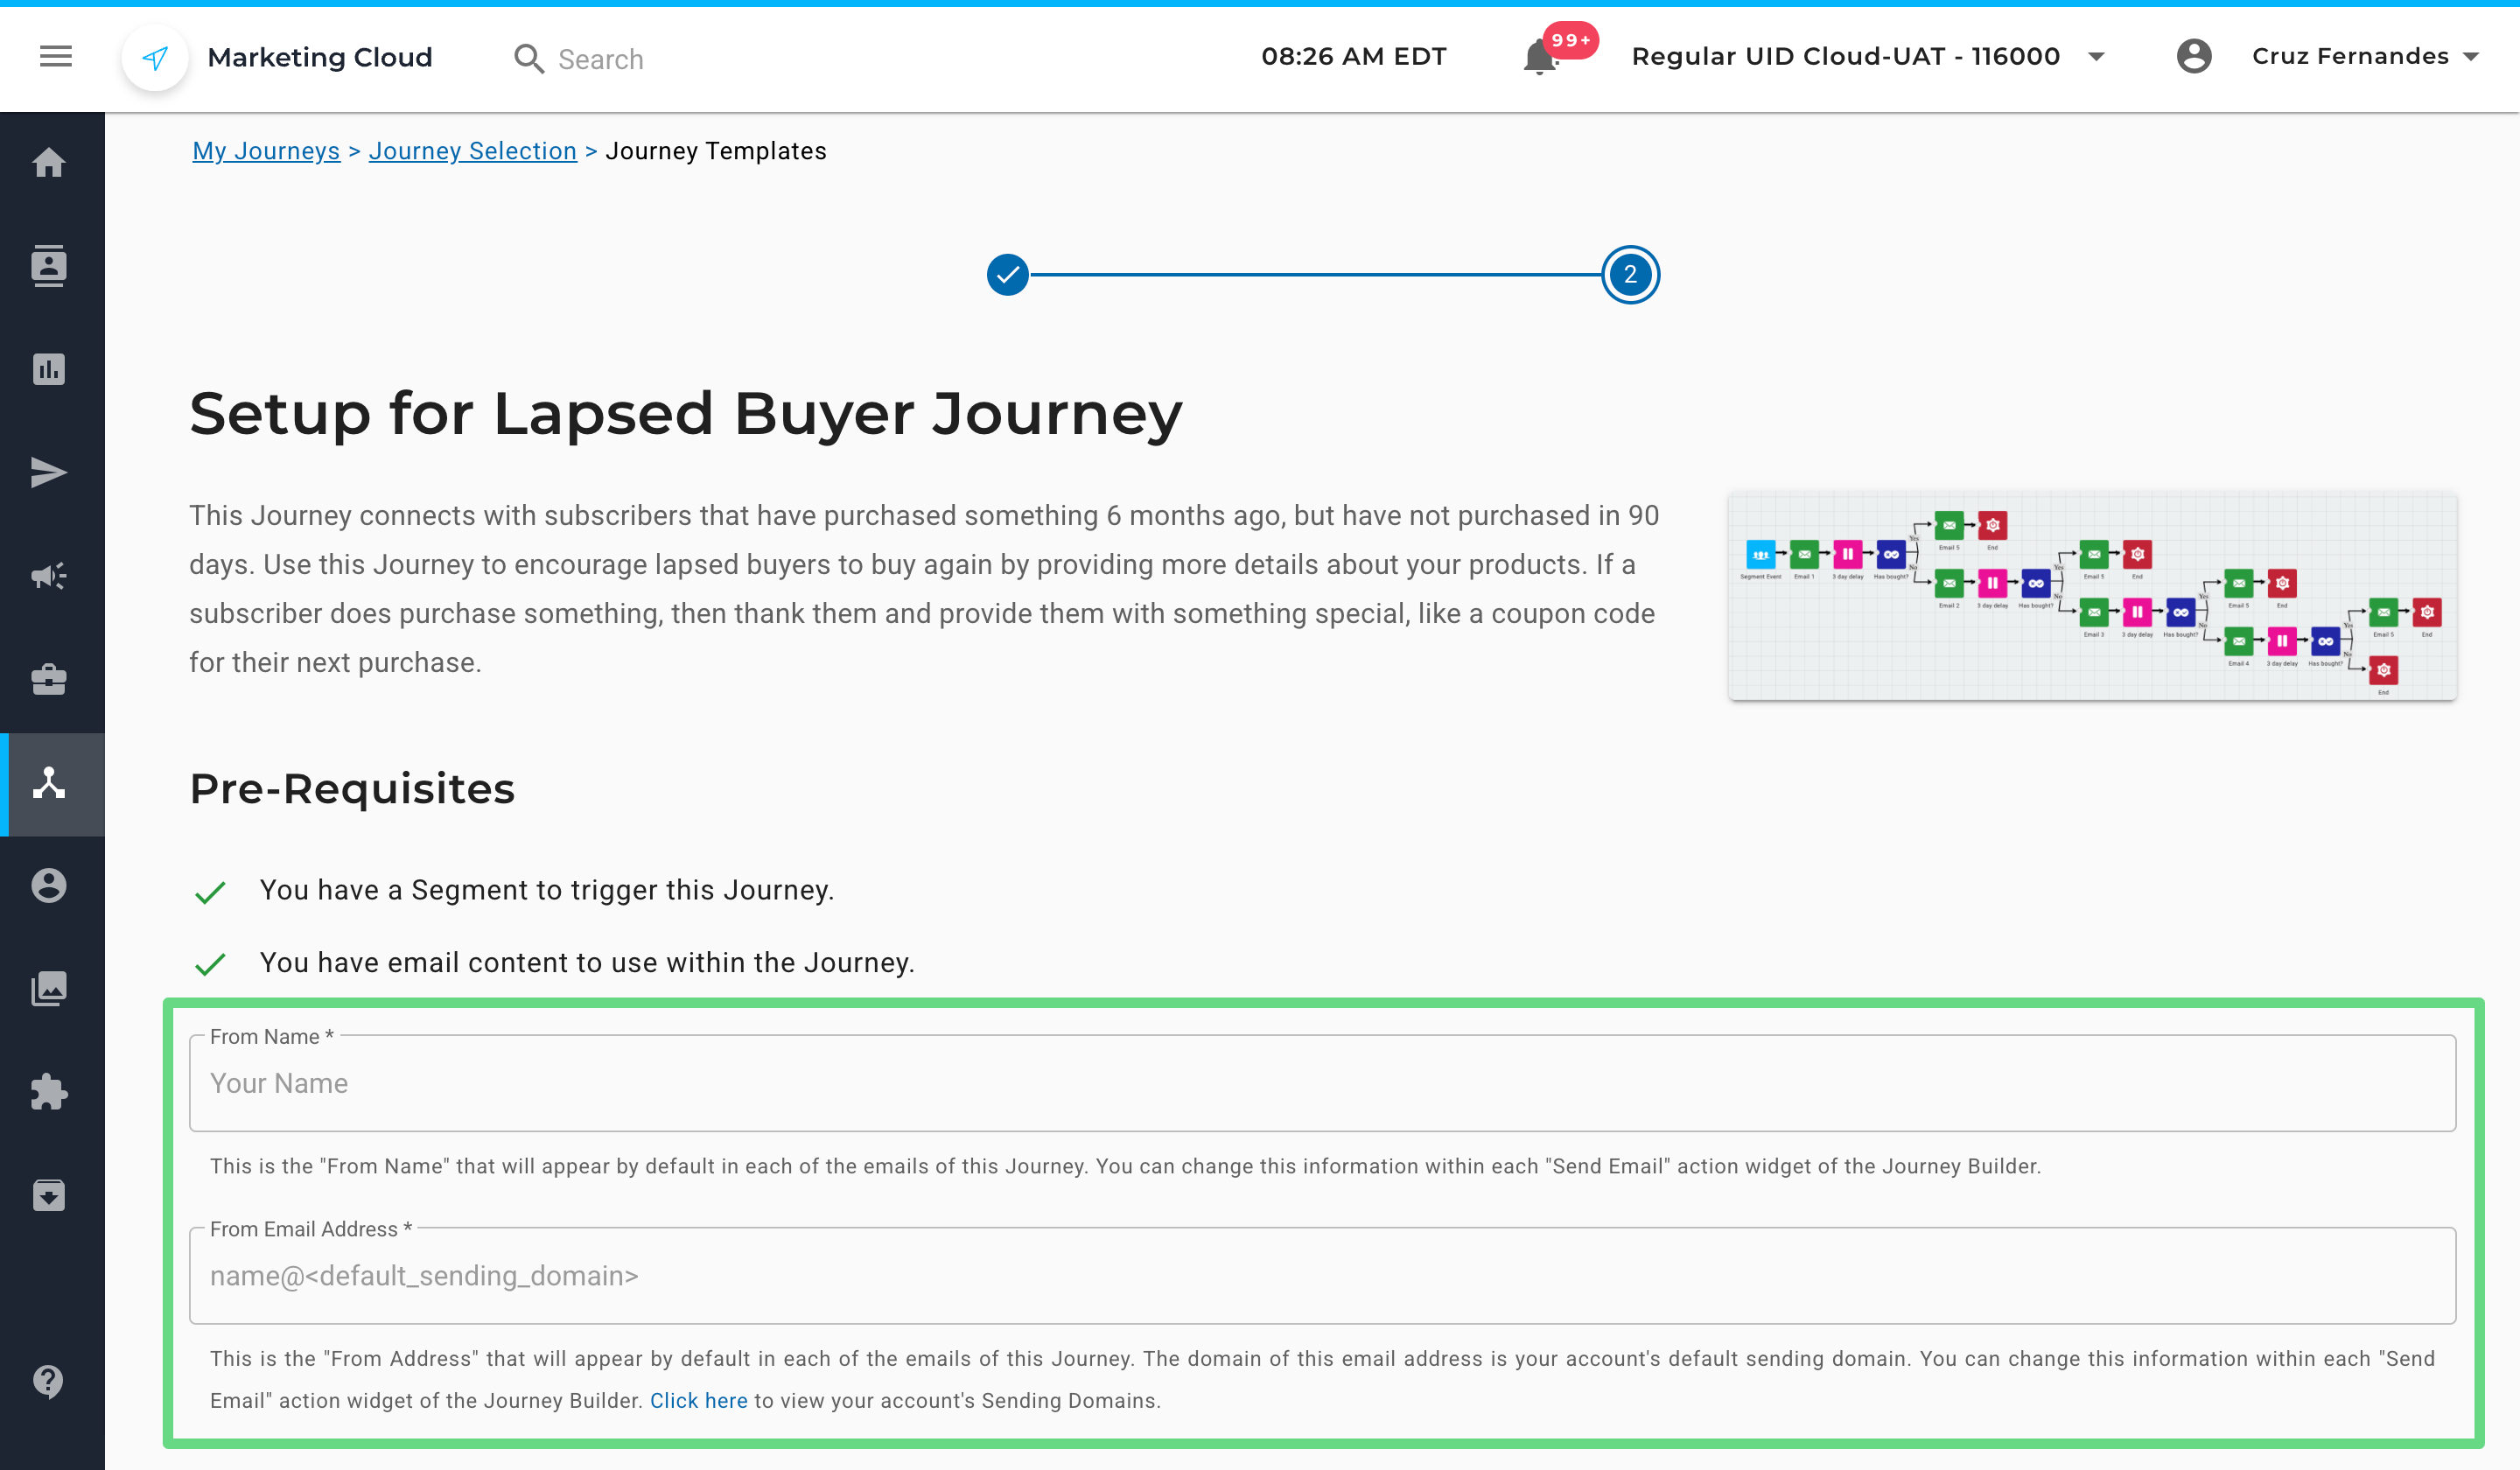
1. Enter your name and email address on the Setup page in the respective text boxes. These details will appear in your trigger emails. The domain of the “From Email Address” is, by default, your account’s sending domain and appears within each email section of a journey. You can modify your existing sending domain by clicking on the “Send Email” action widget of the Journey Builder.
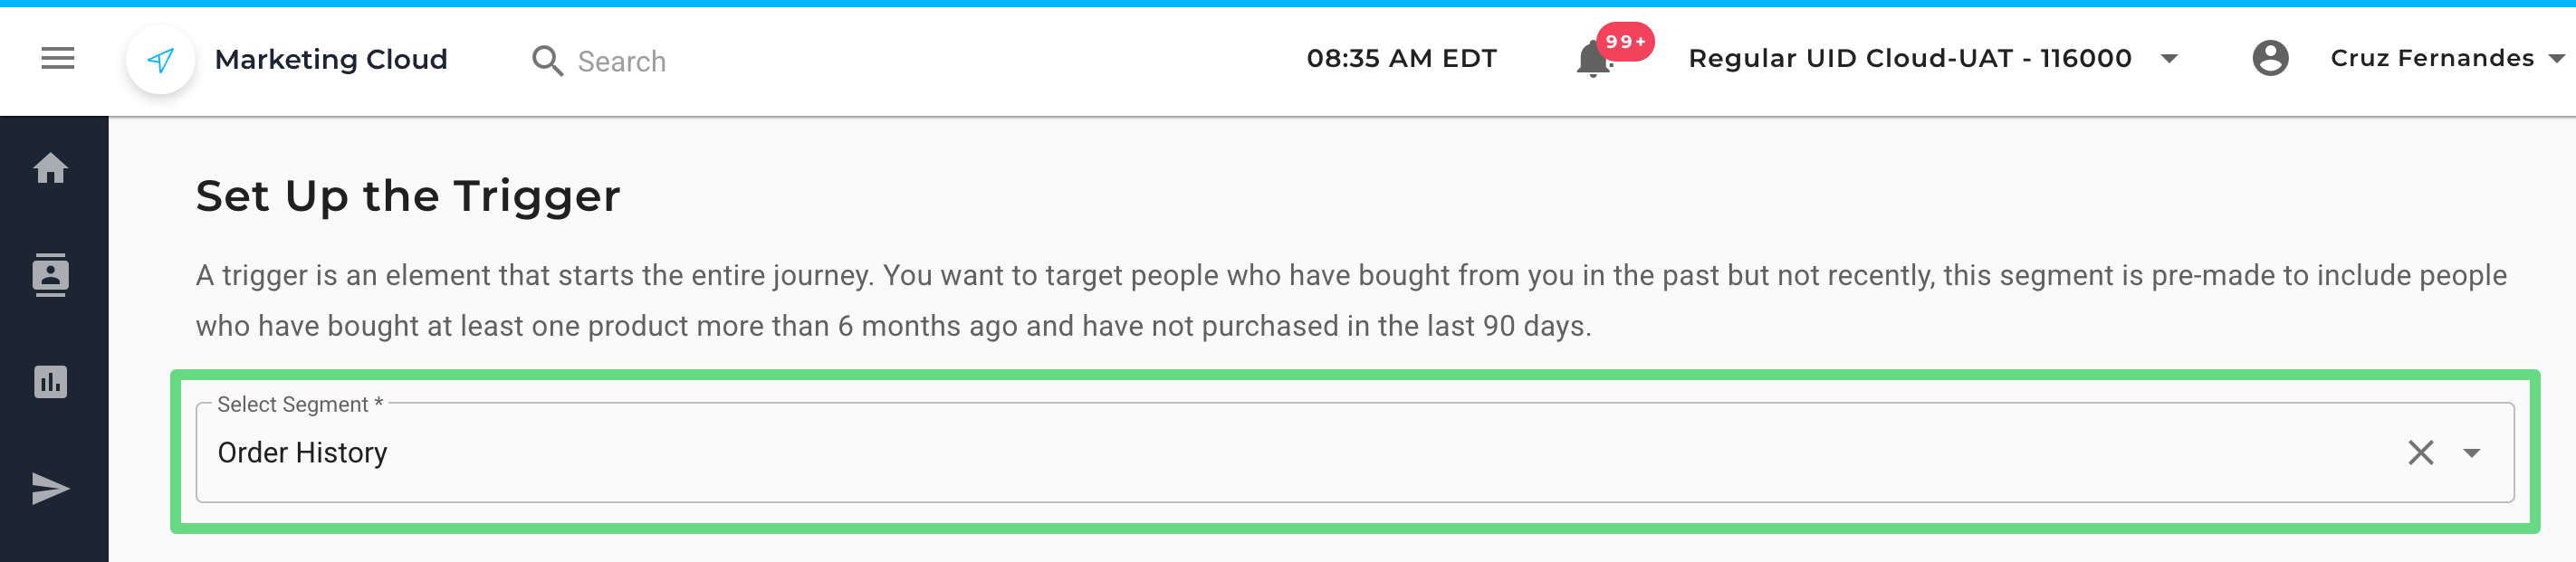
2. Next, select a segment from the dropdown list to initiate a trigger. The trigger fetches contacts who have bought products in the past but not recently, i.e., individuals who have purchased at least one item more than 6 months back and haven’t bought in the last 90-day timeframe.
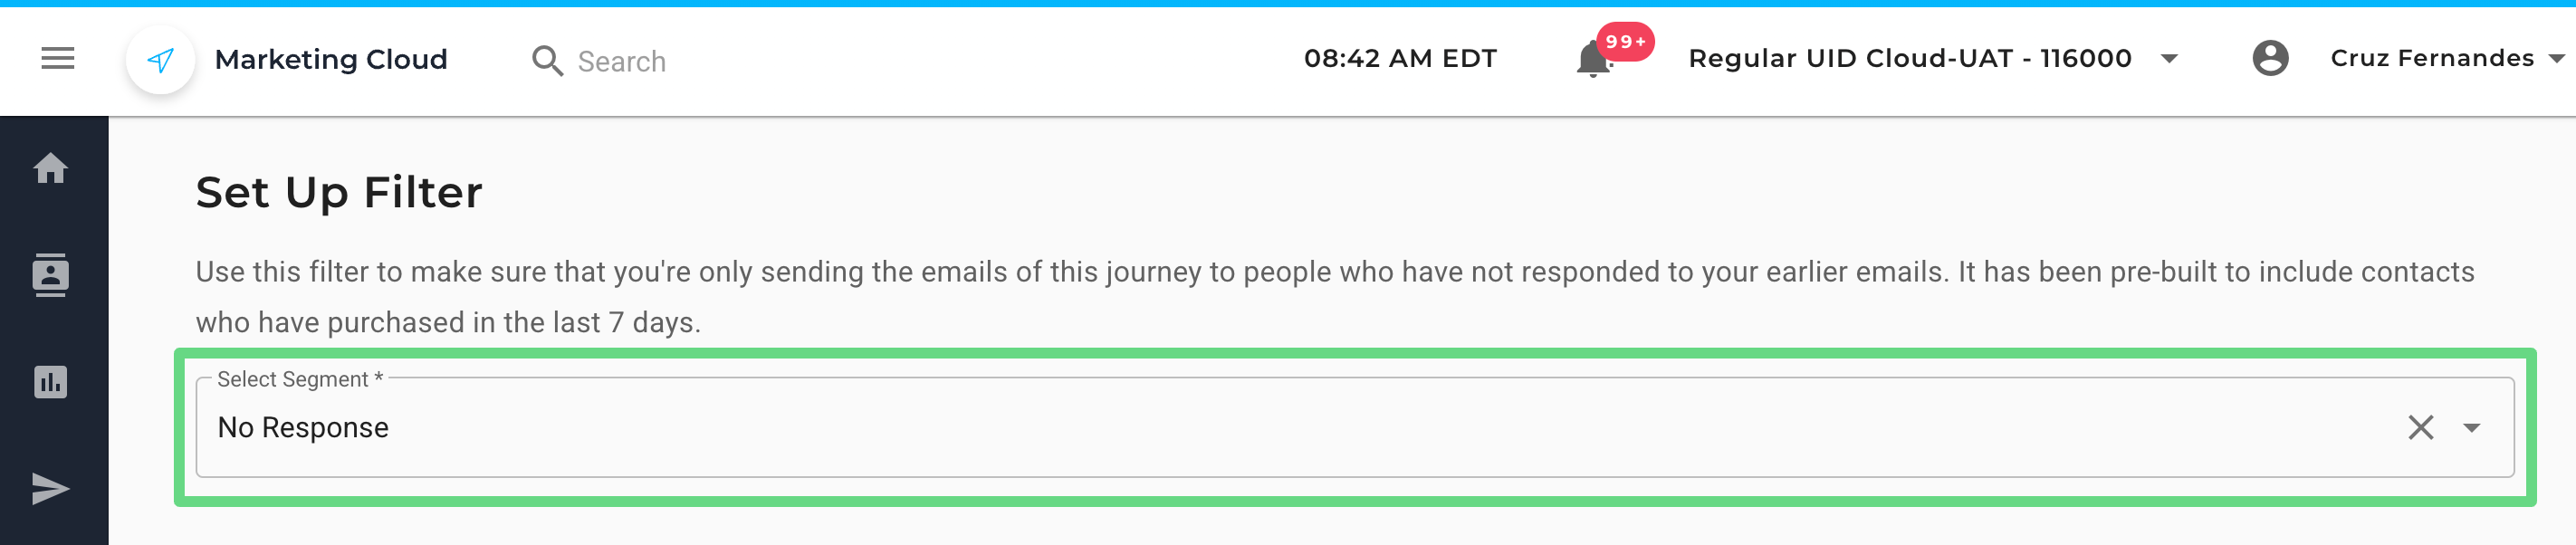
3. Since this journey sends multiple emails to contacts, be sure not to resend it to those who have responded to your initial emails and have placed orders recently. Taking it into consideration, choose a segment that includes contacts who haven’t responded to your earlier emails. Hence, this filter excludes individuals who have made a recent purchase and onboards only those who have yet to place an order with your store.
4. Lapsed Buyer Journey sends five email types to contacts within the chosen segment. They are namely:
- Introductory Email: The first step is to create a sense of brand awareness with your clients without inundating them with order requests.
- Brand Introduction Email: Here, the focus is to reintroduce your brand to your audience, who have been disconnected from your business for a while. Convey your brand’s feedback and testimonials shared by other subscribers. This not only reaffirms your audience’s trust but also creates a sense of authenticity that sets your brand apart from competitors.
- Storytelling Type Email: Similar to the brand introduction email, push your marketing content to be more nuanced and compelling by giving real-world examples of how your brand (products & services) has reshaped the lives of your customers and the steps taken to ensure your customer needs are met. This further bolsters the confidence within the lapsed buyer group, thereby increasing the chance of a sales conversion.
- Product Focused Email: In this email, stress more the products and services you are currently selling. Concentrate not only on your best-selling products, but also try advertising complementary or similar products alongside. Use our Product Feeds feature to recommend products to clients based on their popularity, latest arrivals, trending items, commonly bought accessories, and similar products within your email campaigns.
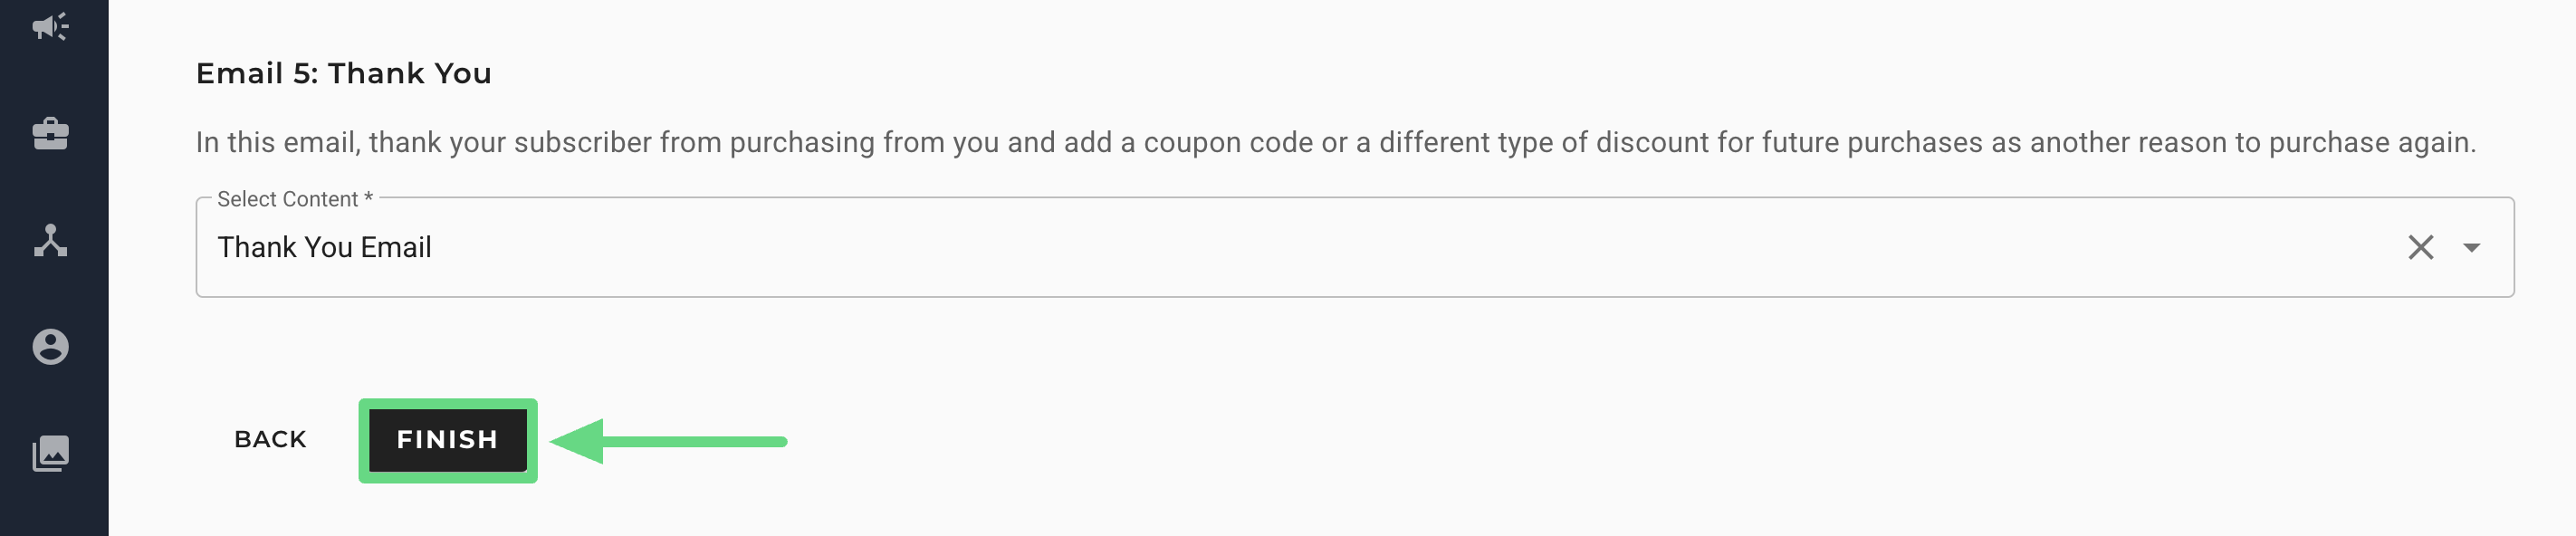
- Thank You Email: Once the client has bought a product or service, show a sign of gratitude by appreciating their recent purchase. Additionally, include a discount code, cashback guarantee, or a coupon enticing them to visit your store again.
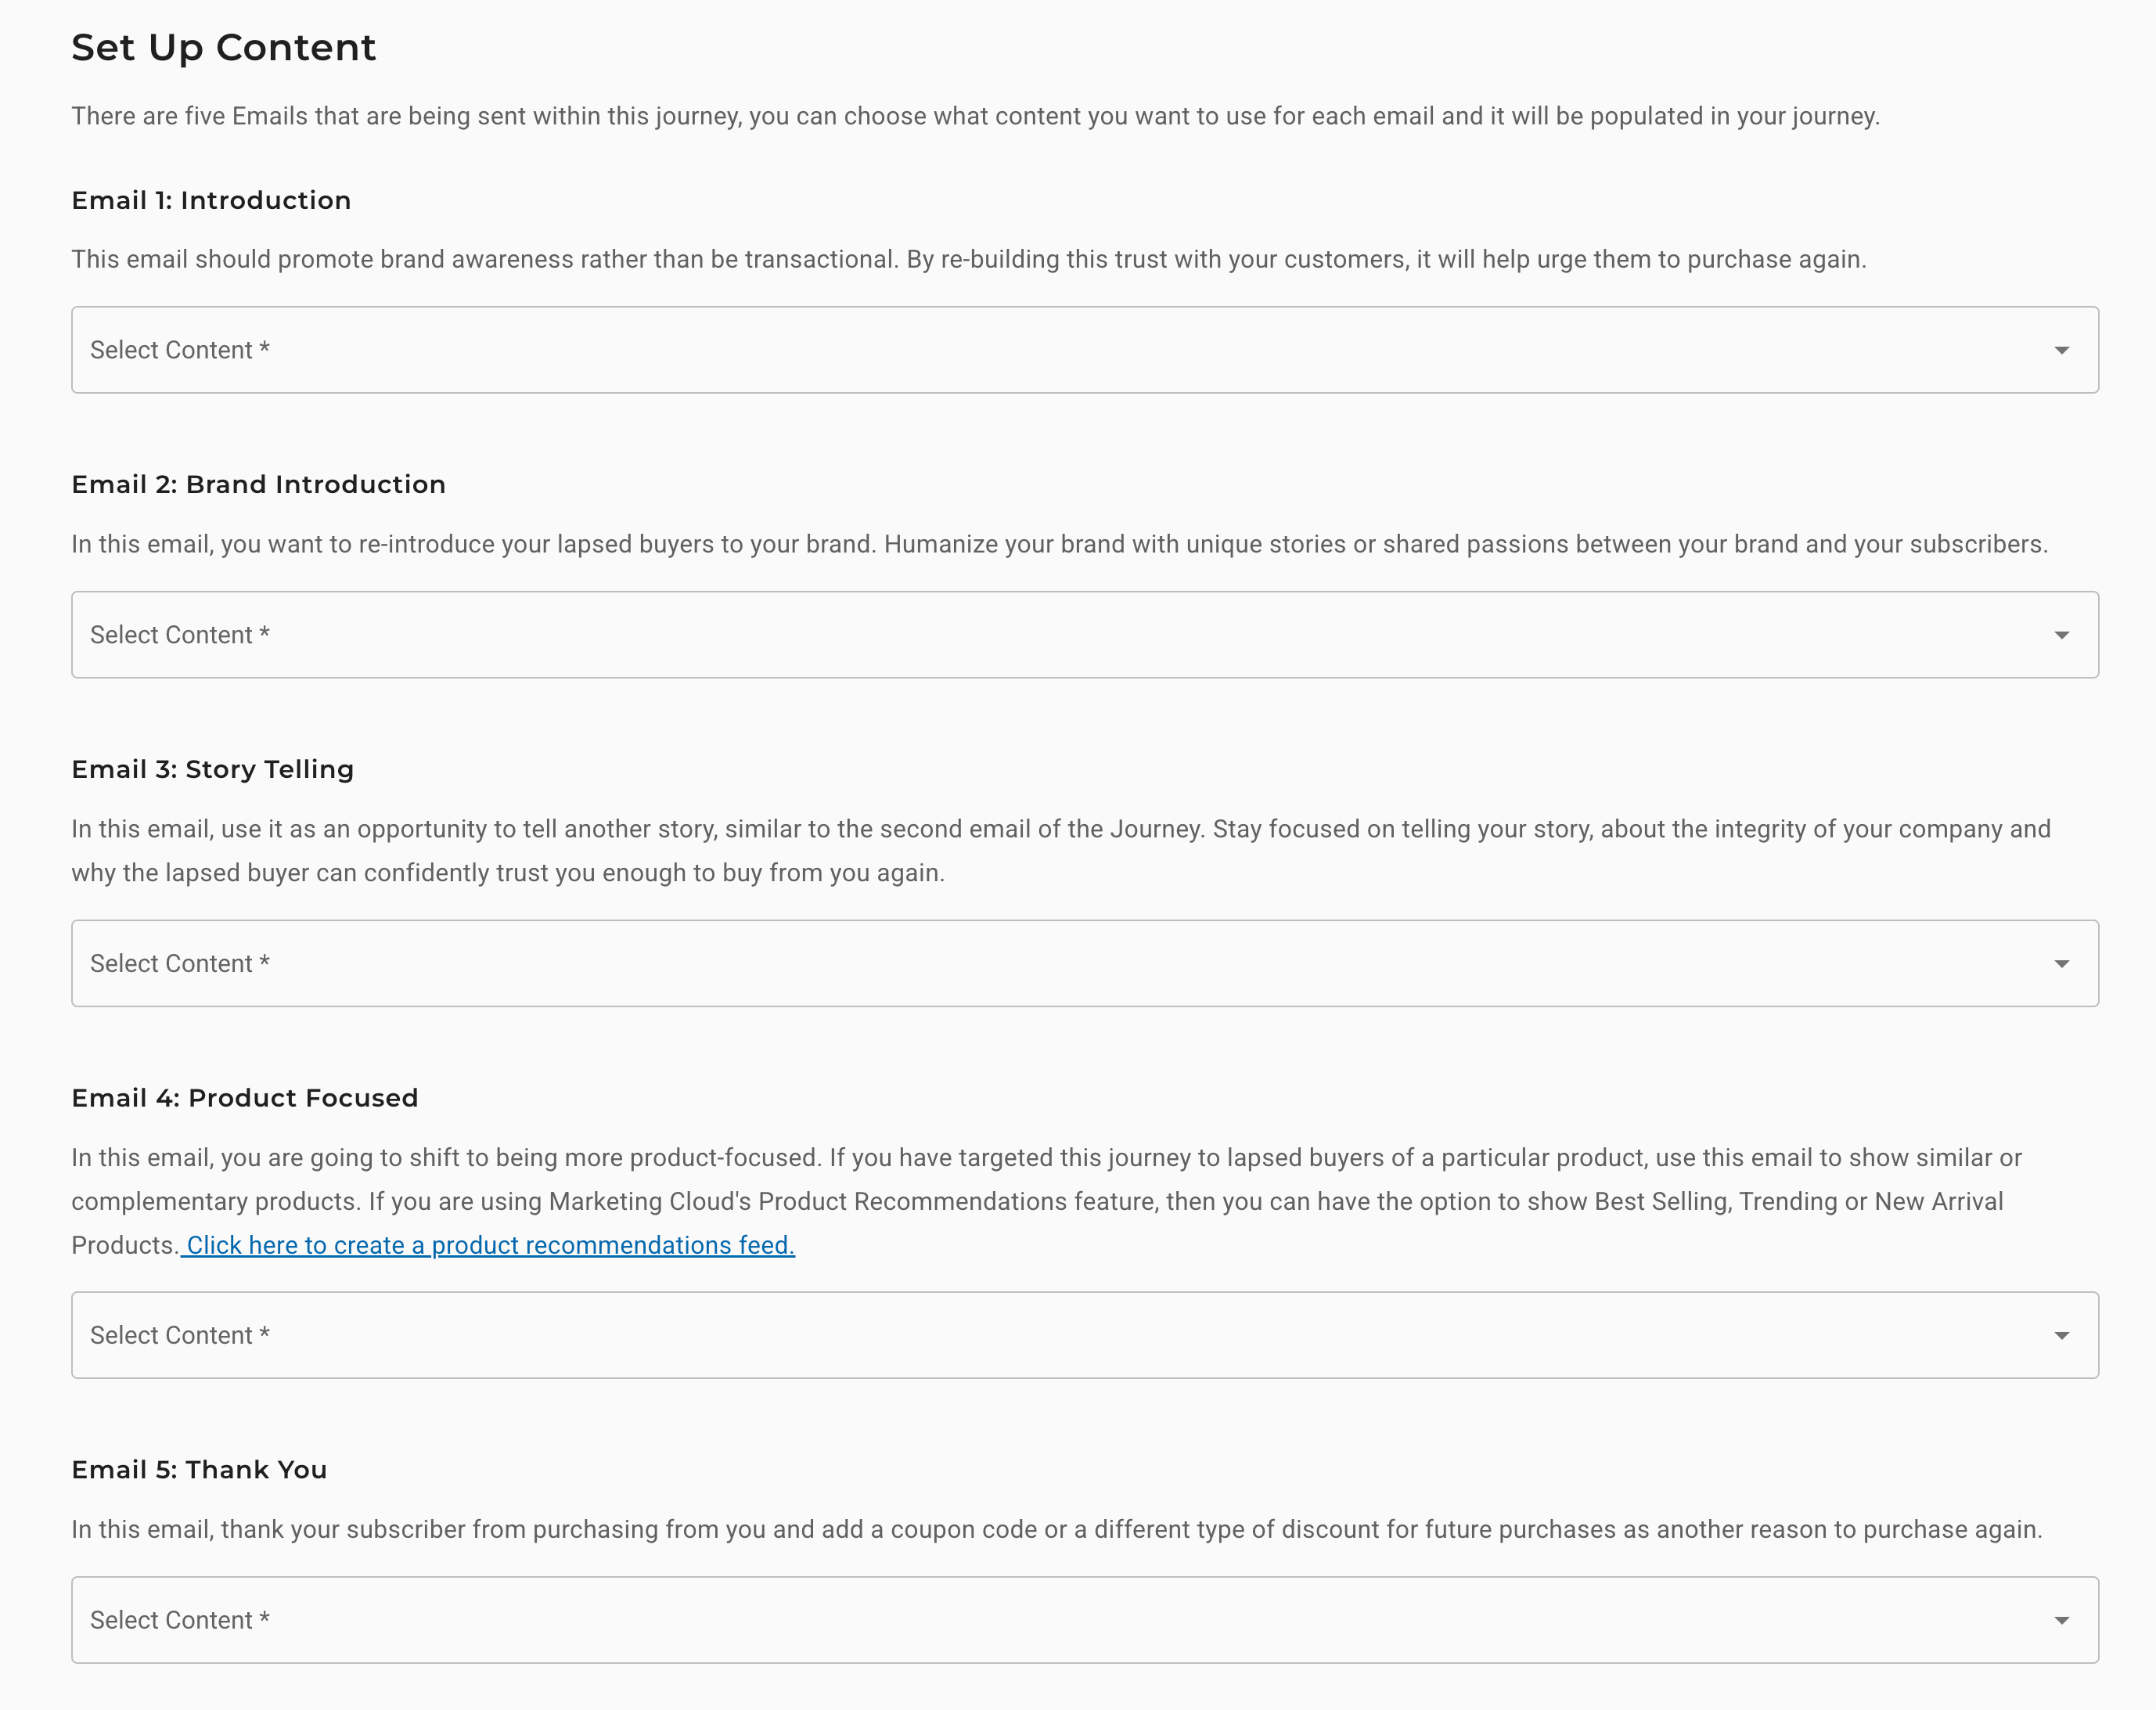
5. Once you have selected your email contents, click on Finish to complete the setup.