The Drag & Drop builder streamlines your email content creation process by enabling you to build professional campaigns without technical expertise. You can create engaging email experiences using personalization features, dynamic images, and merge tags that help improve subscriber engagement while maintaining a consistent brand presentation across all your email campaigns.
Mastering these content editing features enables you to deliver more relevant, personalized messages to your subscribers, which typically leads to better open rates and click-through performance compared to static, one-size-fits-all email content.
This builder enables you to create email content by dragging and dropping content elements onto the canvas. You can edit the content on the canvas and edit its properties on the properties panel. The rows can be used for controlling the structure of your email content.
Builder Toolbar and Content Properties
If you click inside a content block, the builder toolbar appears directly on the editing canvas. It provides access to various editing tools; for example, for a text paragraph, the toolbar options include font family, font size, basic formatting, text alignment, font color, tags, and more.

More customizations are available on the properties panel, which displays different controls depending on the content element you have selected. To learn more, read our Drag and Drop Content Builder article.
Note: If you set the font family to Global Font, it will inherit the font family selected under the Settings tab. This allows you to change the font family of multiple elements simultaneously by simply updating the property in the Settings tab.
Managing Email Content for Audience Groups
Dynamic content in the Drag & Drop Editor allows you to personalize email content for different recipient segments. This feature ensures that subscribers receive relevant information based on predefined conditions, enhancing engagement and message effectiveness by tailoring messages to individual customer journeys.
Dynamic content blocks operate using an underlying "if-else" logic within the Drag & Drop Editor. When you apply a display condition to a row, it initiates a dynamic block. This block functions as a continuous "if-else if-else" structure, where each conditioned row acts as an "if" or "else if" statement.
Crucially, every dynamic content block must include a default option to ensure that all recipients, including those not part of any defined segment, receive appropriate content and avoid blank or irregular emails. The continuity of these if-else statements necessitates that all rows belonging to a single dynamic block are consecutive, meaning no unconditioned "normal content" rows can exist between them.
When setting up dynamic content, adhere to these critical configuration rules:
- Default Option is Mandatory: Every dynamic content block must contain a default option. This ensures that fallback content is always available for recipients who do not meet any specified segment conditions. Once a default row has been designated, no other rows in the block can be set as default, ensuring only one default exists per dynamic block.
- First Row Must Have a Segment: The initial row within any dynamic content block must be associated with a specific segment. You cannot set the first row as the default.
- Subsequent Rows: After the first segmented row, any subsequent rows within the same dynamic block can either be assigned to another segment or designated as the default row, as long as a default has not already been set.
- Minimum Block Requirement: A valid dynamic content block requires at least two rows: one row assigned to a segment and another designated as the default. This is the minimum combination needed to save an email content with dynamic conditions successfully.
- No Maximum Row Limit: There is no restriction on how many rows can be included in a dynamic content block. You may add as many segment-conditioned rows as needed, provided exactly one row is set as the default.
- Normal Content: Any rows without an assigned display condition are considered "normal content" and will be visible to all recipients of the email, regardless of their segment status. These rows can appear outside of dynamic blocks or as separate, distinct dynamic blocks.
Important: The Drag & Drop Editor will not allow you to save a dynamic block configuration lacking a default row, as it serves as the essential "else" condition in the display logic.
Follow these steps to configure dynamic content within the Drag & Drop Editor:
- Select a Row: Click on the row in your email content where you want to apply a display condition.

- Access Display Conditions: In the right-hand Row Properties panel, locate and click Manage Display Condition. This option (Manage Display Condition) can be used to “Configure” as well as “Edit” the dynamic condition.

- Add Initial Condition (First Row of a Block): In the Add Display Condition pop-up, select a segment from the dropdown menu, then click Save.

- Add Subsequent Conditions (Subsequent Rows of a Block): Select the next consecutive row you wish to add to the dynamic block. Click Manage Display Condition. You will see two options:
Select a Segment: Choose a segment from the dropdown to assign this row to a specific audience group. Its preview displays the corresponding {% if segment['segment-name'] %} / {% endif %} tags.
Set as Default Row: Enable the Use this row as default row toggle to designate this row as the fallback for recipients who do not match any defined segment. When enabling, the segment dropdown is hidden, and its preview reflects {% if segment['null'] %} / {% endif %} — indicating this row serves as the "else" condition of the dynamic block. Once saved, the Default toggle gets disabled for all other rows in the block.
Choose the appropriate option and save the changes made.

Note: You must designate exactly one row within your dynamic block as the default. This ensures complete conditional coverage for all recipients. A dynamic block cannot be saved without at least one segment row and one default row.
Once you have saved the contents, visit the preview section and filter the details by selecting the dynamic block segments; their subsequent content layout is rendered. To learn more, read our Previewing Content in Content Builders article.
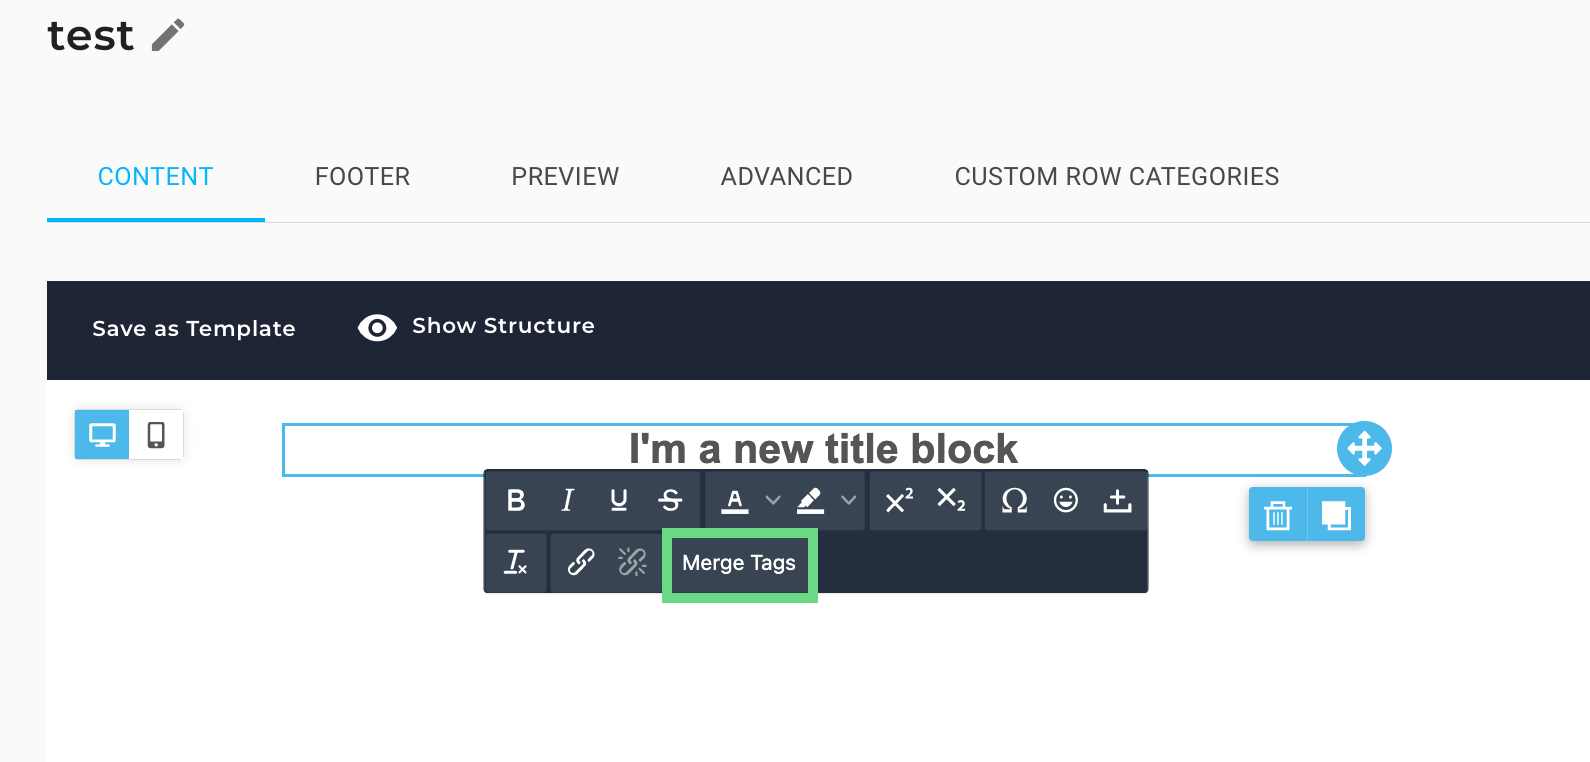
Using Merge Tags
Marketing Cloud enables you to use tags to generate real-time information in your content. You can use the Merge tag option, as shown below, to insert a tag in your content:
- Click within a text content block to open the text builder toolbar.
- On the text builder toolbar, click Merge Tags.
- On the Merge Tag dialog box, select the type of tag that you are looking for – Contact Tags, Dynamic Content Tags, Table Tags, or Product Feed Template Tags.

- Then, from the available list of tags, select the tag you want.
- Click Insert Tag.
Adding Images
When it comes to images, you can drag and drop image files directly from your desktop onto an image content block. You can also upload them using the Image Library or use the URL of remotely hosted images.
The image element provides a built-in image file manager for browsing and adding images. The image file manager opens over the builder and lets you browse, search, and select images from the Image Library to use in your email message.
With the handy image file manager, you can:
- Browse, search, and sort existing files
- Switch between list and grid view
- Import new files
- Create new folders
- Preview and insert images into your message

Adding Dynamic Images
When you insert an image in the builder, you can mark it as ‘Dynamic.’ Dynamic images are images that change based on one or more values passed to the system that delivers them. The image link is no longer a static URL but rather a variable URL that includes an email address, customer ID, date, and so on.

The variables are the merge tags in the URL, which are replaced with actual values (for example, the customer ID, the recipient email, and the person's name) when the email is sent or the landing page is rendered.
For example, you can use the dynamic images feature when you are using a third-party service that displays a different image in each contact’s own email client, depending on the personalized information dynamically provided in the full URL of the image.
Undo, Redo, and Timeline Features
The Undo and Redo icons enable you to rewind and fast-forward to any point in your recent edit history. When changes are detected, a compact Undo icon is displayed in the bottom-left corner of the stage.
The timeline enables you to browse through the most recent changes. The timeline widget shows:
- An icon to identify the content element type (an image, text, and so on).
- A description of what changed, giving the new property value (if any).
- The exact time it happened.
These details help determine what modification was applied and, if desired, rewind the content to an earlier state.

Saving the Content as a Template
Once you're satisfied with the layout of your email content, you can save it to the Marketing Cloud Template Library so that all users in your account can use it to create their own email content. To save your email content as a template, select Save as Template in the top-right corner. The content gets saved to the Template Library.
Note: If your email content includes any locked rows, then when other users create content from your template, those rows will remain locked in their exact positions within the created content.

Adding Custom HTML Block
The Custom HTML content block lets you add your own HTML code while designing an email message within the builder. It’s as simple to use as a text block.
Note: Using your own code may affect how the message is rendered in email clients, preventing it from adjusting the screen size (i.e., the message responsiveness). Ensure that you use HTML that is email-compliant and responsive.
To add your code, simply drag an HTML content element into your message. It can be positioned alone, with other HTML content items, or mixed with other types of content.
The newly inserted content block shows default placeholder text. Click on it, and the right-side property panel displays the HTML code editing panel. Paste your own HTML code or write it directly in the editing area. The system will highlight your syntax and indent your code to make it more readable.
The HTML content automatically corrects minor issues (such as open HTML tags) and strips out codes that cannot be used (such as script tags or iframe tags). Most email clients don't support these code tags, which can therefore cause deliverability problems or pose security risks.
List of supported tags:
a, abbr, acronym, address, area, b, bdo, big, blockquote, button, caption, center, cite, code, colgroup, dd, del, dfn, dir, div, dl, dt, em, fieldset, font, form, h1, h2, h3, h4, h5, h6, i, ins, kbd, label, legend, li, map, menu, ol, optgroup, option, p, pre, q, s, samp, select, small, span, strike, strong, sub, sup, table, tbody, td, textarea, tfoot, th, thead, u, tr, tt, u, ul, var
List of supported attributes:
- General attributes: style, id, class, data-*, title
- a: href, name, target
- img: align, alt, border height, hspace, src, vspace, width, usemap
- table: align, bgcolor, border, cellpadding, cellspacing, width
- tbody: align, valign
- td: align, bgcolor, colspan, height, rowspan, valign, width
- tr: align, bgcolor, valign
- tfoot: align, valign
- th: align, bicolor, colspan, height, rowspan, valign, width
- thead: align, valign
- li: type
- map: name
- area: alt, coords, href, shape, target