Custom footers, when integrated with your preference pages, enhance subscriber retention by offering convenient access to profile and subscription management elements. This approach helps minimize unsubscribes while ensuring regulatory compliance.
The Footer Management feature allows you to build and maintain custom footers for your campaigns. Within these footers, you can incorporate your existing preference pages, including manage subscription, edit profile, report spam, 1-click unsubscribe, and thank you pages.
Note: Maropost includes a predefined footer set as the default option. You can, however, choose a custom footer to serve as your account's default. See the “Managing Custom Footers” section below for instructions on how to make this change.
Creating Custom Footers
The Footer Management feature lets you create and customize footers using the “Drag & Drop” & “WYSIWYG” editor types.
- To access the footer module, visit the Navigation panel, select Content, and click on Footer Management.
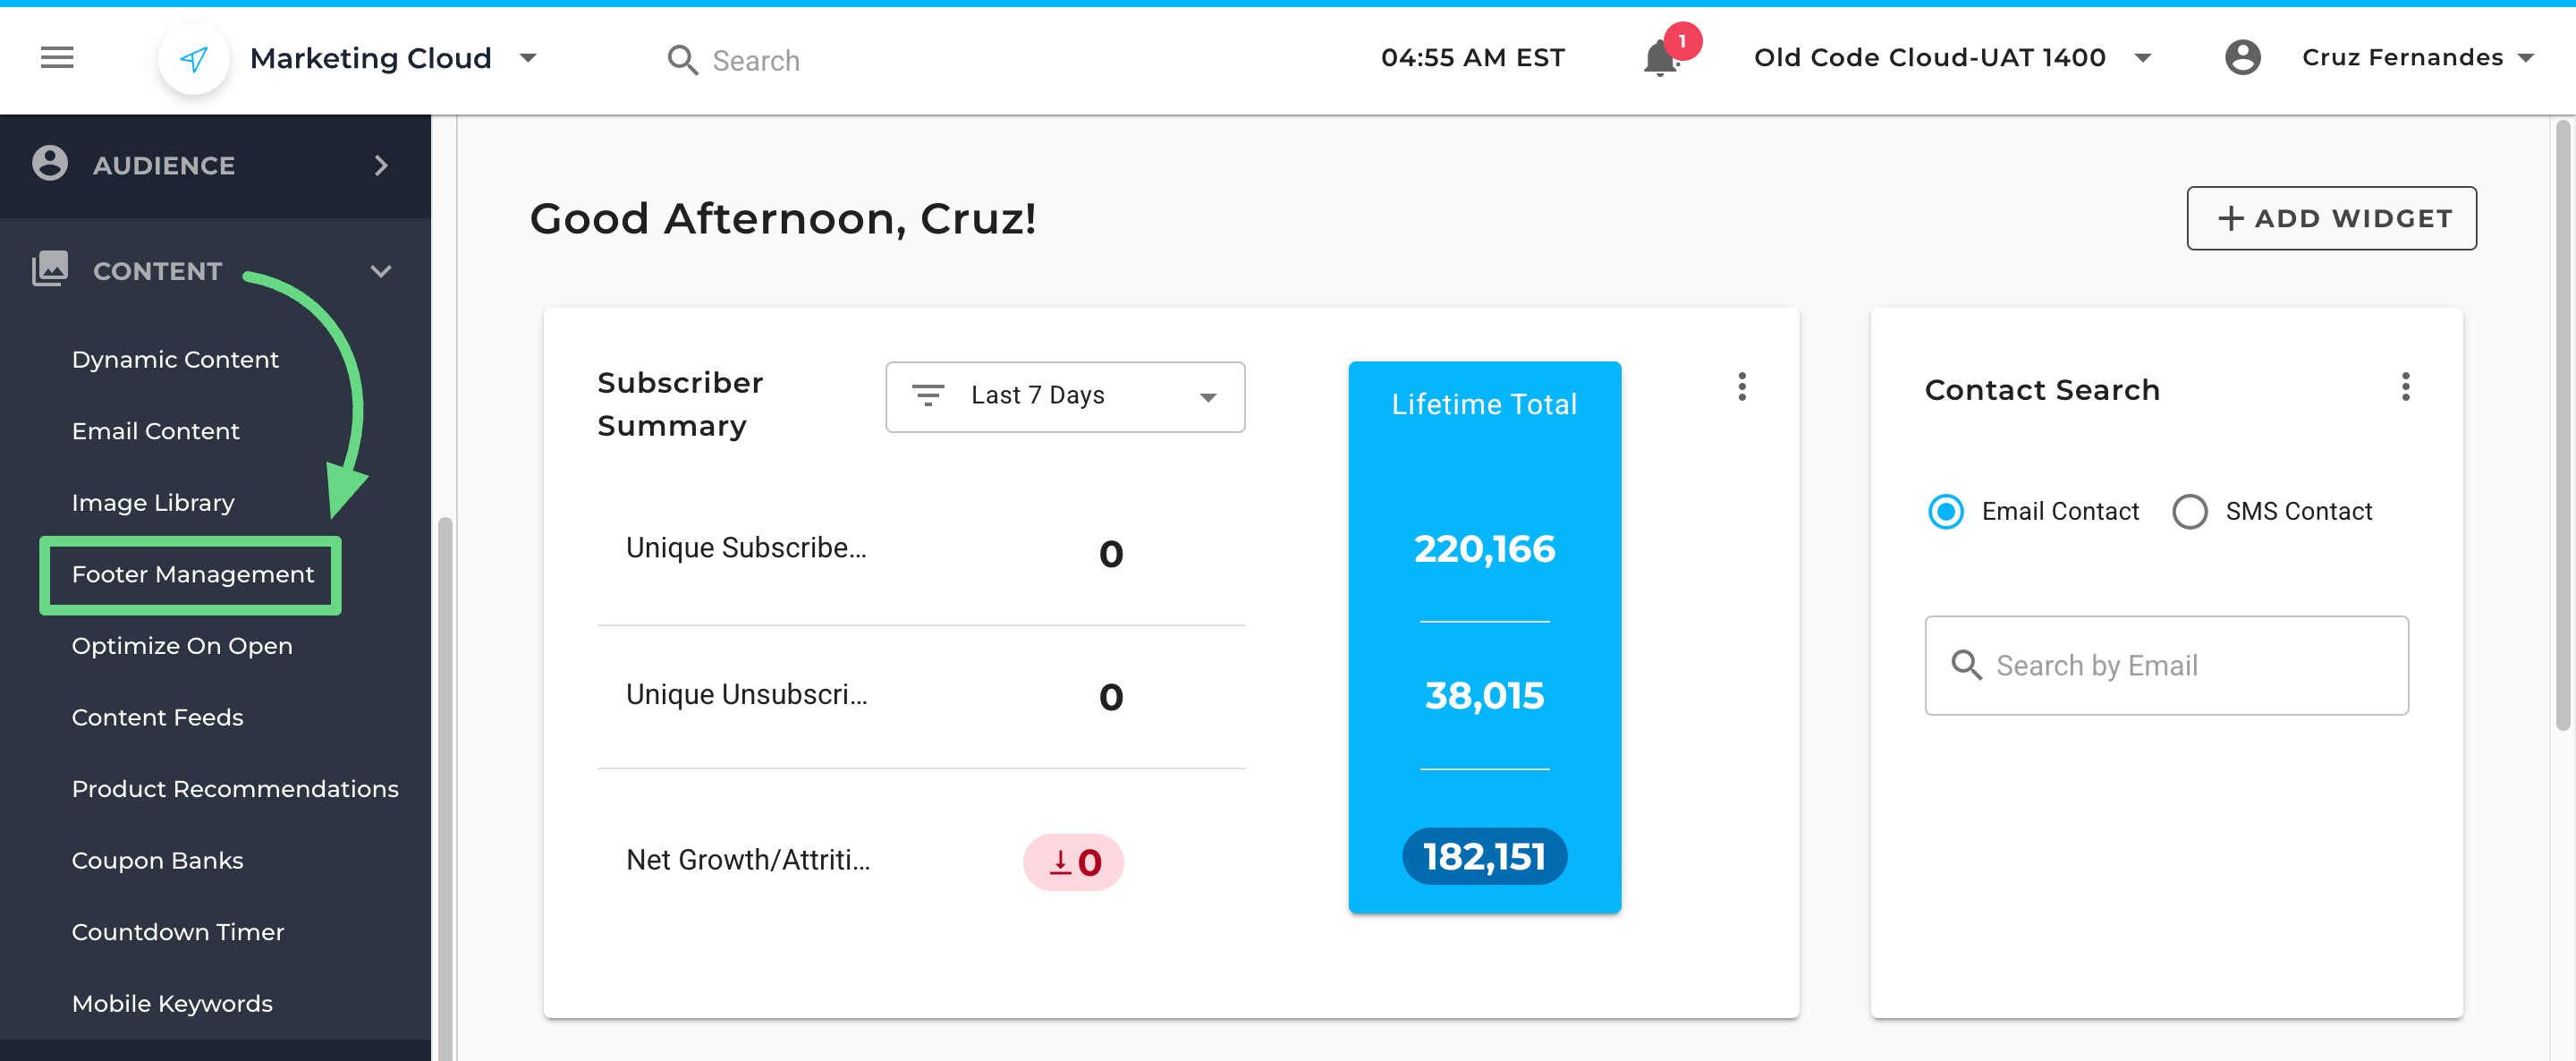
- The Footer Management index page opens. To create a footer from scratch, click on the New Footer tab.

- Start by entering a name for your new footer.

- Next, you can select a custom preference page type by searching within the dropdown lists. If custom preference pages aren't available, you can utilize Maropost's default preference pages instead. Insert campaign tags in your footer content to direct customers to the appropriate preference pages.
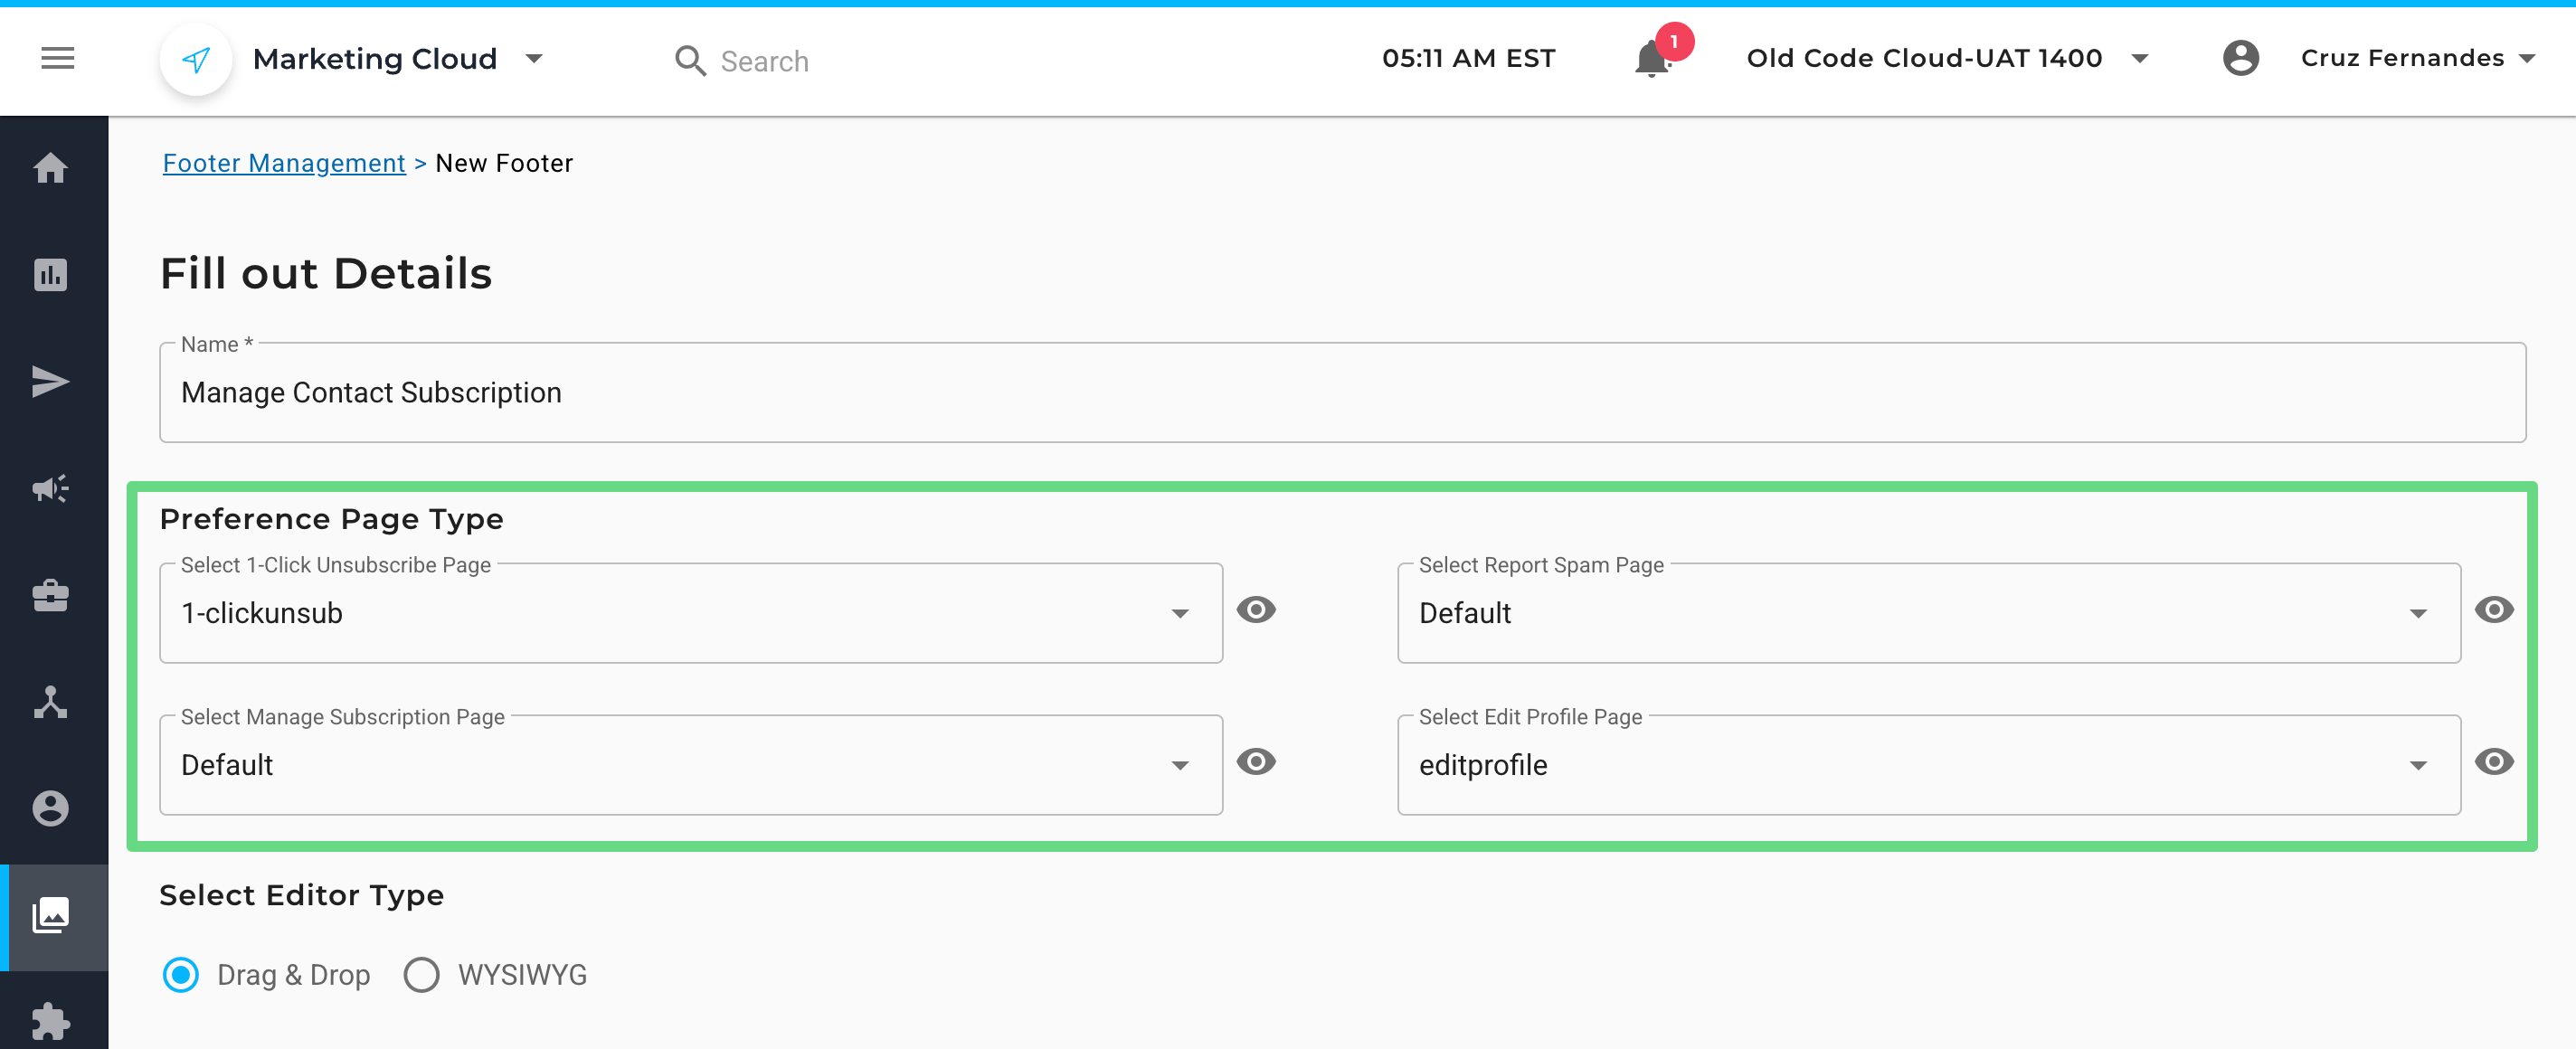
- Below are the preference pages you can include in your footer along with their corresponding campaign tags:
Manage Subscription Page: Apply the “{{campaign.unsubscribe_link}}” or “{{campaign.unsubscribe_url}}” tag.
Edit Profile Page: Apply the “{{campaign.edit_profile}}” tag.
1-Click Unsubscribe Page: Apply the “{{campaign.one_click_unsub_url}}” tag.
Report Spam Page: Apply the “{{campaign.report_spam}}” tag.
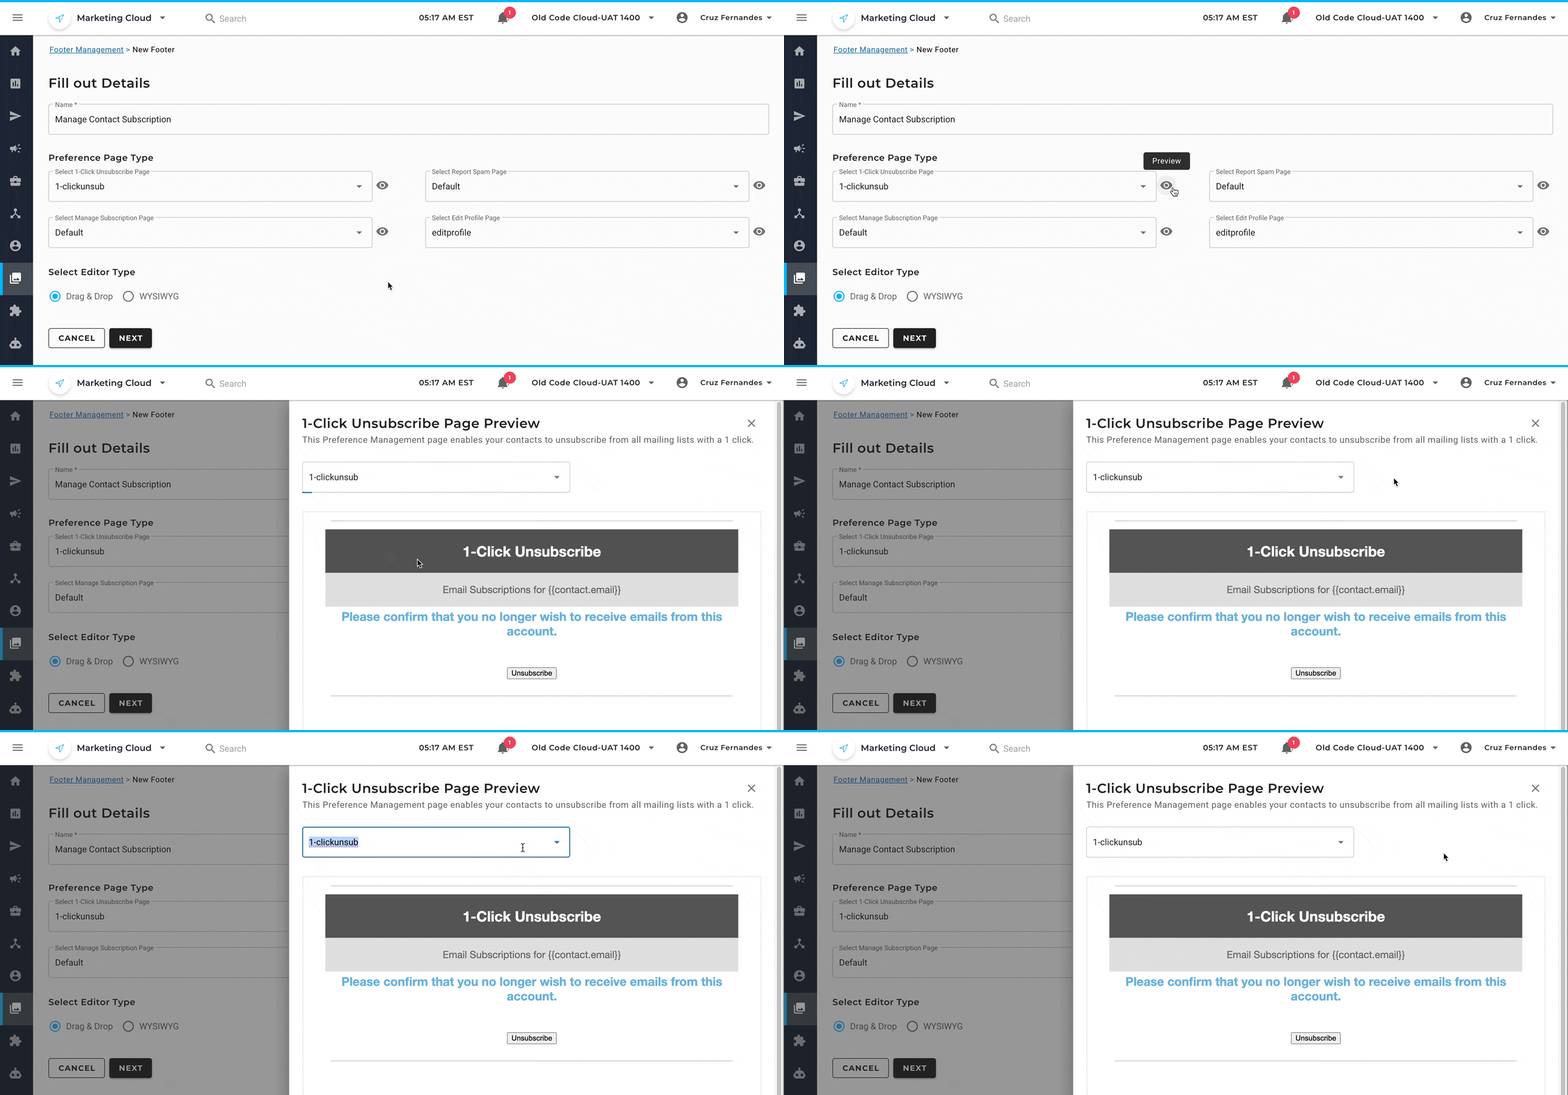
Proceed ahead with filling out the footer details. - If you wish to see a preference page’s preview, click on the preview icon next to the preference page field. A preview slider opens up, allowing you to review your selected preference page. Here, you can even choose other custom pages from the dropdown list field to compare and analyze with one another.
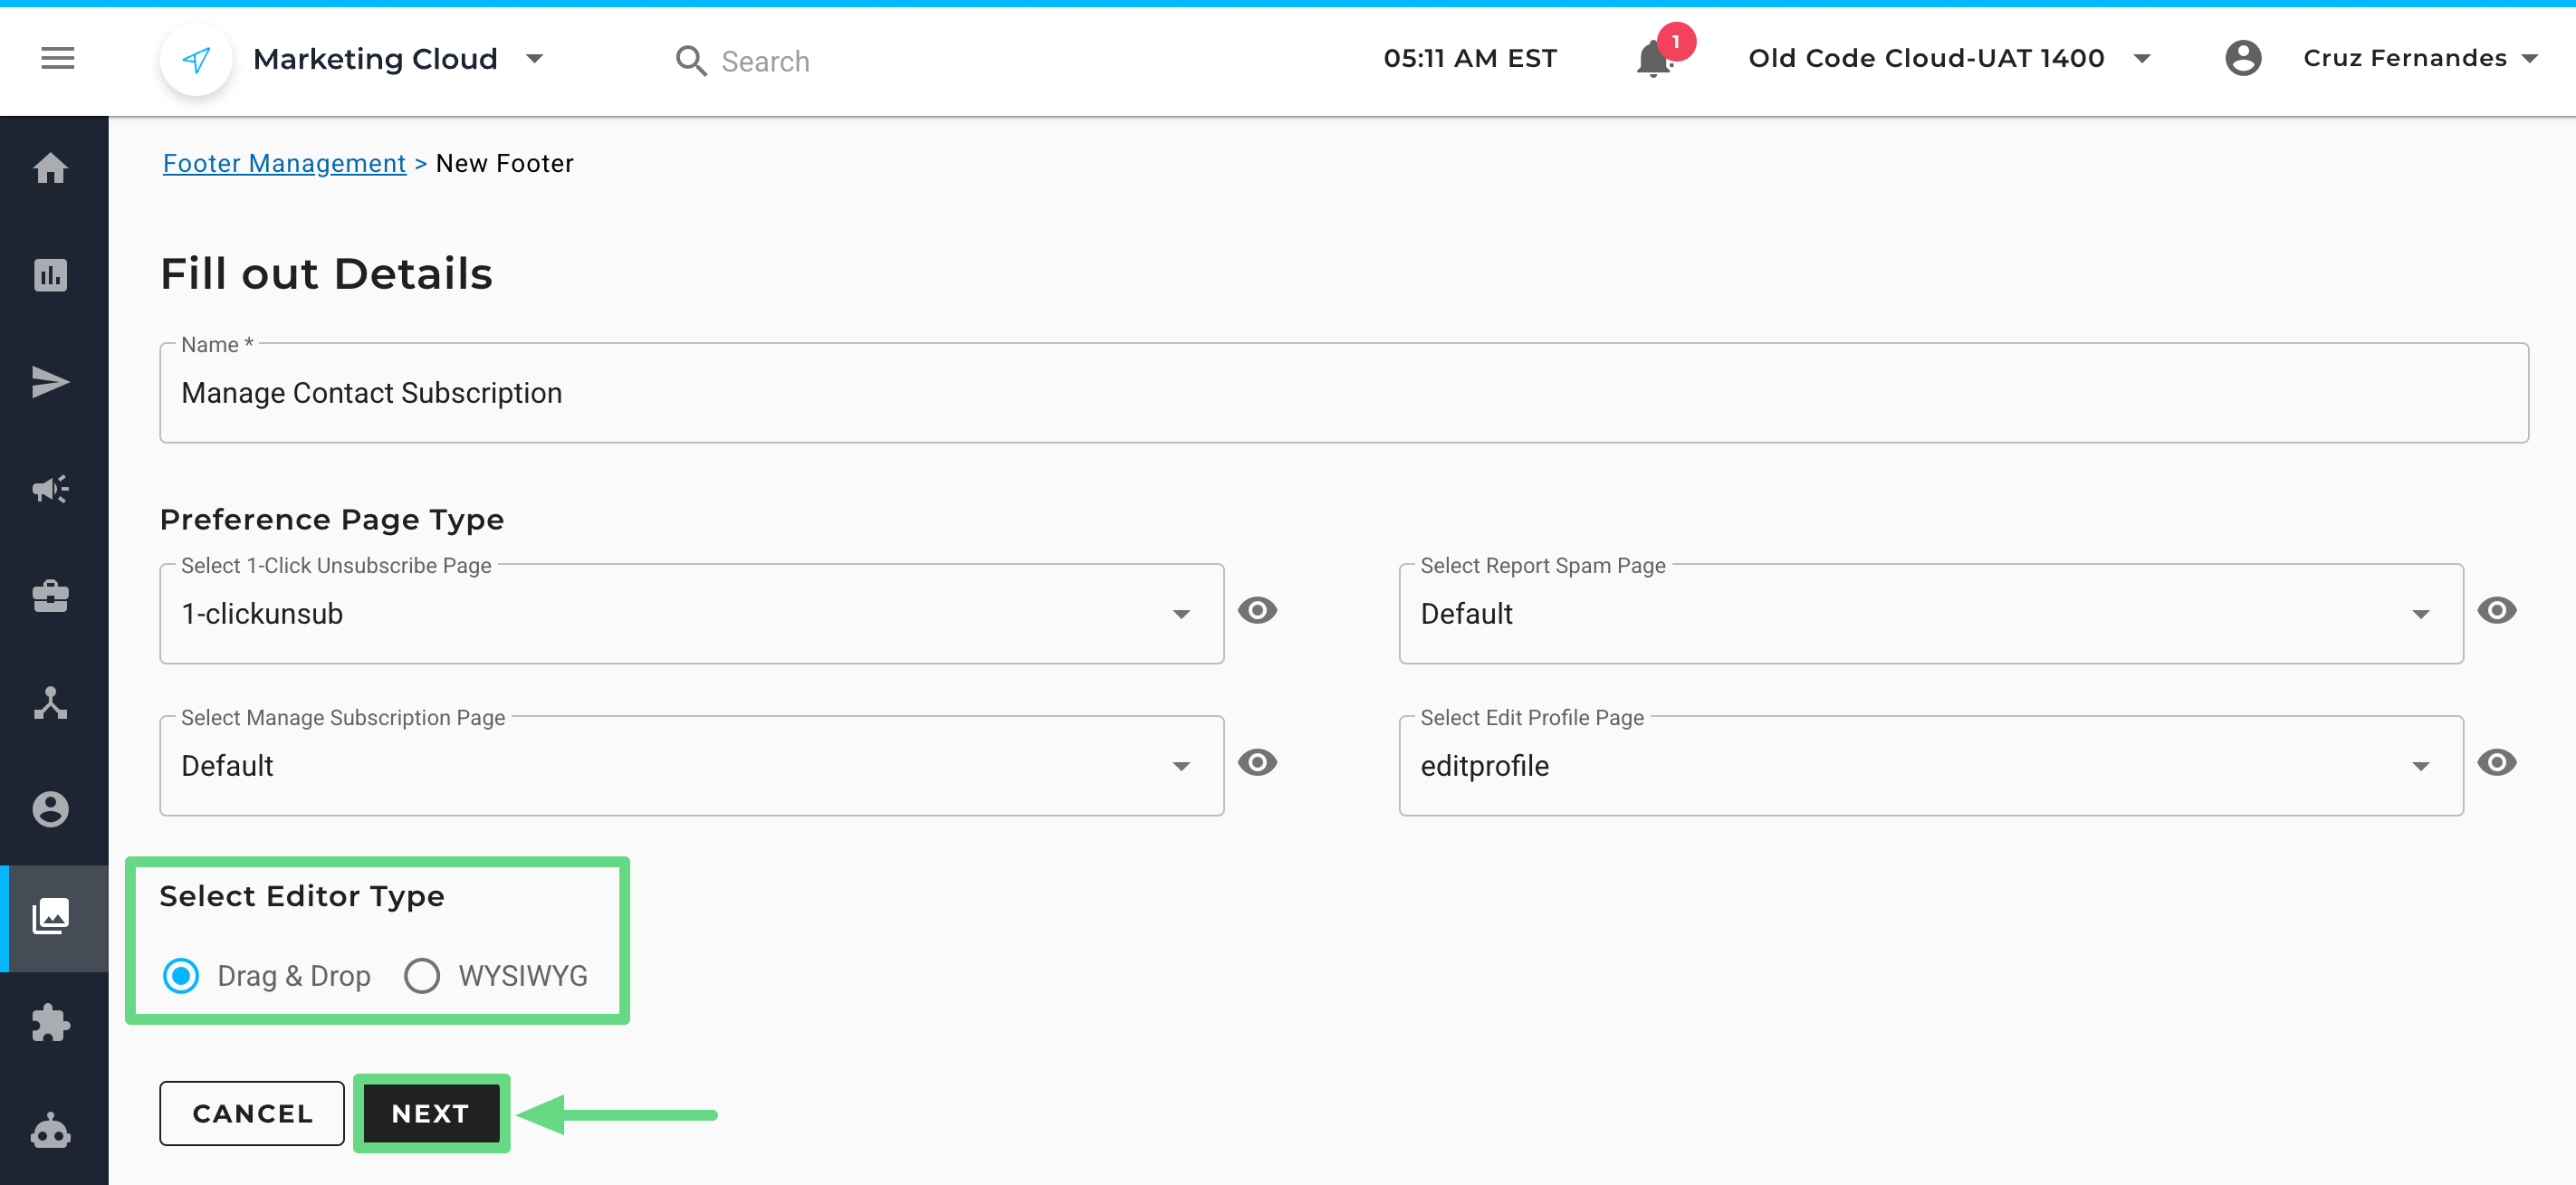
- Before heading out to customize your footer, you have the option to choose either the Drag & Drop or WYSIWYG editor type. Click on Next to proceed ahead.
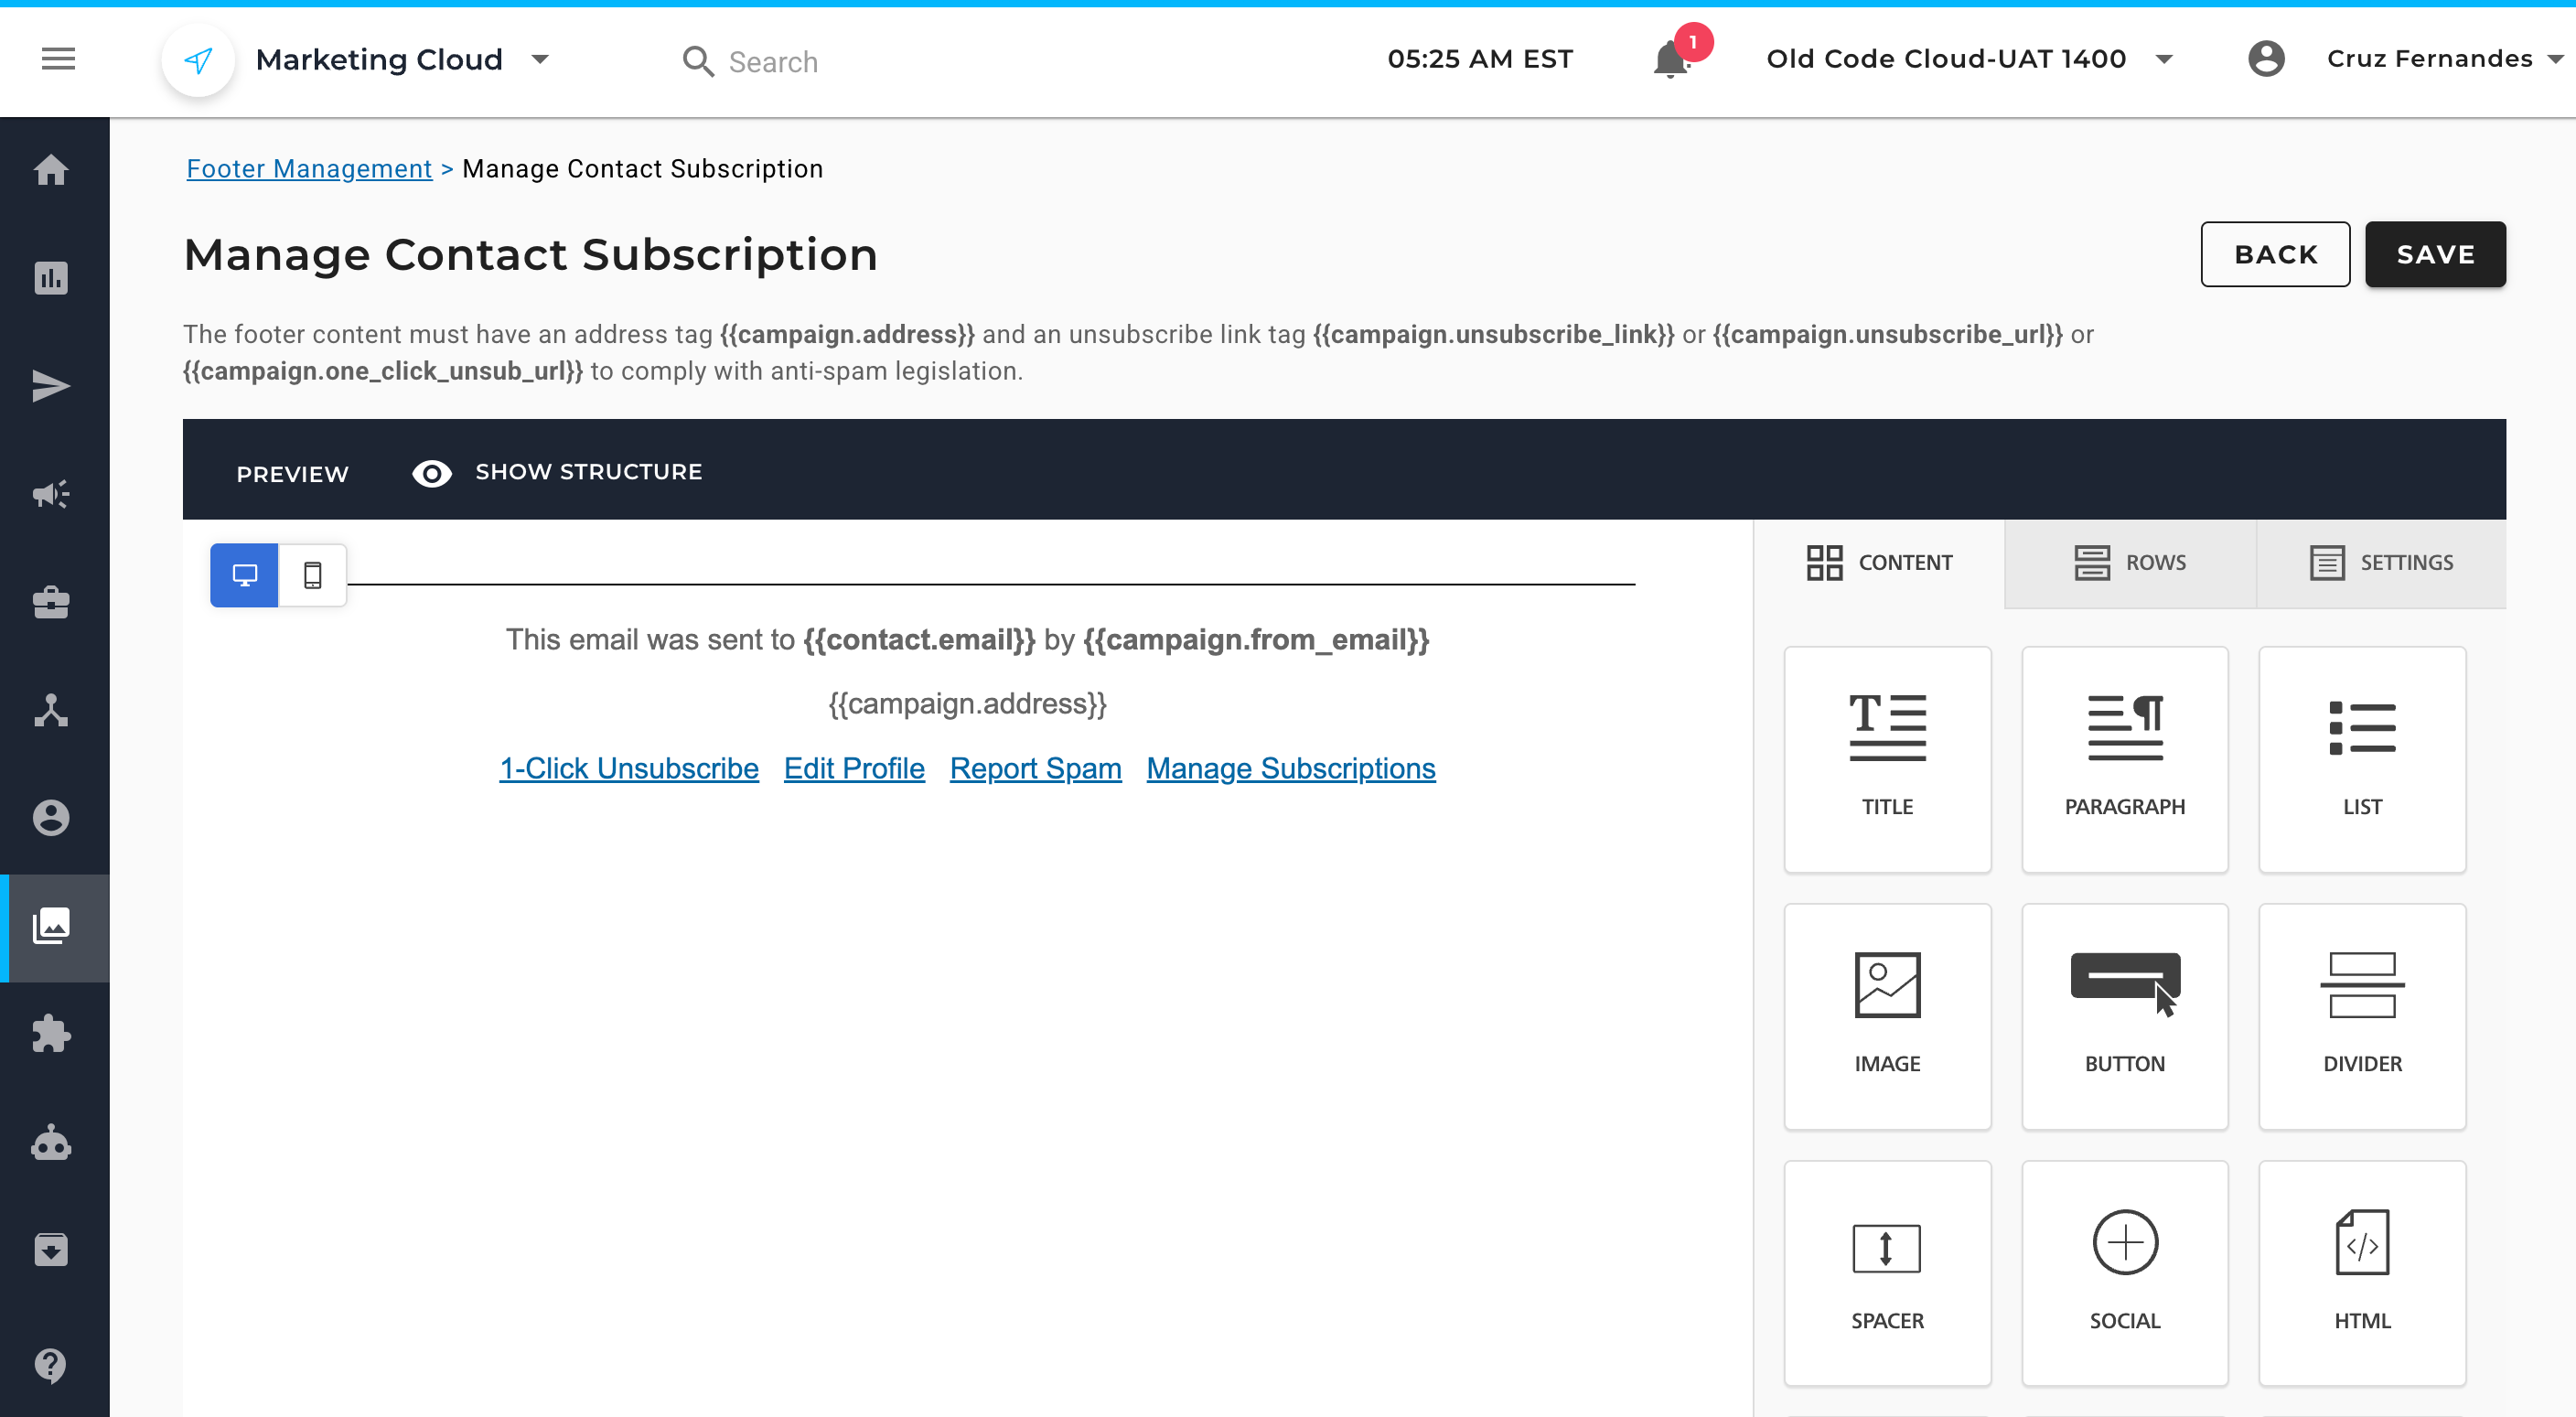
- Depending on the editor type chosen, you will be redirected to the respective editor pages, where you can utilize the tools at your disposal to fine-tune your footer layout. Below is an example of the Drag & Drop editor page.
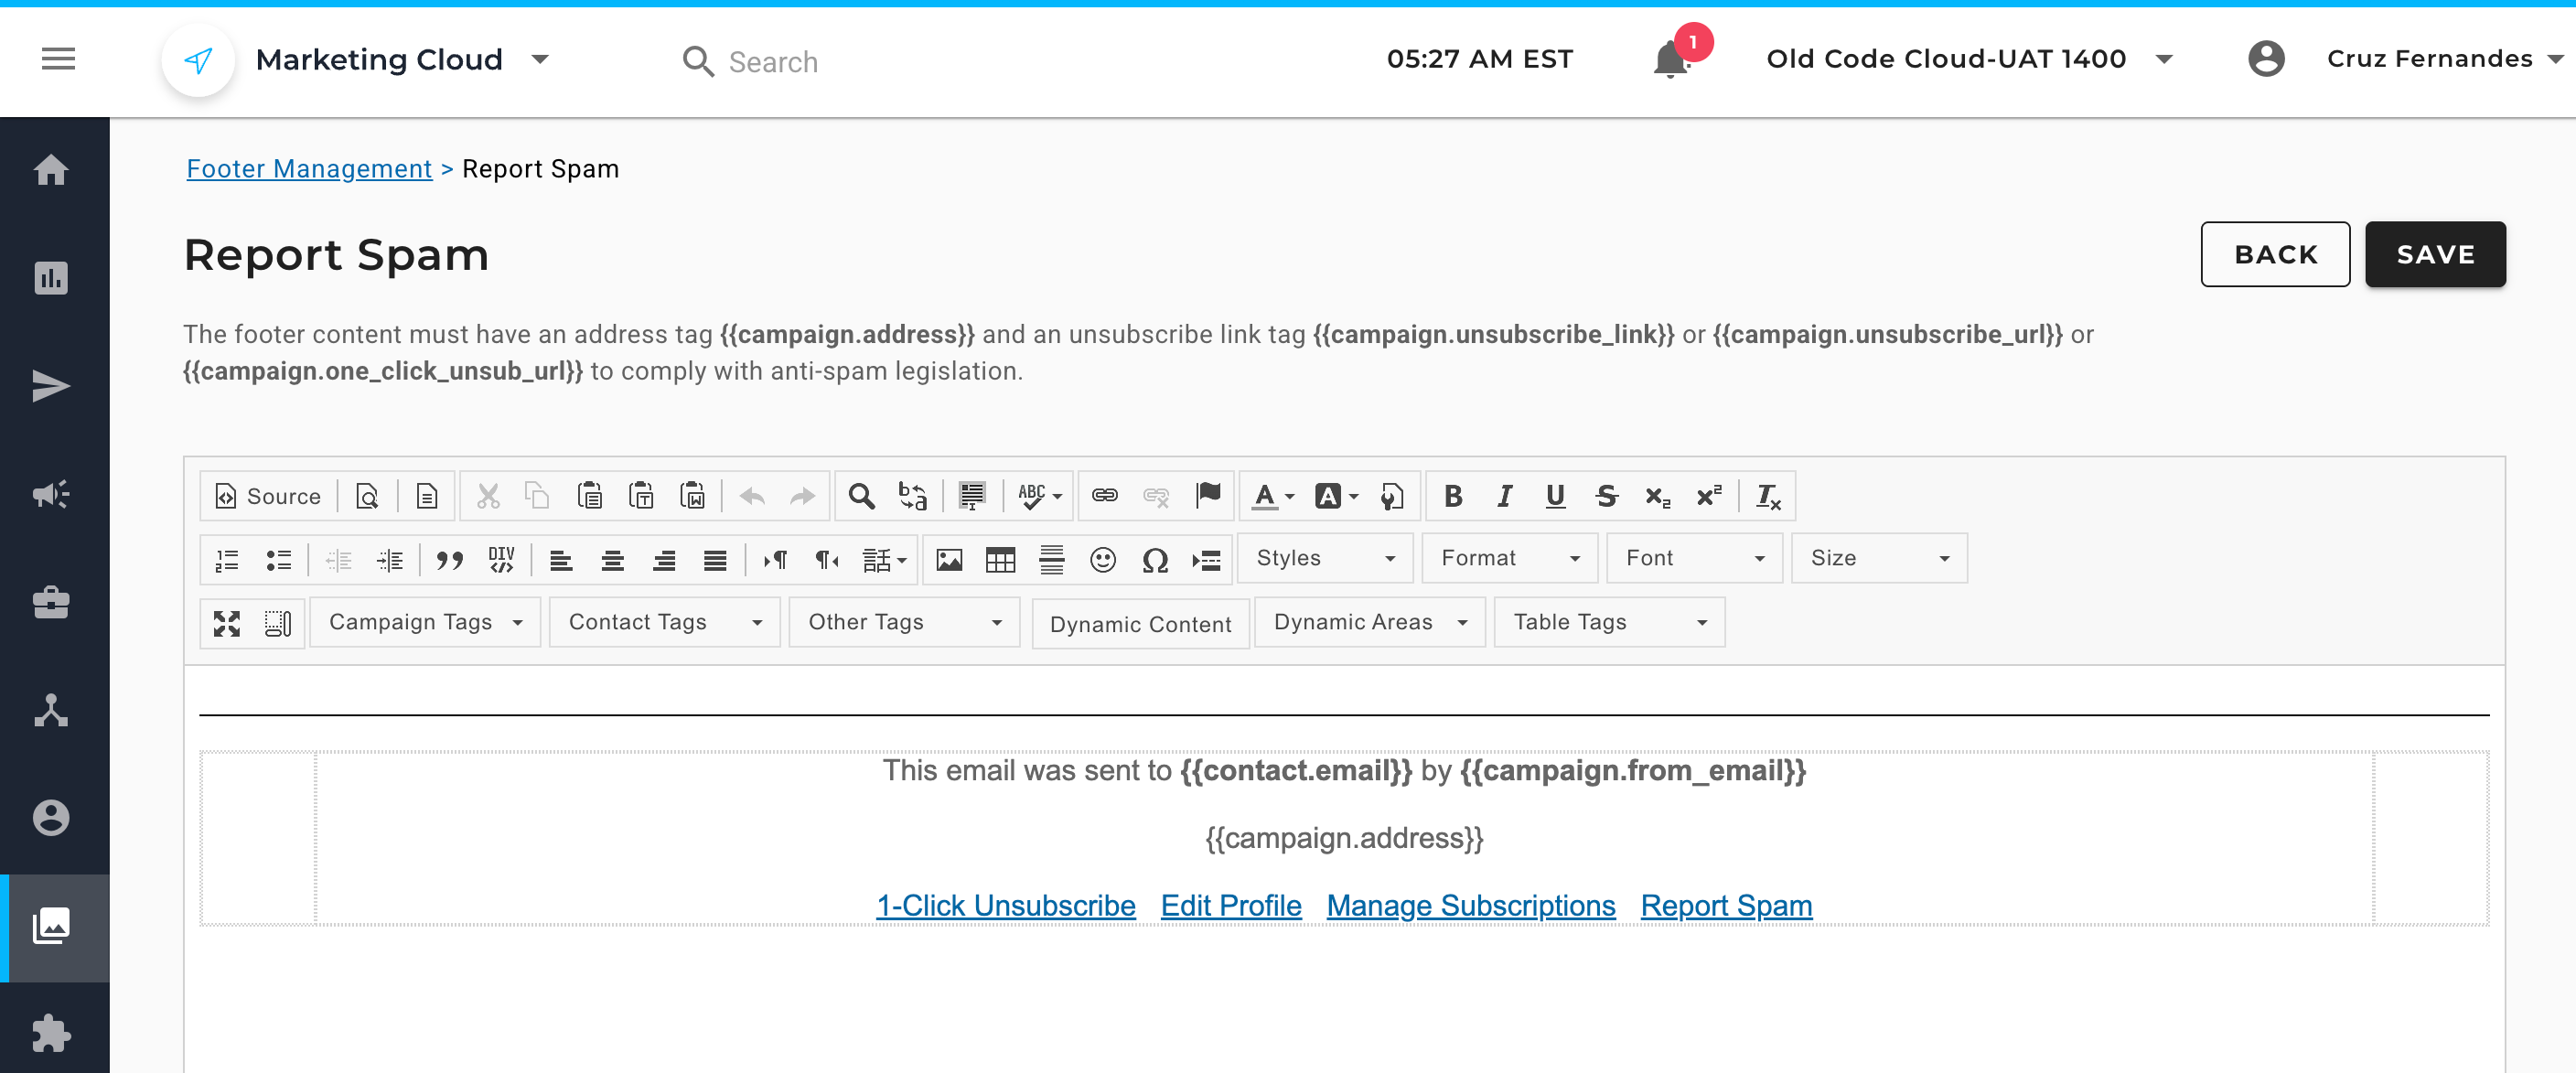
- Similarly, if you have chosen the WYSIWYG editor type, this is how the editor page would appear.
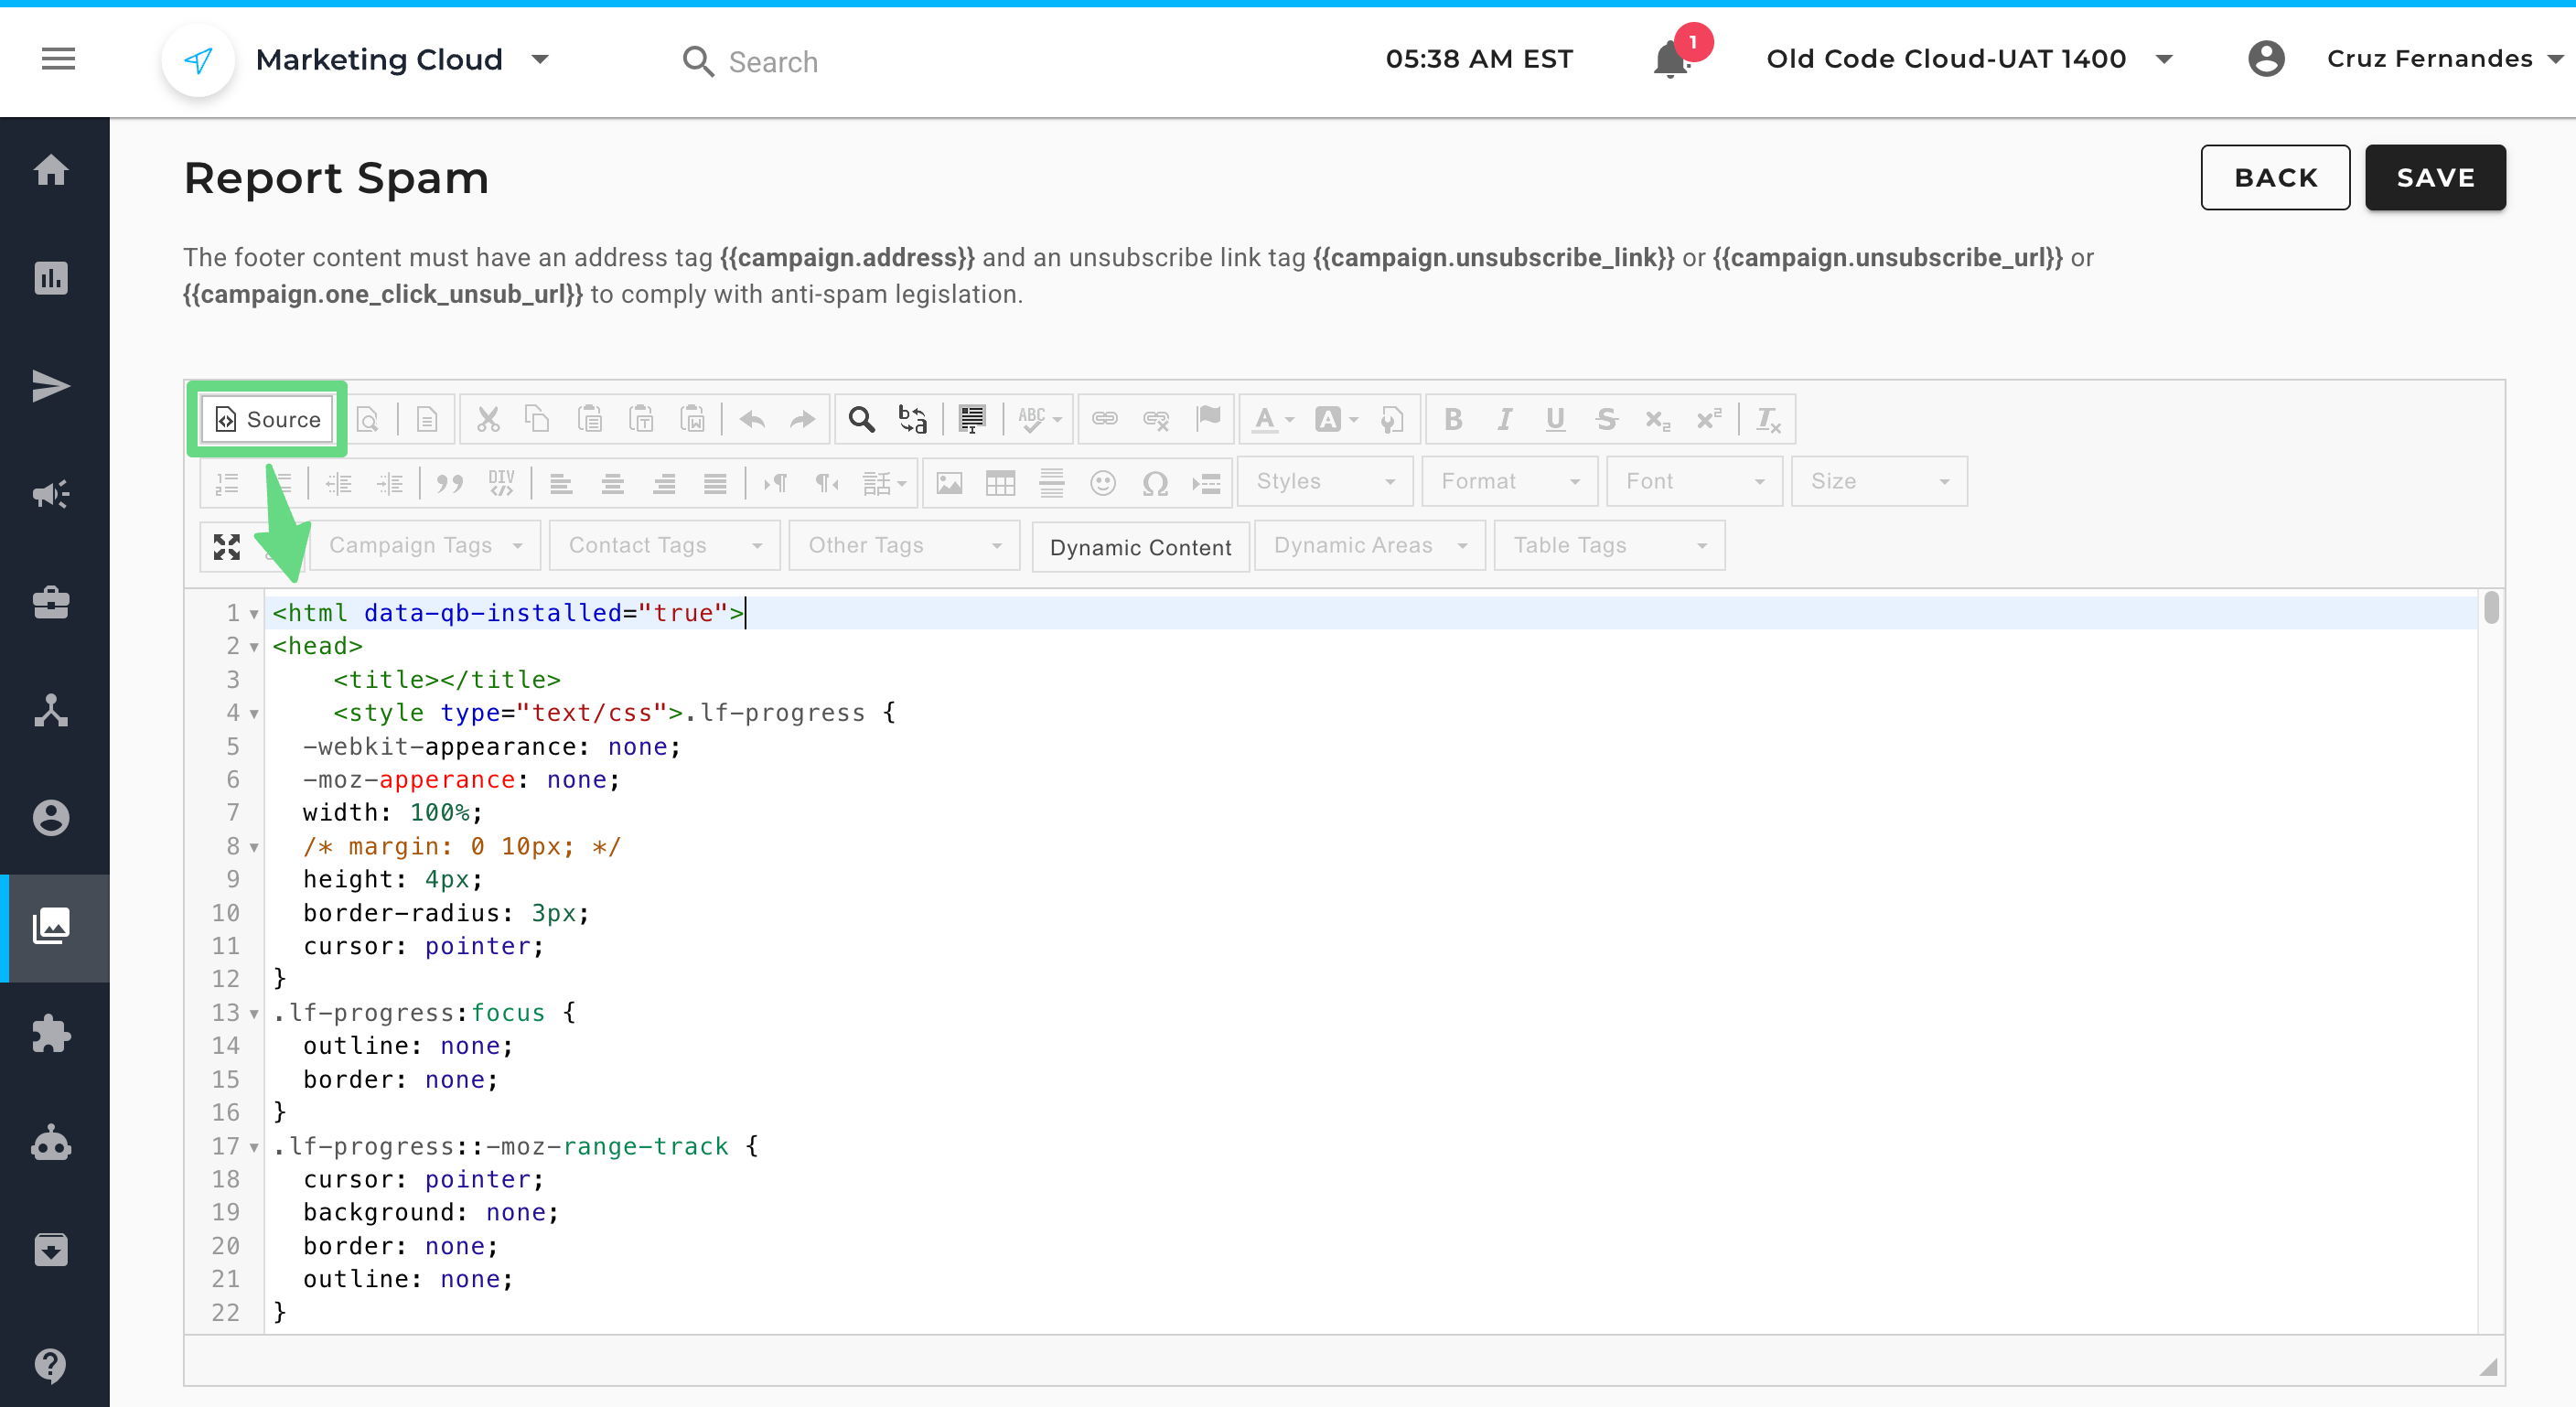
Important:Regardless of the editor systems used, ensure the footer content contains an address tag{{campaign.address}}and an unsubscribe link tag{{campaign.unsubscribe_link}}or{{campaign.unsubscribe_url}}or {{campaign.one_click_unsub_url}}so your email complies with anti-spam legislation. - The editors also enable you to add tags for customizing the footer content. If you have existing HTML code to repurpose within the WYSIWYG editor, click the Source icon to access the editor's source code view and insert your code there.
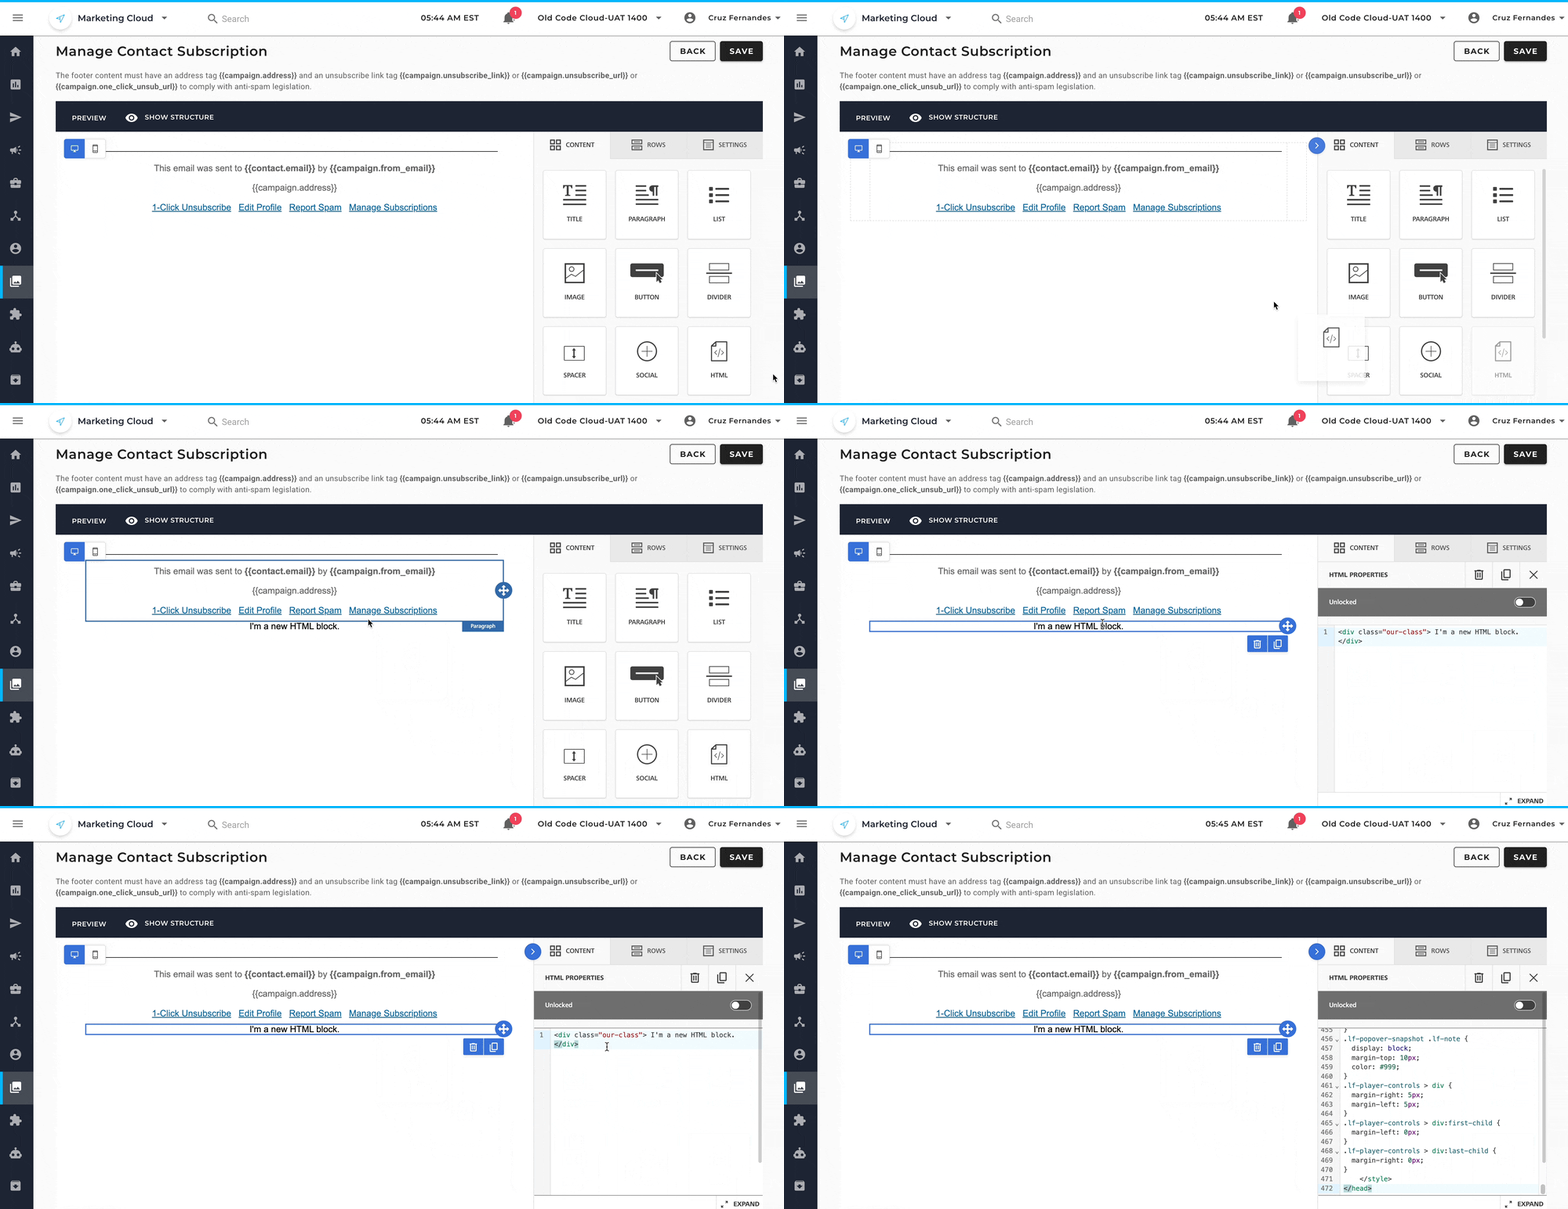
- If you are designing with the Drag & Drop editor, click and hold the HTML widget, drag it into the workspace canvas, and then insert your code in the HTML field.
- After saving your work, you can take a preview of your footer and make changes to the name, preference pages, or the layout if needed. Click on Exit to finish the designing process.
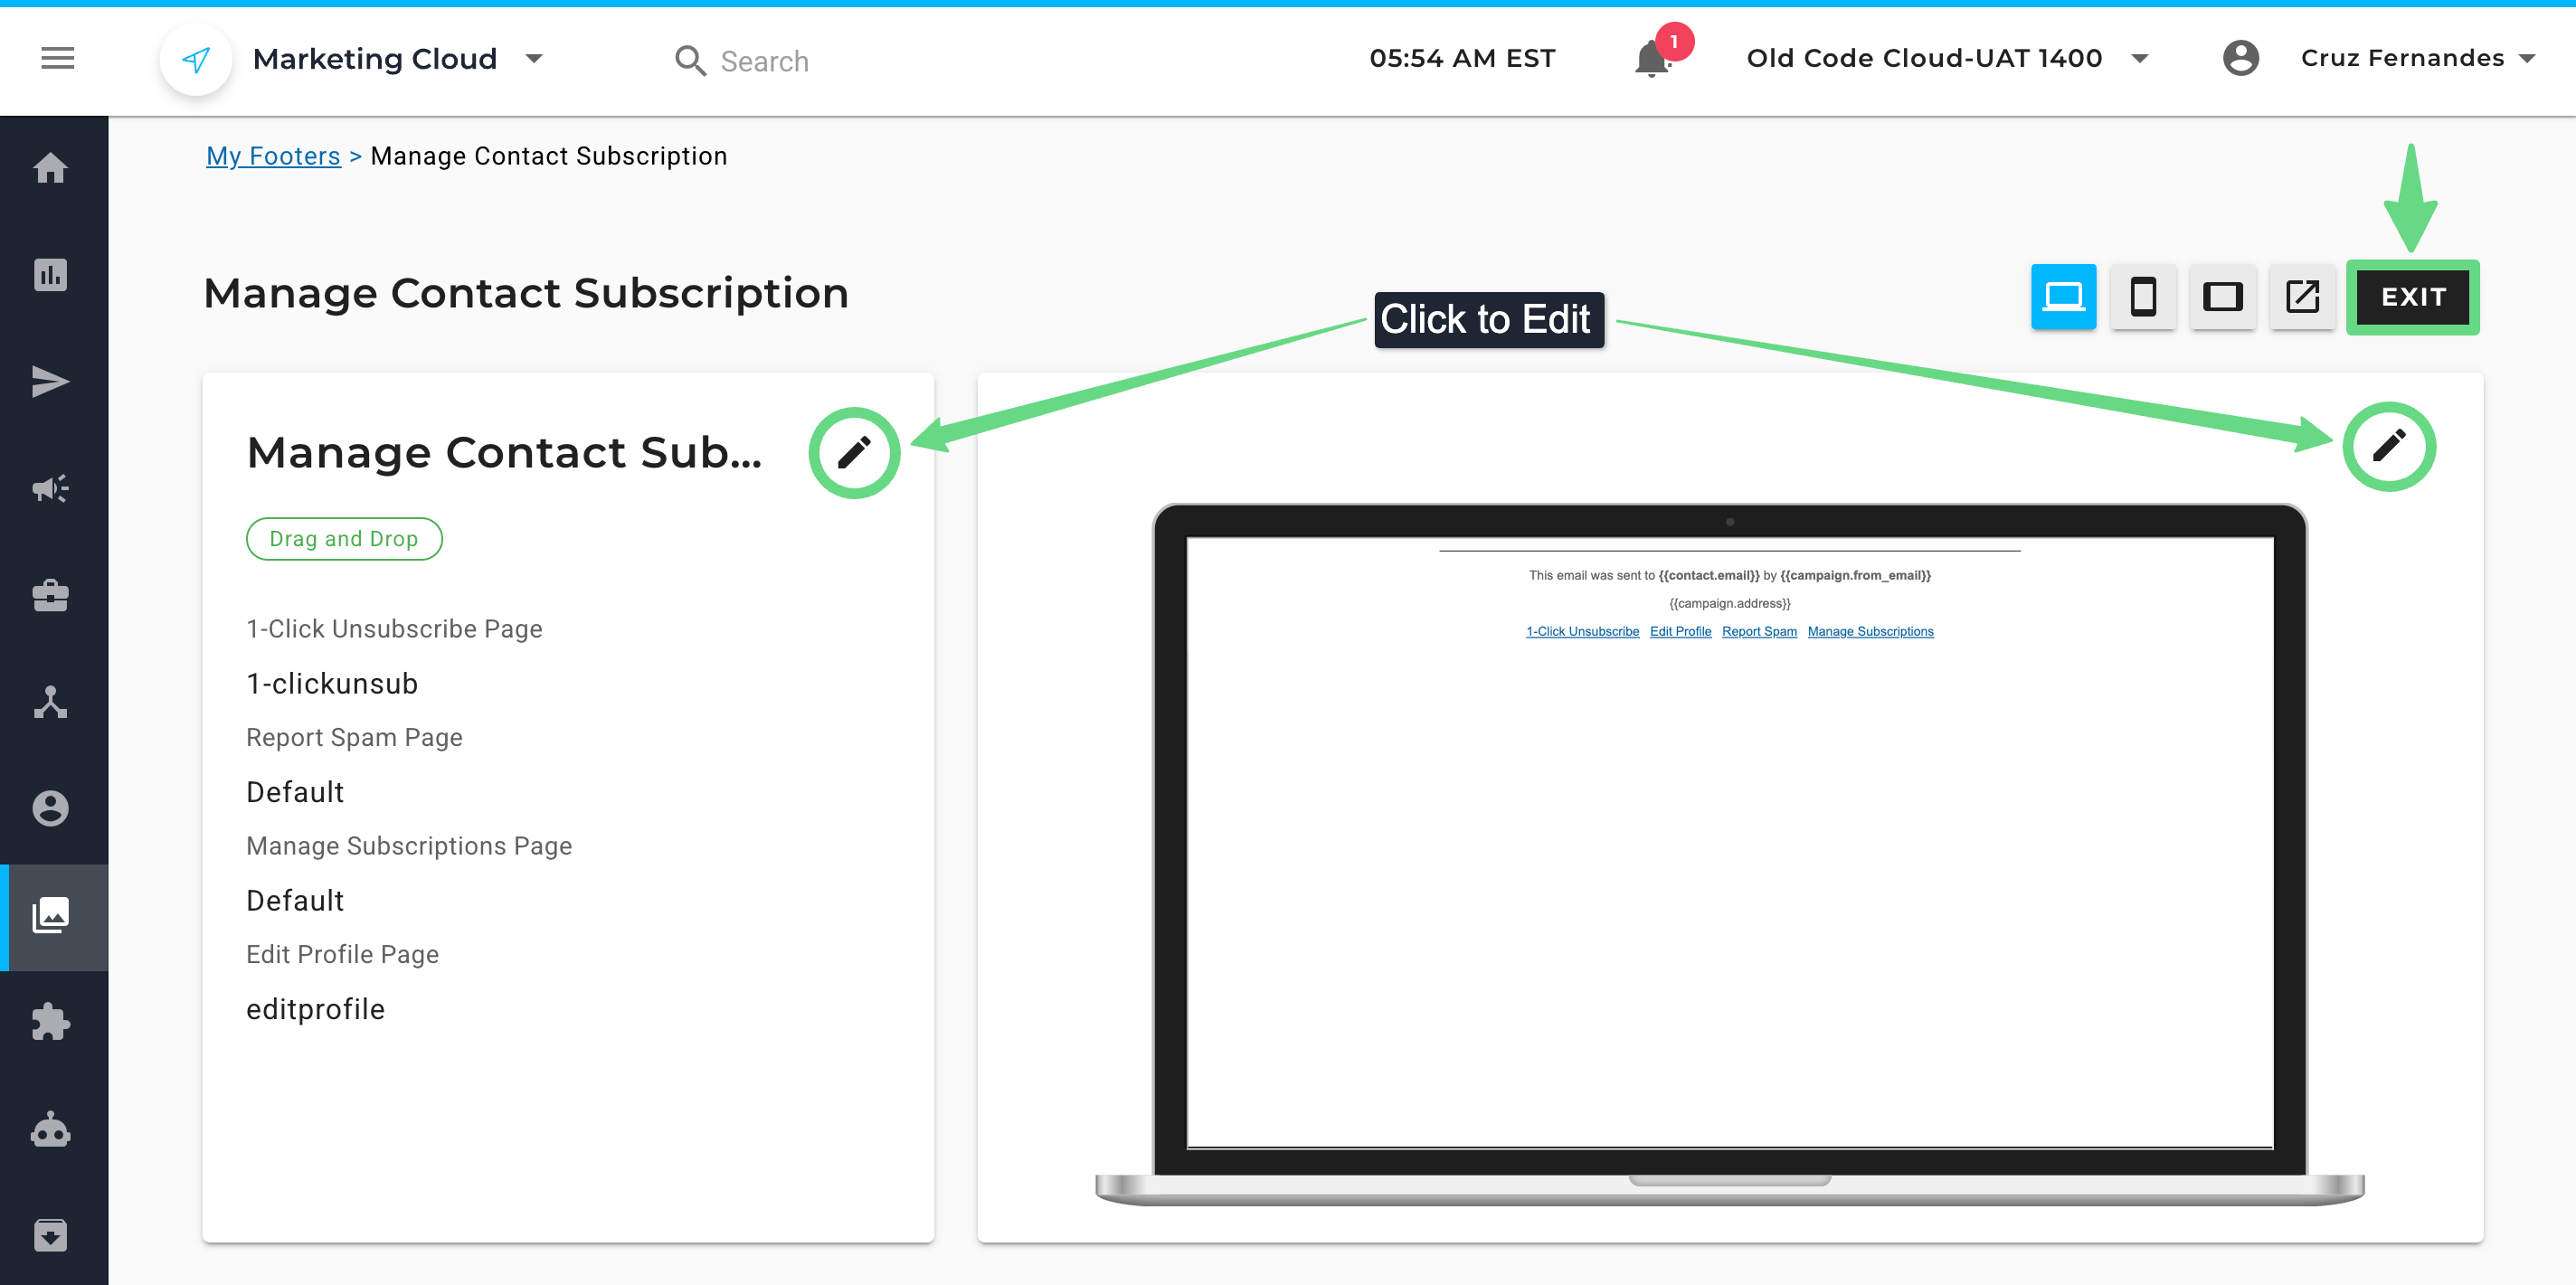
- The newly created footer appears on the index page, which can be managed alongside other footer templates in your account.

Managing Custom Footers
You can manage your recent and previously created footers on a single index page in the Footer Management module. The index page lists information such as the footer name, date of creation/modification, action components, and the editor used to design the footer.
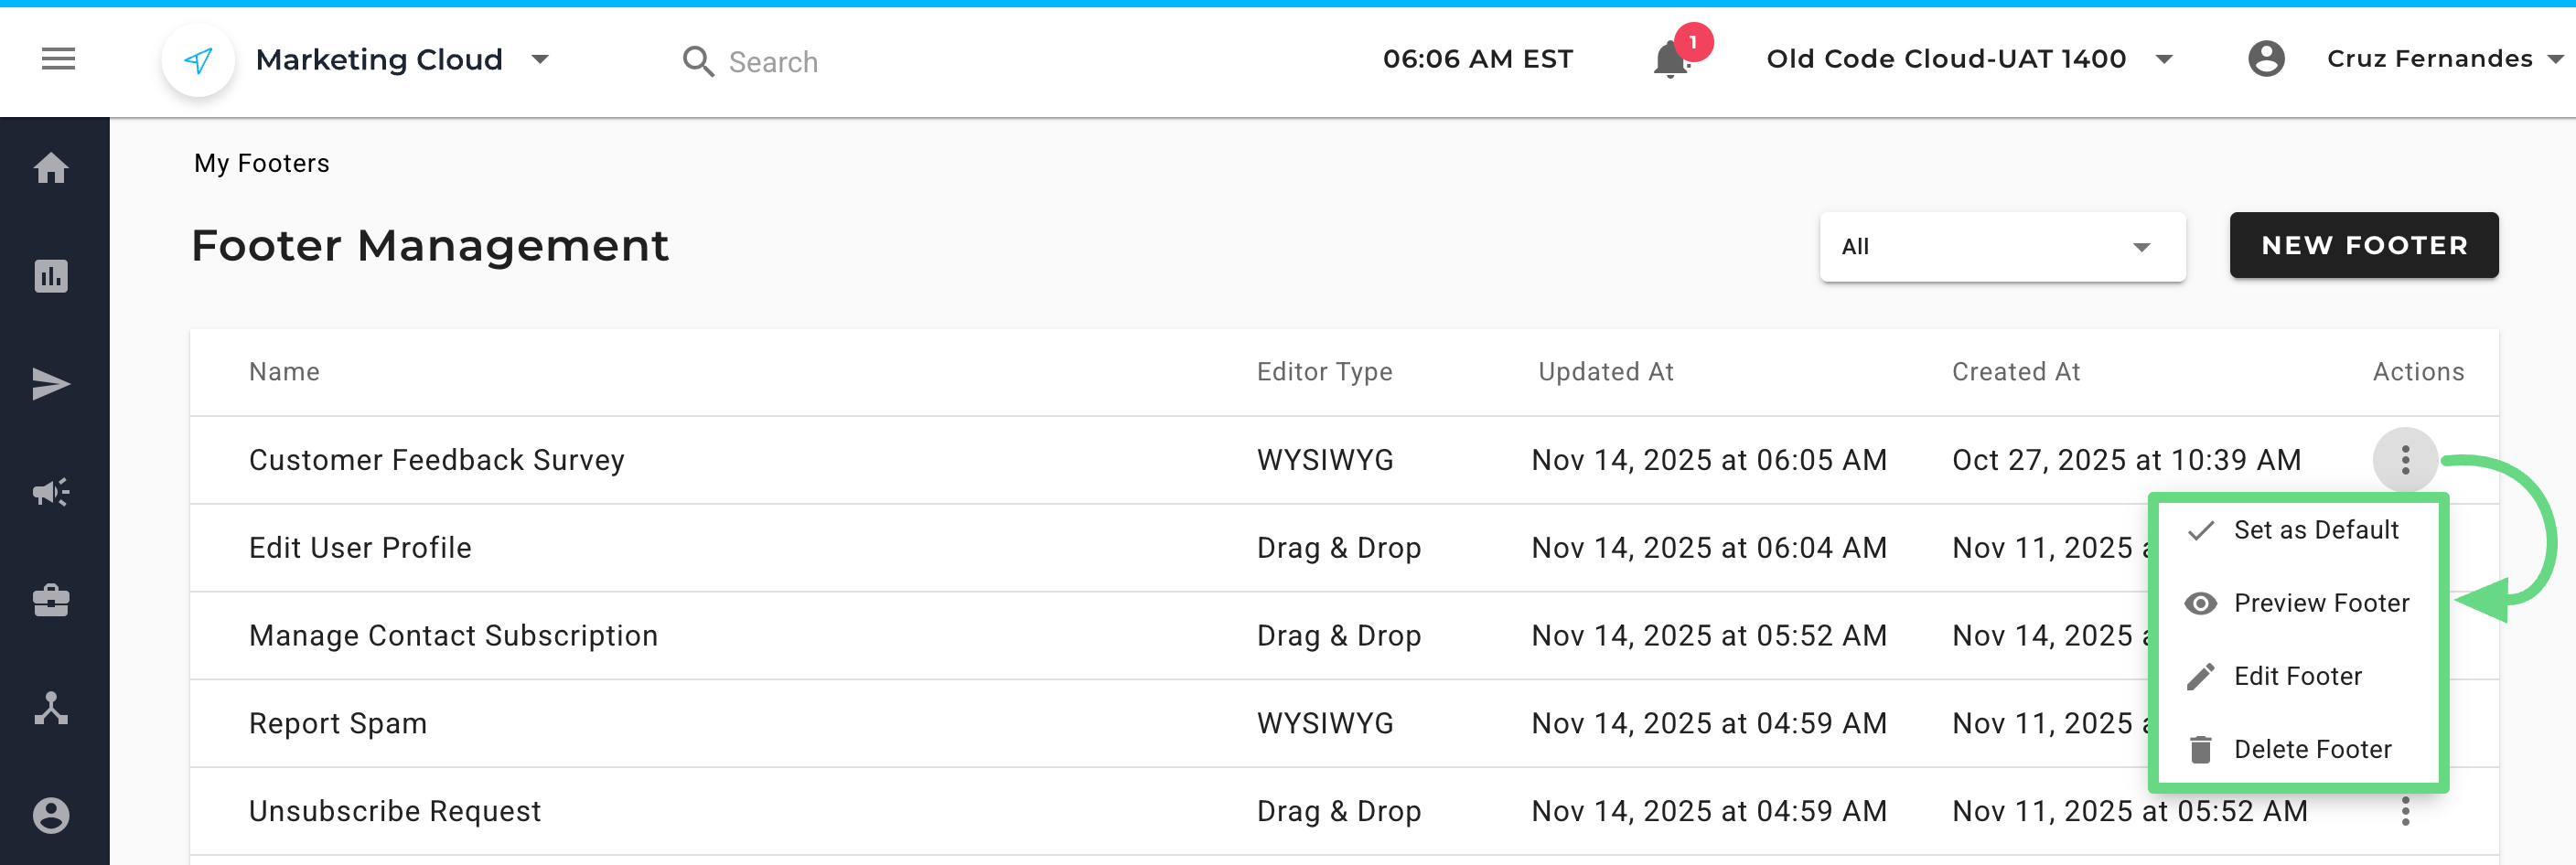
Likewise, you can use the following actions available within the Actions column. They are as follows:
- Set as Default: Designates the footer as your account's default. Once you establish a custom footer as the default, it automatically replaces the Maropost predefined footer in all existing content.
- Preview Footer: Displays how the footer will look in your email campaigns.
- Edit Footer: Allows you to modify the footer.
- Delete Footer: Permanently removes the footer.
Related Articles
Content Design:
Campaign Management: