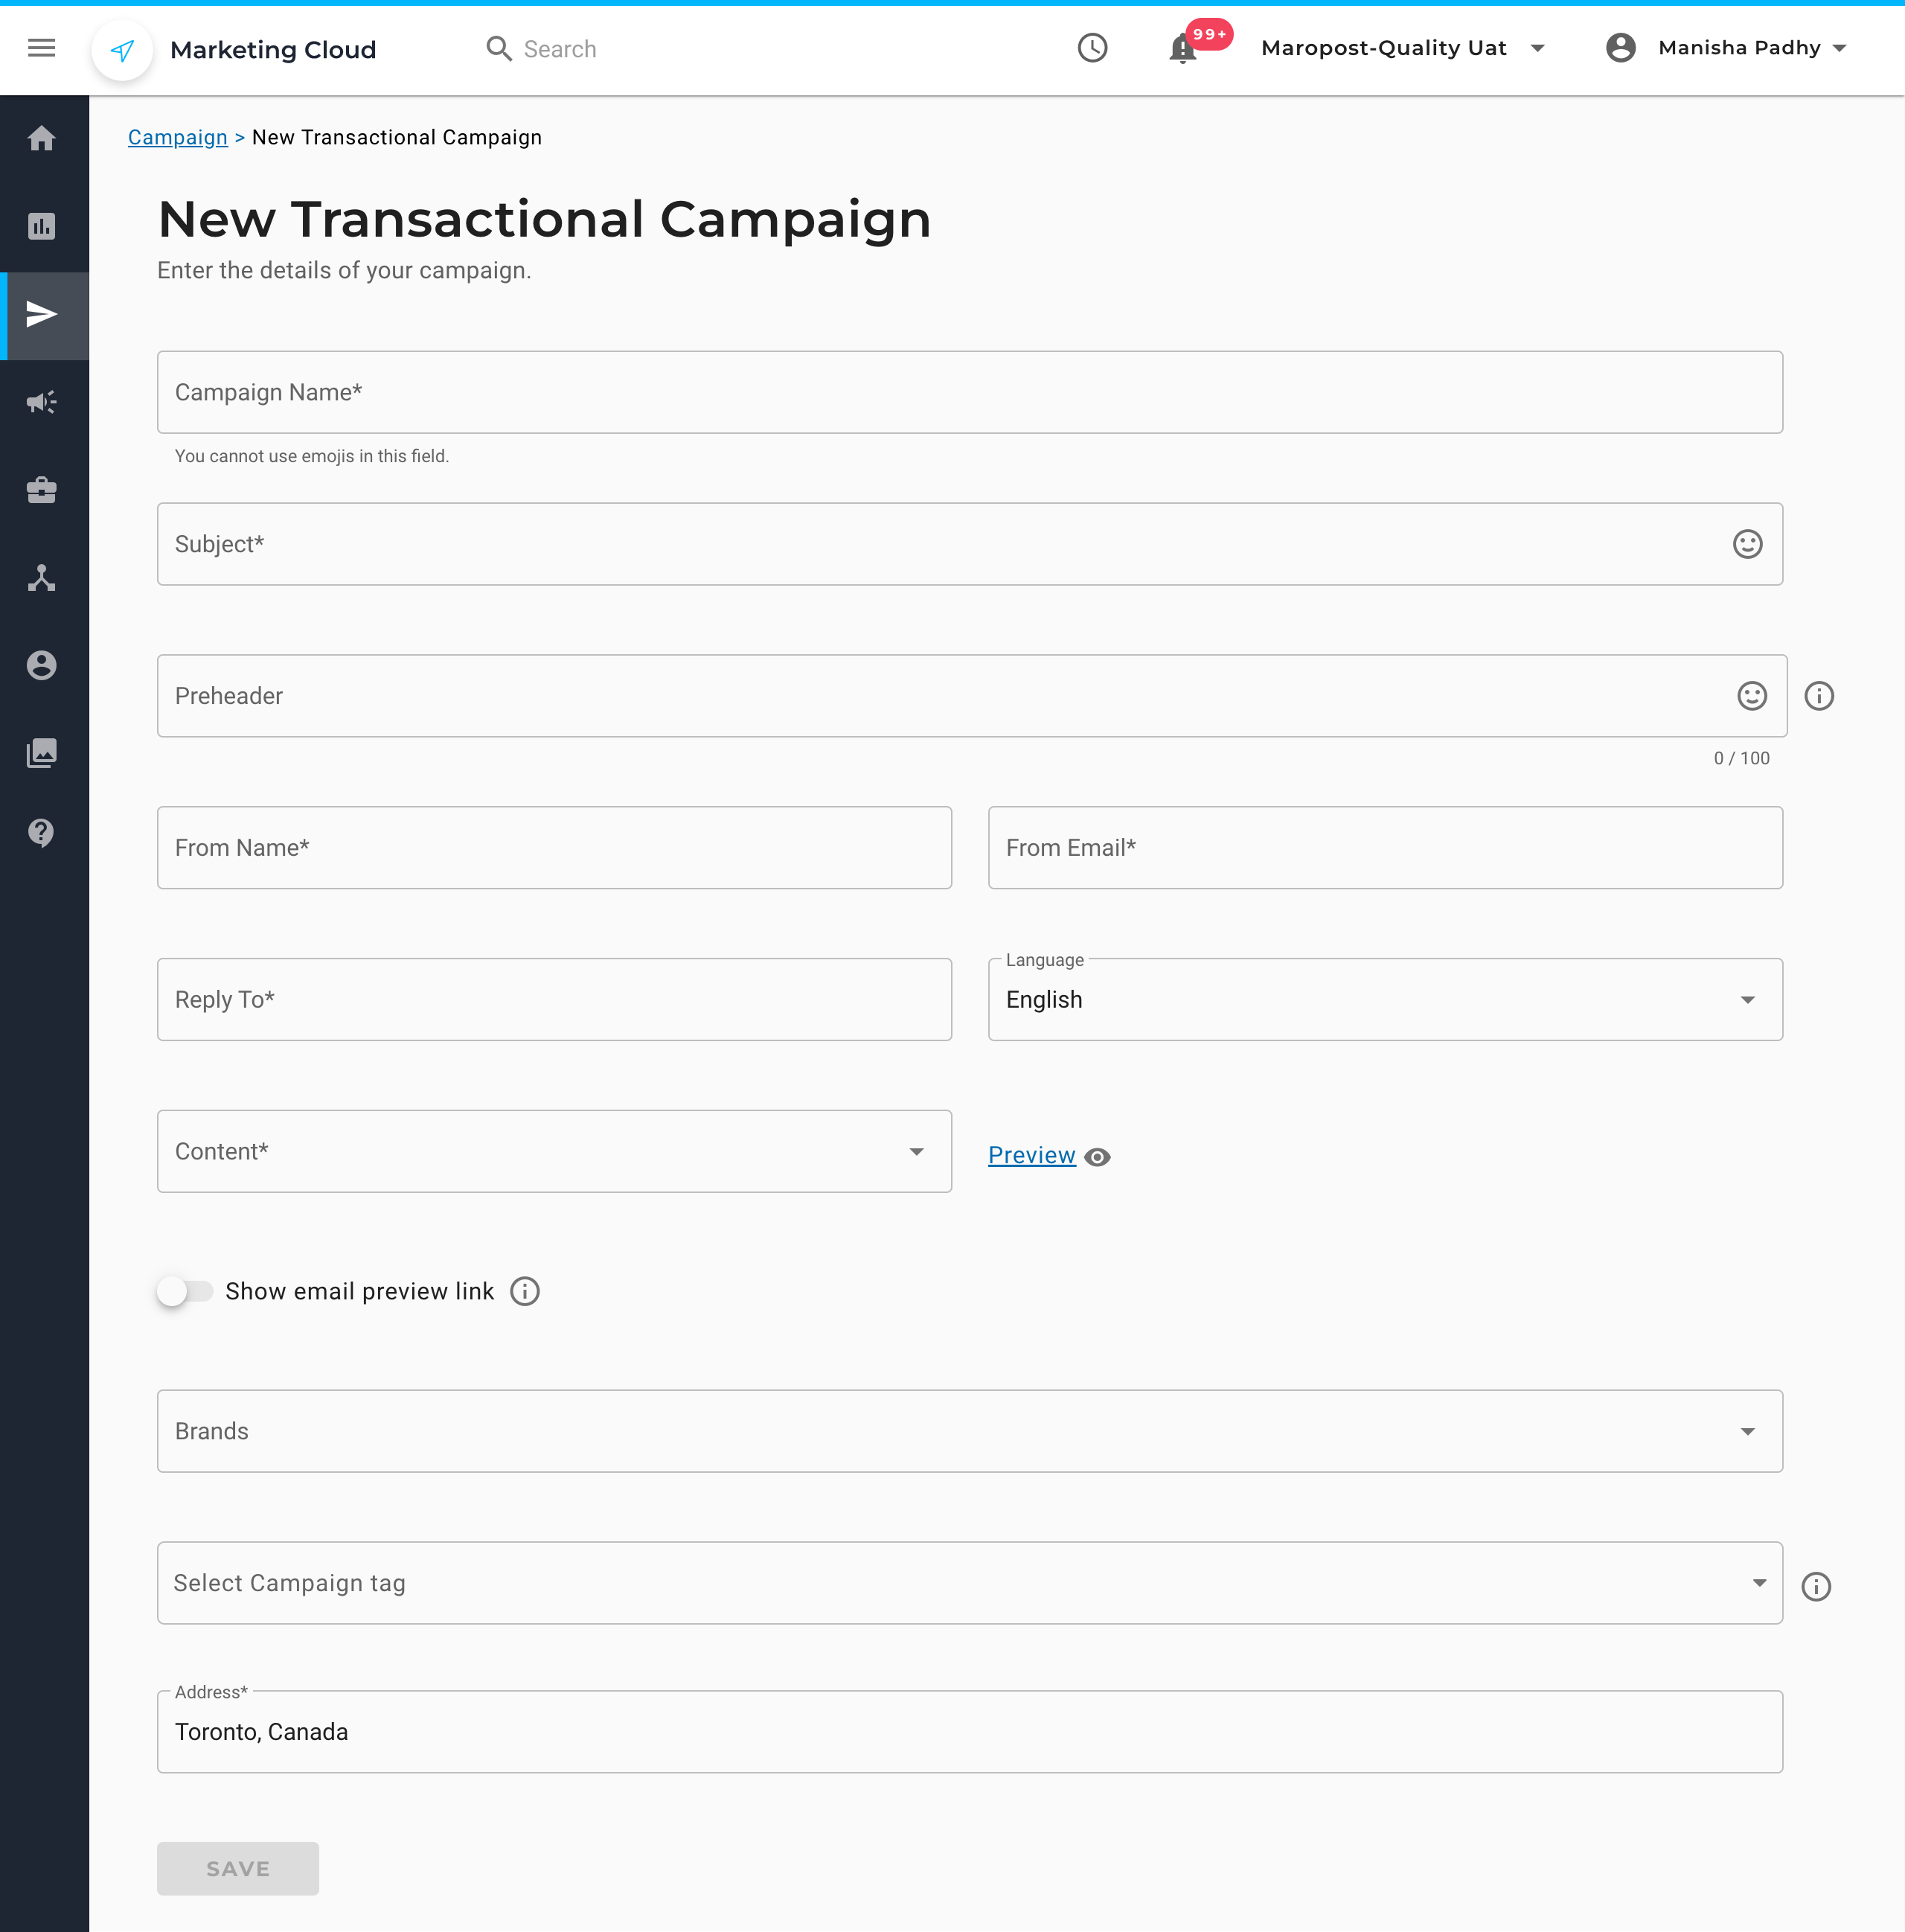
You can create transactional email campaigns to deliver time-sensitive messages like order confirmations, password resets, or account notifications that maintain customer engagement and trust. These automated communications typically achieve high open rates because recipients expect and rely on them, making them essential for maintaining strong customer relationships and operational efficiency.
Transactional campaigns help optimize your workflow by automating critical customer communications through API or SMTP delivery, ensuring consistent messaging while reducing manual effort in customer service operations.
Maropost Marketing Cloud enables you to create and manage Transactional Campaigns in the application user interface. You can then use Marketing Cloud's REST API or SMTP feature to send these campaigns to your contacts.
You can send a transactional email campaign either through API or SMTP.
Creating a Transactional Email Campaign
Perform the following steps to create a new transactional campaign:
- In Navigation, go to CAMPAIGNS, and then select Transactional Campaigns.
- On the Transactional Campaigns page, click NEW CAMPAIGN.
- On the New Transactional Campaign page, in the Campaign Name text box, enter a name for the campaign.

- In the Subject text box, enter the text to be shown as the email subject.
- In the Preheader text box, enter a summary text that follows the subject line when the email is viewed from the inbox.
- In the From Name text box, enter the name of the sender.
- In the From Email text box, enter the email address of the sender.
- In the Reply To text box, enter the email address to which you want to receive replies from your contacts.
- From the Language drop-down list, select the language to be used for your system-generated links in the campaigns. By default, the field is prepopulated with the language previously selected in the COMPANY OVERVIEW tab of the Account & Billing page.
- From the Content drop-down list, select the email content from the content list. The content list contains all the content created in your account. To learn about our content builders, see Content Builders: Overview.
- Click the Preview link to see how your email will look to your contact. Here's what the preview looks like:

- Turn on the Show email preview link toggle button to include a link in the email for previewing the email. If the toggle is turned on, the text "If you are having trouble viewing this email, click here” is automatically inserted at the top of your campaign.
- From the Brands drop-down list, select the Brand with which you want to associate your campaign.
- From the Select Campaign tag drop-down list, select the campaign tags with which you want to associate the campaign. You can select multiple tags.
- In the Address text box, enter your company address. By default, the field is prepopulated with the address previously entered in the COMPANY OVERVIEW tab of the Account & Billing page.
- Click SAVE.