The File Import feature lets you import a contact list from your computer. This import supports the following file types: .txt, .csv, and .zip (must contain only one file of the type .txt or .csv). The maximum file size must be limited to 128 MB.
The CSV file must be formatted as per the following guidelines:
- There must be no spaces in the header column names, and the leading and trailing spaces should always be removed.
- Follow UTF-8 encoding (note that we do not support UTF-8 BOM).
- The date format must be in dd-mm-yyyy.
- The boolean type fields must use "0" and "1" to indicate false and true.
Additionally, when importing a CSV file, ensure that you map the custom fields appropriately in the mapping step.
Importing Contacts Using File Import
Perform the following steps to import contacts into a list via the File Import method:
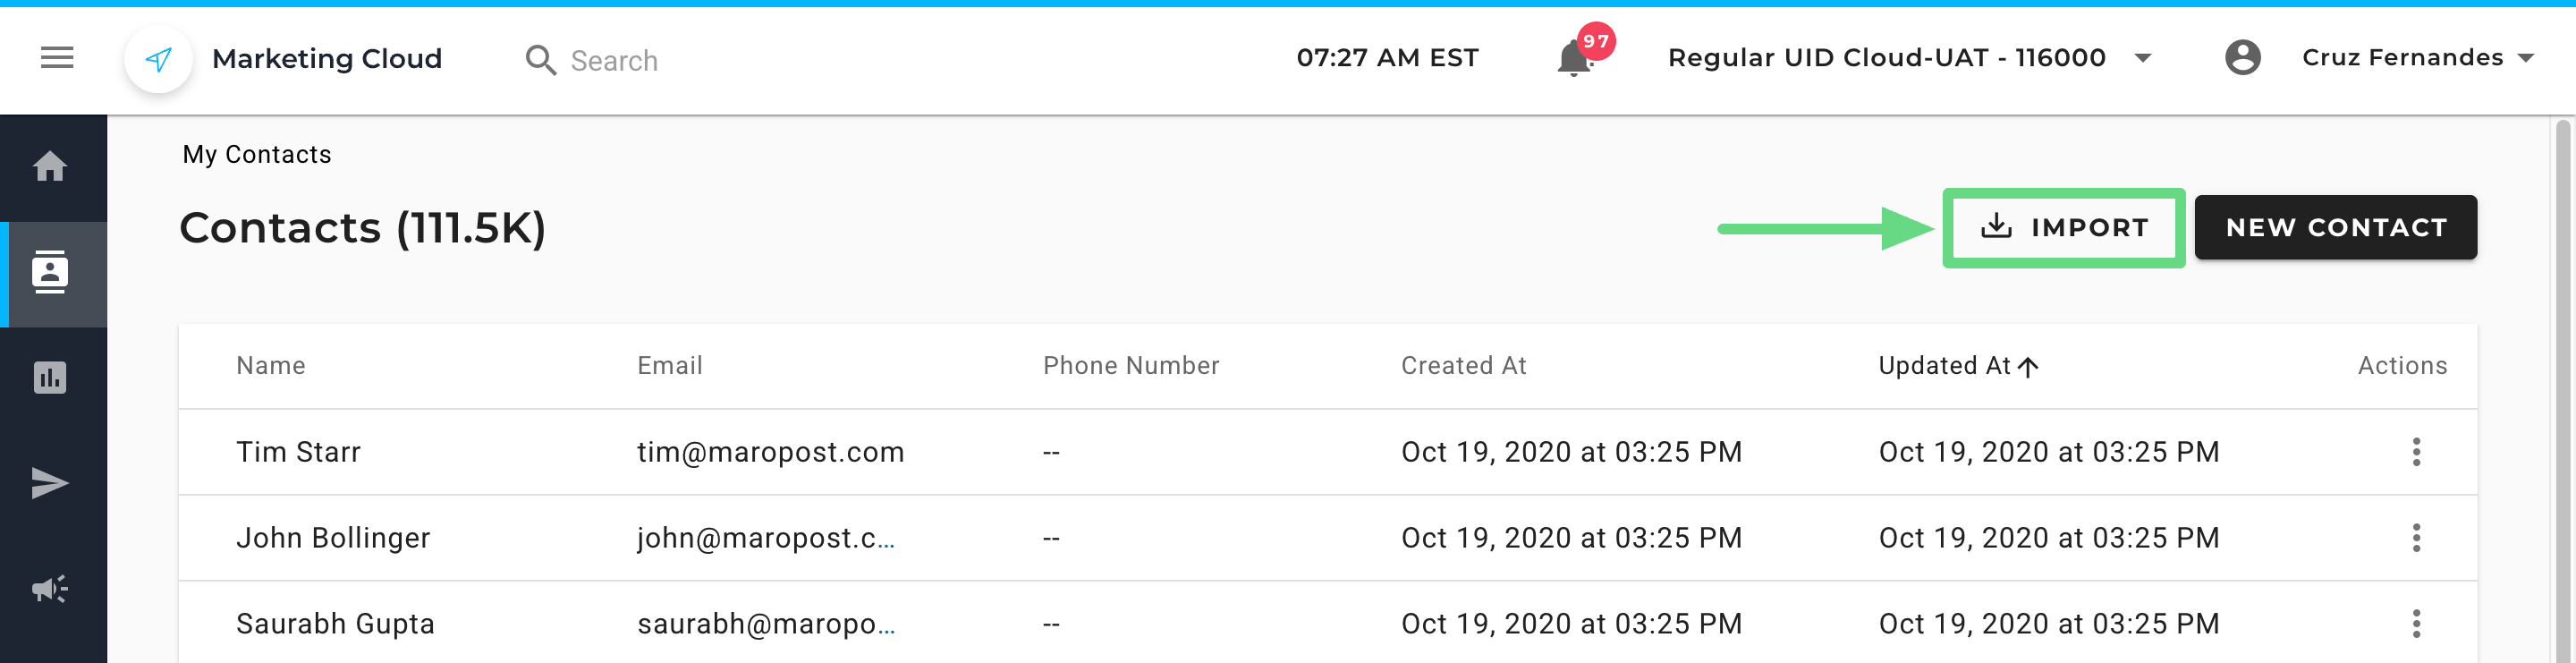
- To access the import feature, go to Contacts from the Navigation panel. You can also access the import feature by visiting the Contact Lists section under the Audience menu.

- From the contacts index page, click on the Import tab to begin importing contacts to your account. You can also initiate the import process from the Contact Lists by first clicking on the Actions drop-down menu next to the list name and choosing Import Contacts.
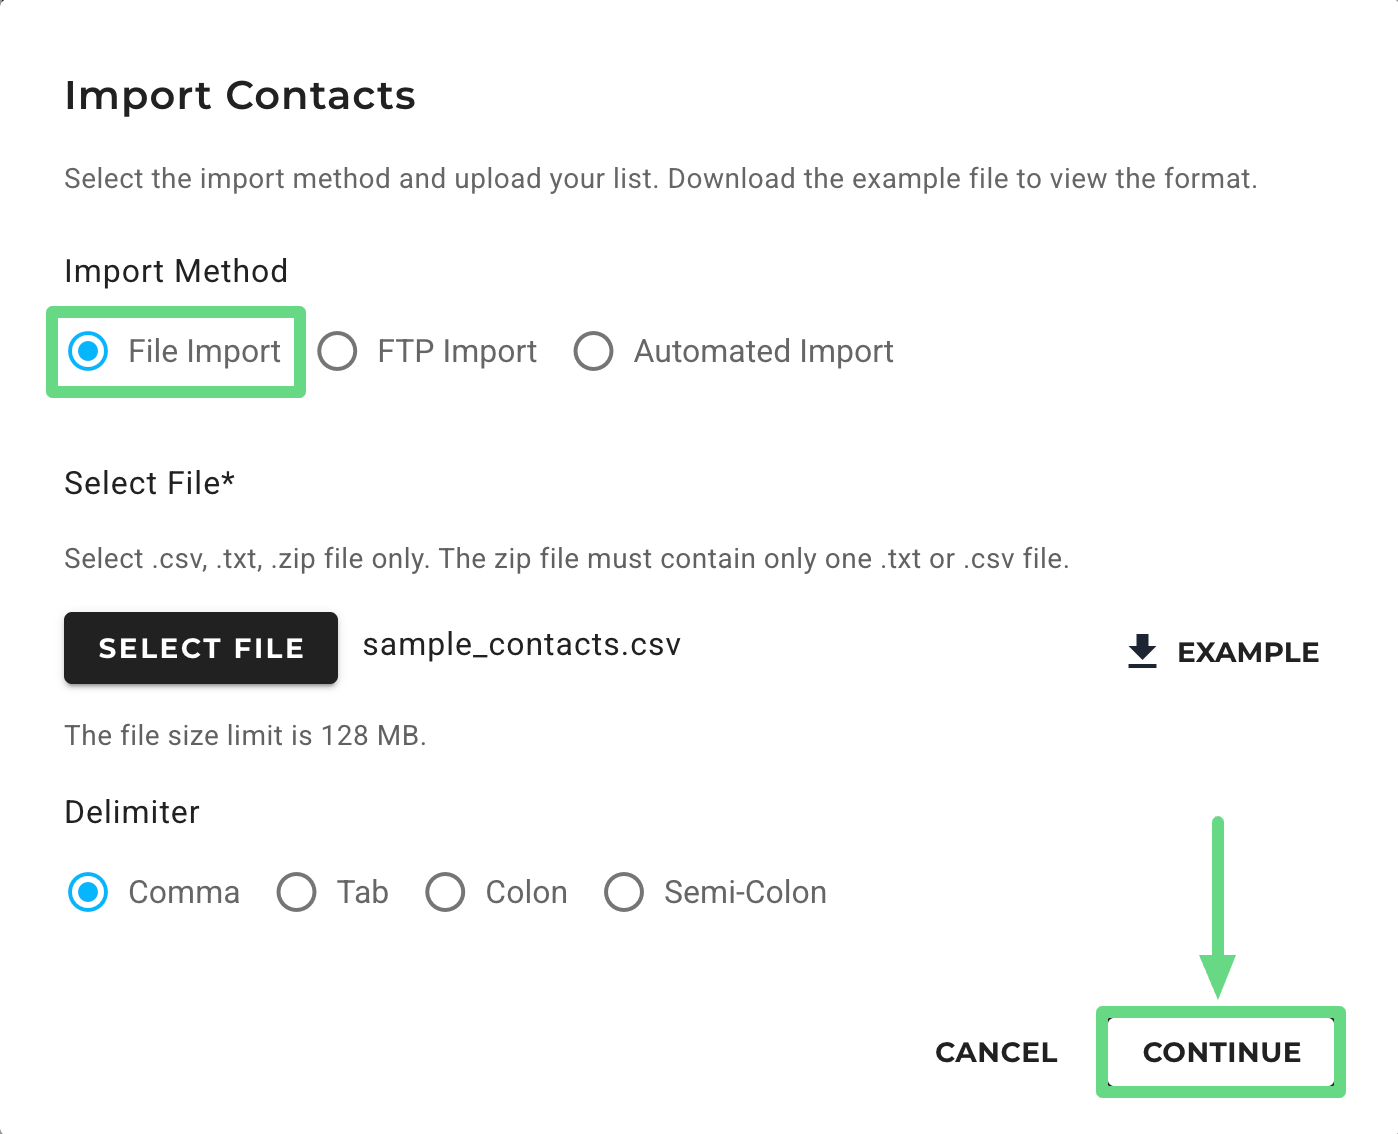
- In the Import List dialog box, choose “File Import” as the import method. Then, upload the file containing the list of contacts from your device. Also, select the field delimiter that is used in the file. Click Continue to proceed ahead.
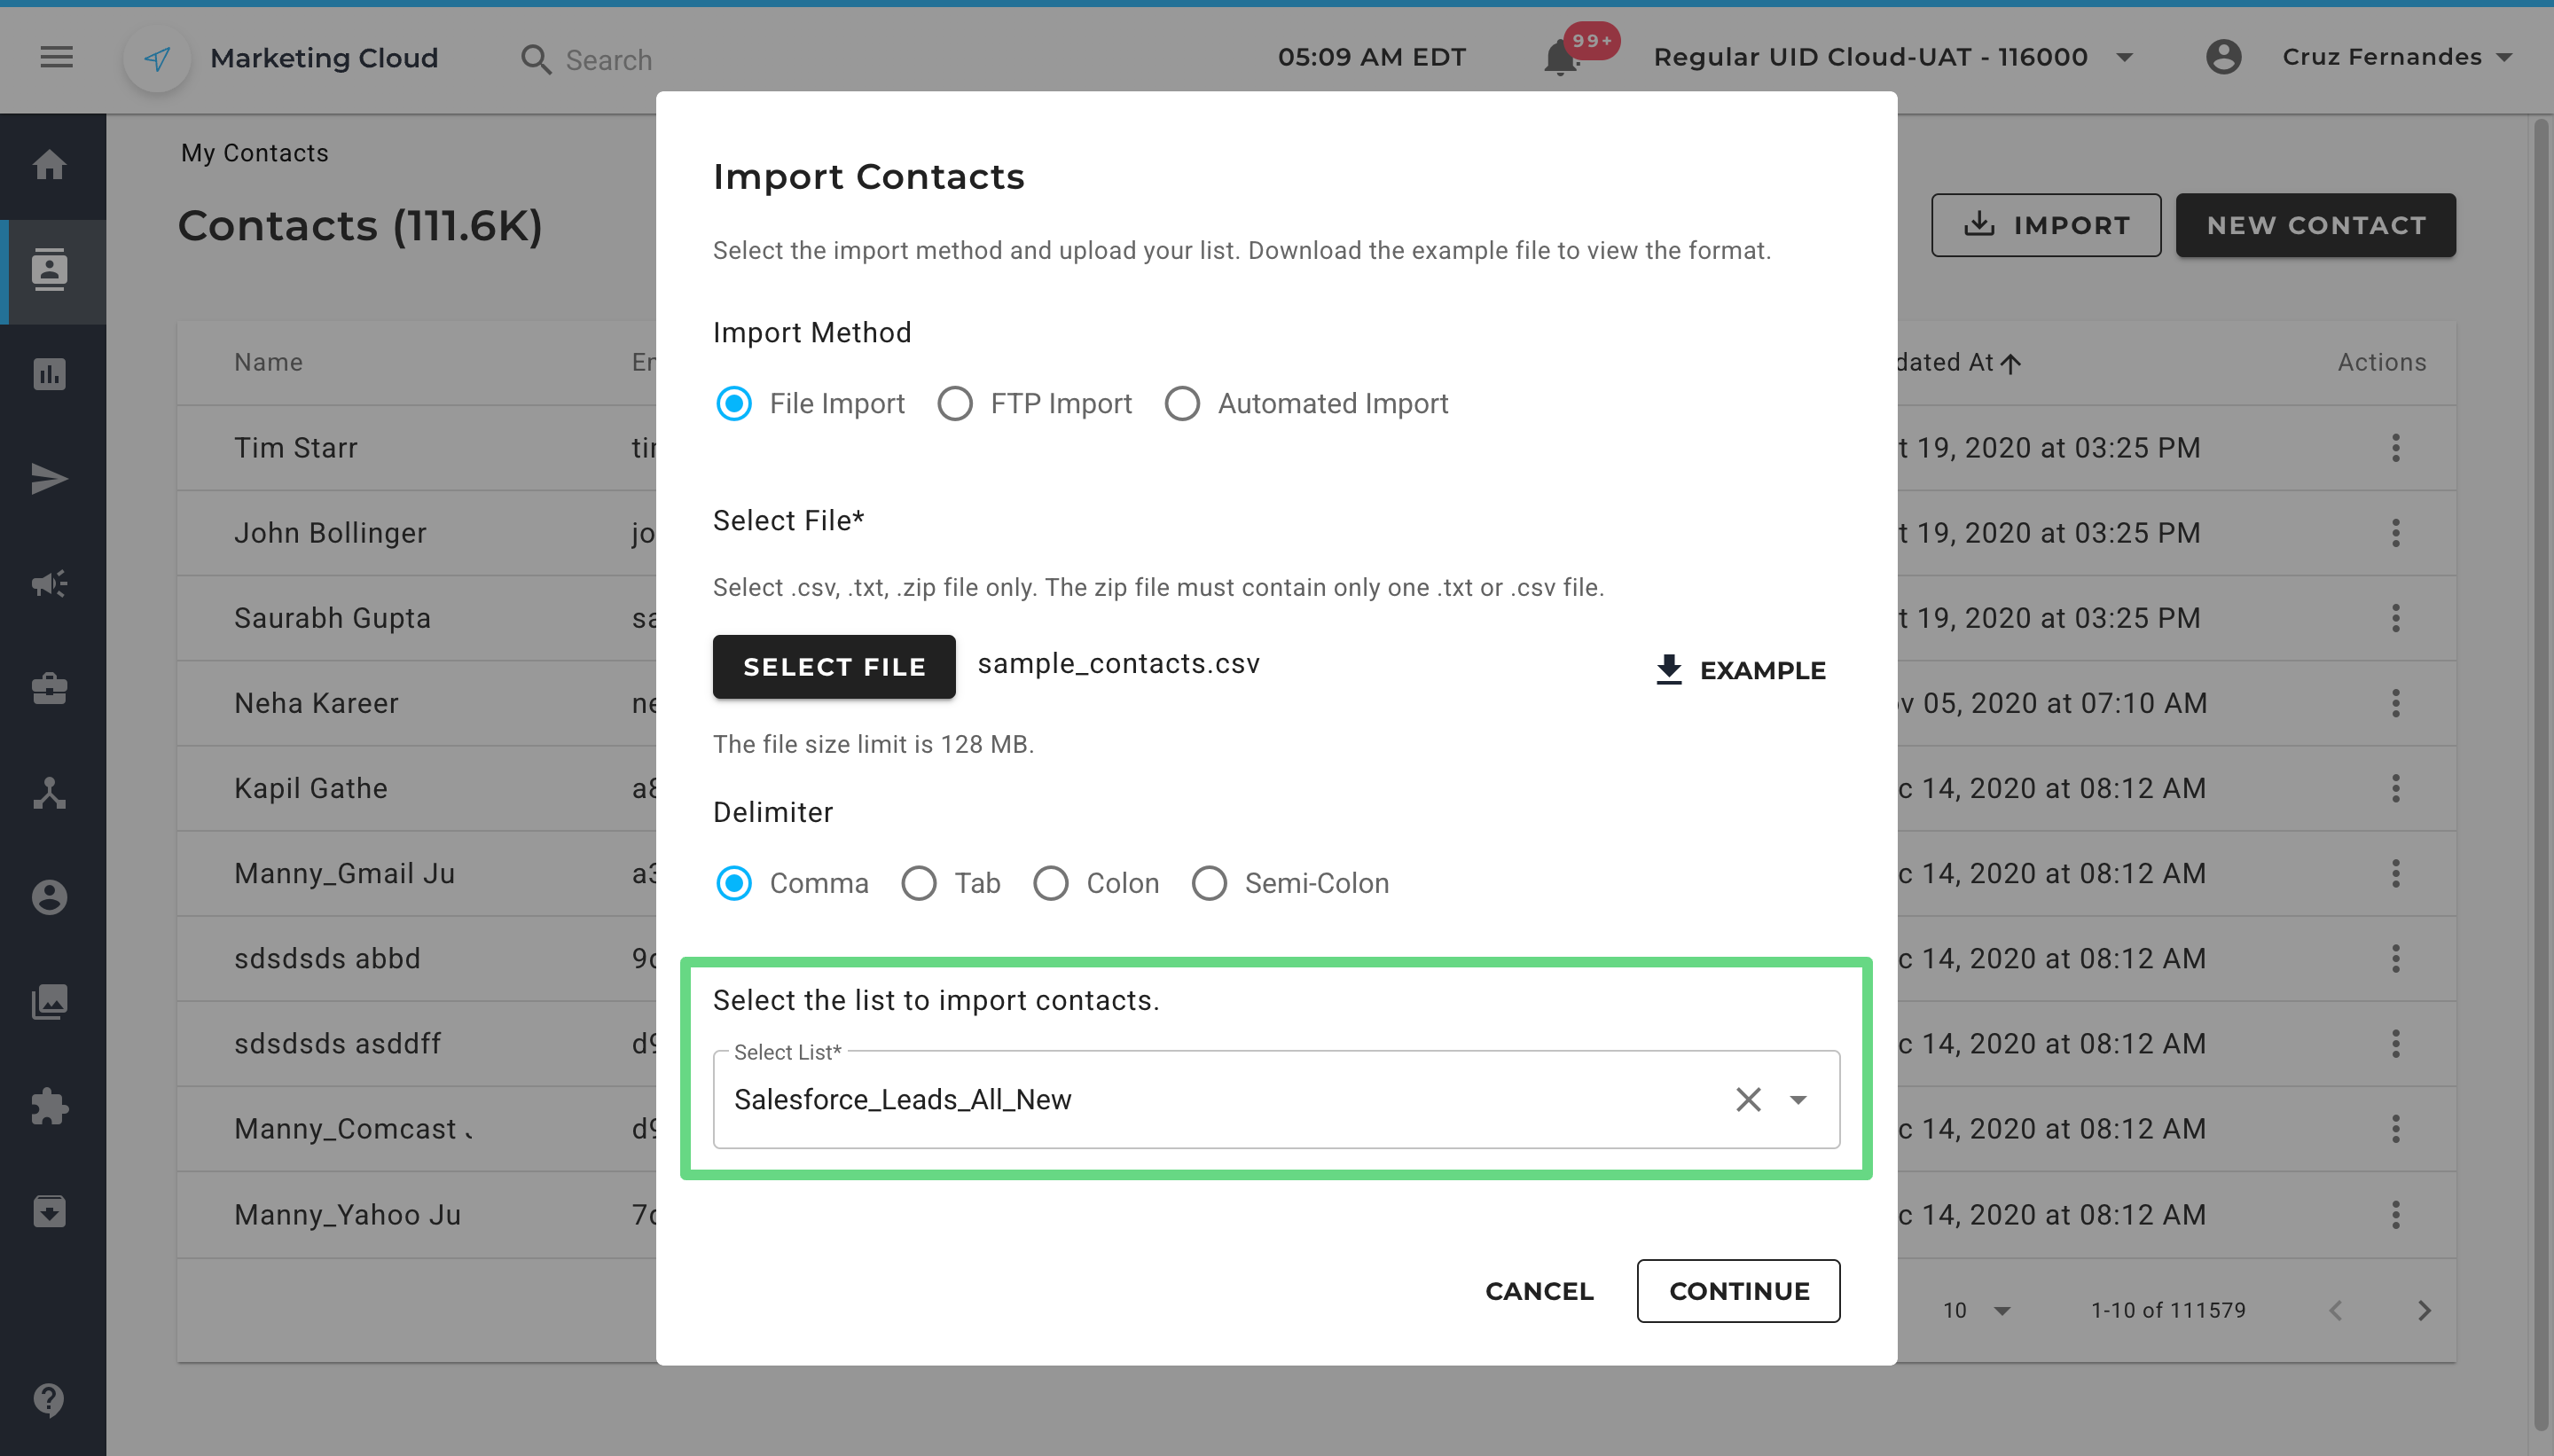
- However, please note that when importing contacts from the Contacts menu, the Import List dialog box will display an additional List field. Here, you must select the list into which the contact should be imported.
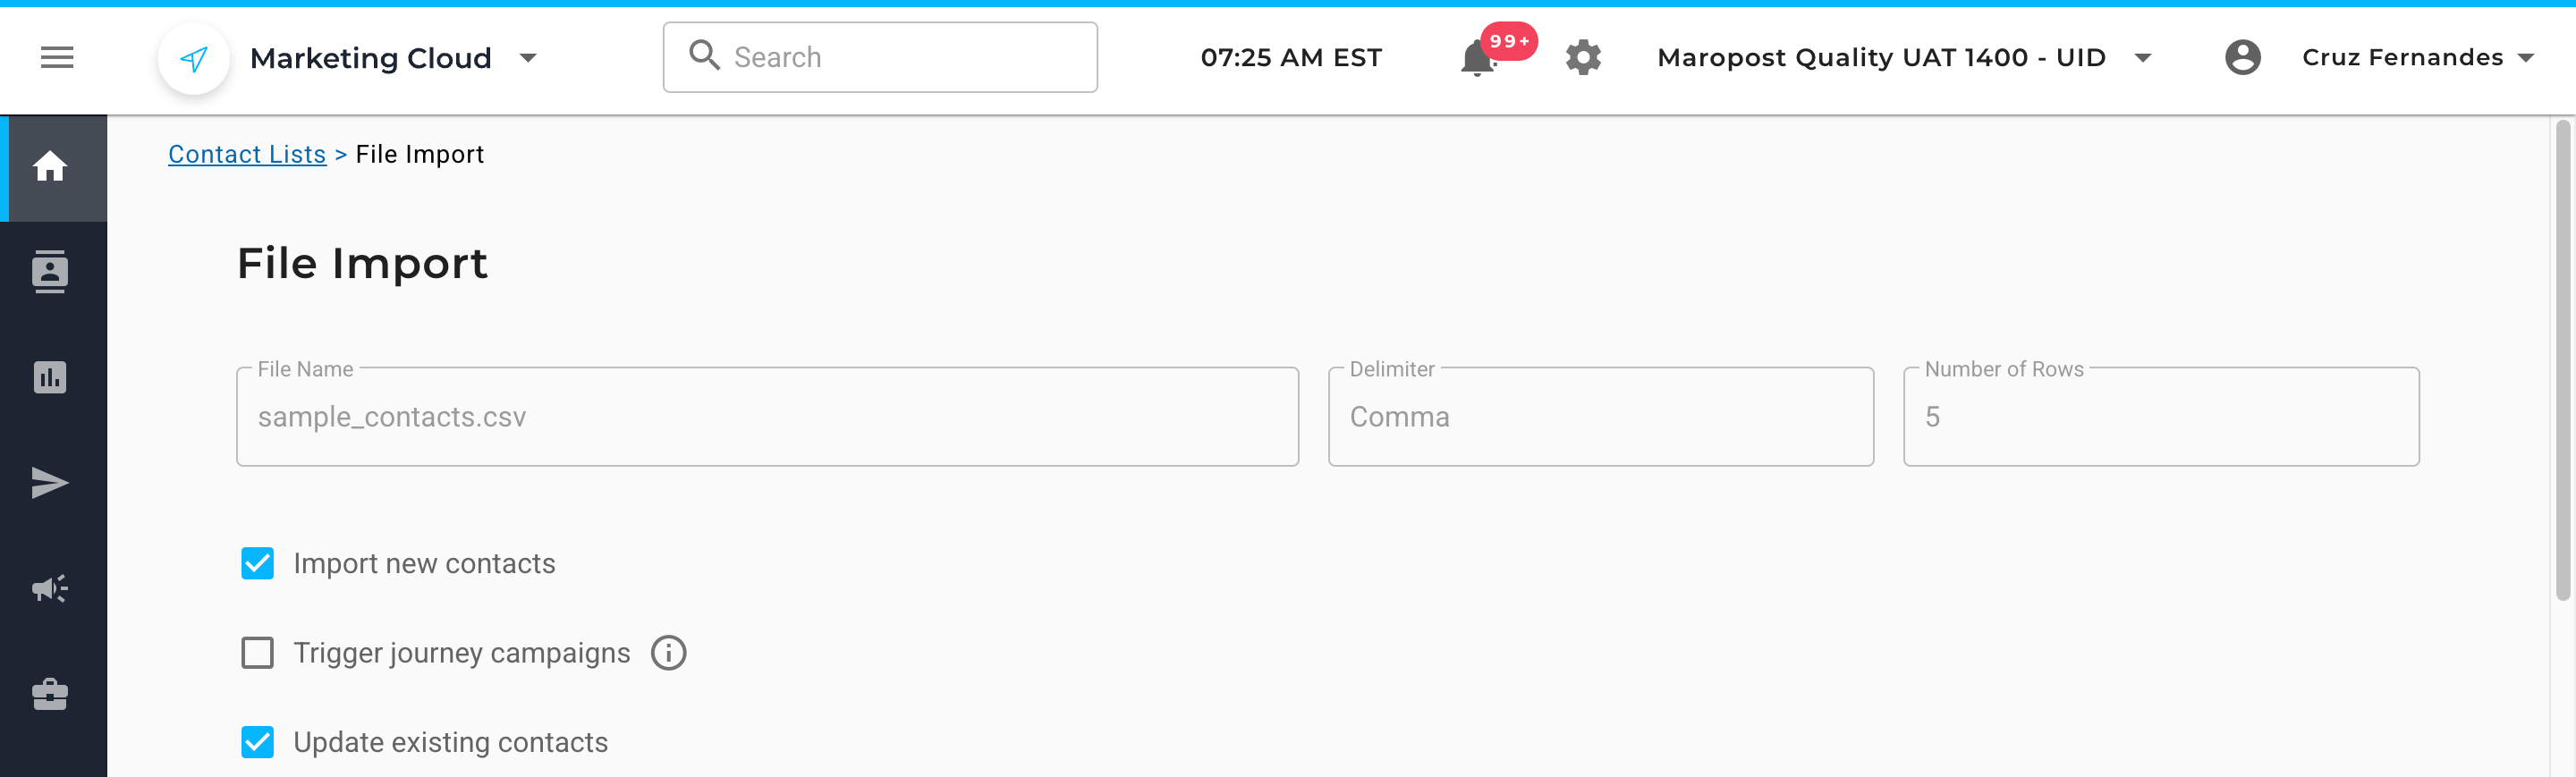
- On the File Import page, the system automatically fills in the uploaded file name, delimiter, and the number of rows/columns. Next, proceed to select the following checkboxes as applicable:
Import new contacts: This option imports new contacts only.
Trigger journey campaigns: This option triggers a new journey while onboarding new subscribers via a product purchase, surveys, newsletters, feedback forms, etc.
Update existing contacts: This option updates the information on existing contacts in a list.
- In the Mapping section, select the imported file’s default fields you wish to match with those currently registered in Marketing Cloud. The standard default fields include name, email, phone number, subscription status, contact tags, etc.

- If you are importing contacts directly from the Contacts menu, you can change the list by selecting a new one from the drop-down list. However, if you are importing a new batch of contacts from the Contact List section, the List Subscription field will be grayed out.

- Optionally, if you have designated a custom field for your contact records, then select the field’s name in your import file containing the member IDs, subscriber IDs, or any other type of profile IDs your internal system is using to uniquely identify each contact record. Once you have properly configured the basic details, contact fields, mappings, list subscription, and custom fields sections, click on Save.

- You can track the progress of the import by clicking on the notification icon. To view and download past imports, click on the See All tab under the notifications slider, which redirects you to the notifications page.
