Custom Row Categories streamline your email production workflow by enabling you to save and reuse proven email design elements across multiple campaigns. This helps maintain brand consistency while significantly reducing the time needed to create new emails, as marketing teams can build from their most effective templates rather than starting from scratch each time.
You can create reusable design templates that maintain your brand standards and proven layout patterns, which helps ensure consistent subscriber experiences while improving operational efficiency for your email marketing team.
Custom row categories, available in the Drag and Drop builder, are placeholders to store any customized row as a template that can be reused in the future.
You can create multiple custom row categories, and in each row category, you can save multiple row templates.
Creating and Managing Row Categories
The Custom Row Categories tab in the Drag and Drop builder shows all your existing custom row categories. The row templates saved in the categories are shown as collapsible rows, and a category with rows is indicated through an [arrow] icon.
On the Custom Row Categories tab, you can create a new category by entering a name and clicking Create. Here, you can also manage your category list by deleting the ones you don't need.

Saving a Row in a Row Category
Saving a row as a template is very simple. After you are done updating the properties of the row, do the following:
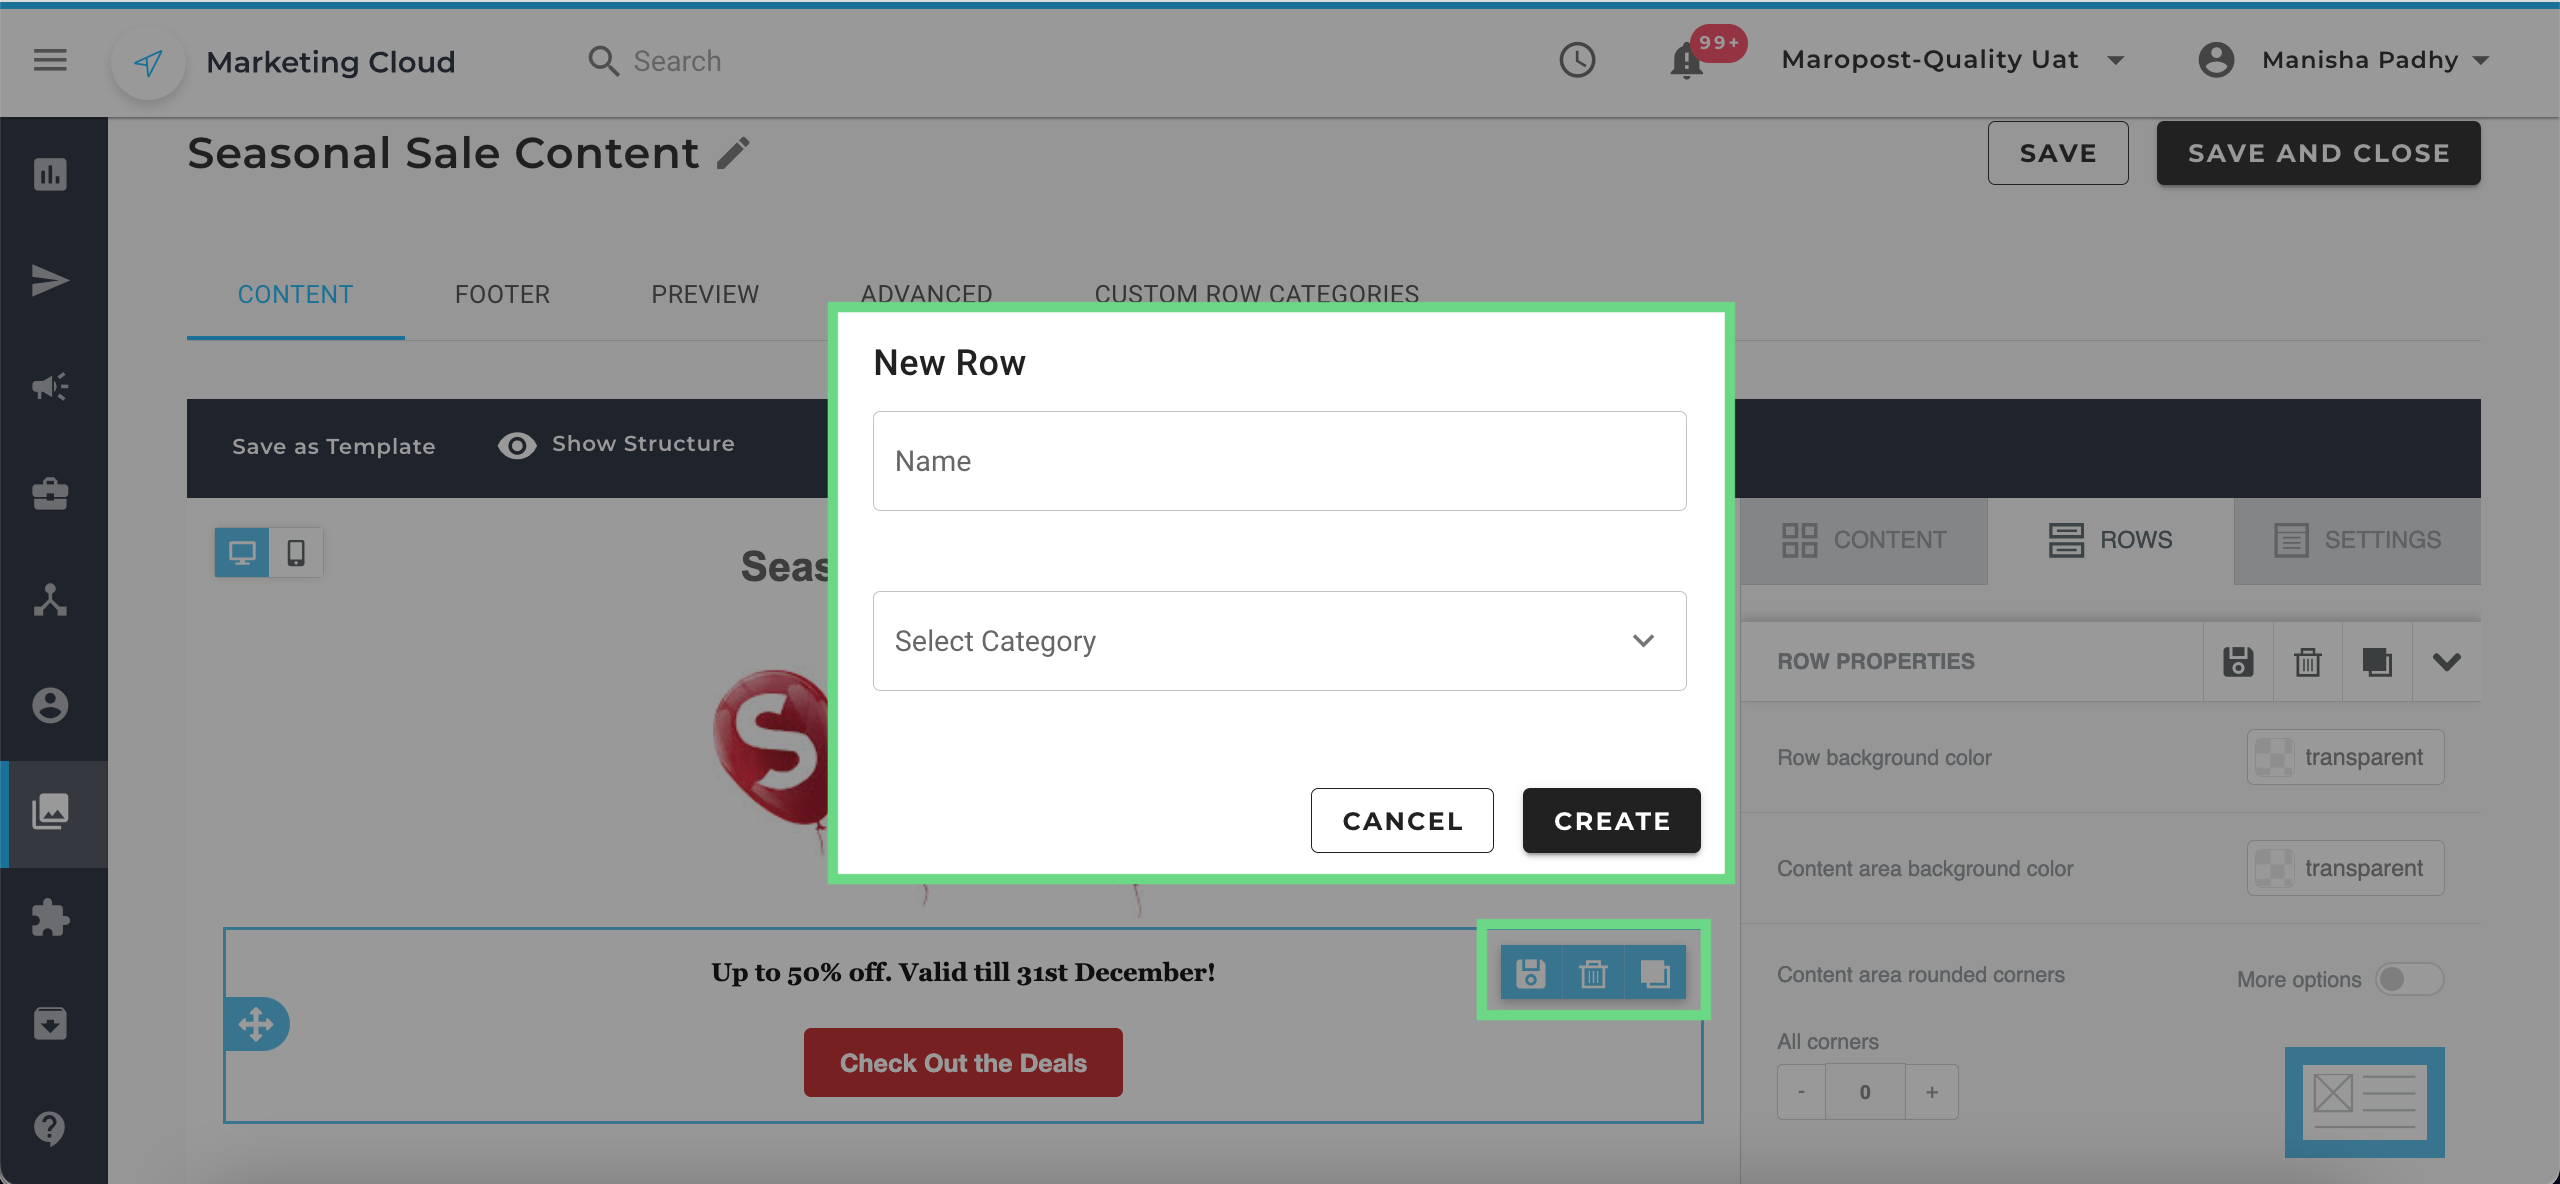
- Click the row to select it. On selection, you'll see the action menu icons: Save, Delete, and Duplicate.
- Click the Save icon. The New Row dialog box opens.
- In the New Row dialog box, enter a name for the row, select a category, and click Create.
Using a Row From a Custom Row Category
To use a saved row template from the custom row category, do the following:
- In the Content tab, go to the Rows subtab.
- From the drop-down list, select the custom row category in which you saved the row. All the rows available in the custom row category are shown.
- Drag and drop the row into the editing canvas. Optionally, you can edit the row after adding it to your canvas, as needed.
Related Articles
Content Creation & Design:
Advanced Features: