You can create product feed templates to deliver personalized product recommendations that significantly improve email engagement and drive e-commerce sales. This helps streamline campaign production by establishing reusable templates that automatically showcase relevant products to your customers, creating engaging email experiences that maintain brand consistency while reducing the time needed to build product-focused campaigns.
Product recommendation templates enable you to achieve better campaign results by delivering relevant product suggestions at scale, whether through dynamic feeds that update in real-time or carefully curated manual selections. This approach helps optimize your email marketing effectiveness by presenting the right products to the right customers at the right time.
A Product Feed Template is a pre-defined template created within certain parameters that can be reused in multiple emails to display product recommendations.
To create a product feed template, you use the product feed (that generates the product recommendations) and define the structure of the product recommendations with the help of layout styling and product catalog arrangement.
Creating a Product Feed Template
To create a product feed template, follow the steps shown below:
- From your MMC account, go to the Navigation panel, click on Content, and select Product Recommendations.

2. On the Product Recommendations page, go to the Product Feed Templates tab.

3. To create a new product recommendation, click on New Product Feed Template.

4. In the draft, first add a name for your product feed template.

5. Next, you’ll have two choices for adding products to your template. They are as follows:
- Product Feed: With the help of this option, you can automatically generate product recommendations based on the product feed you’ve created. Such templates created via product feeds are dynamic in nature, i.e., their product suggestion gets updated as per their features and is shown in real-time whenever a reader opens and views the email campaign. To learn how to create such data sources, read the Product Feeds article.
- Manual Selection: With this option, you can add items manually to the template that are present in the Marketing Cloud account. However, the recommendation created with manual selection is static, i.e., its attributes (product availability, price change, item variants, etc.) remain the same regardless of any reader that views the email campaign. To learn more about the products and how they are imported and stored in Marketing Cloud, read the Product Catalog article.

6. To automatically generate product recommendations, choose the Product Feed tab and select the feed from the drop-down list. Customize the template according to your preference and insert it in your journeys, abandoned cart emails, and campaigns. To learn more about adding product recommendation templates to your emails, read our Content Builders articles.

Note: If you have selected an abandoned cart as a product feed, you will need to add the contact’s email in the given field to generate the product recommendation for that particular user.

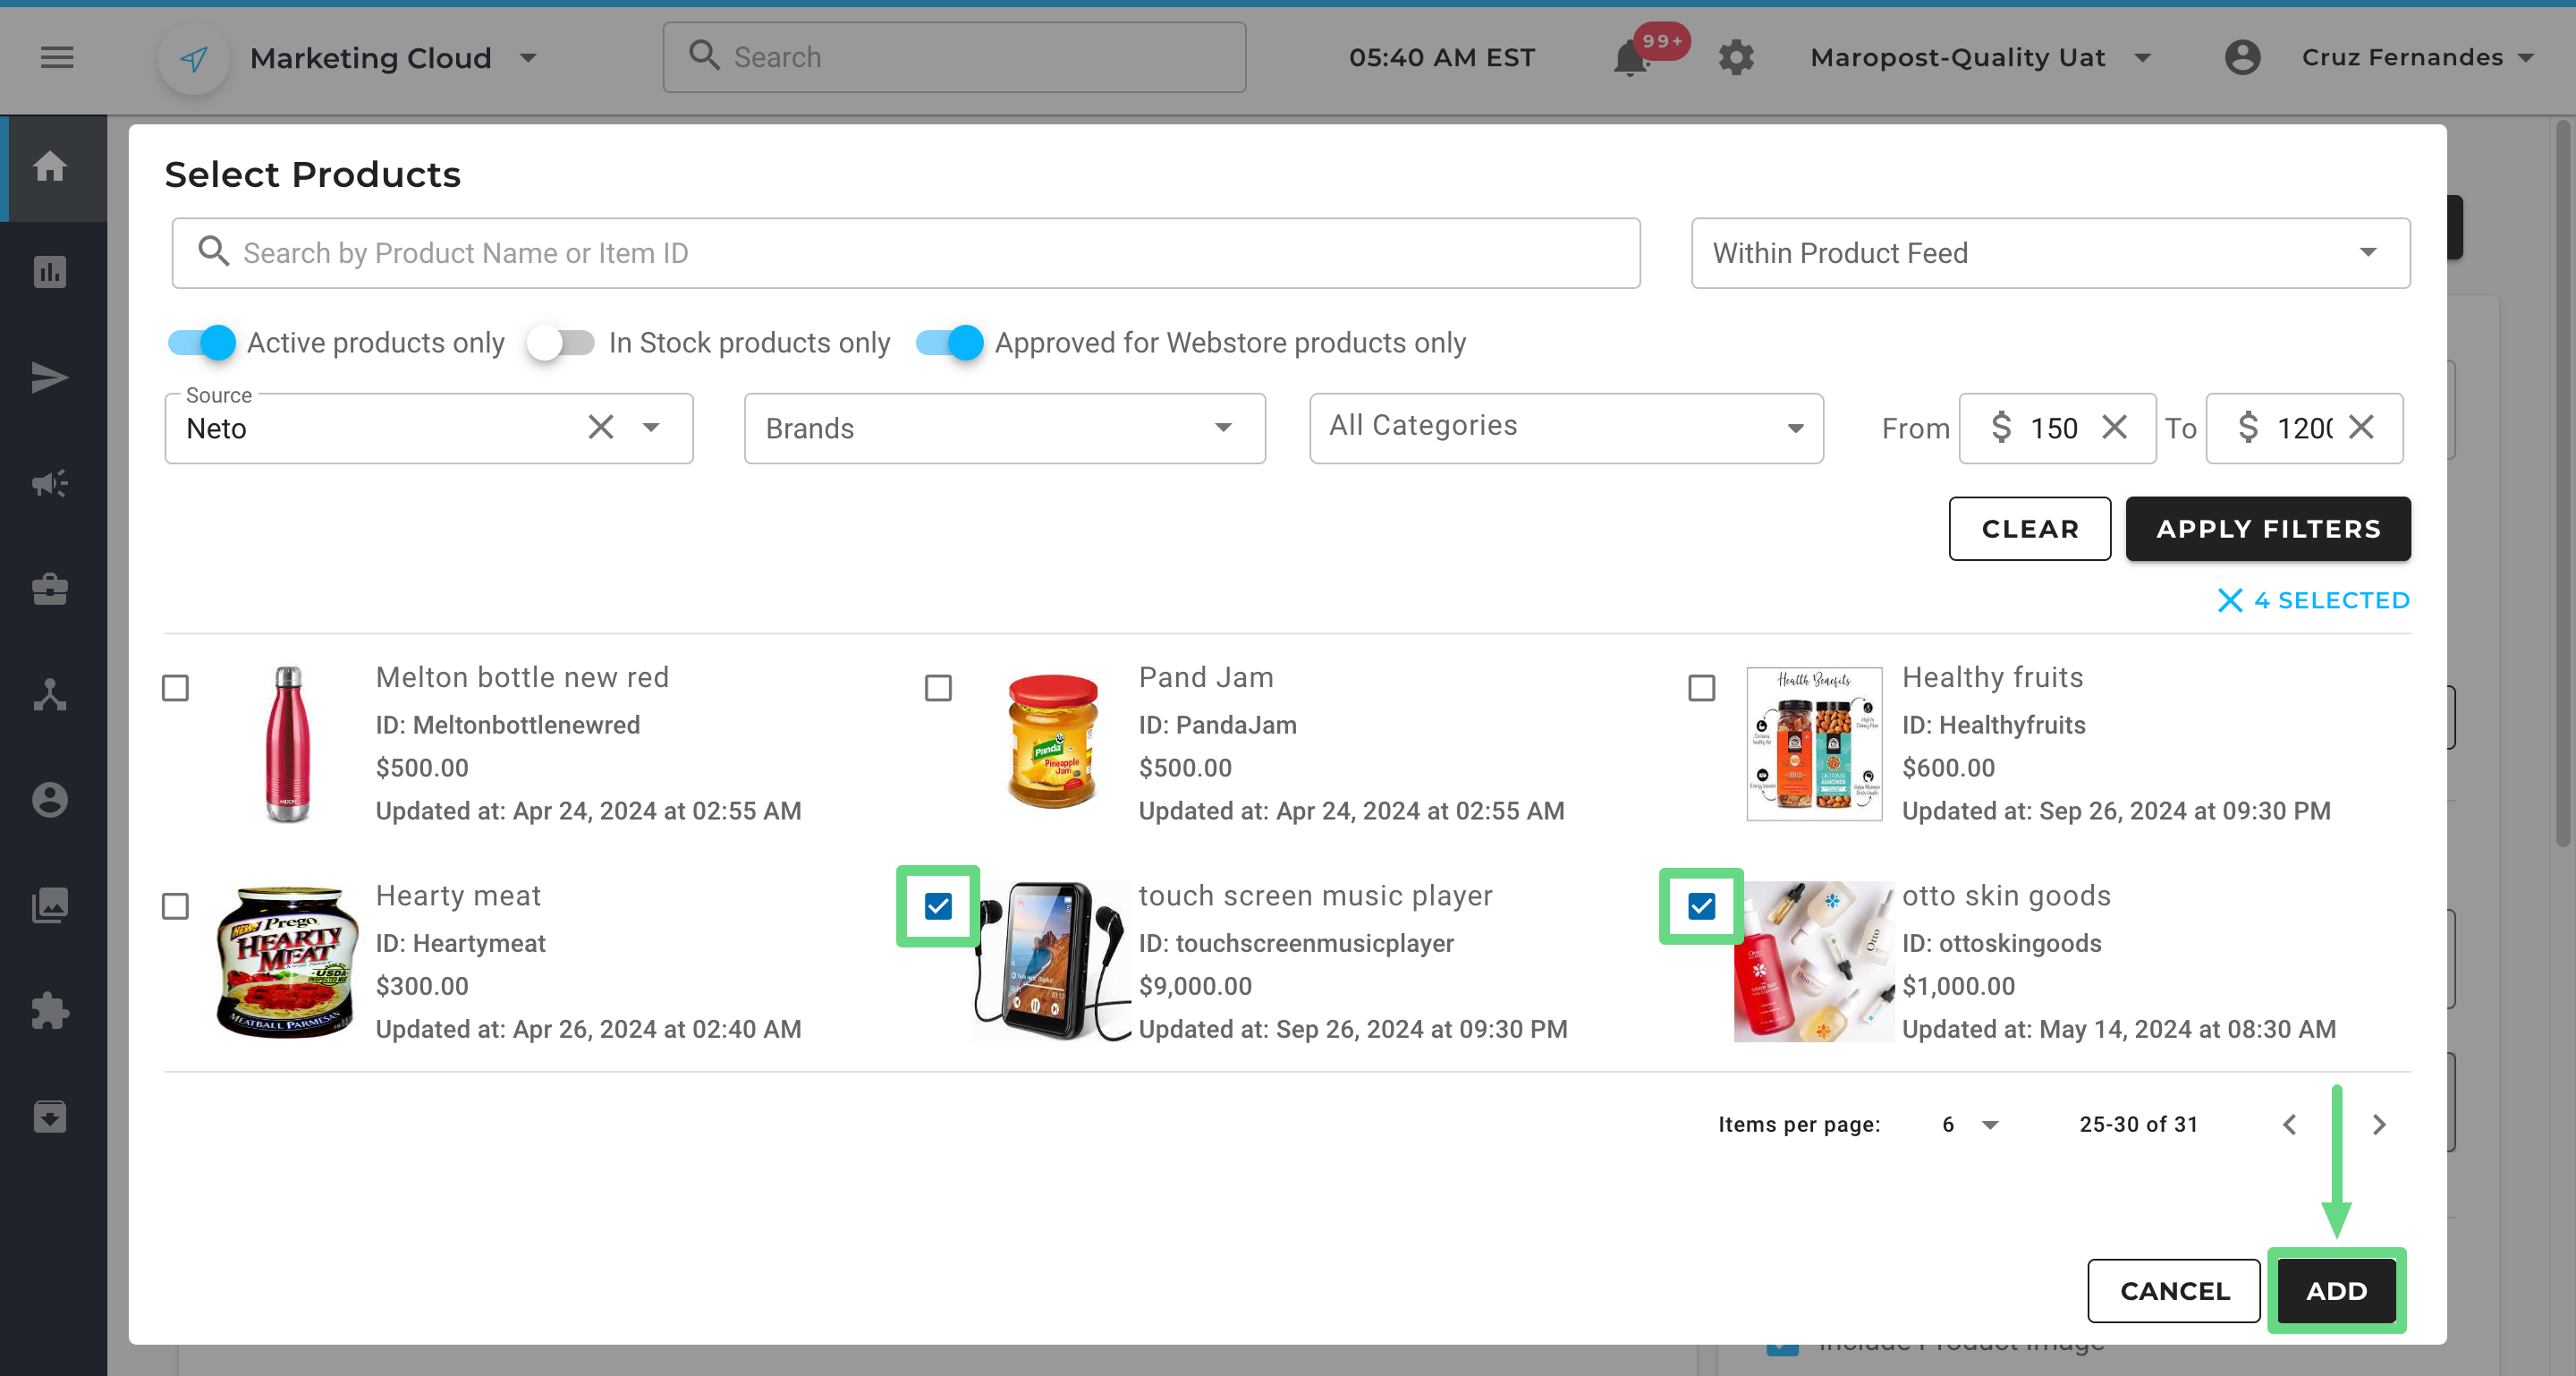
7. To manually add the items, choose the Manual Selection tab and click Add Products. A product selection dialog box will appear that you can use to pick and choose items for the template.

8. To begin with, search for a product by its name or Item ID. You can also add items from within the product feed. In order to create a product feed and acquire data from them, make sure to integrate your Marketing Cloud account with your third-party platforms such as Neto, Shopify, Keap, Retail Express, ClickBank, etc.

9. Now, select the product recommendation toggles to filter out the product listings. These recommendations are enabled by default. They are, namely:
- Active products only: This filter ensures that only products with an "Active" status are shown in the product listing, excluding any products marked as "Inactive" in the system.
- In Stock products only: This filter ensures that the listing only includes products currently available for purchase, excluding any items that are out of stock.
- Approved for Webstore products only: This filter includes products that meet specific guidelines for display on a particular webstore, ensuring the listings are limited to items approved for that platform.

10. Next, choose the integrated e-commerce platforms from the Source dropdown that will display the products. Additionally, select the Brands and Categories that are associated with the chosen platform. You can further narrow down the selection by including the pricing range of products that fall under the selected platform, brand, and category. Click on Apply Filters to see the results.

11. If you are satisfied with the filtered results, select the checkboxes next to the items and Add them to your template.

12. The chosen product catalogs are displayed in the template canvas region. Two preview modes (desktop/mobile) are available, along with an option to showcase or hide the product information in the template draft. For each item, there are two options: one is to edit the product name and the other is to delete it. The product can also be rearranged within the canvas region by dragging the product fields up or down the catalog list.

13. After this, use the Block Layout section to arrange your products in pre-defined rows and columns. The layout you choose here will be used to show the recommended products in the email campaign.

Note: You can have a maximum of three rows and a maximum of three columns, thus bringing the total number of products that can be displayed to 9.
14. In the Product Layout, choose whether you prefer to add the product image, name, price, and call to action button in the recommendation. By default, all the options are selected, and you can clear the checkbox if you wish to exclude some item information from your recommendations. Besides, in the Button Styling section, you can customize the button shown next to each recommended product:
- Text: Indicates the label of the button.
- Text Color: Indicates the color of the button label.
- Background Color: Indicates the color of the button.

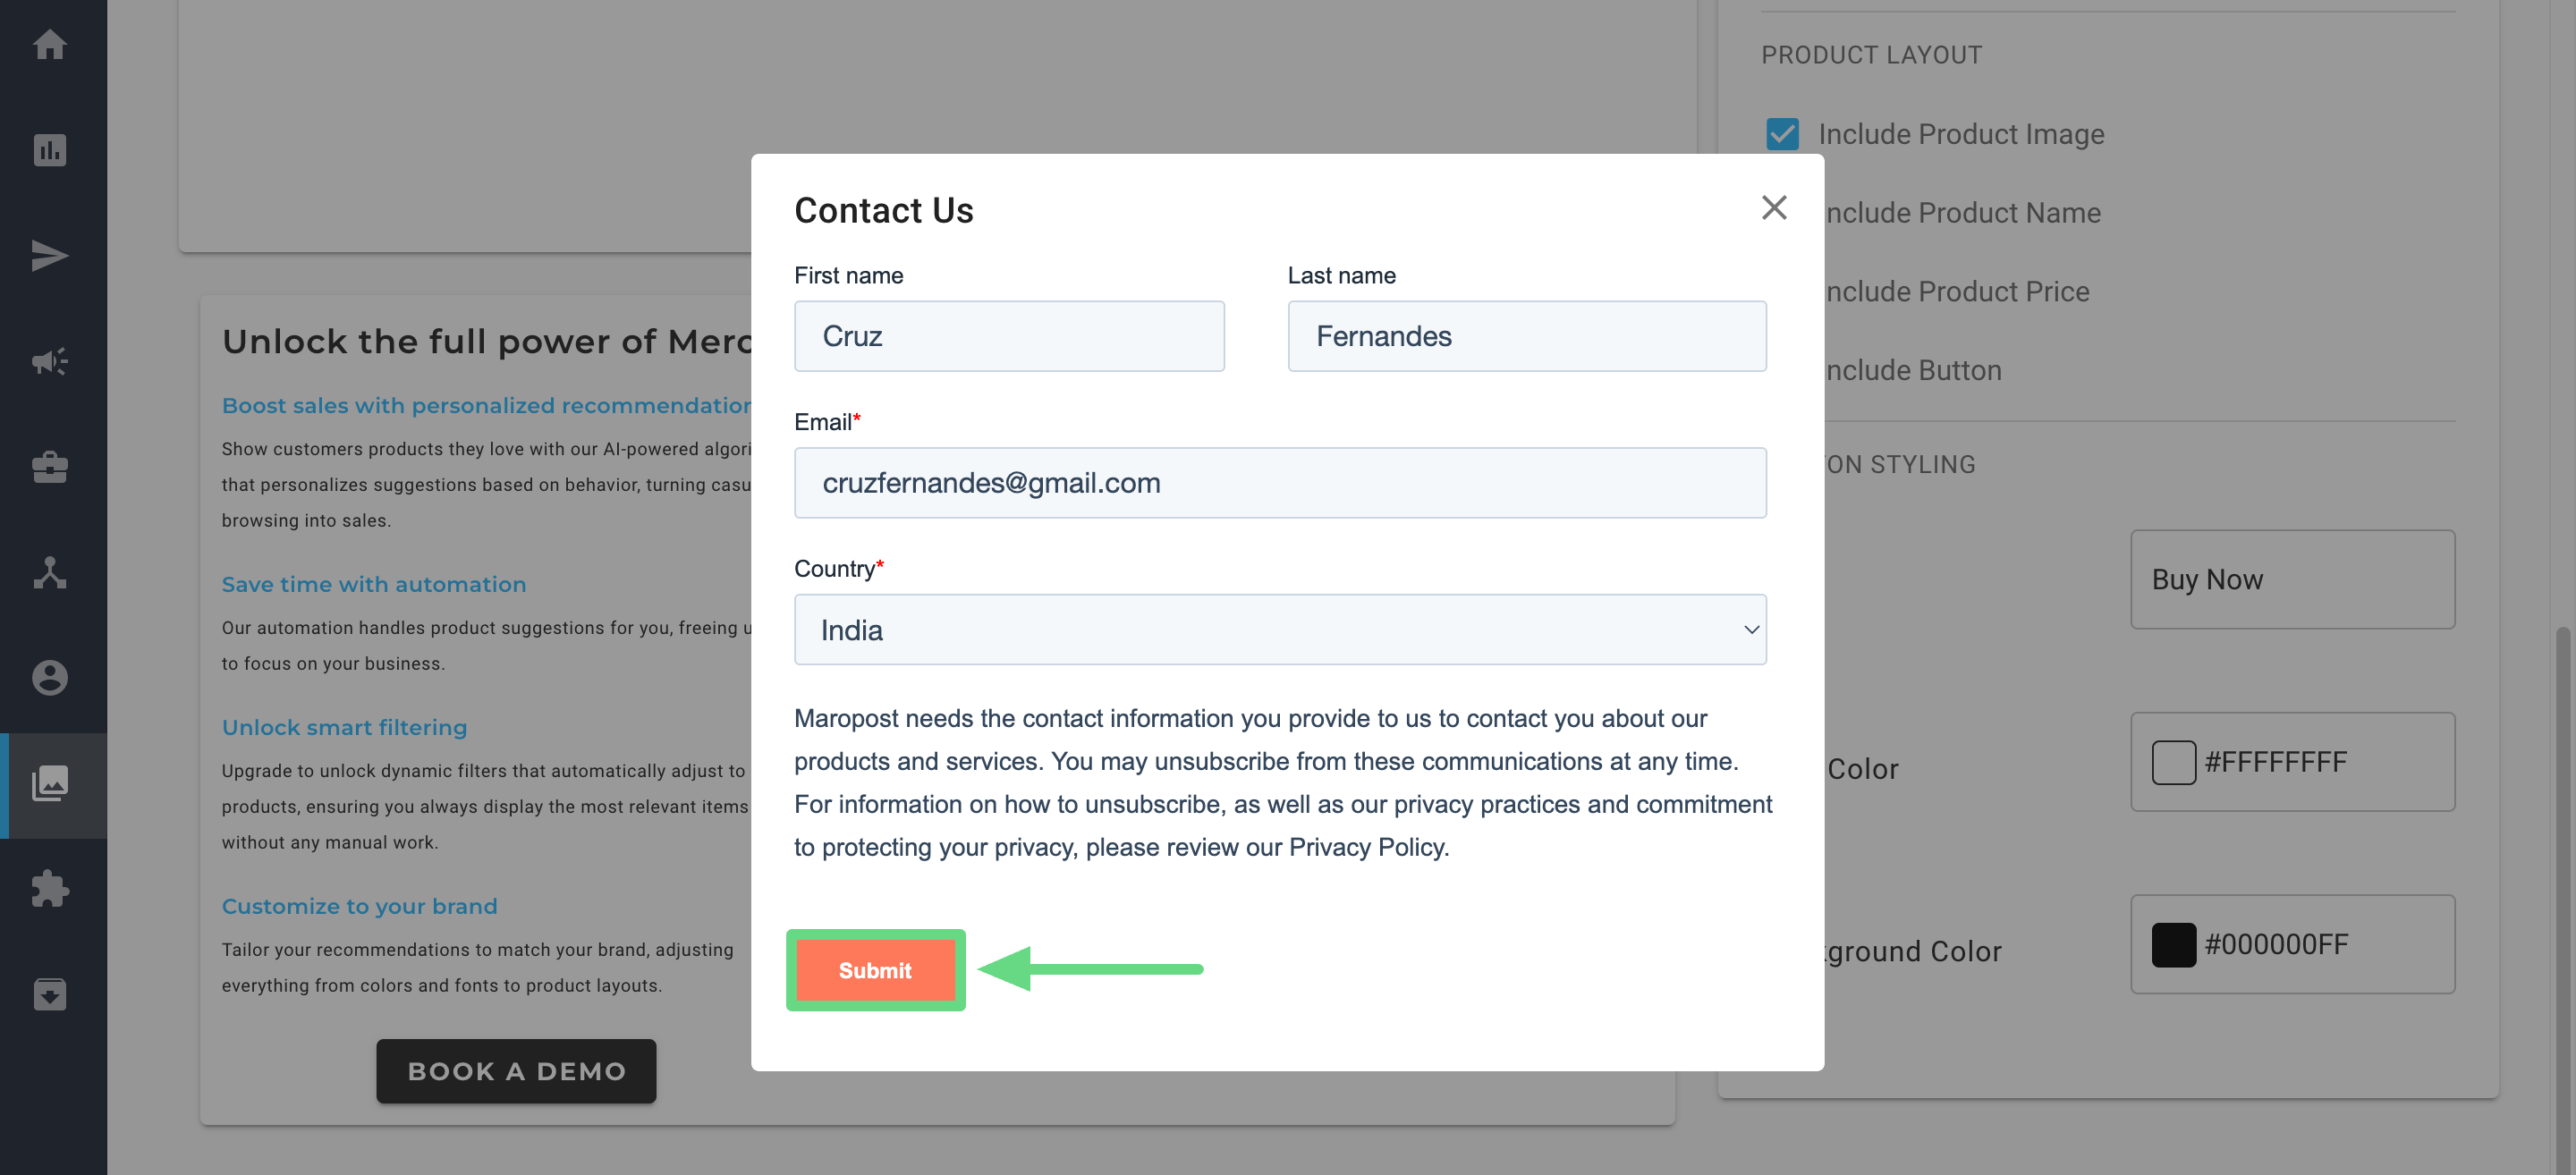
15. While developing your product recommendations, you can view an advanced recommendation panel at the bottom of the canvas, powered by Findify’s advanced algorithmic tools that highlight the benefits of product recommendations and showcase Findify’s versatile customization options. There is also a provision to book a demo with Findify by clicking on the ‘Book A Demo’ CTA (Call To Action) button.

16. Upon clicking the demo button, a dialog box appears prompting you to add your basic contact details. Enter your name (optional), email, and country of origin, and click on Submit. A demo request will be booked with Findify, and you’ll receive future updates from them henceforth.

17. Once you have finished preparing the recommendation, Save the changes made to the template.

This template can now be inserted and reused multiple times while you’re drafting an email campaign. To learn more about the different content editors available in Marketing Cloud, head over to our Content Builders: Overview article.
Related Articles
Content Creation & Design:
Advanced Product Features:
Campaign Implementation: