You can create relational tables to organize complex customer data beyond basic contact information, enabling more targeted email campaigns and personalized messaging. This helps optimize subscriber engagement by allowing you to segment contacts based on purchase history, preferences, or behavioral data that wouldn't fit in standard contact fields.
When properly configured, relational tables significantly improve your ability to send relevant content to the right audiences while maintaining data integrity through structured relationships between different types of customer information.
This article provides you the step-by-step instruction on how to create a relational table.
For learning about relational tables, see Introduction to Relational Tables.
Perform the following steps to create a new relational table:
- In Navigation, go to AUDIENCE, and select Relational Tables. On the Relational Tables index page, click the New Table button.
- On the Relational Tables index page, click the NEW TABLE button.
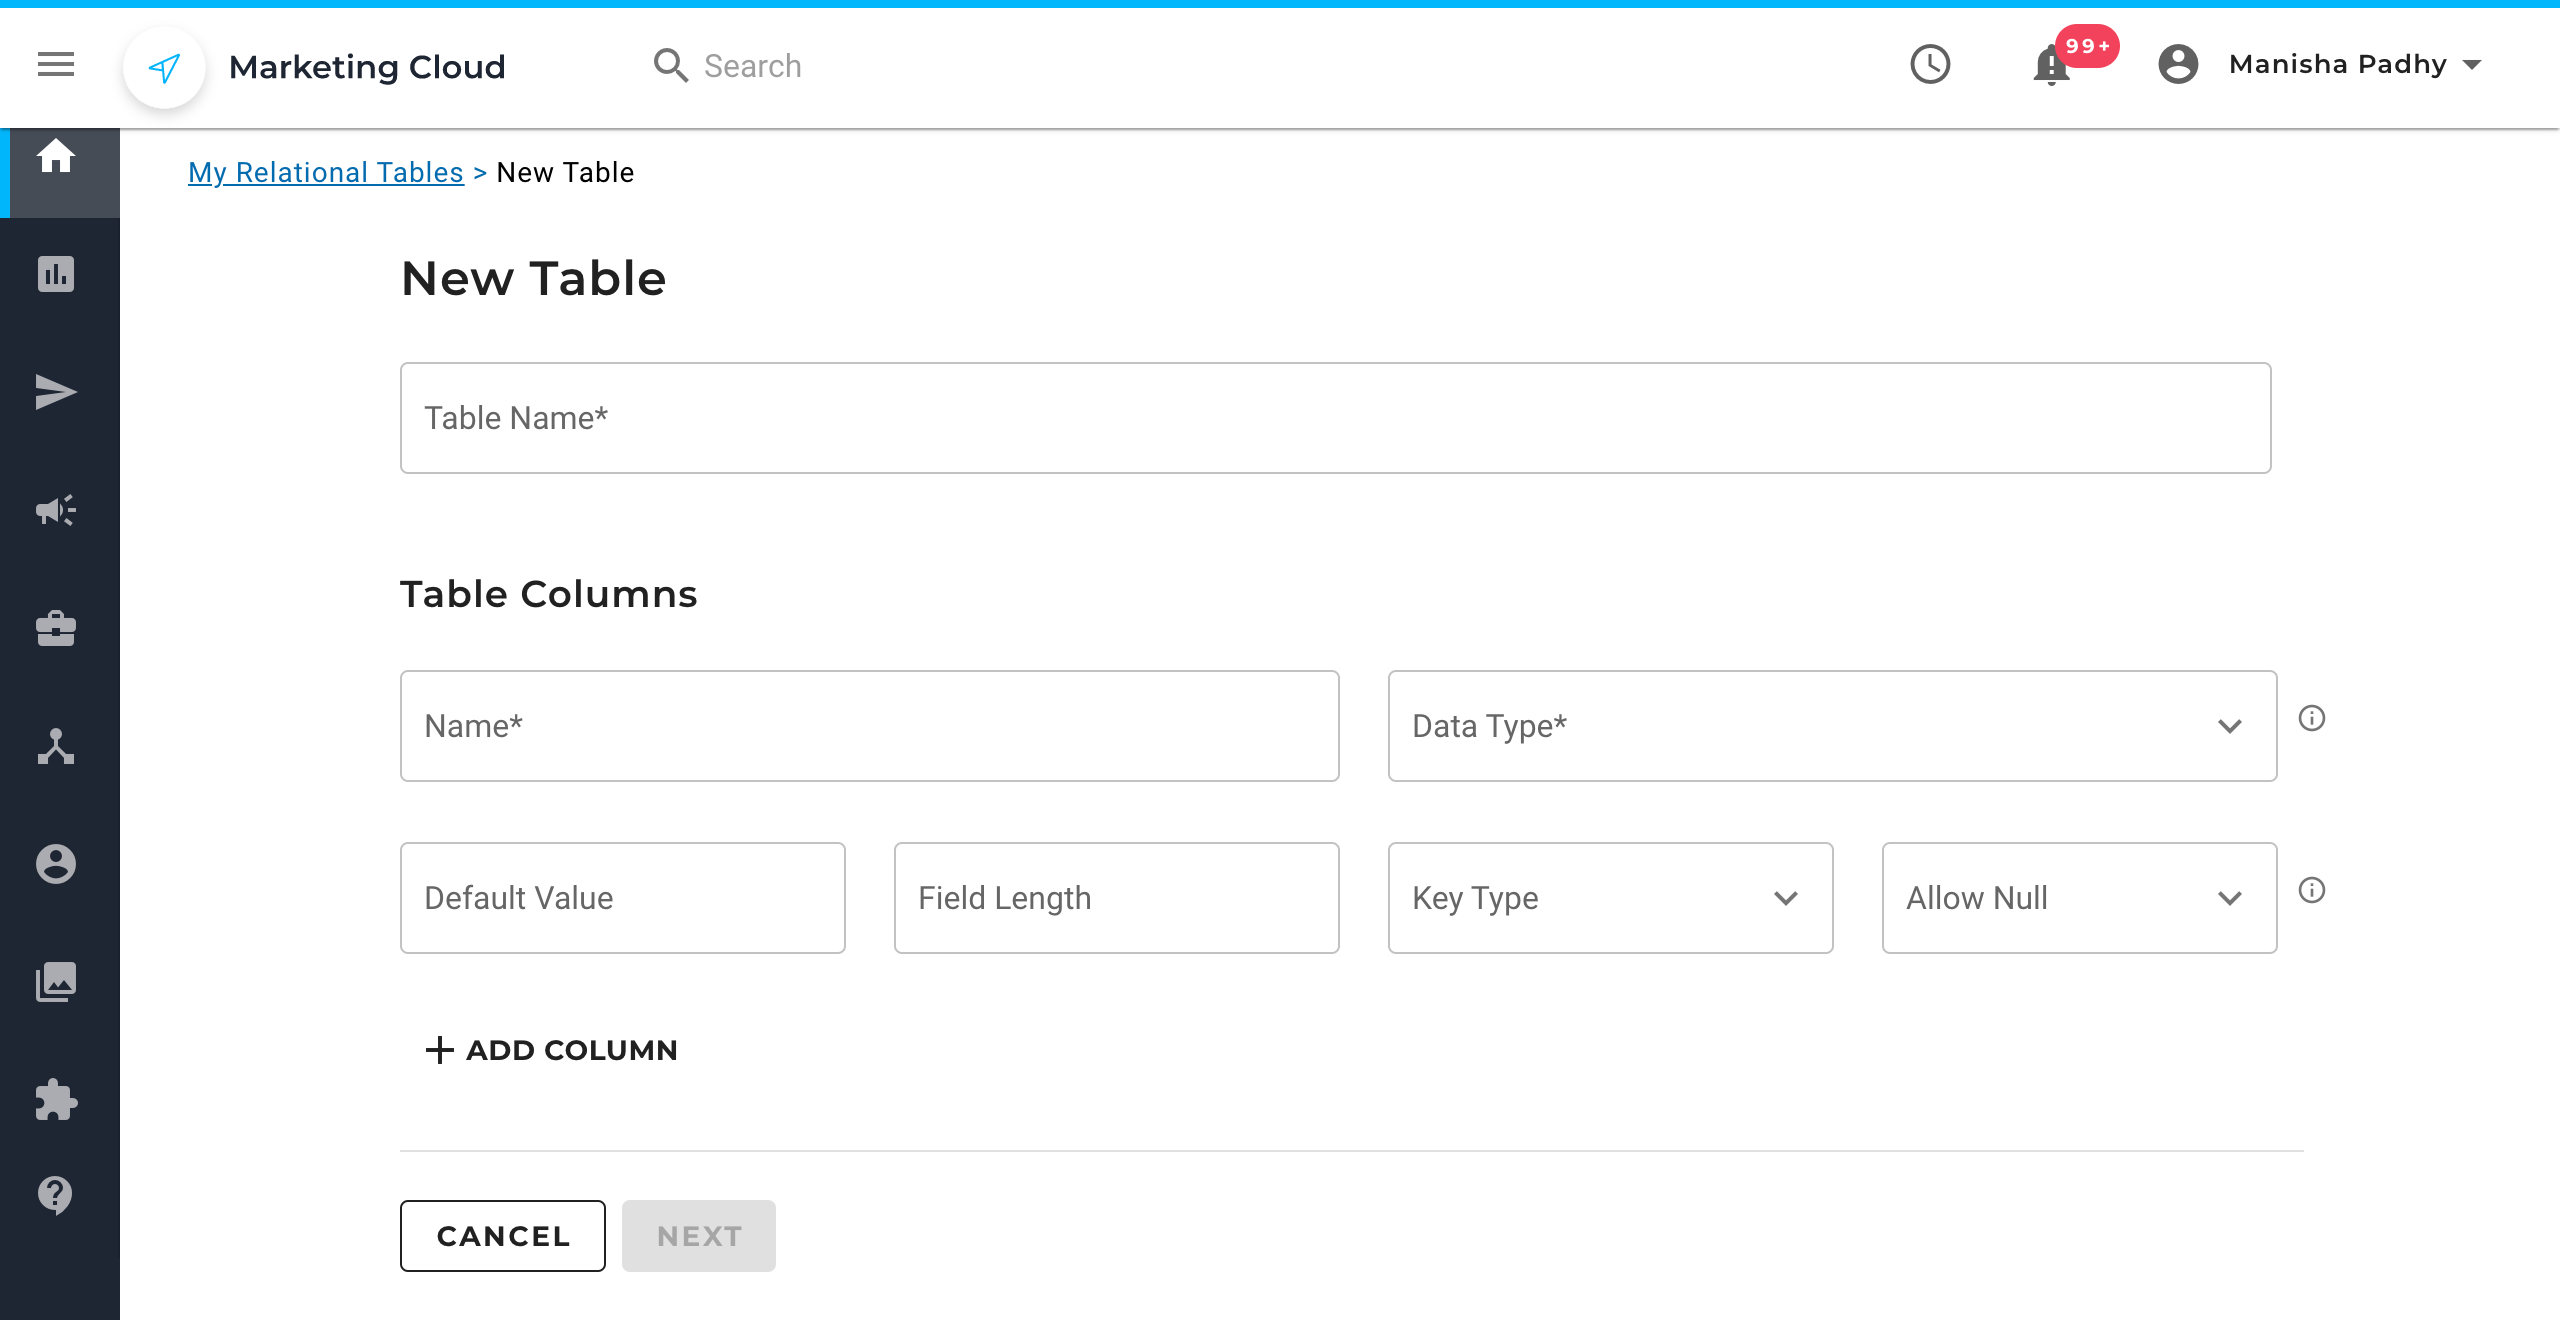
On the New Table page, enter a name for the relational table.
Note: You must only use lowercase letters, numbers, and underscores in the table name. If you include ANY capital letters, spaces, or special characters in the name, you will receive a SQL error. You’ll notice that if you use a capital letter in the table name, you will still be able to create the table, but will receive an error when attempting to load data into it.
For example,
My Table – not allowed
My_Table – not allowed
my_table – not allowed

- In Table Columns, enter a name for the column.
- In the Data Type field, select the type of data the column will hold. The following data types are supported:
- String: A sequence of up to 255 characters.
- Text: A String data type up to 65535 characters.
- Integer: A whole number, which can be positive, negative, or zeroes up to 11 digits.
- Bigint: An integer data type of up to 20 digits.
- Boolean: Also known as true or false. The values are stored in the relational table as 1 and 0 indicating true and false respectively.
- DateTime: Data in the date/time format.
- Email: Data type to store the email address of the contact. It is only one of two data types that can be set as 'Sendable' for tables.
- UID: If you have specified a custom field to be the unique identifier of your contact records, then this data type will appear in this list. This is the other of the two data types that can be set as 'Sendable' for tables.
6. In the Default Value field, enter a default value for the column. The default value depends upon the data type selected. The column can also be kept blank.
7. In the Field Length field, enter the field length. Set the maximum value allowed in the column, keeping in mind that there is already a maximum value set for every data type at the backend which cannot be exceeded.
8. Select the Key Type as None, Index, or Unique.
9. In Allow Null field, select whether the column accepts blank data. Empty data can be imported if the column has been set to allow Null.
10. You can add more columns to the table by clicking ADD COLUMN icon and repeating steps 4 through 8.
11. Click NEXT to set up the table options.
12. In Table Setup, you can define the following options for the table:
- Primary Key: A uniquely identifying constraint for each record in the database. It should contain unique values. The primary key cannot contain a null value. A table can only have one primary key.
- Auto-Increment: Automated process to increase the value for the column.
- Sendable: Indicates how you set the relationship between the contact in a table and the contact that is in the contact database. By default, the email address stored in the field with data type 'Email' and the 'Sendable' option selected is used to define the relationship. If you wish to send an email to a contact that is stored within a relational table, then that contact’s email address must also exist in your contact database. If you have defined a unique identifier (for example, member ID, customer ID, and so on) for your contacts, you can set the field with data type 'UID' and the 'Sendable' option selected instead. When you do this, then the contact stored in the relational table will receive an email if there is a record in the contact database with the same unique identifier.

13. Click SAVE.
Related Articles
Relational Data Management:
Contact Data Integration: