Multi-Factor Authentication (MFA) is a security procedure that uses more than one form of authentication to verify a user. It provides an additional security layer beyond a username and password, thus reducing the risk of security breaches.
Multi-factor authentication has become a standard practice across various online systems, including Net Banking, iCloud, and business-approved CRMs. The term “Multi-Factor” refers to a multi-step account verification process in which the user is required to provide additional information beyond their usual login credentials.
To log in to their Marketing Cloud accounts, users must first provide their username and password (1st-factor authentication), followed by a verification code sent to their mobile via a security app (2nd-factor authentication).
To summarize, the key benefits of Multi-Factor Authentication (MFA) are as follows:
- MFA protects against common threats, like identity theft.
- MFA lowers the risk of passwords being compromised.
- MFA can help prevent unauthorized individuals from accessing a company’s confidential data.
- MFA strengthens a company’s overall IT cloud security.
How to Log In
Below are the steps to initiate multi-factor authentication:
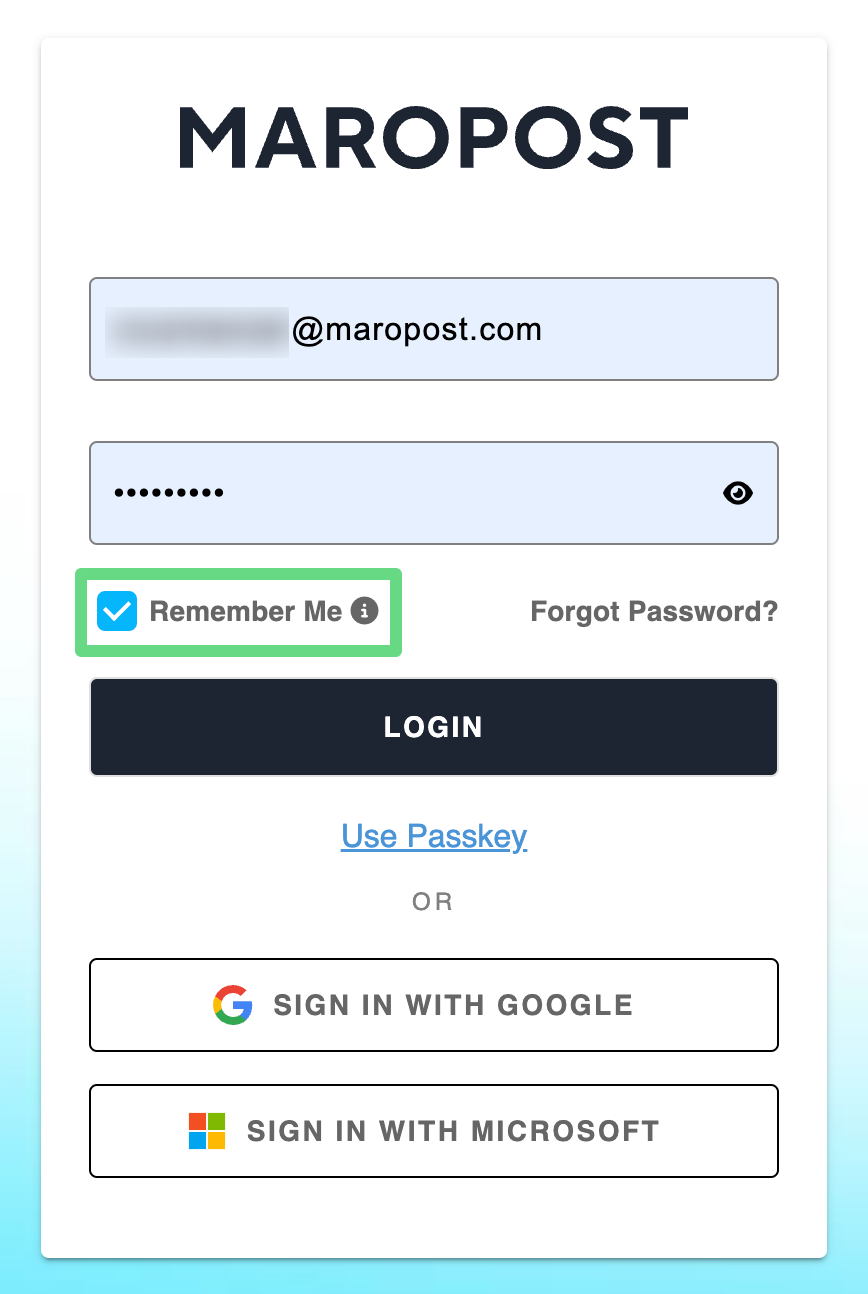
1. On the login page, enter your current Marketing Cloud credentials.
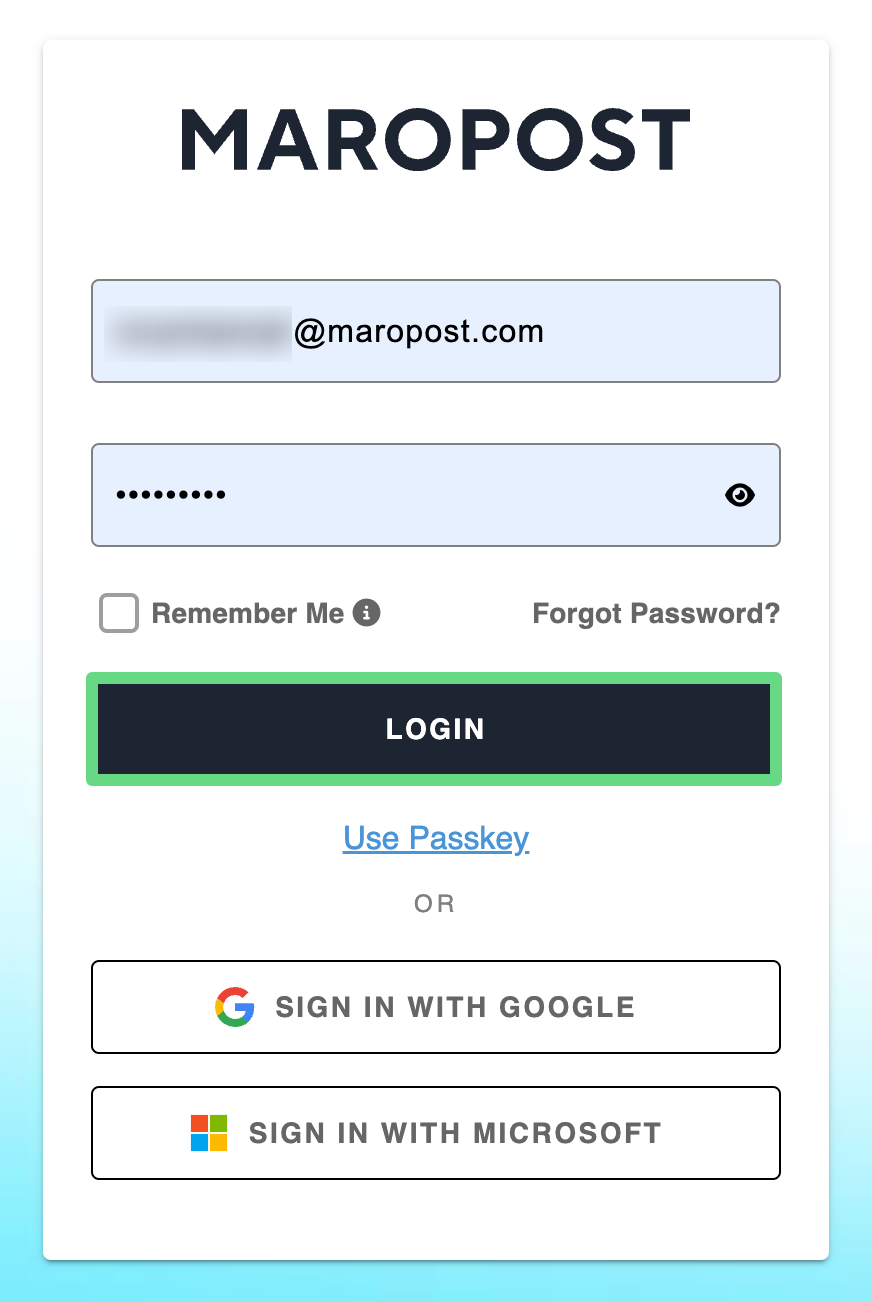
Tip: To save your session even after you close the browser, select the “Remember Me” checkbox before logging in. Bear in mind that it saves your session only if you have directly logged in through your authenticator apps.
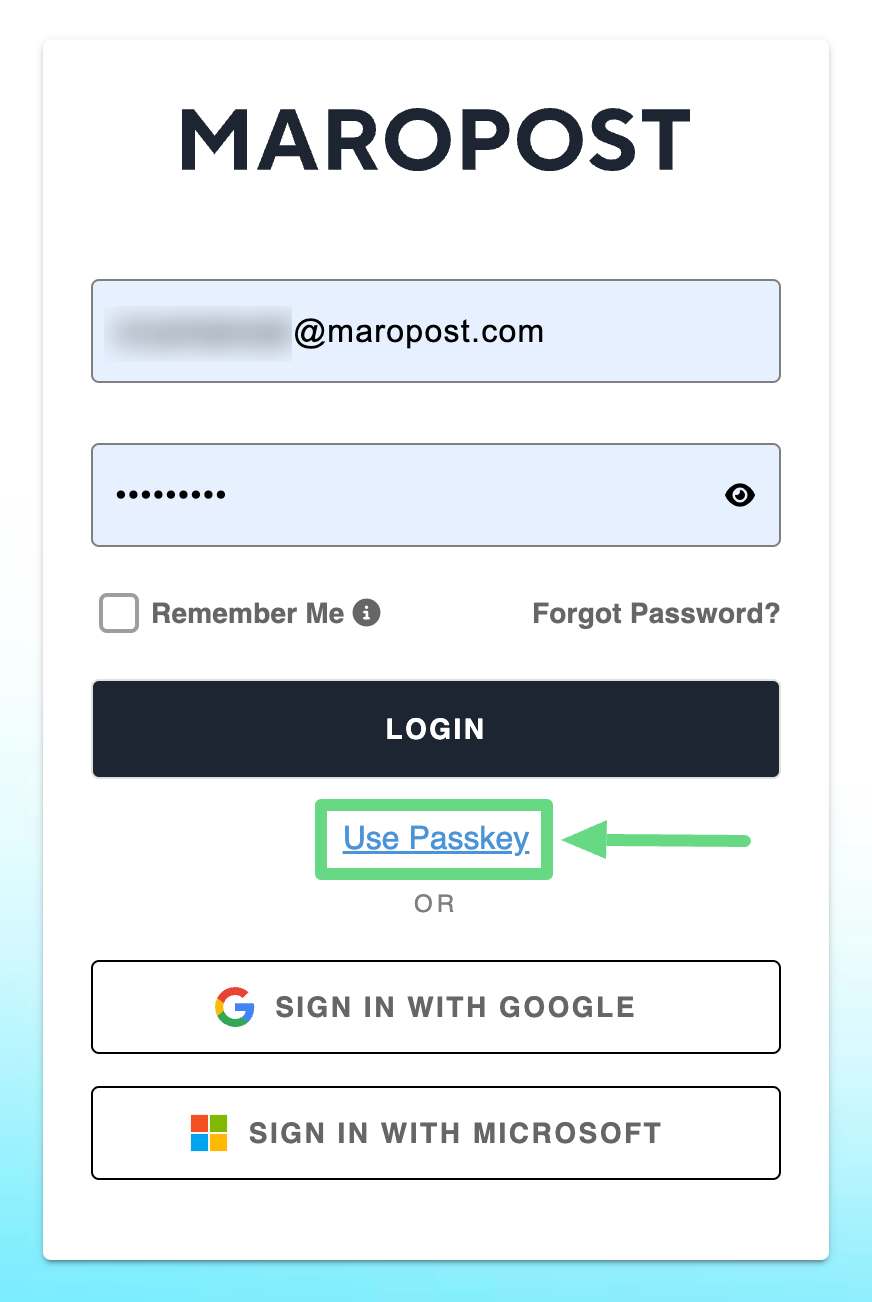
2. If you wish to log in without an account credential, avail the passkey option by clicking on the “Use Passkey” link. To learn more about this alternative login method, read our Passkey Authentication (For macOS Users) and Passkey Authentication (For Microsoft Windows Users) articles.
3. If you are logging in for the first time, you have to perform the following steps:
a. After inserting your account credentials, you will receive an MFA one-time password (OTP) via SMS or an MS, Authy, or Google Authenticator security app. These OTP screens only appear to you once while you’re logging in for the very first time.
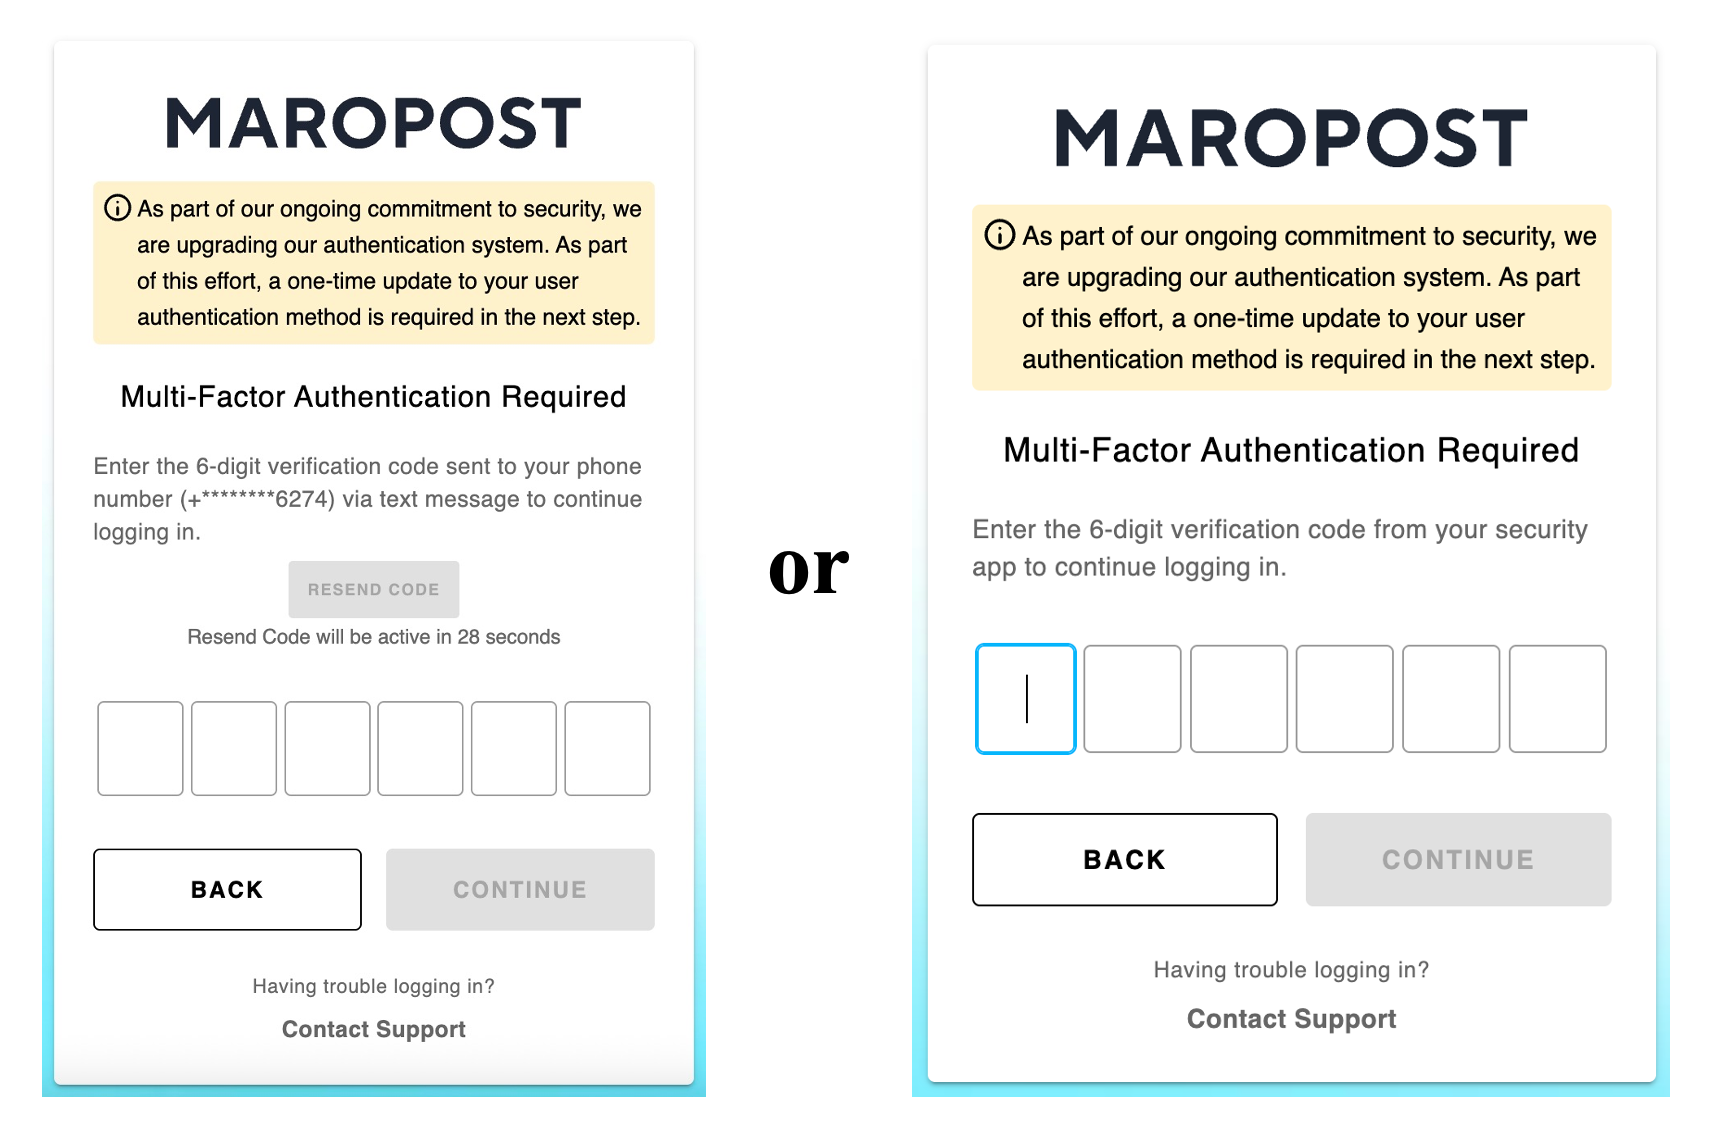
Note: For SMS-based OTP verification, you can try resending the code three times. After you have exhausted all attempts to resend the code, you will need to restart the login process.
b. Upon entering a valid MFA OTP, you will be redirected to an MFA setup page where you’ll have to scan the QR code (displayed on the page) through an MS, Authy, or Google Authenticator app (iOS or Android version). To directly scan the QR code from your laptop or PC desktop, utilize the Authenticator extension from the Chrome Web Store. After scanning the QR code, select Continue to proceed further.

c. Next, enter a six-digit verification code sent to your mobile (via the security app) and submit the code.
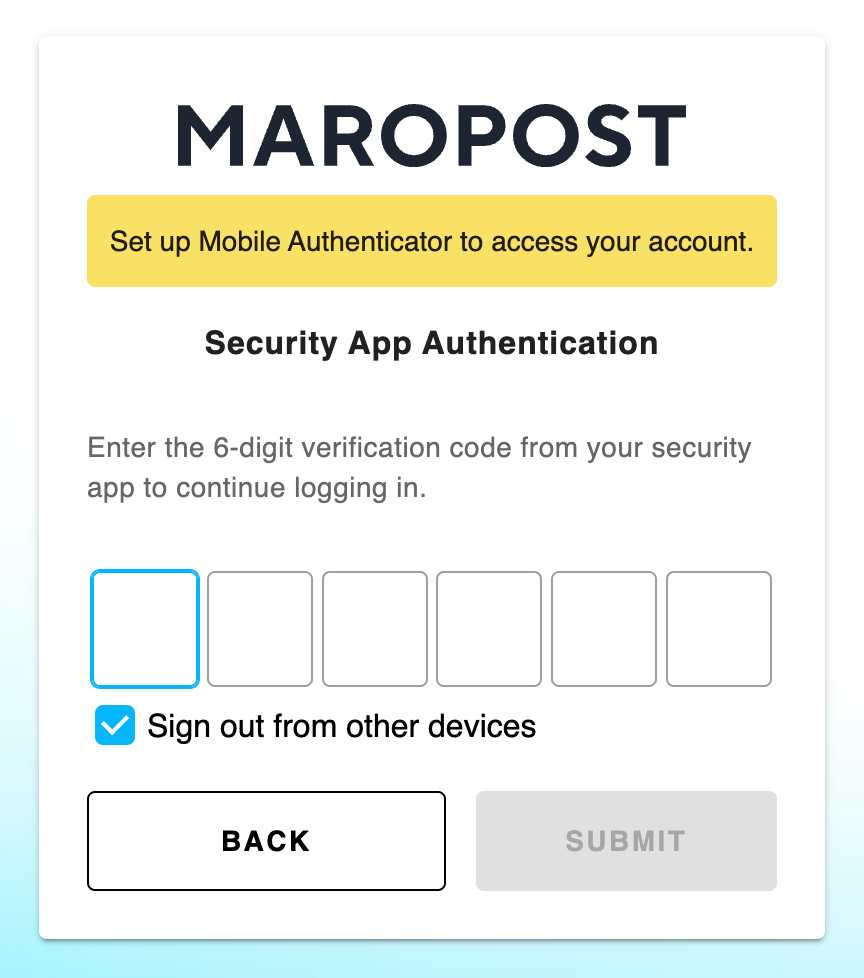
d. A list of backup codes gets generated that can be printed, downloaded, or copied to a secure folder. Use these recovery codes to log in to your account if you cannot access your MS, Authy, or Google Authenticator apps. Click Complete to finalize the process.

Note: You must enable Authenticator app-based MFA since SMS-based MFA has been officially discontinued. Once the MFA is configured, the existing Authenticator app or SMS OTP will no longer be needed.
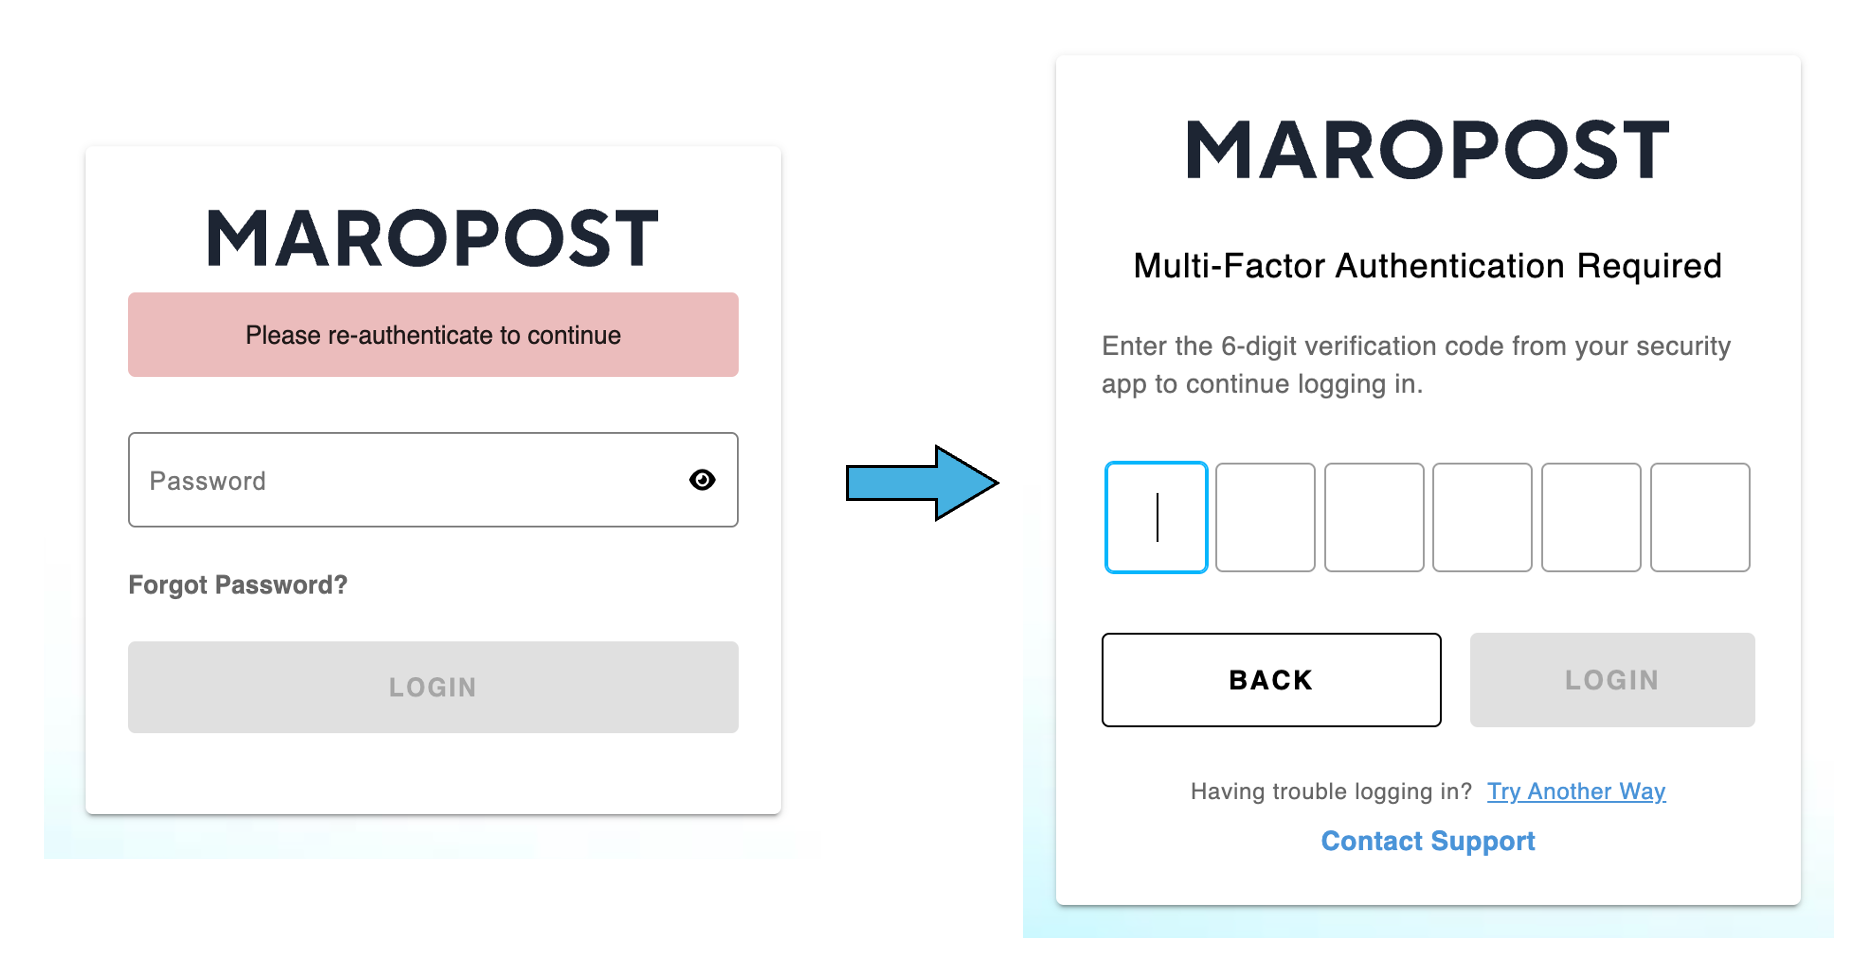
4. If you have already set up MFA before, you’ll be redirected instead to the OTP page, where you must enter a six-digit OTP sent to your mobile via the MS, Authy, or Google Authenticator app.
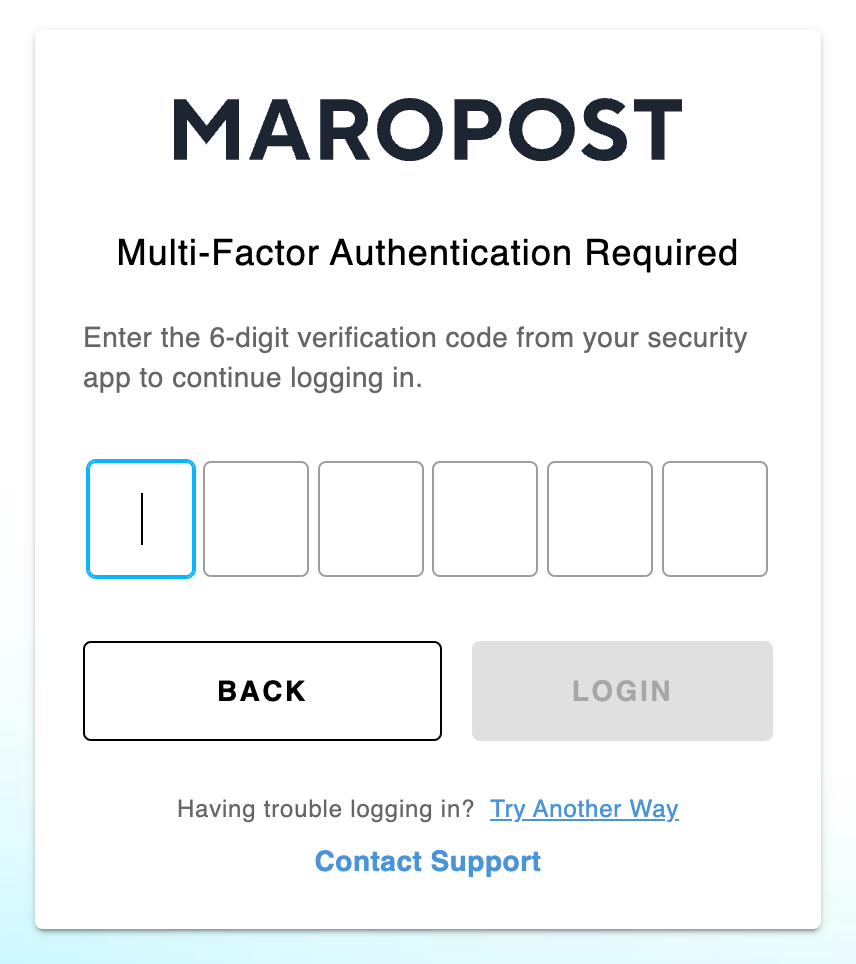
Important: To ensure your OTP codes are validated by the system at all times, kindly synchronize your device’s timezone with your Maropost account’s default timezone.
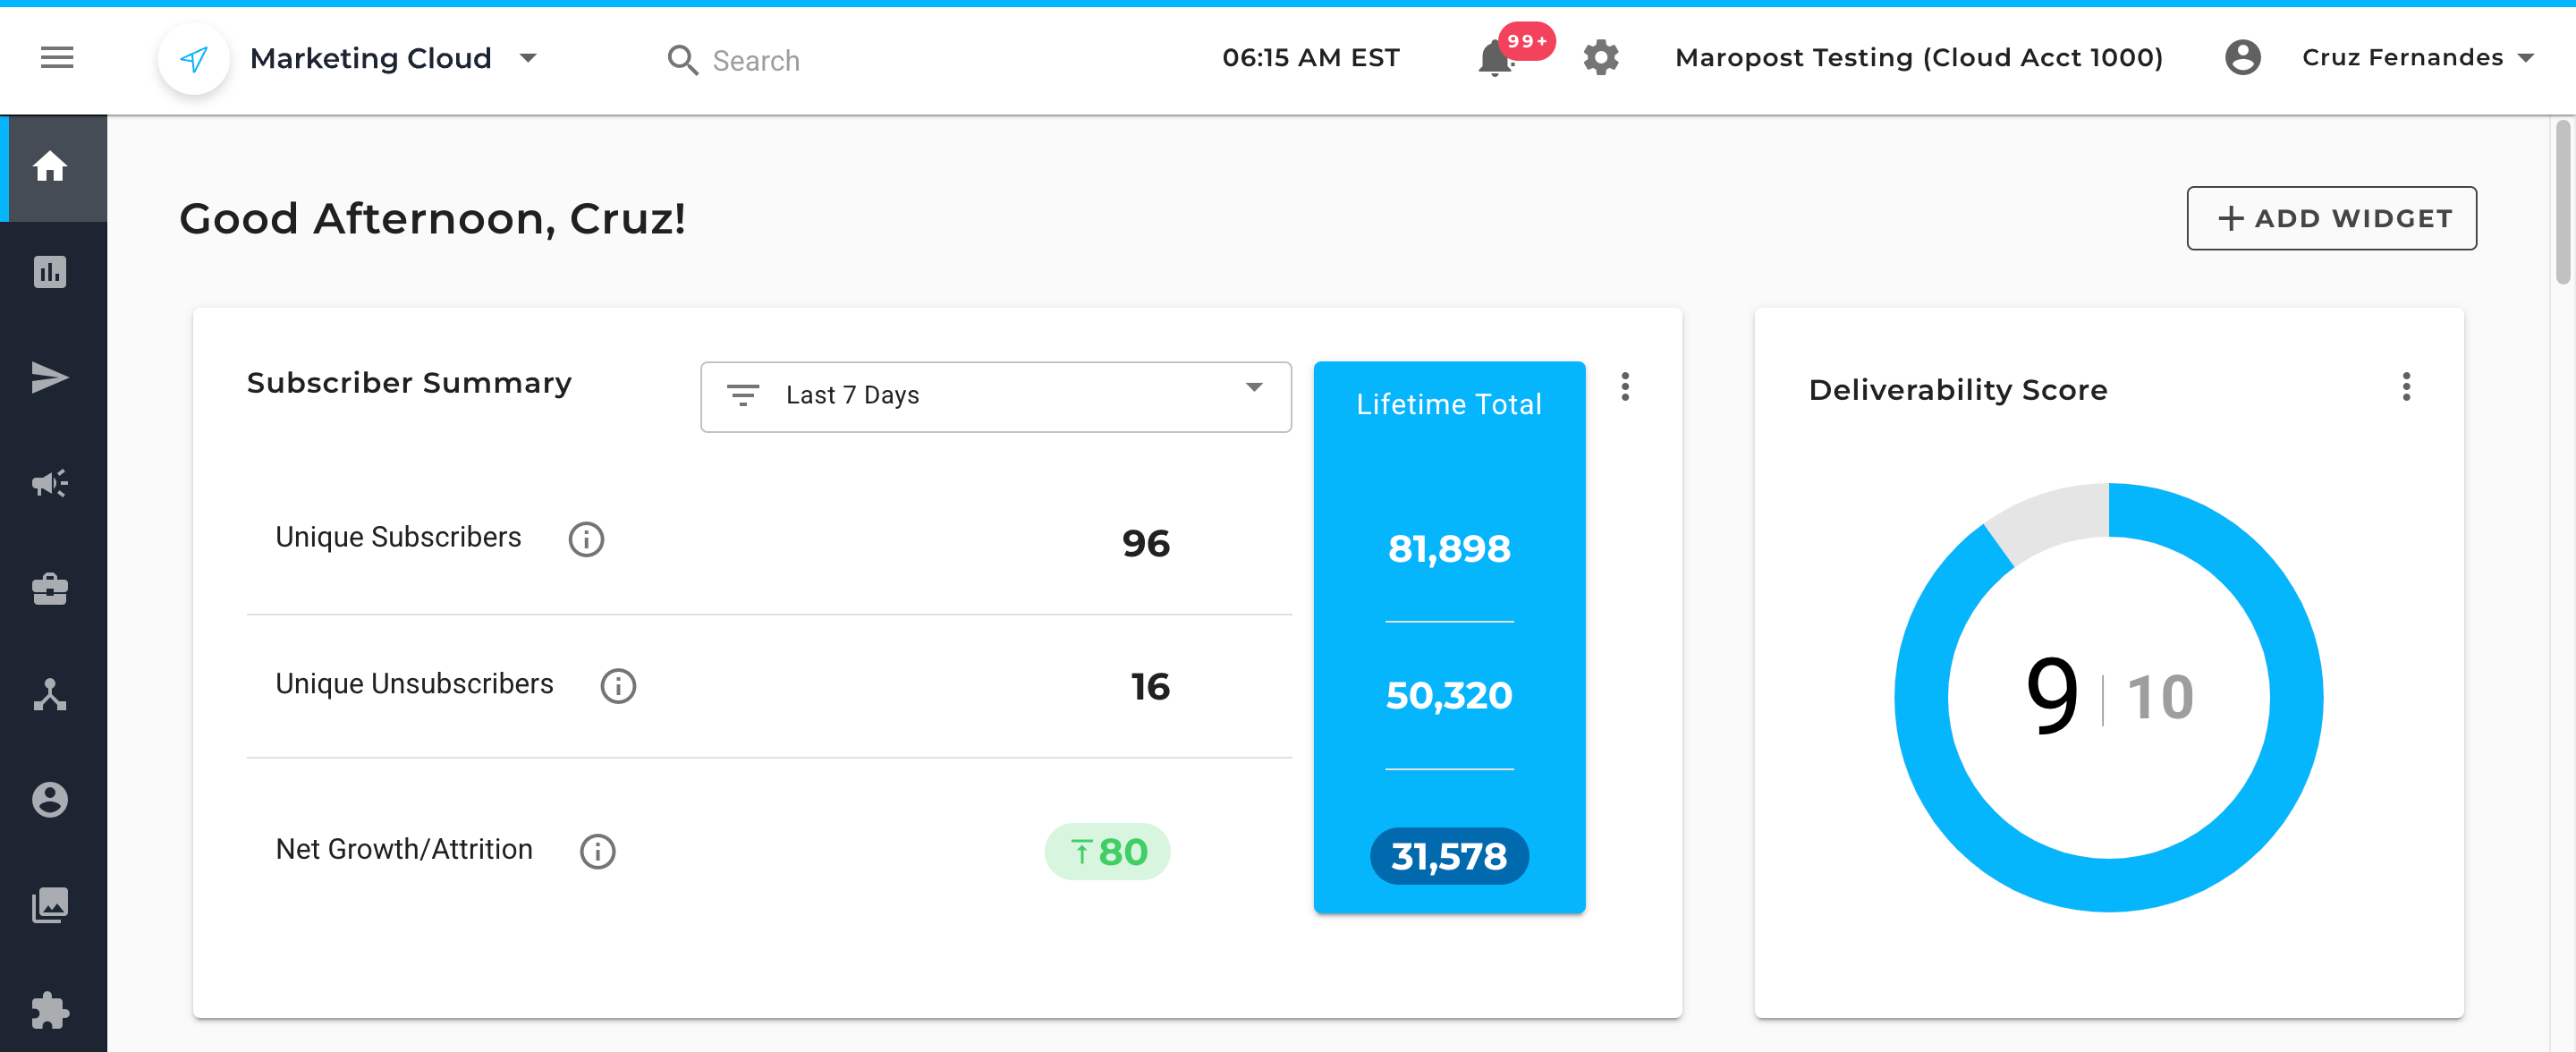
After you complete the login process, the system will redirect you to the Marketing Cloud’s Dashboard if you own an account or have been added to one.
Important: If you aren't linked to an account, you’ll be redirected to the Marketing Cloud’s Identity application after you log in. To gain access to your account, kindly contact your system administrator.
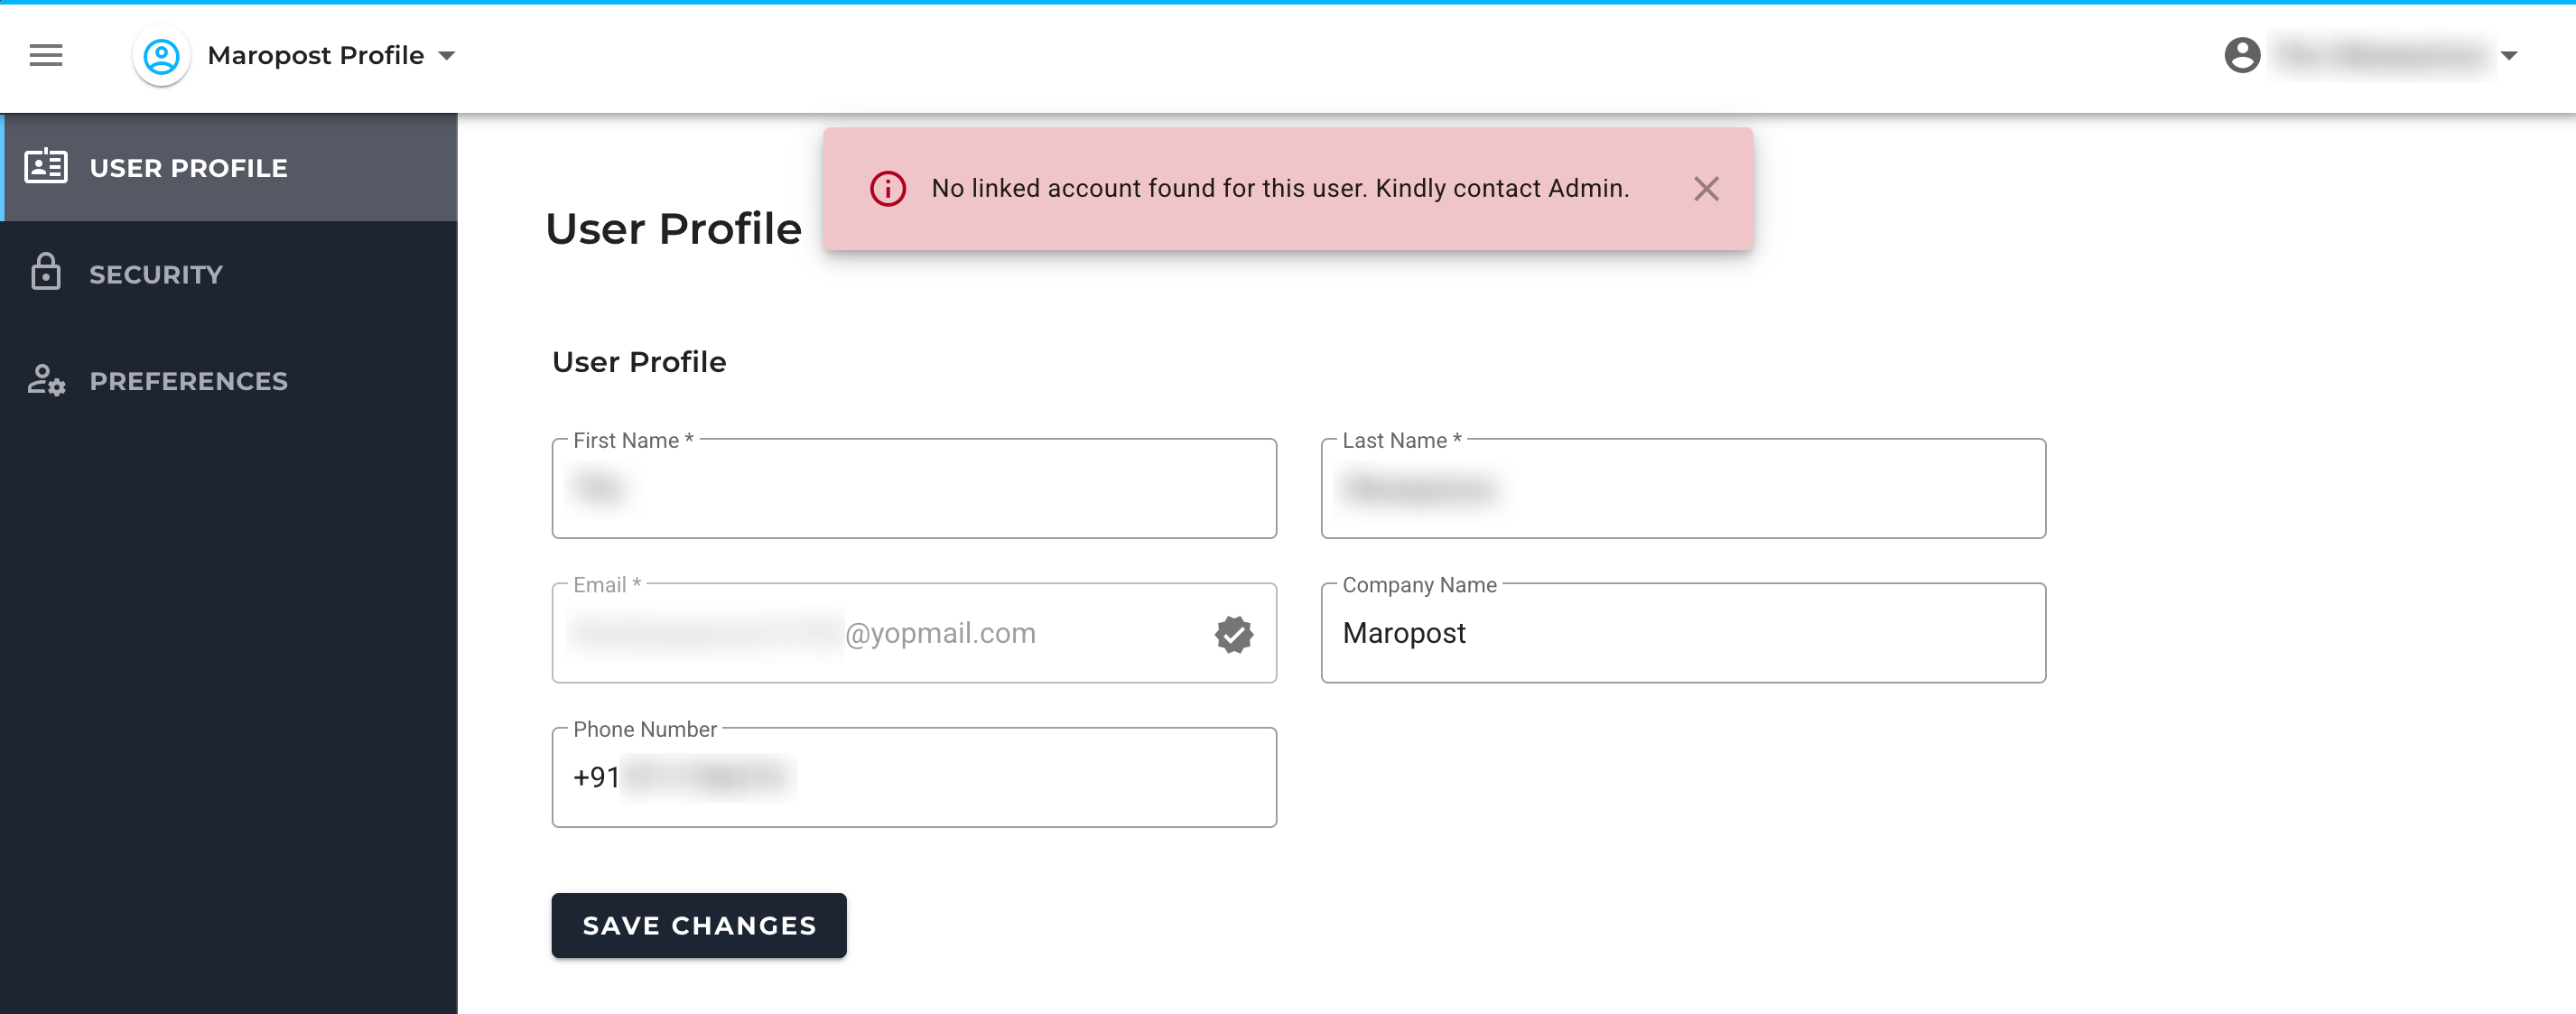
Once the administrator grants you account access, log in to your account and start using the application.
Updating Password from the Identity Application
To update your account credentials, access the security section present in the Maropost Identity (https://id.maropost.com/) application. Follow the steps shown below to update your existing password:
1. From the Marketing Cloud account, click on your username in the top right corner of the application. Then, click on Profile.
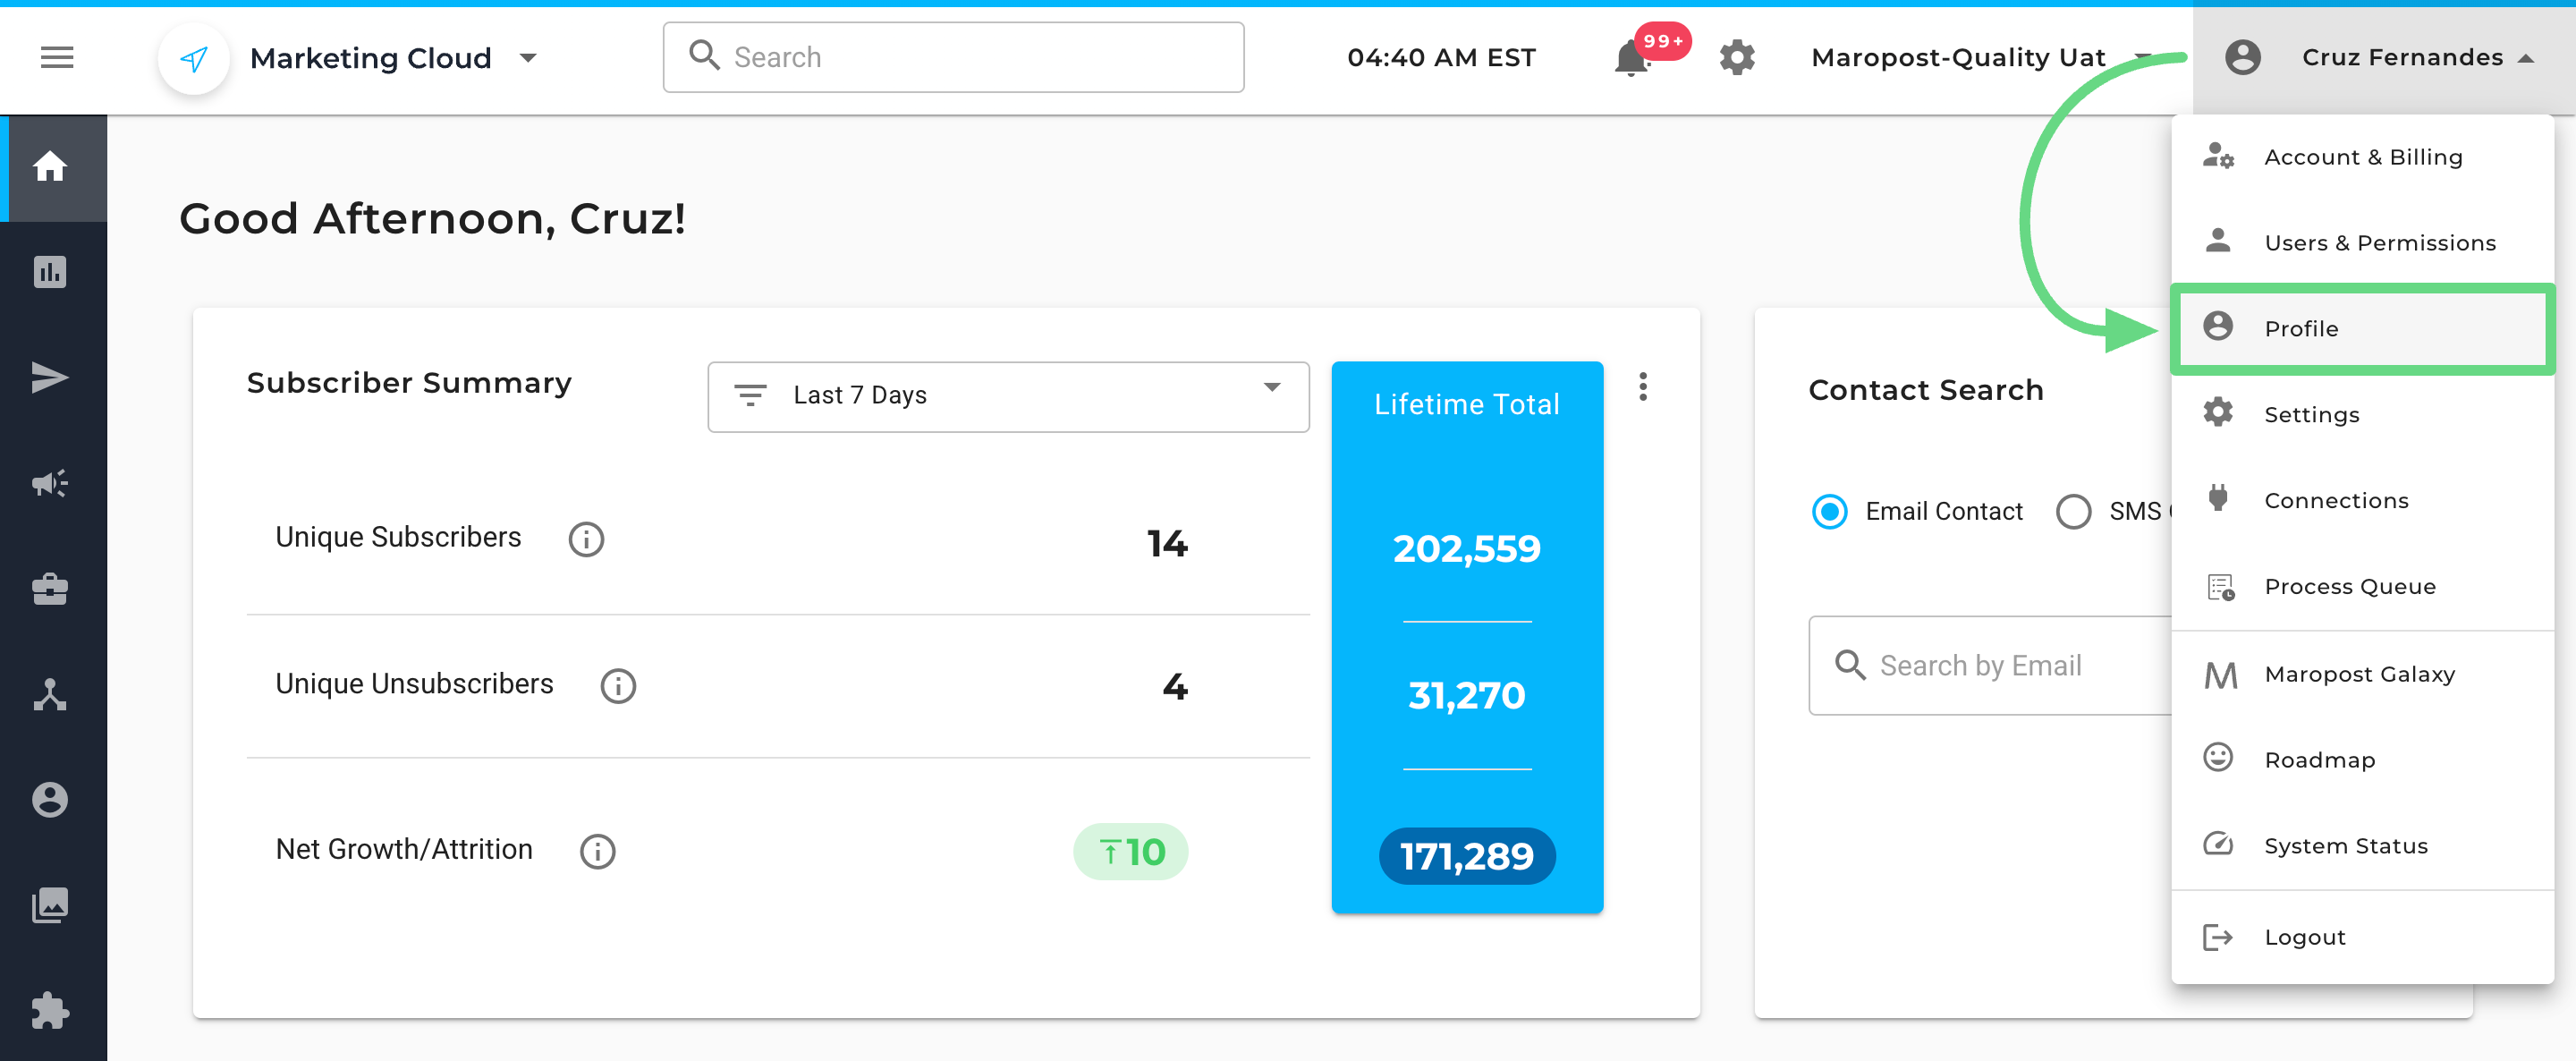
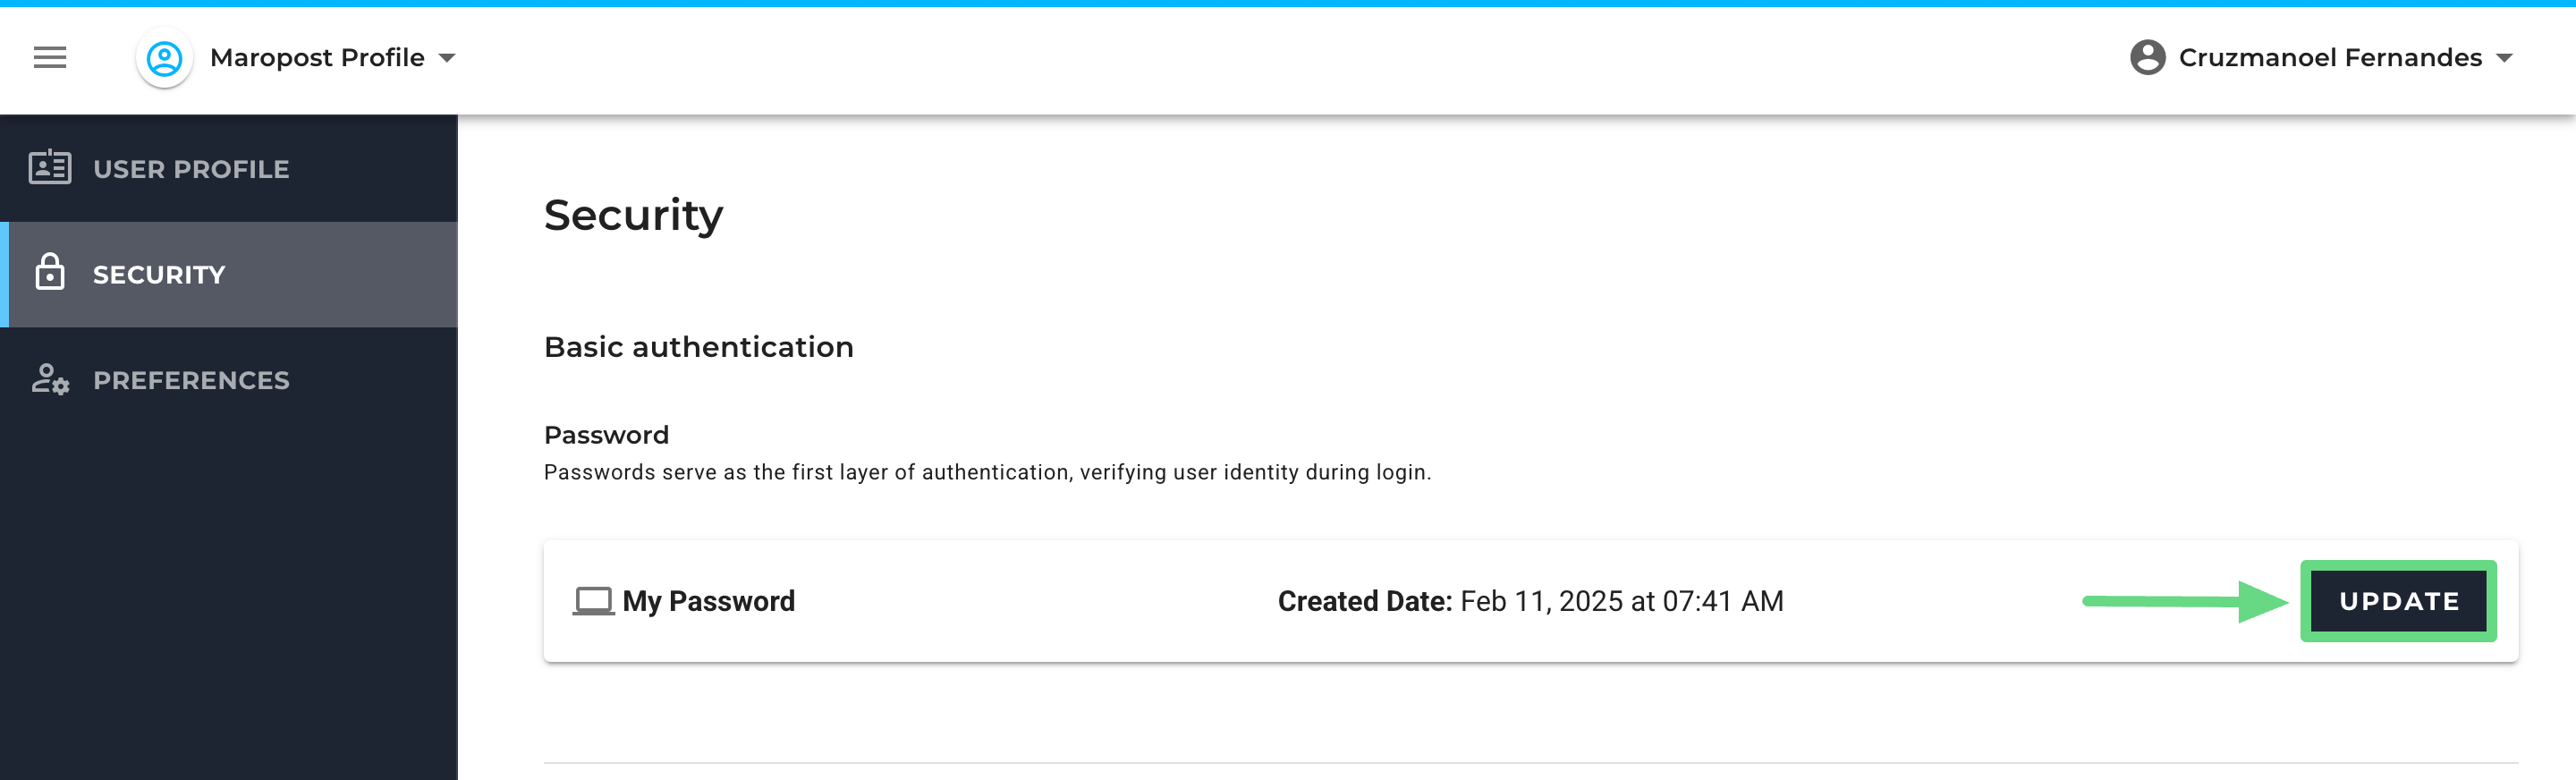
2. You’ll be redirected to the Maropost Identity (https://id.maropost.com/) application. To change your login password, visit the Security section, and next to My Password, click on Update.
3. Enter your existing password and submit a one-time OTP before adding your new login credentials.
4. A password reset page will be shown to you. Here, you won’t have to add your current password; instead, mention your new password (complying with the password rules) and re-enter it again. Finally, click on Submit to reset the password.
After submitting the new password, the changes will take effect the next time you log in.
Resetting Your Login Password
Follow the steps shown below to reset and generate your new login credentials:
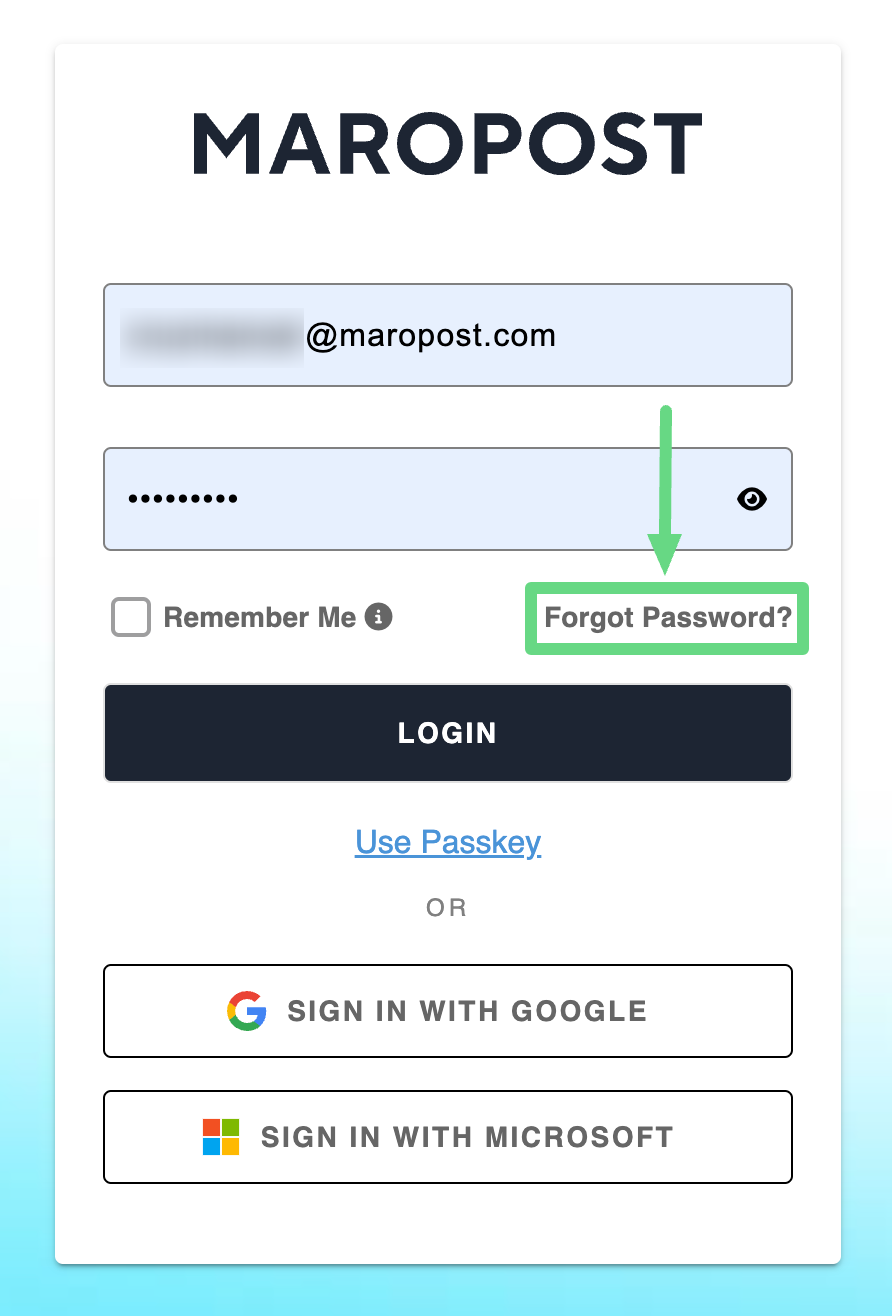
1. If you have forgotten your current password and wish to replace it with a new one, click on the Forgot Password link on the login page.
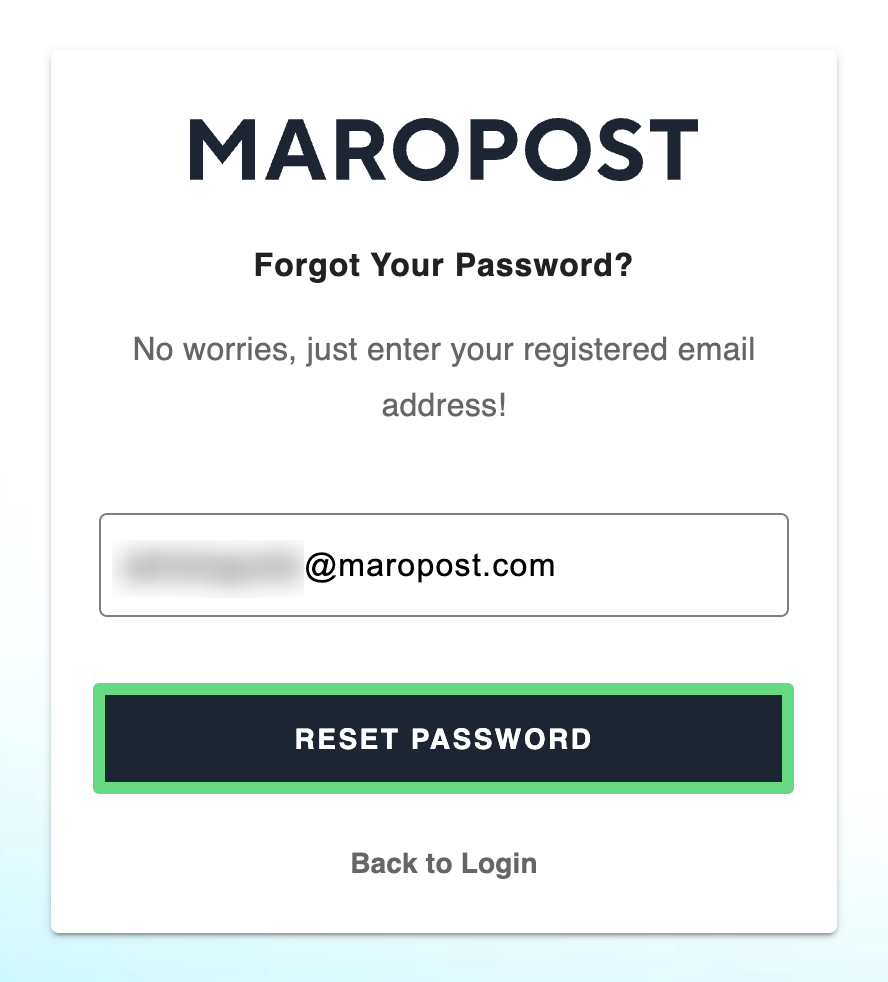
2. Enter a valid email address registered with your Marketing Cloud account and click on Reset Password.
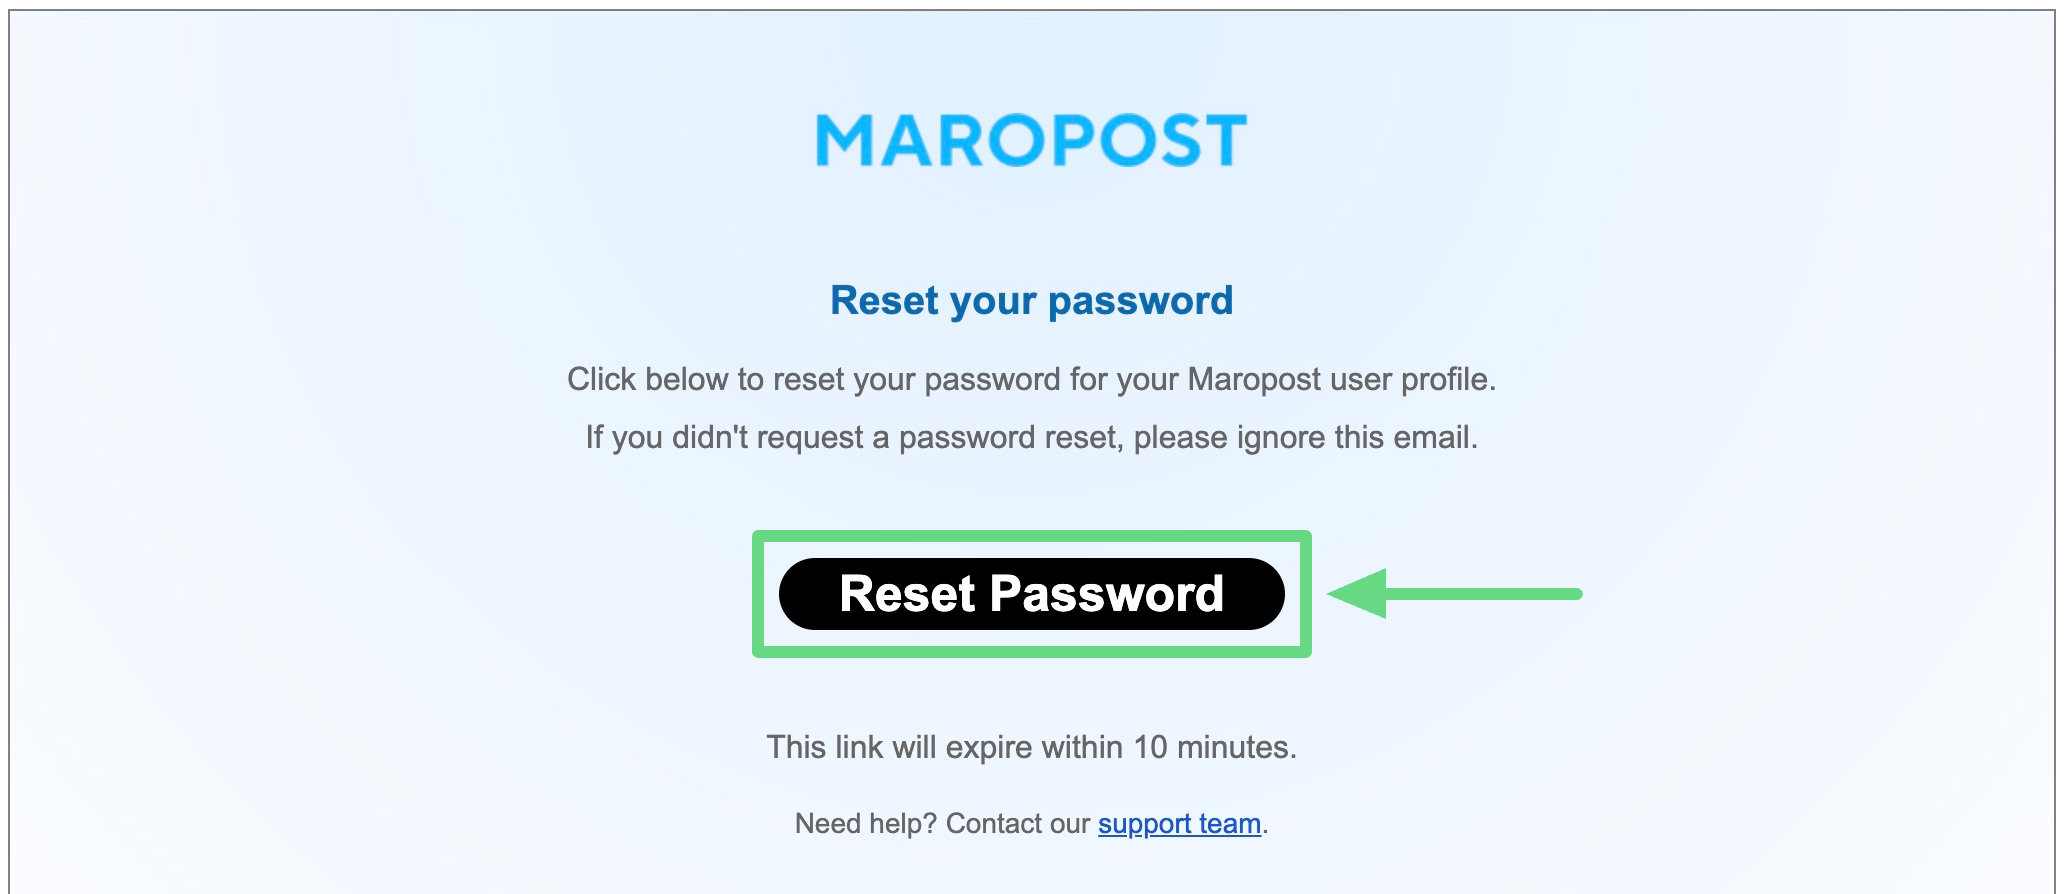
3. A reset password link will be sent to your registered email address. Open the email and click on the link.
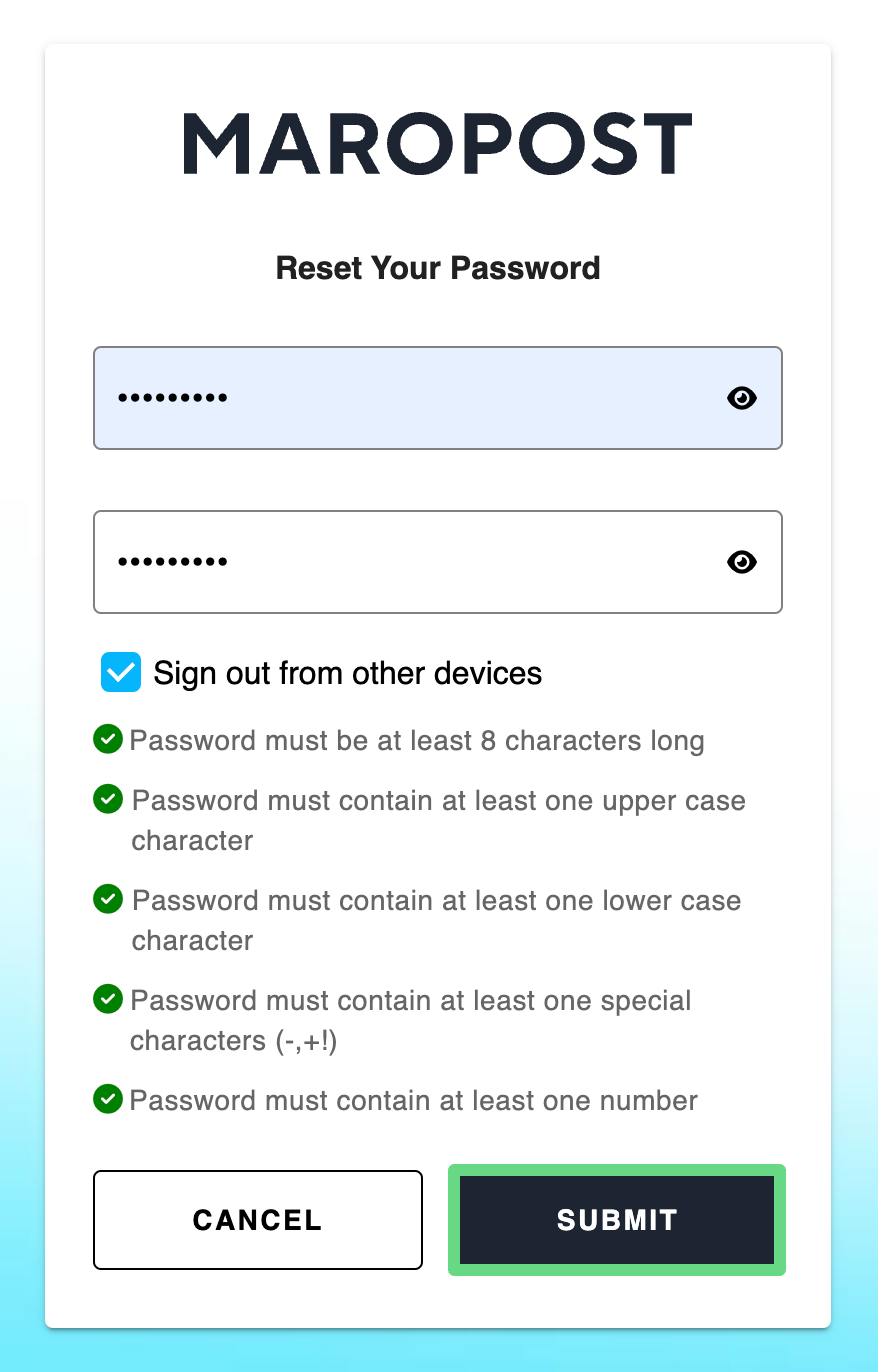
4. Enter your new account password and submit it. Your account gets configured with your new login password.

Setting Up a New User's Login Password
New users need to undergo the same authentication process as existing Marketing Cloud users, along with the additional steps of account profile and email verification. Below are the steps to set up a new user’s login credentials:
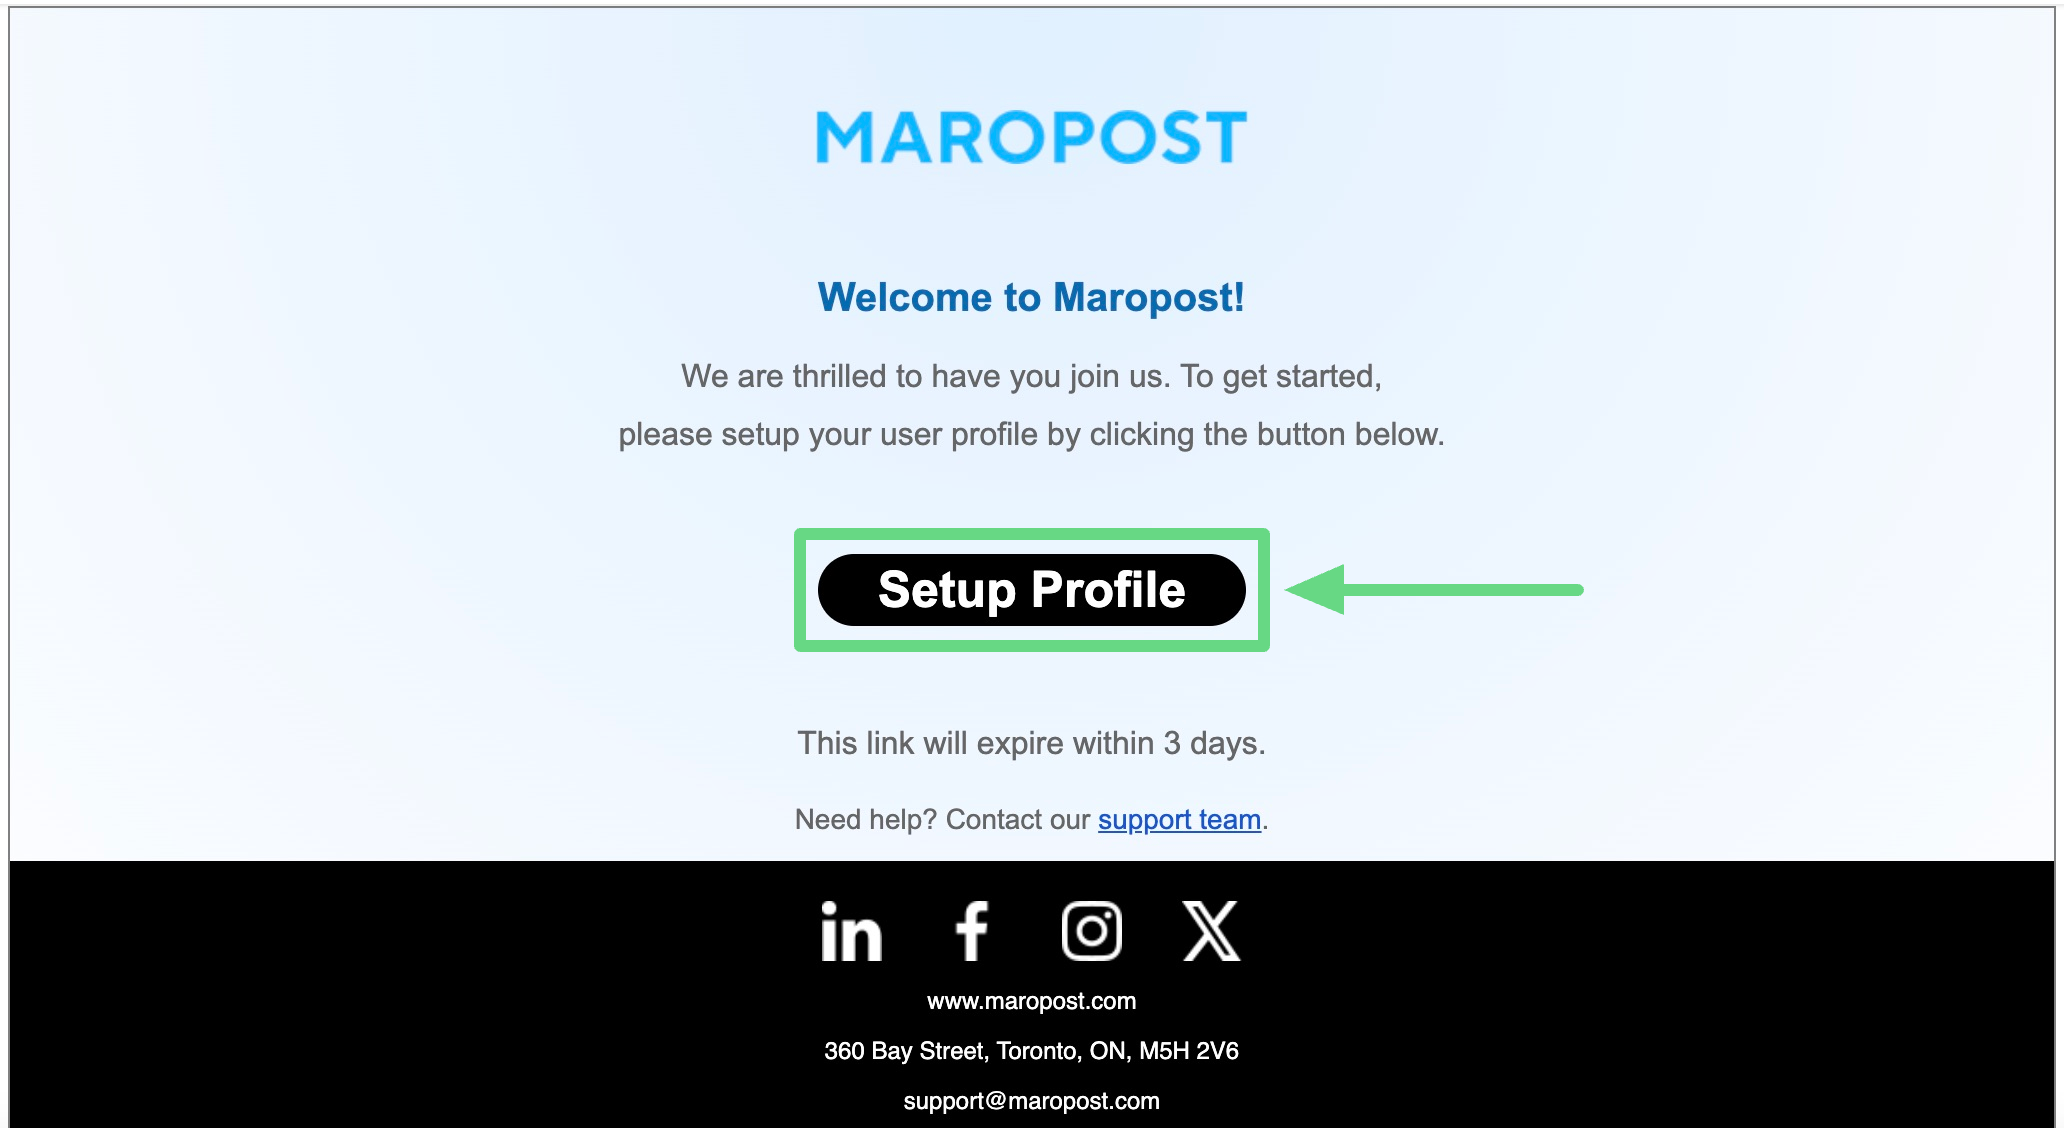
1. After being invited to Maropost, you will receive an invitation email from us. Open the email and click on the Setup Profile tab/link to configure your new account.
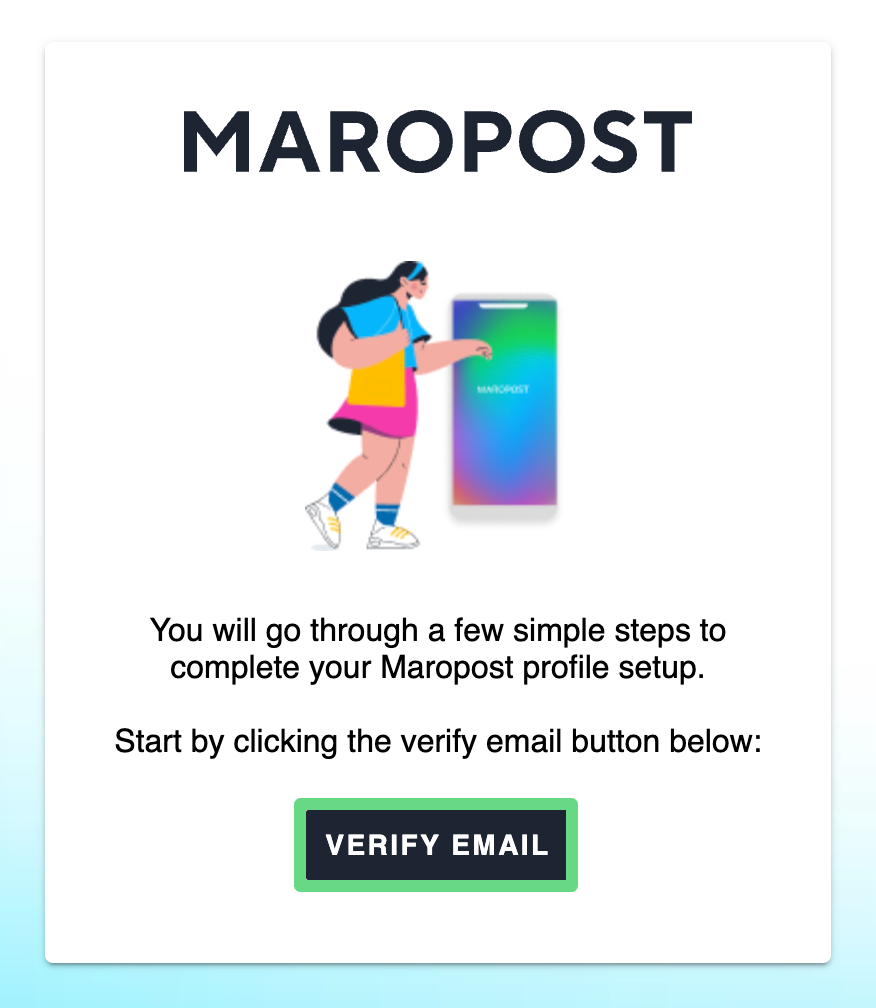
2. Firstly, verify your email with us.
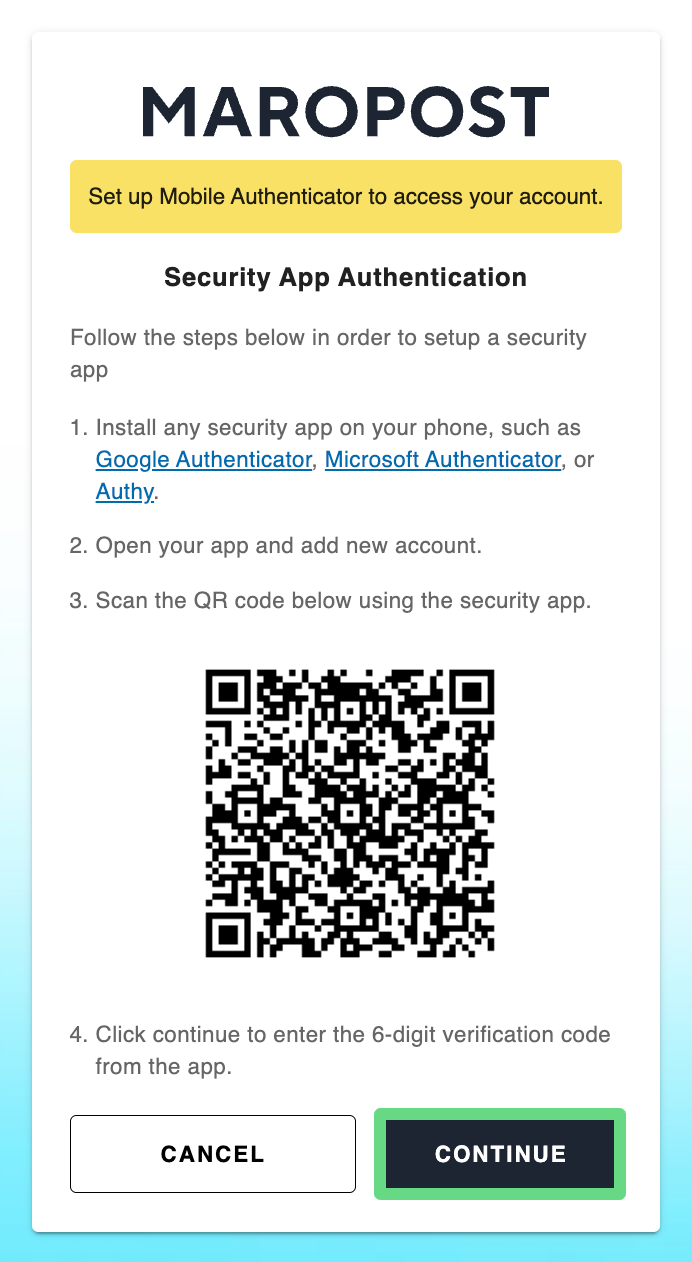
3. Next, an MFA setup page will be shown from which you’ll have to scan the QR code (displayed on the page) through an MS, Authy, or Google Authenticator app (iOS or Android version). After scanning the QR code, select Continue to proceed further.
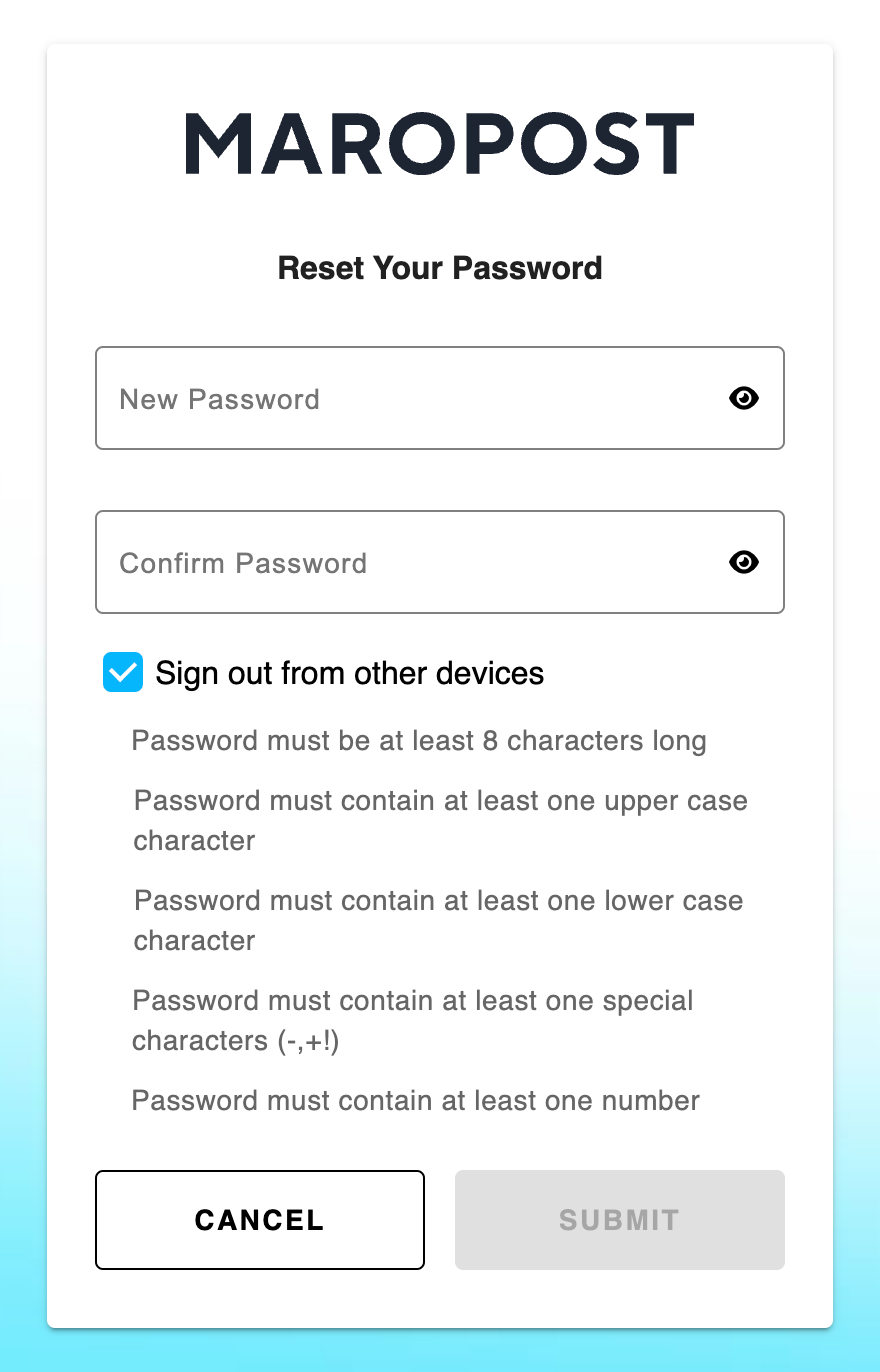
4. As part of our safety measures, enter a new password.
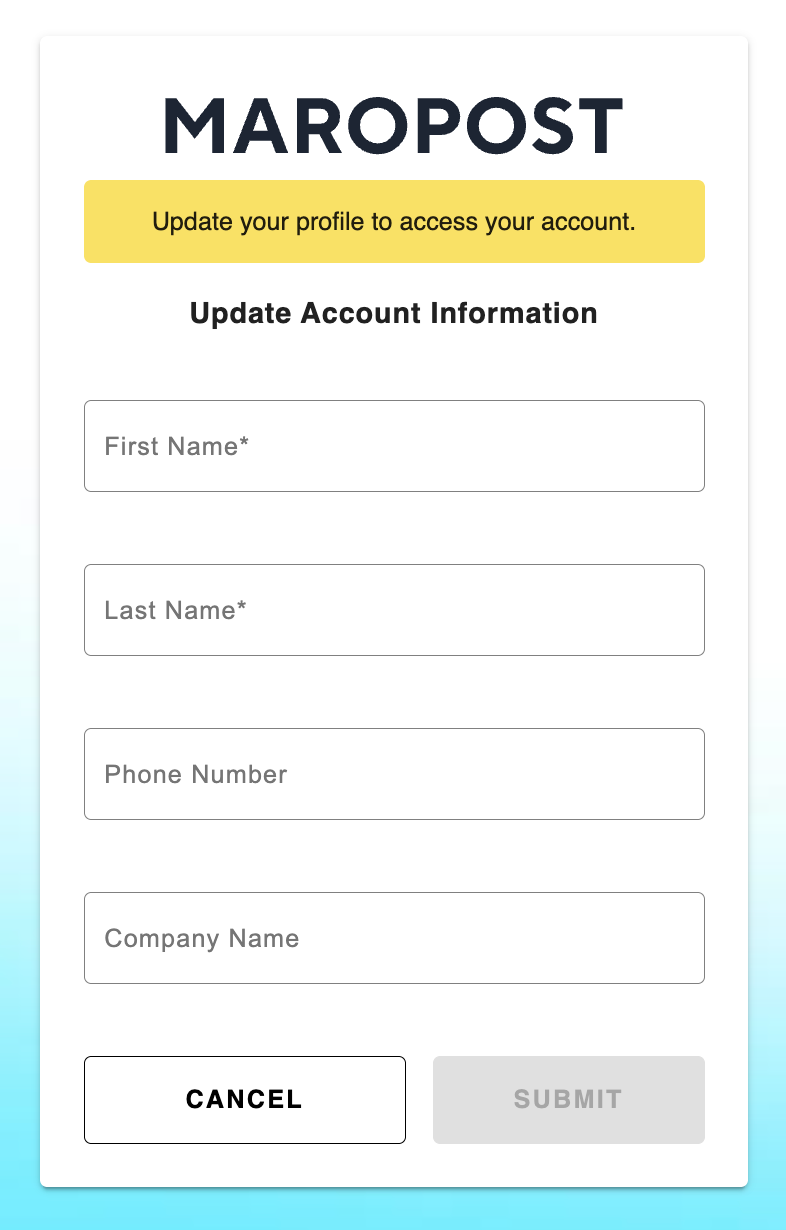
5. To access your account, you must update your profile details, such as your name, phone number, and company name. Submit the changes you have made.
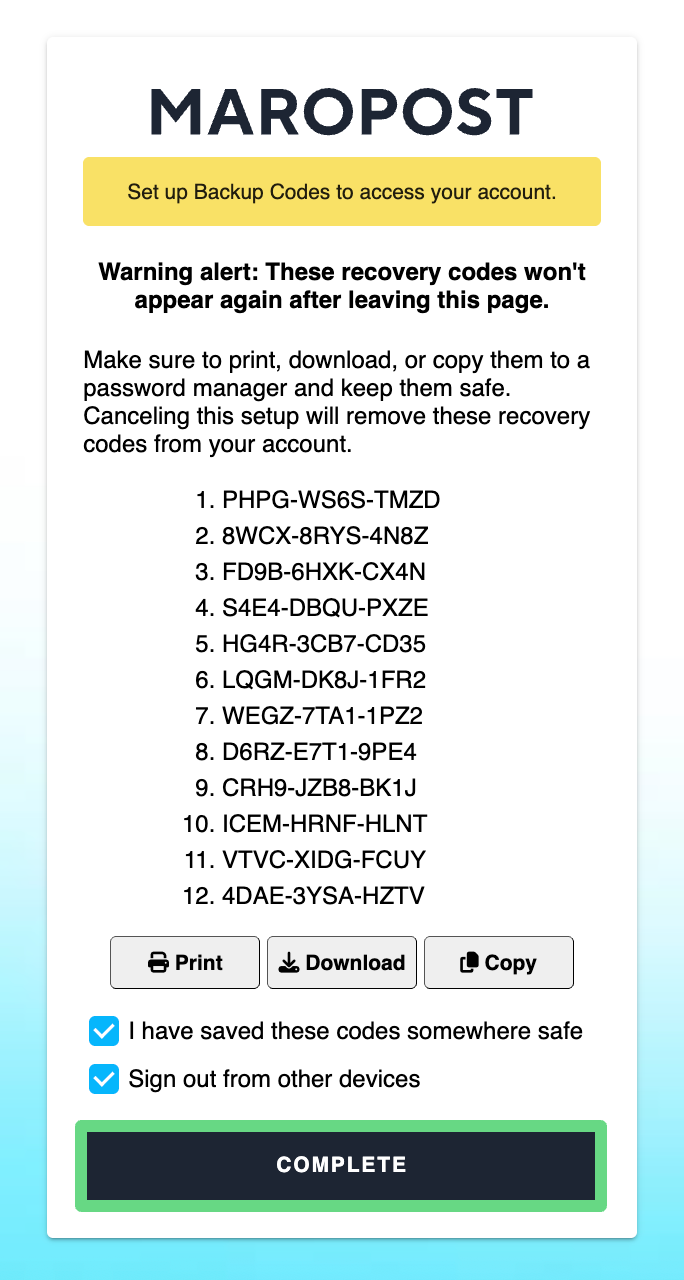
6. A list of backup codes gets generated for your new account. Make sure you print, download, or copy the codes to a secure folder, as these recovery codes can be used to log in to your account if your MS, Authy, or Google Authenticator apps aren’t accessible. Click Complete to finish the process.
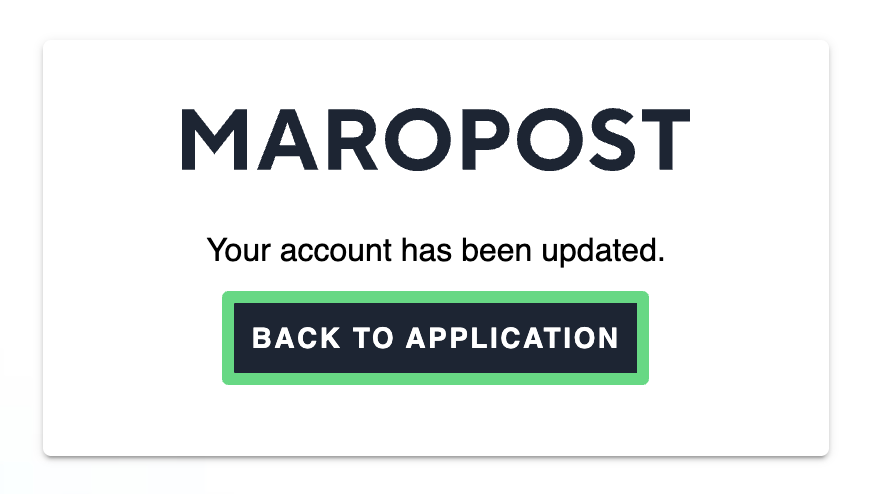
7. Finally, your account gets registered with your new login credentials. Head back to your application and start using your newly created account.
Related Articles
SMS & Multi-Channel:
Contact Management:
Campaign Management: