You can control global styling for Merchandising Cloud elements to ensure visual consistency across search, collections, recommendations, and autocomplete interfaces. Centralized styling management helps maintain brand coherence while simplifying the customization process.
Global styling controls enable you to establish consistent visual design across all Merchandising Cloud components, ensuring a cohesive appearance that aligns with your overall brand identity. By managing colors, typography, spacing, and other design elements centrally, you can maintain visual consistency while reducing the effort required to implement design updates across multiple interface components.
This guide will help Shopify users customize the global styling of our elements in their theme using the Liquid language. You can easily change fonts, colors, and other styles to match your store's branding.
How to Customize our Global Styling
Step 1: Locate our CSS Files
After installing Maropost Merchandising Cloud (formerly Findify) into your Shopify theme, you can start customizing the styles. To do this, follow these steps:
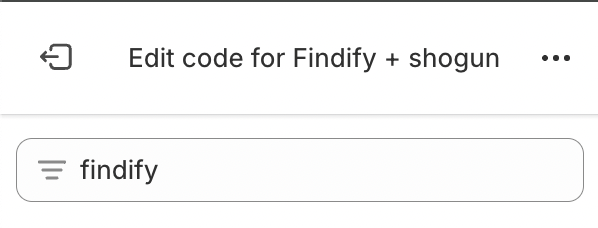
- Go to your Shopify Admin panel.
- Navigate to Online Store > Themes.
- Click on Actions > Edit code for the theme you want to customize.
- In the filter files field, type
findify.
Step 2: Identify and Edit CSS Files
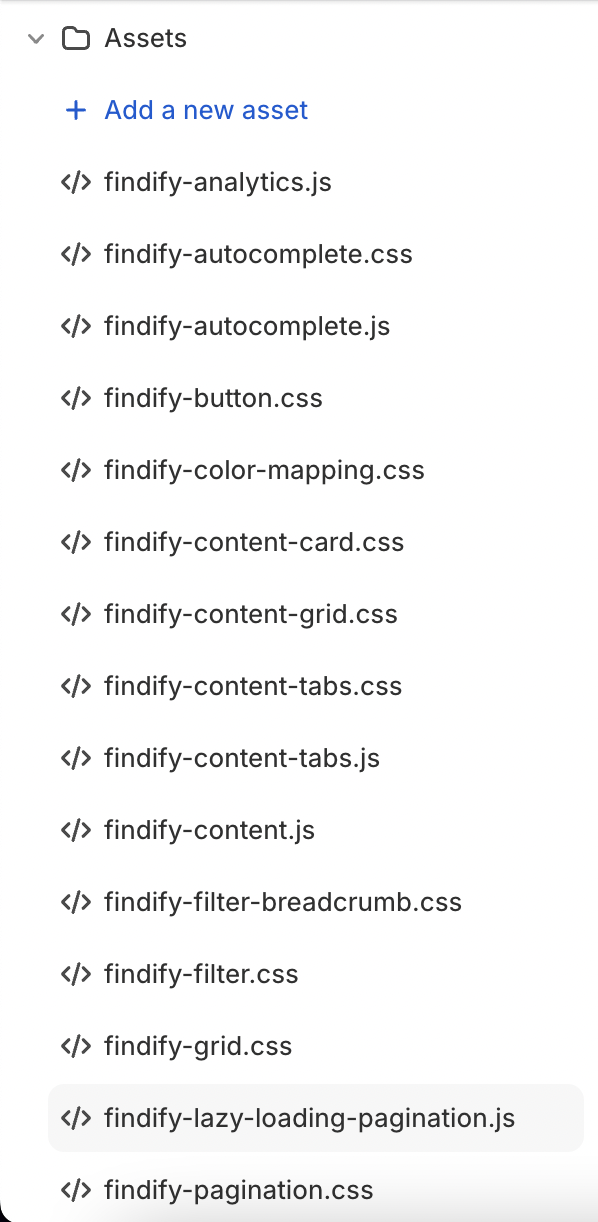
In the assets folder, you will see a list of files with names starting with findify and ending with .css. These are the CSS files you can edit to change the global styling of our elements.
Step 3: Customize Styles
You can either edit our CSS files directly or add your custom styles to your own CSS file. Below are examples of how you can change font and color settings.
Example 1: Changing Font
To change the font of our elements, update the relevant CSS variables or add new CSS rules in your custom CSS file:
CSS
/* In your custom CSS file */.findify-product-title { font-family: 'Arial, sans-serif'; font-size: 16px;}
Example 2: Changing Colors
To change the color of our elements, update the CSS variables in findify-variables-defaults.css or add new CSS rules:
CSS
:root { --findify-text-color: #000000; /* Primary text color */ --findify-background-color: #ffffff; /* Background color */}.findify-product-price { color: var(--findify-text-color); background-color: var(--findify-background-color);}
By following these steps, you can customize the global styling of our elements in your Shopify theme to better match your store's branding.
For further assistance or inquiries, feel free to contact us at support@maropost.com