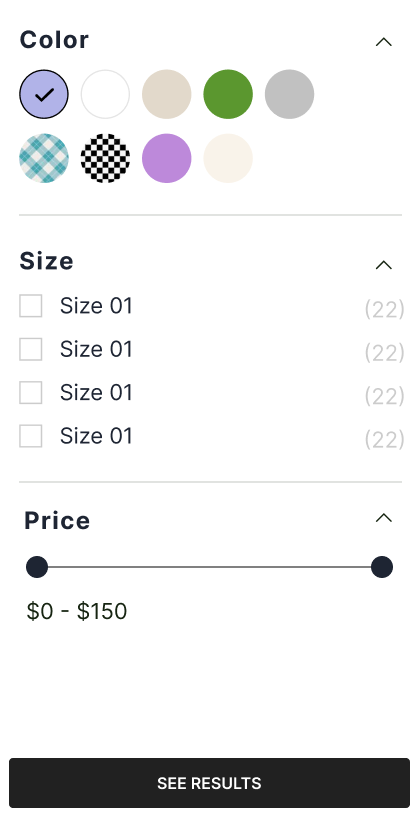
You can implement a price slider filter to provide customers with an intuitive way to refine product searches by price range, offering a more user-friendly alternative to checkbox-based price filters. This interactive slider interface helps customers quickly narrow down products to their budget, improving the search experience.
Price sliders enable more precise price range selection compared to predefined checkbox ranges, giving customers greater control over their search refinement. This flexible filtering approach can help improve product discovery by allowing shoppers to easily adjust price parameters to find products that match their budget, potentially leading to better search satisfaction and higher conversion rates.
Many clients prefer using a price slider over checkboxes for their price filter. This guide will help you set up a price slider in your Shopify store.
1. Navigate to Slider App
First, navigate to the slider app within your Shopify theme.
2. Modify the Liquid Code
Next, you need to modify the findify-filter-range.liquid file to replace the checkboxes with the price slider.
- {% render 'findify-filter-range-slider', min: min, max: max, name: name, from: sliderFrom, to: sliderTo %}
- {% render 'findify-filter-checkbox', name: name, type: type, is_selected: is_selected, value: value, text: text, count: count, component: component%}
- {% render 'findify-filter-price-range', name: name, currency: currency, min: min, max: max%}
3. Customize the Slider
You can further customize the slider by editing the findify-filter-range-slider.liquid file. Here is an example of how you can initialize the SwiperJS slider:
<div class="swiper-container"> <div class="swiper-wrapper"> <div class="swiper-slide" data-min="{{ min }}" data-max="{{ max }}"> <input type="range" min="{{ min }}" max="{{ max }}" value="{{ from }}" class="slider" id="priceSliderFrom"> <input type="range" min="{{ min }}" max="{{ max }}" value="{{ to }}" class="slider" id="priceSliderTo"> </div> </div> <!-- Add Swiper controls if needed --></div><script> var swiper = new Swiper('.swiper-container', { // Swiper options }); // Additional JavaScript to handle the slider values document.getElementById('priceSliderFrom').addEventListener('input', function(event) { // Update the 'from' value }); document.getElementById('priceSliderTo').addEventListener('input', function(event) { // Update the 'to' value });</script>
Conclusion
By following these steps, you will replace the checkbox price filter with a more user-friendly price slider in your Shopify store. This enhances the user experience by allowing customers to easily adjust the price range using a visual slider. For advanced customization, you can directly modify the CSS and JavaScript files associated with the slider component.
For further assistance or inquiries, feel free to contact us on support@maropost.com.