You can configure translations for search interface elements and merchandising content across different language markets, ensuring customers experience search and filtering in their native language.
This localization capability helps provide culturally appropriate shopping experiences that improve usability and conversion for international customers, while maintaining AI-powered personalization that adapts to regional shopping behaviors and preferences.
Implementing multimarket translations helps deliver professional localized experiences without duplicating configuration effort. You can manage translations for UI elements, facet labels, messaging, and other interface components centrally-enabling consistent brand voice across markets while respecting language differences that influence customer trust and purchase decisions, supporting global expansion with localized experiences that maintain the personalization driving conversion.

How Do I Manage Translations?
To support multimarket operations, we provide four main types of translations:
- Static Translations
- Dynamic Translations
- Product Data Translations
- Collection Data Translations
1. Static Translations
Static translations are rendered through our Liquid framework. They are managed within Shopify's built-in functionality.
- Example Uses: Text in headers, buttons, or labels.
- Management: Shopify's translation interface.
This function is also useful for single-market clients needing to alter default language settings. Consider documenting this feature as a standalone resource in Liquid.
2. Dynamic Translations
Dynamic translations cover items that may frequently change or vary by customer interaction, including:
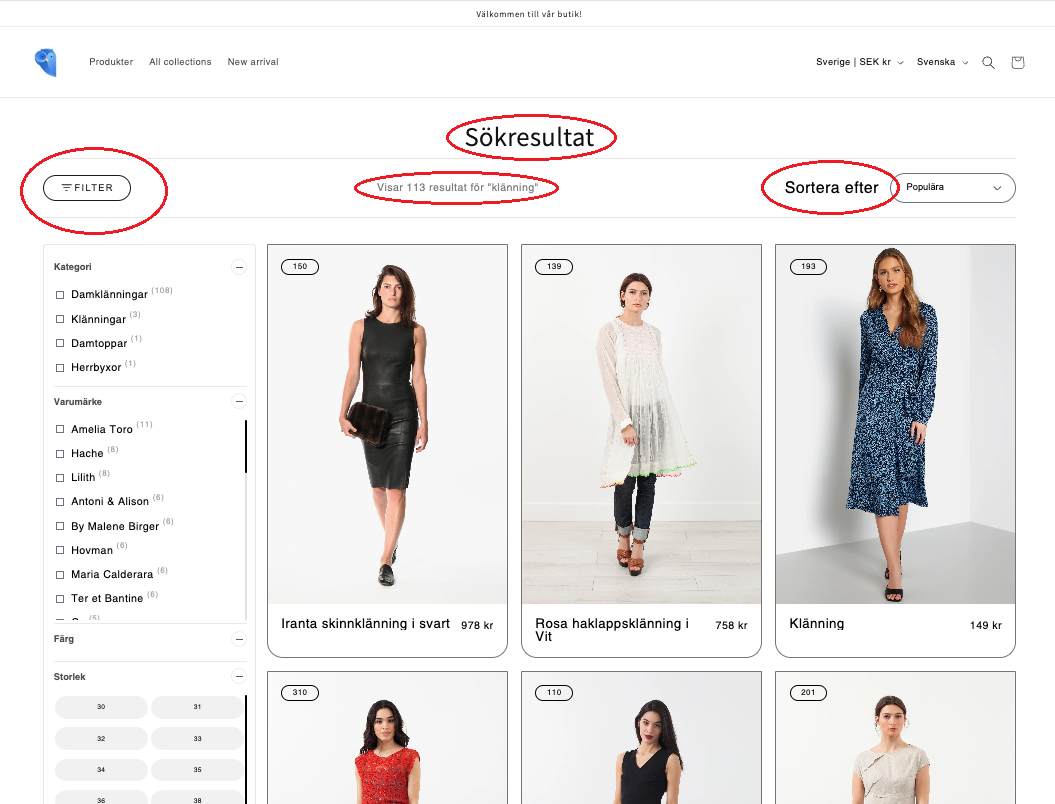
- Filter names
- Sorting options
- Promo card content
- Management: Handled directly in our interface.

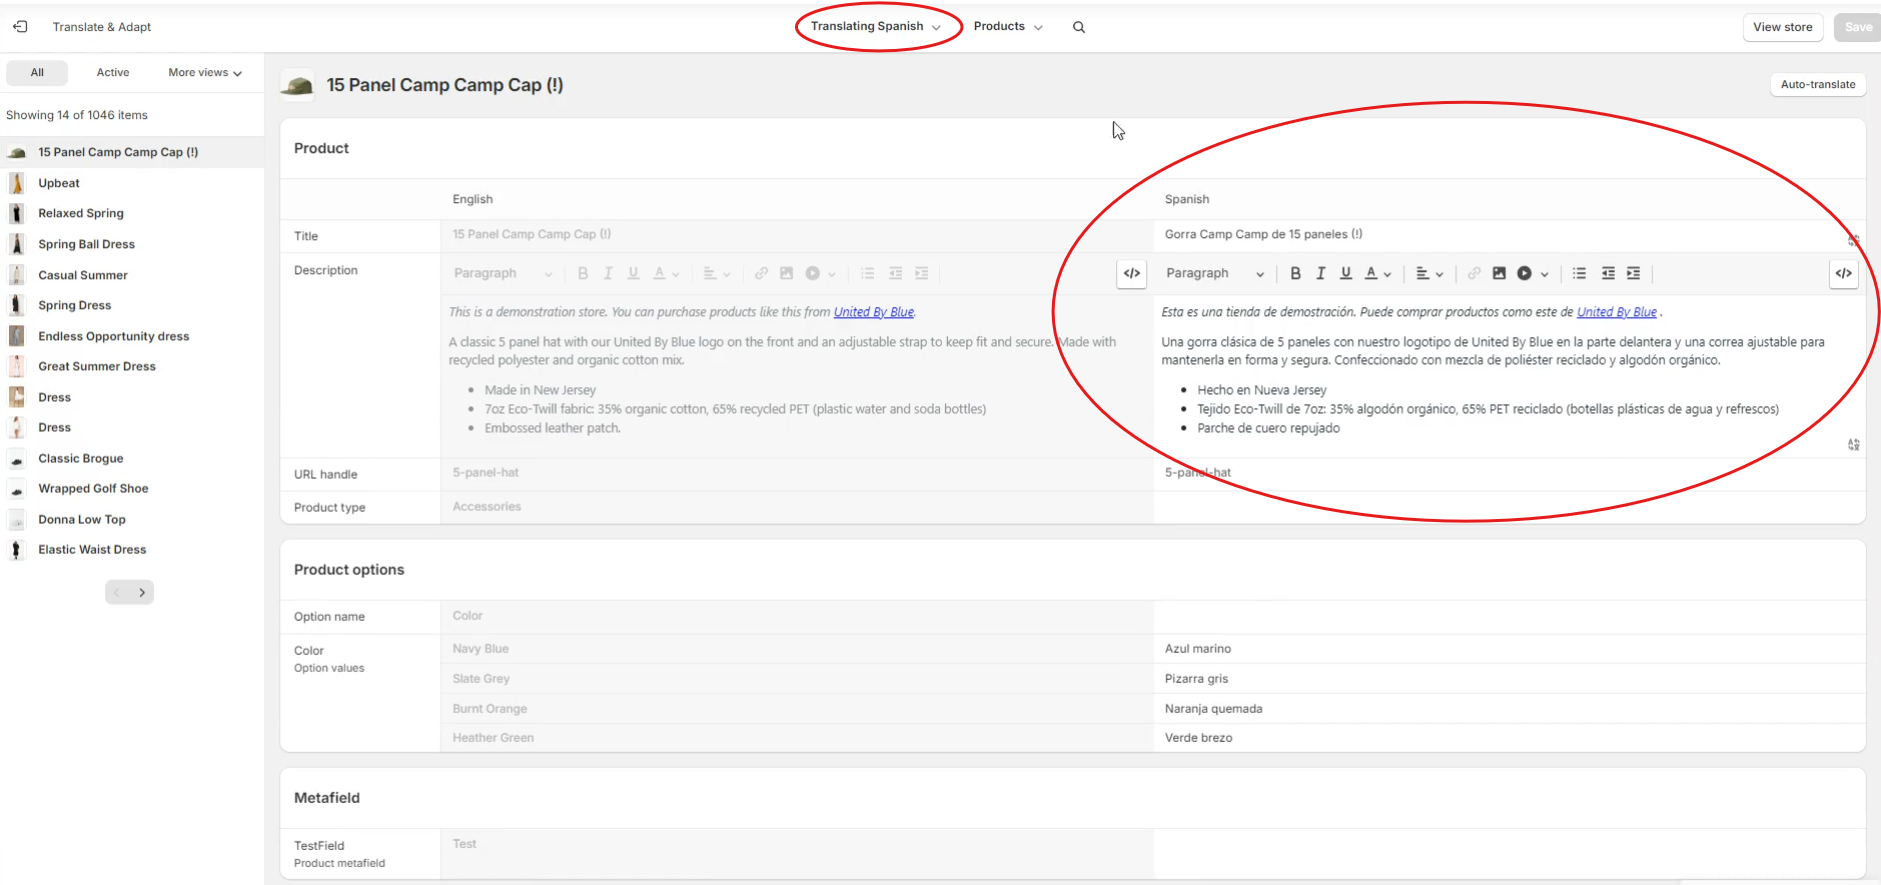
3. Product Data Translations
Product data translations are managed through Shopify's Localization App, syncing translated data into Merchandising Cloud on a scheduled or on-demand basis.
- Management: Shopify Localization App.
- Syncing: Every 24 hours by default, with on-demand updates available. Once Shopify's webhooks support translations, this process will integrate seamlessly.
Shopify's product webhooks currently lack translation support, so updates follow a scheduled pattern.
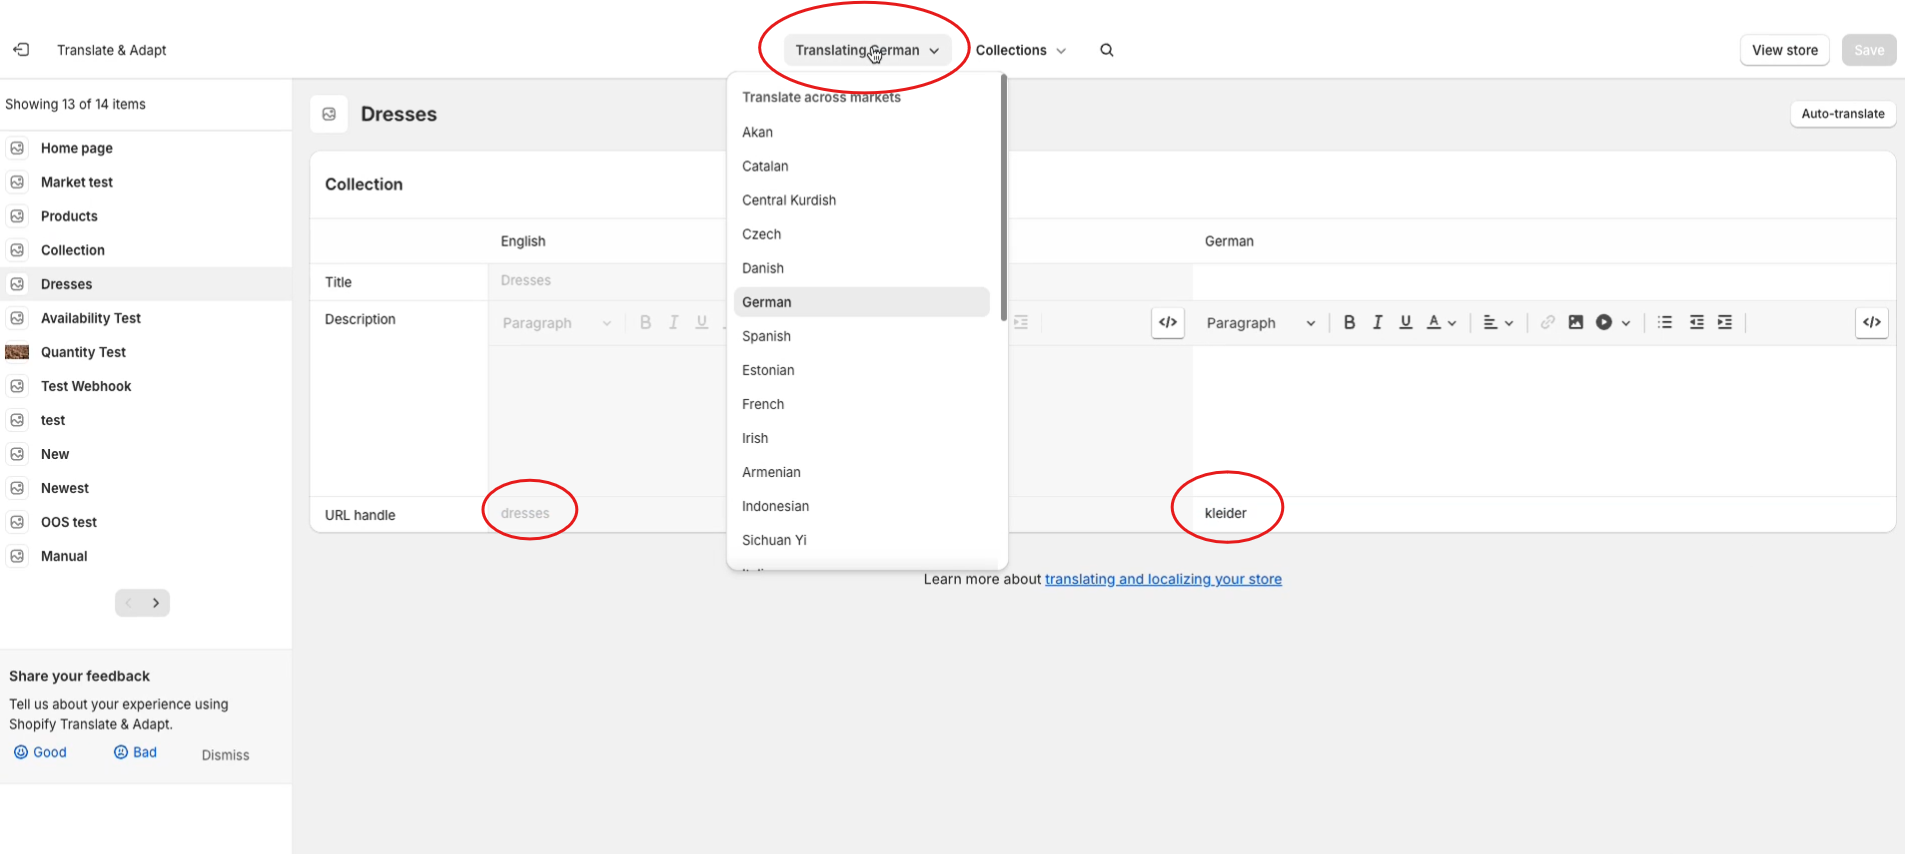
4. Collection Data Translations
Collection translations operate similarly to product translations and are also managed via Shopify's Localization App, syncing to Merchandising Cloud under the same schedule and on-demand options.
- Management: Shopify Localization App.
- Syncing: 24-hour default sync with on-demand updates.
Shopify's collection webhooks also lack translation support but will be updated once available.
Translated Collection URLs are optional - merchants can blend translated and untranslated collections. In Merchandising Cloud, collections are treated as a unified entity, allowing merchandising actions by either aggregate or individual markets.
Adding Translations for Custom Features
To manage translations for custom theme components within Merchandising Cloud, you can follow these steps:
1. Set Up the Findify-Related Locale Configuration
- Default locale files are named based on the default language of your store (e.g.,
locales/en.default.json). Refer to Shopify's documentation for details.
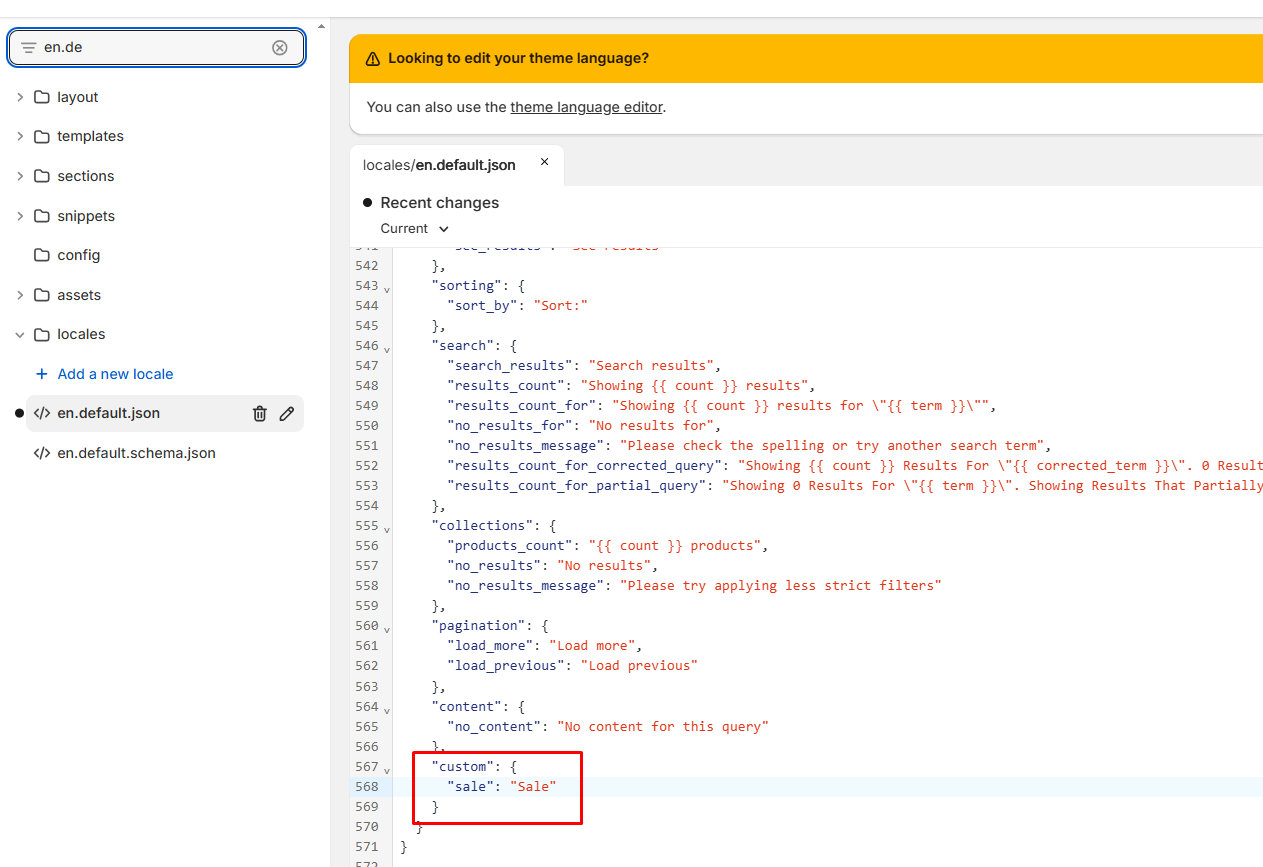
In the theme code, locate the default locale JSON configuration file.
- Open the file and navigate to the Findify configuration section.
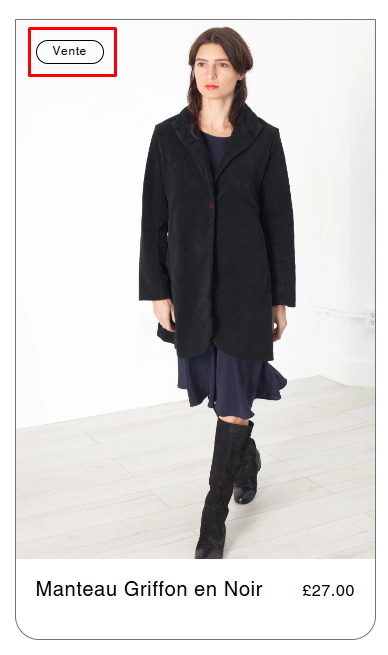
- Example: To add a "Sale" label, use the key
custom.sale:
2. Use the Locale Configuration in Theme Code
To reference your custom locale configuration in theme code, use the following format:
{{ 'findify.custom.sale' | t }}
- {{ 'findify.some_custom_key.some_custom_subkey' | t }}
3. Add or Update Translations
To add translations for other languages:
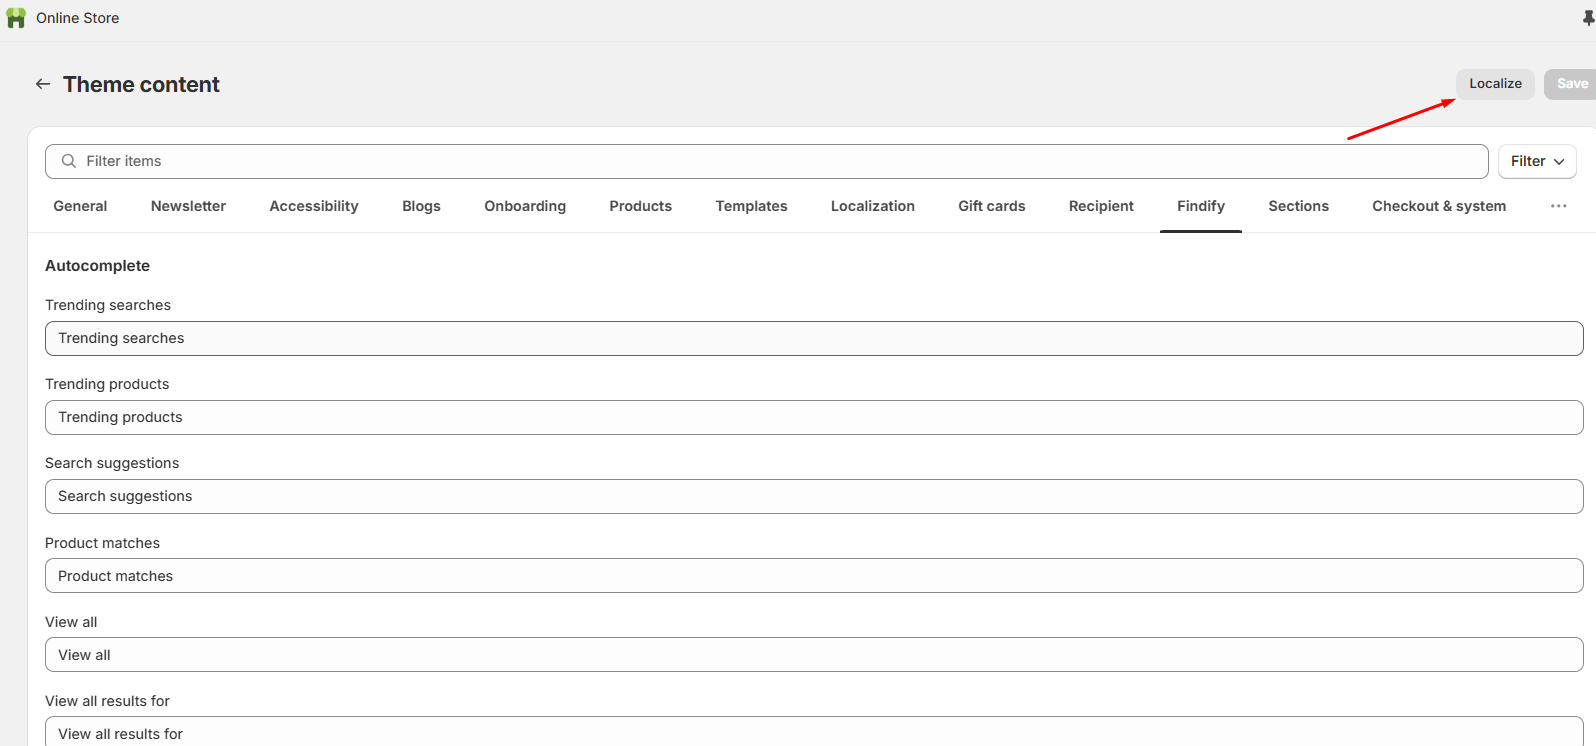
- Open the theme in the Shopify admin panel.
- Select Edit Default Theme Content.
- Example Screenshot

- Click Localize.
- Example screenshot:
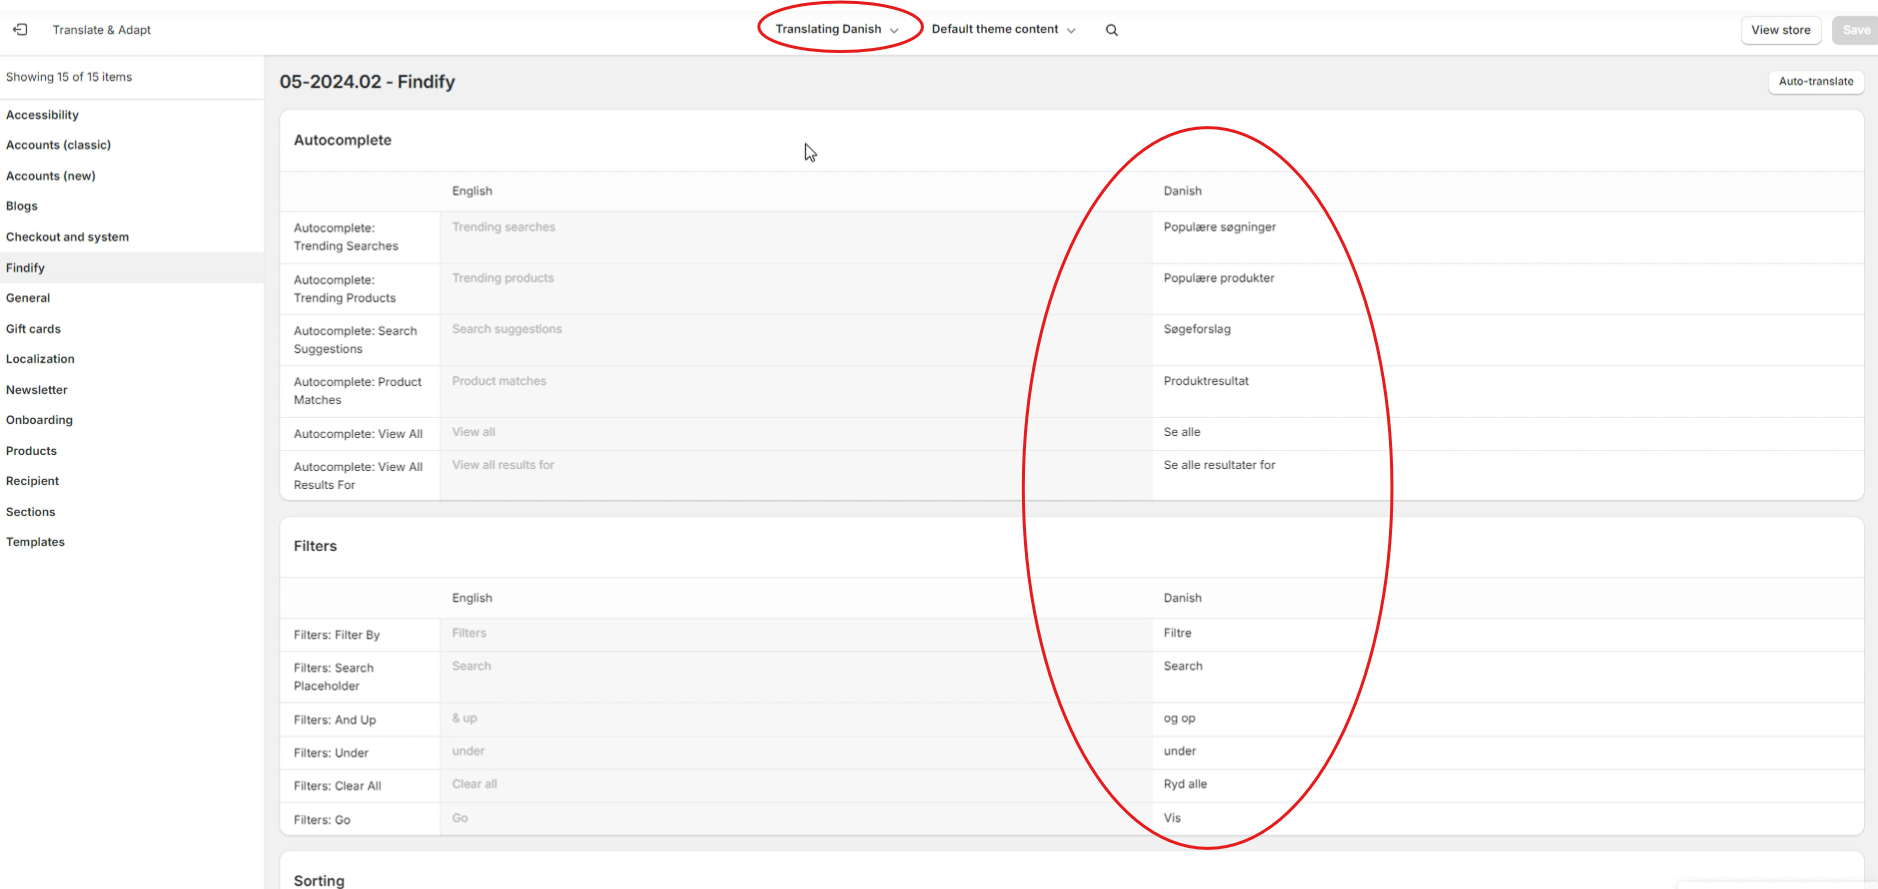
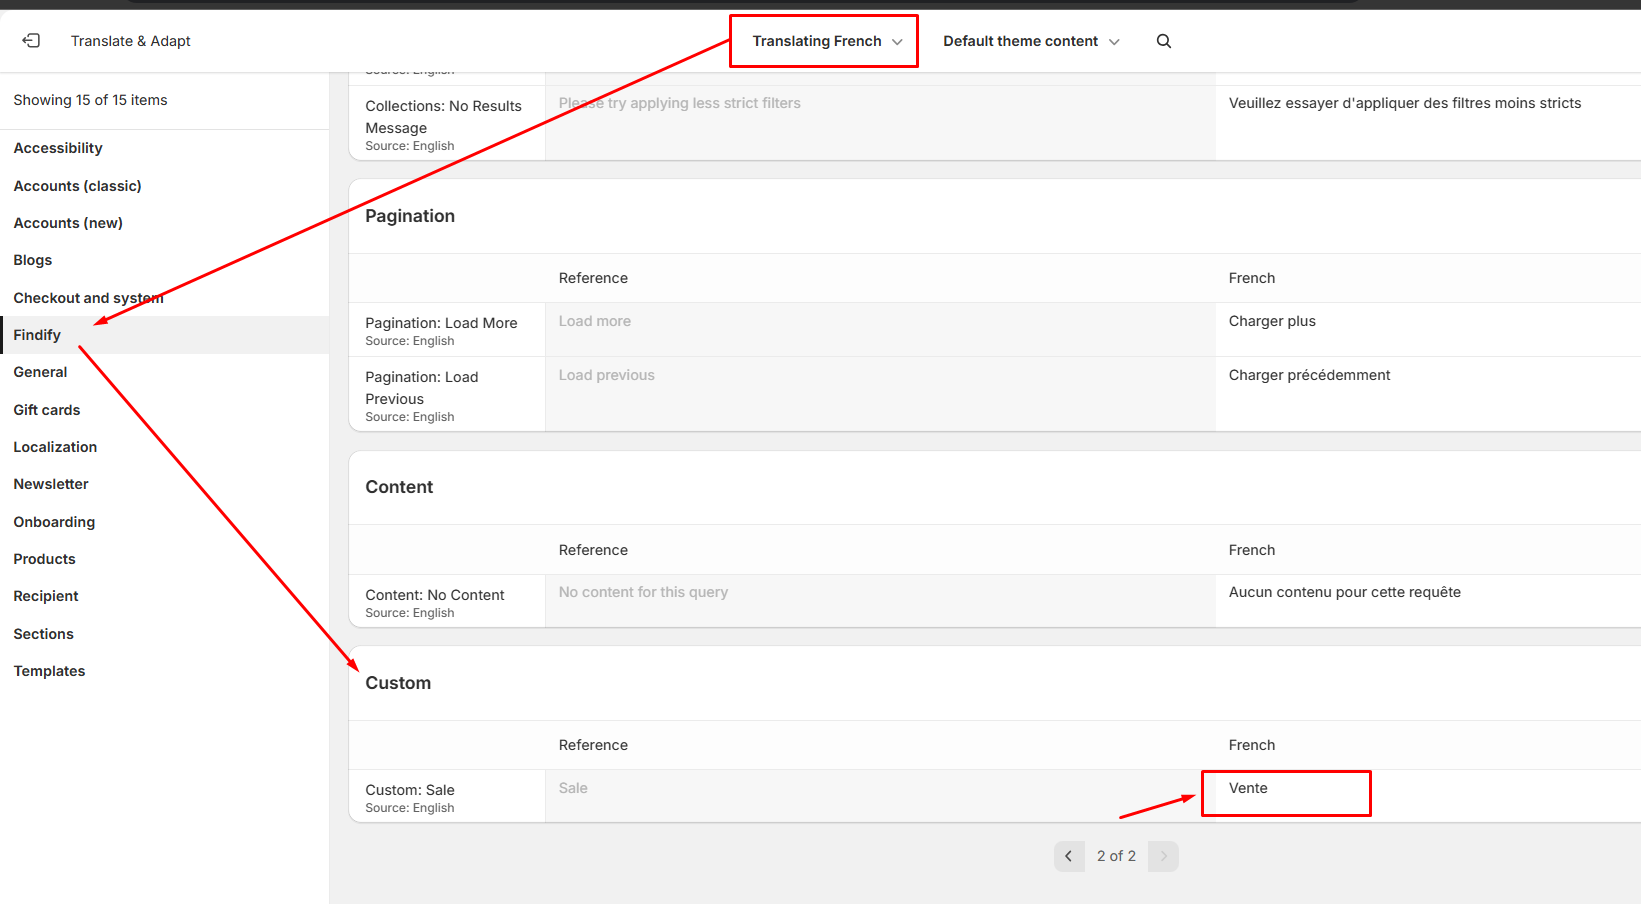
- Use the Translate & Adapt app to add or update translations for your custom keys.
- Example screenshot (adding a translation for
custom.sale):
4. Verify Translations
After adding translations, verify that they appear correctly across all markets.
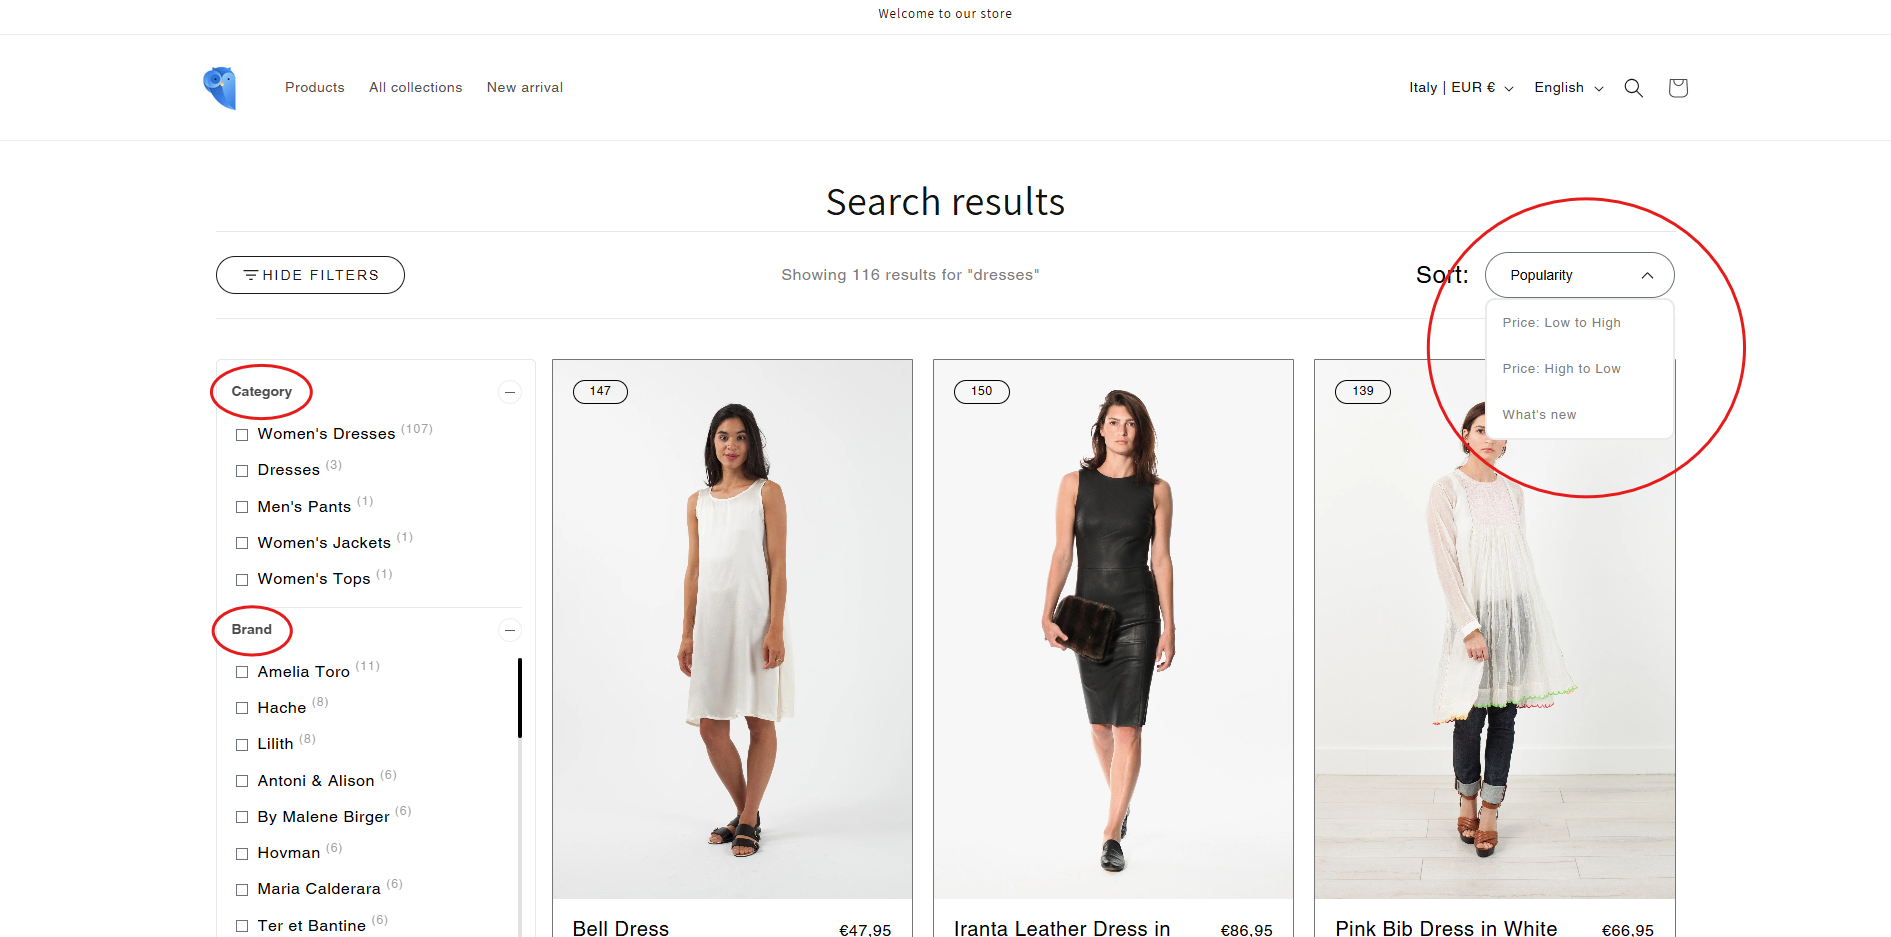
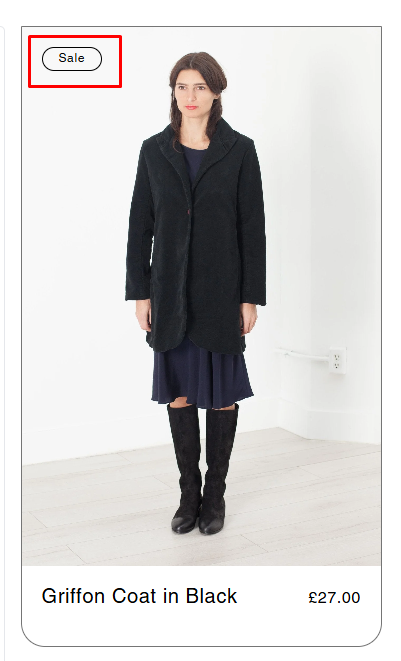
- English market example:
- French market example:
This documentation should provide an accessible overview of translation types and the processes for maintaining them within a multimarket environment. For further queries, feel free to email support@maropost.com.