Important: This article covers the new Theme Store and Editor, which is currently only available on new webstores. If you the steps in this article do not reflect your webstore's Theme Store and Editor, please refer to the standard instructions.
Neto by Maropost partners can design and customise a theme to your needs. Contact a design partner for a consultation.
Add a Webstore Theme to Your My Themes
The Maropost Theme Store offers a variety of pre-existing themes that can be used as as is or as the base for developing your own unique webstore theme.
The filter list on the lefthand side of the Theme Store page allows you to select criteria that you are looking for in a theme. You can choose criteria for Price, Recommended Industry, and default Features. Themes that do not have at least one of the selected criteria will not be displayed in the list.
Note: The filter criteria do not stack, meaning that the themes shown may not necessarily meet all the selected options.
To add a theme to My Themes:
- In your Neto control panel, navigate to Webstore > Themes. You will be taken to a page with thumbnail images of all of the Neto theme templates. You can also browse themes in our theme library.
- Scroll down to the All Themes section. When you find one that you like, hover your mouse over the thumbnail image. Click the Add Theme button to add the theme to your Neto site.
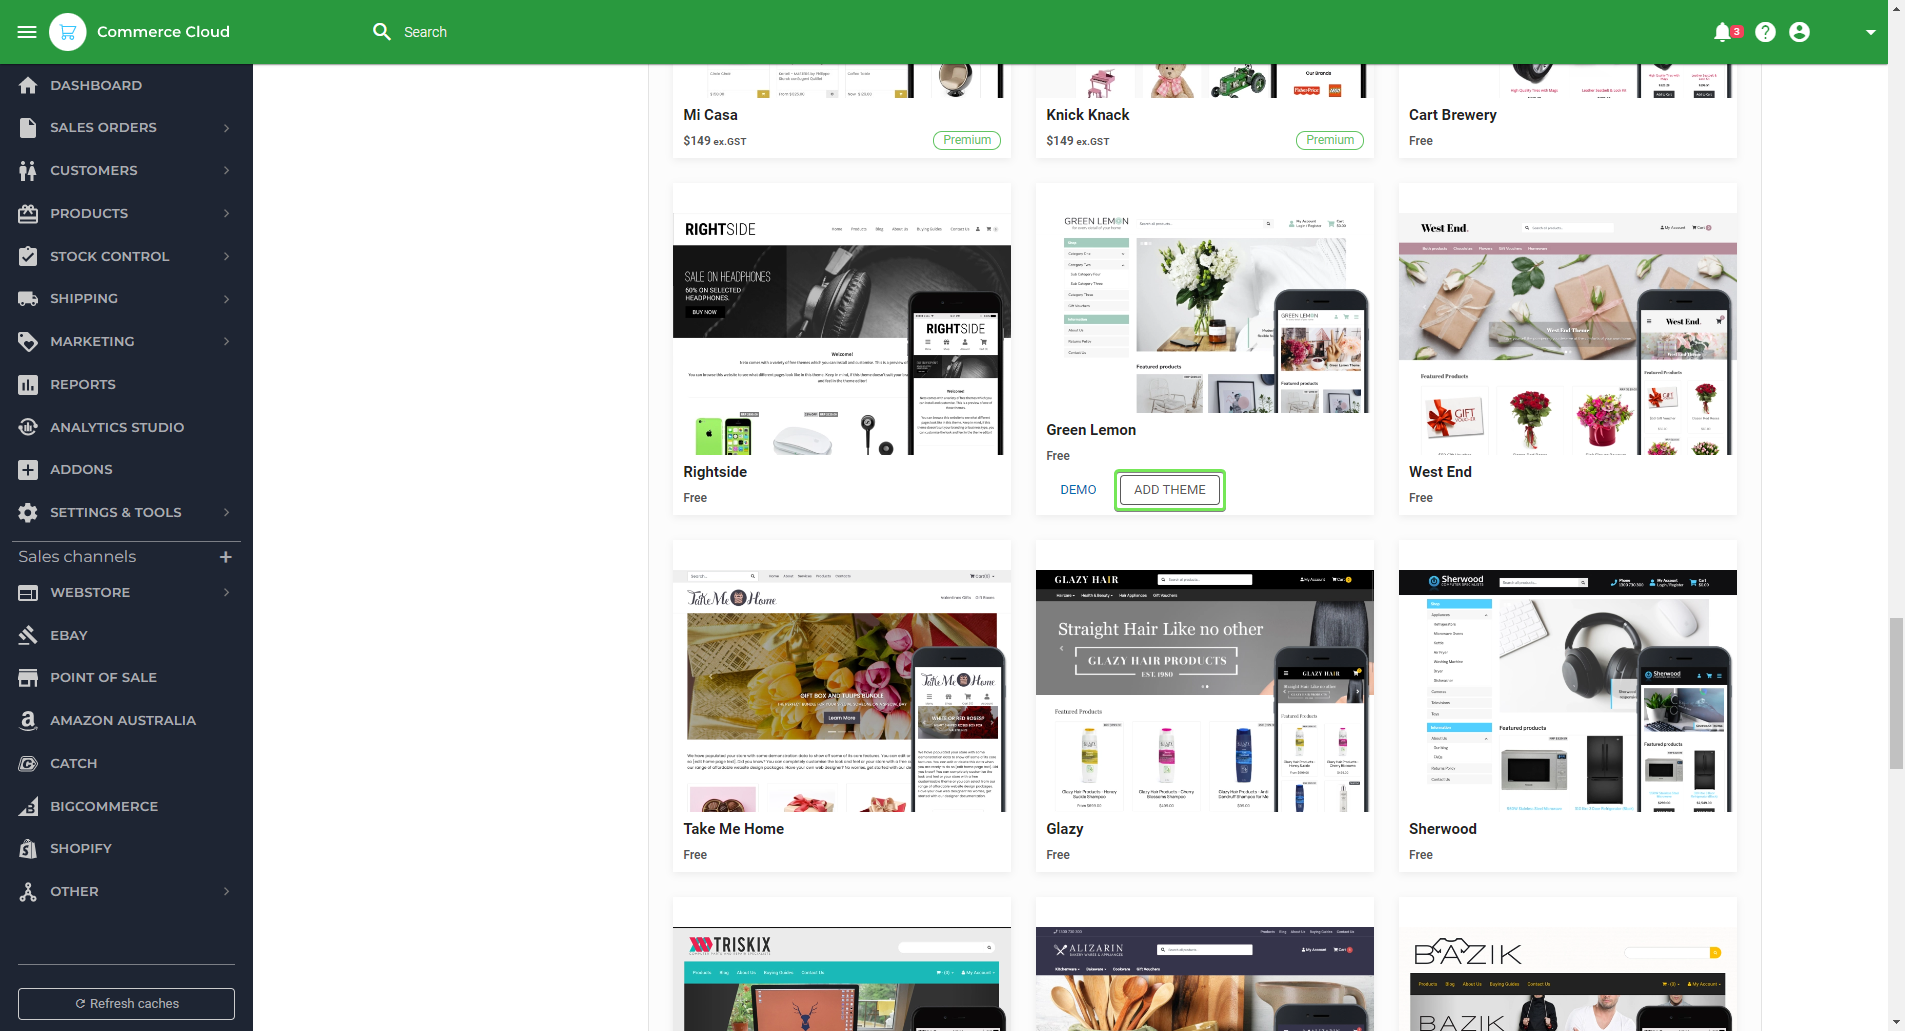
- You will be presented with a pop-up asking if you wish to edit the theme. Click No to refresh the page.
Once the theme has been added to My Themes on your Maropost Neto site, you must publish it to make it the Live theme for your website. To do this, scroll to the My Themes section and hover over the theme with your mouse. Where the Add Theme button used to be, there will now be a Publish button. Click this, and the theme will be set as your current Live theme.
Tip: You can preview what a theme will look like by entering your website address, followed by /?nview= and the name of your theme e.g. mywebstore.mymaropost.com/?nview=skeletal or mywebstore.com.au/?nview=skeletal.
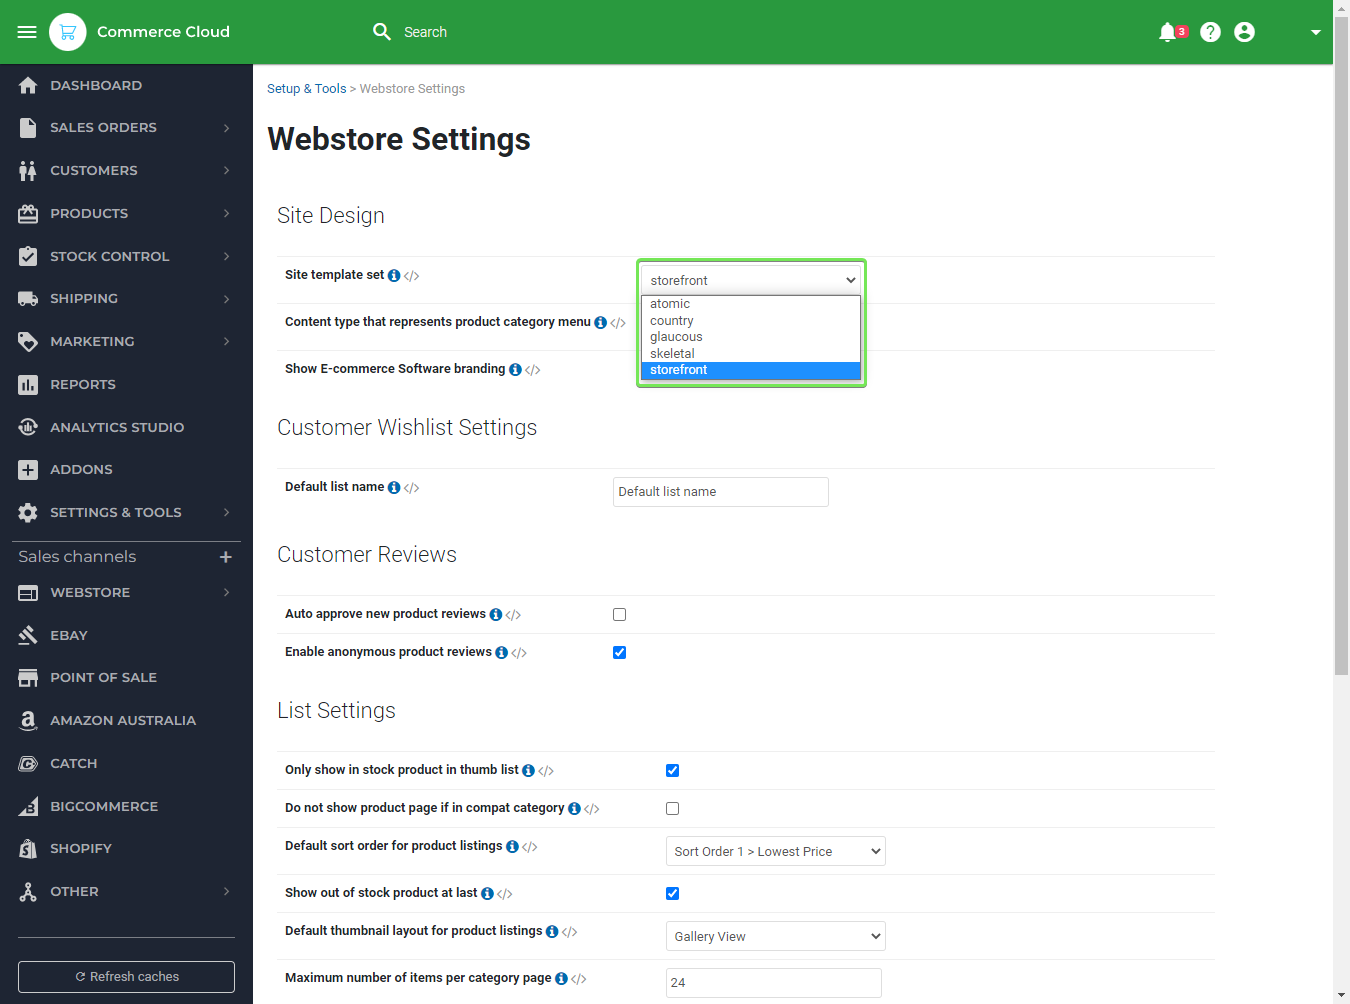
You can also choose which theme to activate by navigating to WEBSTORE > All Settings & Tools and clicking Themes. Here you will find a drop-down box to choose your webstore template set.
Webstore Theme Customisation Options
Each Neto theme has customisation options you can toggle and set to personalise and brand your theme. From the theme editor page, you can:
- Customise your Header, Body, Footer, and site-wide colours such as buttons and links to match your branding.
- Preview both desktop and mobile versions of your web shop directly in the editor, at the click of a button.
- Change configurations to your web shop right from the editor, such as Default Sort Orders, Checkout Options, and more.
- To set a theme from your My Themes as your Live web store theme, simply select the SAVE AND PUBLISH button.
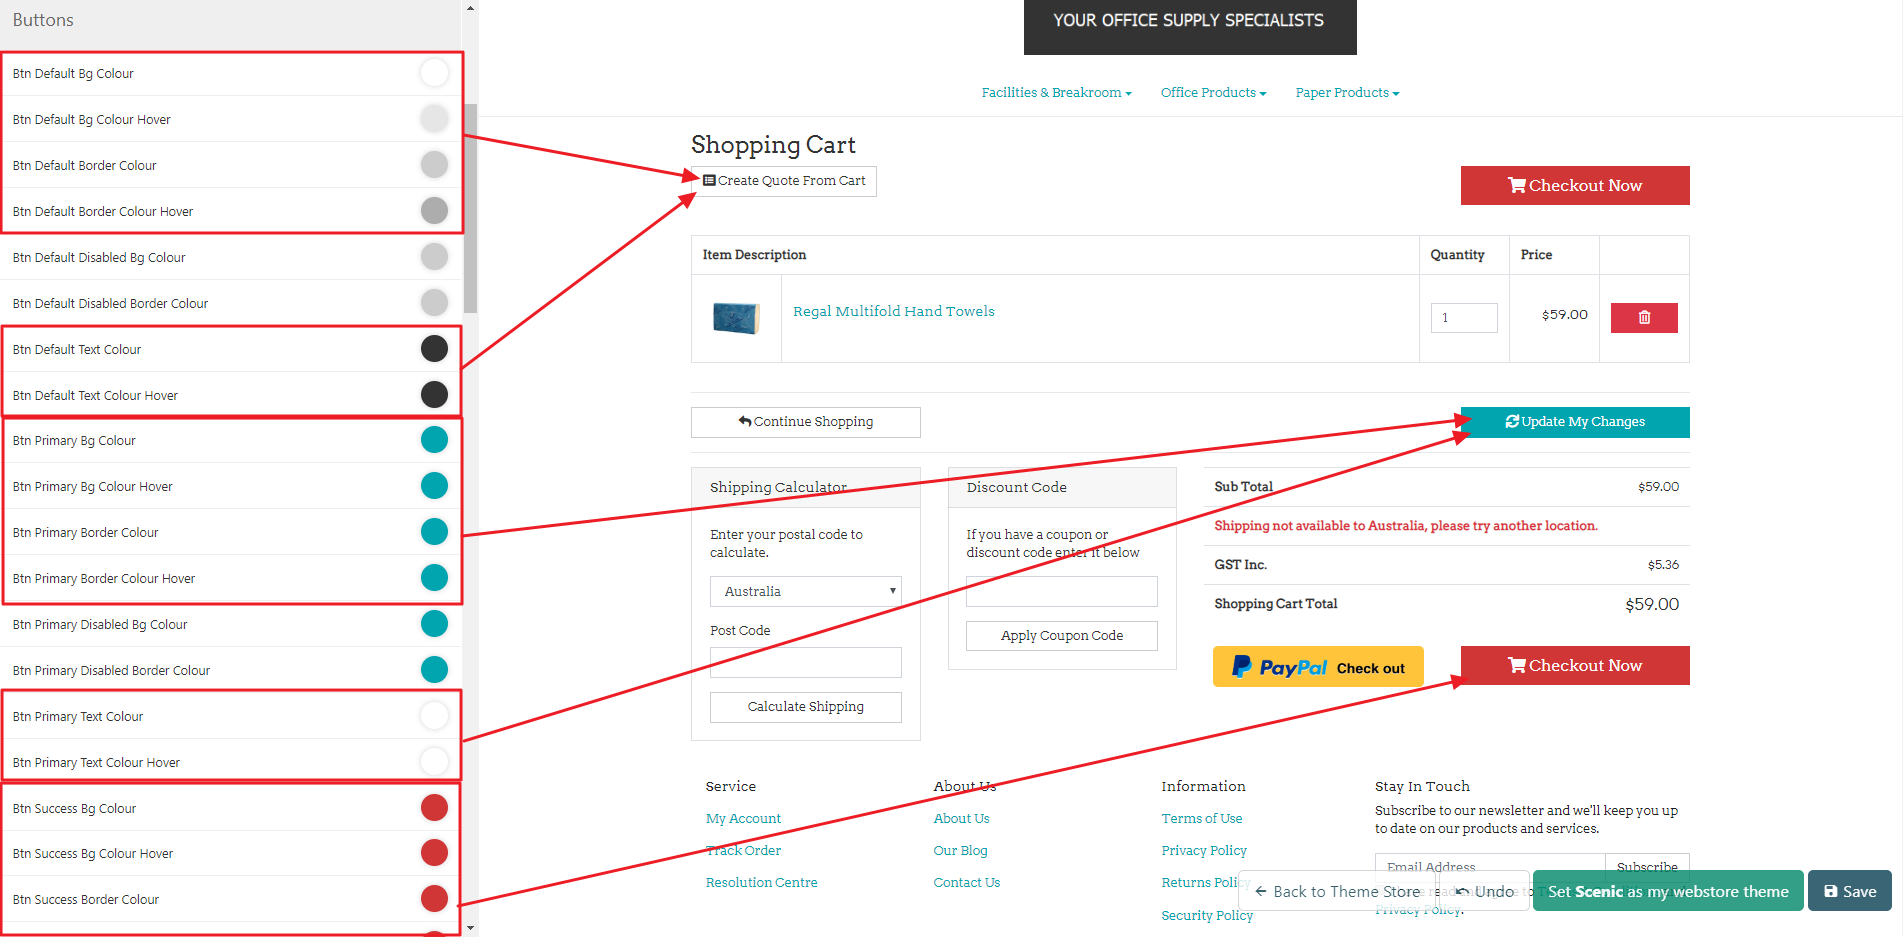
Below is an example of where colours for buttons can be updated. Don't forget you can change colours and preview them in the editor to see how they look.
Design In Neto
Getting around the Neto file system
Every Neto theme has a folder for the theme and its assets. This folder contains every JavaScript, CSS, and image file that the theme depends on.
This folder is only accessible via FTP and contains the markup for your theme. The files in this folder are parsed by Neto to create the pages you see on the front end.
Tip: The theme assets for the default theme, skeletal, is located in /httpdocs/assets/themes/skeletal.
Templates
The Neto CMS has 5 main page types, but chances are you'll only need to work with two: Content pages and Product pages.
Content Pages
Content pages cover everything from the homepage to the category pages. Most of them speak for themselves, but below is a quick overview of each of the default pages and their purpose.
Tip: Located in /httpdocs/assets/themes/your-theme-name/templates/cms.
- home.template.html - Everything contained on the homepage is in this file.
- default.template.html - This is the default template for any content pages, such as the About Us page.
- category.template.html - This page contains the contents of the standard category page. It has a list of all products in the category, as well as things like the category description.
- search_results.template.html - This page is very similar to the category page. It is the template for all search results. Chances are you'll want to make many of the changes you make to the category page to this page as well.
Product Pages
Product pages are simply the pages that display the details of your product to the customer. They contain their own /includes/ folder.
Headers & Footers
Our templates also include headers and footers. Like any template system, these are a great way to have consistent design elements at the top and bottom of every page. You can, however, specify for content pages to use an alternate header.
By default, the header contains all CSS calls, the footer contains all .JS calls.
Includes
Includes are embedded code snippets, and work the same as they do in most CMS's. By default, we only have sidebars in here, but you can make your own includes and call them via the [%LOAD_TEMPLATE%] tag.
Thumbs
These are the templates for all of the thumbnails used across the site. They are mostly used for product thumbnails on category pages and advert thumbnails in banners.
Cart, Customer, Stockists
You can also edit various elements of the Cart, Customer and Stockist pages. Stockist pages are simple to edit and function similarly to any Content page.
We do not recommend people make changes to customer and cart pages, however, unless they're confident with the template system first. Typically, when building a theme, you should not need to make many significant changes to these pages.
Website Assets
Assets are really simple in Neto and work the same as any other system. Our software does not parse or modify these assets at all, except when users are customising themes.
By default, we include Bootstrap, Lightbox, and a few other core plugins that our software depends on. We do not recommend changing or removing these plugins.
If you would like to include an asset in your templates, we recommend using the [%NTHEME_ASSET%] tag. This tag is great for theme building. It will automatically put the full asset URL up until the theme name. This means if you rename the theme, you will not need to change any of the URLs. This tag will also add a query string to the end of every URL after a user saves any customisations to the theme. This effectively circumvents any asset caching that may be on the site due to CDN services.
This tag only works on templates. You cannot use the [%NTHEME_ASSET%] tag in an asset file, such as a CSS or JavaScript file, as our software does not parse these files.
Neto B@SE Tags
So far, we've mentioned a handful of tags that you can use in our templates, such as [%NTHEME_ASSET%] and the [%LOAD_TEMPLATE%] tag. These are both B@SE tags.
Our parser will go through template files on page load and parse these tags for you. There are many tags, and they can be extremely powerful [%IF%] tags and expressions for example). We won't go through them in this walkthrough, but you can find a list of all B@SE tags here.
Create a Neto Theme
Ensure you request SFTP access from us so you can make changes.
If you don't have an FTP program, we recommend using FileZilla which you can download here.
Using the above section as a reference, and our tag library, you should be ready to get started on your first Neto theme. For the sake of simplicity, this walk through will assume that you're happy with the default functionality of our base template, and that the changes you wish to make are purely structural (HTML) and aesthetic (CSS).
There are 3 steps to making a Neto theme. Firstly, you need to Install a base template, then you need to make your customisations.
Step 1: Install a new theme
All custom themes should be built from our base template, Skeletal. To install the latest version of Skeletal, complete the following steps:
- In your Neto control panel, navigate to Webstore > Themes.
- Locate the Skeletal theme and click Install. Now you'll want to set your theme to Skeletal.
- We'll come back to the theme builder later, but for now the rest of the work is done via FTP. Feel free to get started here though. If you want, you can make minor customisations from the Customise tab, before you even have FTP access.
Some developers prefer to do things like change font, link and button colours here to save a bit of time.
Eventually, we'll learn how to set up our own customisable fields for themes.
Step 2: Customise your theme
For CSS, we'll typically make all changes to the style.css file (httpdocs/assets/themes/skeletal/css/style.css).
This is important because it means you can update dependencies like Bootstrap in the future and keep your custom styles. This is also the only file that the theme builder reads/edits when users are customising their themes in the control panel.
Step 3: Make your theme customisable
You can make most styles in the styles.css file customisable.
In style.css, next to the style you want to be customisable, include a CSS comment with the desired ID of the customisable field.
.dropdown-menu>li>a:hover {
background:none;
background-color: #006dcc /{primary-colour}/ ;
}
This will now be customisable in the back-end under the title primary-colour. You can also reuse this tag, as long as the style is identical every time.
It does display a bit ugly, though. We can rename these to something a bit more presentable by matching them up in the style.info.txt (httpdocs/assets/themes/skeletal/css/style.info.txt) file.
Where you simply need to add it, with the nicer name to the right, separated by a colon.
e.g. primary-colour: Primary Colour
Step 4: Test your theme
If you find yourself designing a theme for a live site and want to test how it will look, there's an easy way without setting it live.
To change your view to see your new theme, you can visit the site url:
www.yoursiteurlhere.com/?nview=themename
Just replace the yoursiteurlhere with your own Neto site address, and themename with the name of your theme, and you'll see what your theme looks like on your site.
To clear the view and to go back to default, simply type in the following URL:
www.yoursiteurlhere.com/?nview=
Access for Designers
If you've requested changes to the look of your website from a designer or front-end developer outside of the in-house team at Neto, you will need to provide them with access to your website control panel.
Note: Neto partners can be granted access by completing this form.
This could include:
- Contracting an outside designer to work on your website.
- Requesting maintenance on a premium theme.
Control Panel Access
Control panel access is required to clear the web accelerator cache during implementation, as well as to scope out if and how the requested modifications will work in the context of your website.
To provide access to your website control panel, you'll need to create a new staff user. Instructions on how to do this can be found here.
SFTP Access
Many designers will also need SFTP access to your website template files to make changes. You can request SFTP access by completing the form here (this doesn't apply to AV Tech as you agree to give them access as part of the tweak process).
Staff Permission Groups
If you'd like to restrict access to parts of your control panel for any reason, you can do so by setting up a staff permission group.
You should ensure the staff permission group has access to information relevant to the design work you've requested.
For example:
- If your tweak involves work on the product page, they'll need access to products, custom product fields, and other product-related areas.
- If your tweak requires setting up adverts, they'll need to access ad campaigns, ad groups, and other advert-related areas.
Theme Terms & Conditions
Please review the terms and conditions for using a theme here.