The Promotions page gives you a centralized view and management console for all the discount campaigns running on your store — from percentage-based discounts to amount off to free shipping codes. You can access this section under:
To access,
Go to Navigation > Promotions
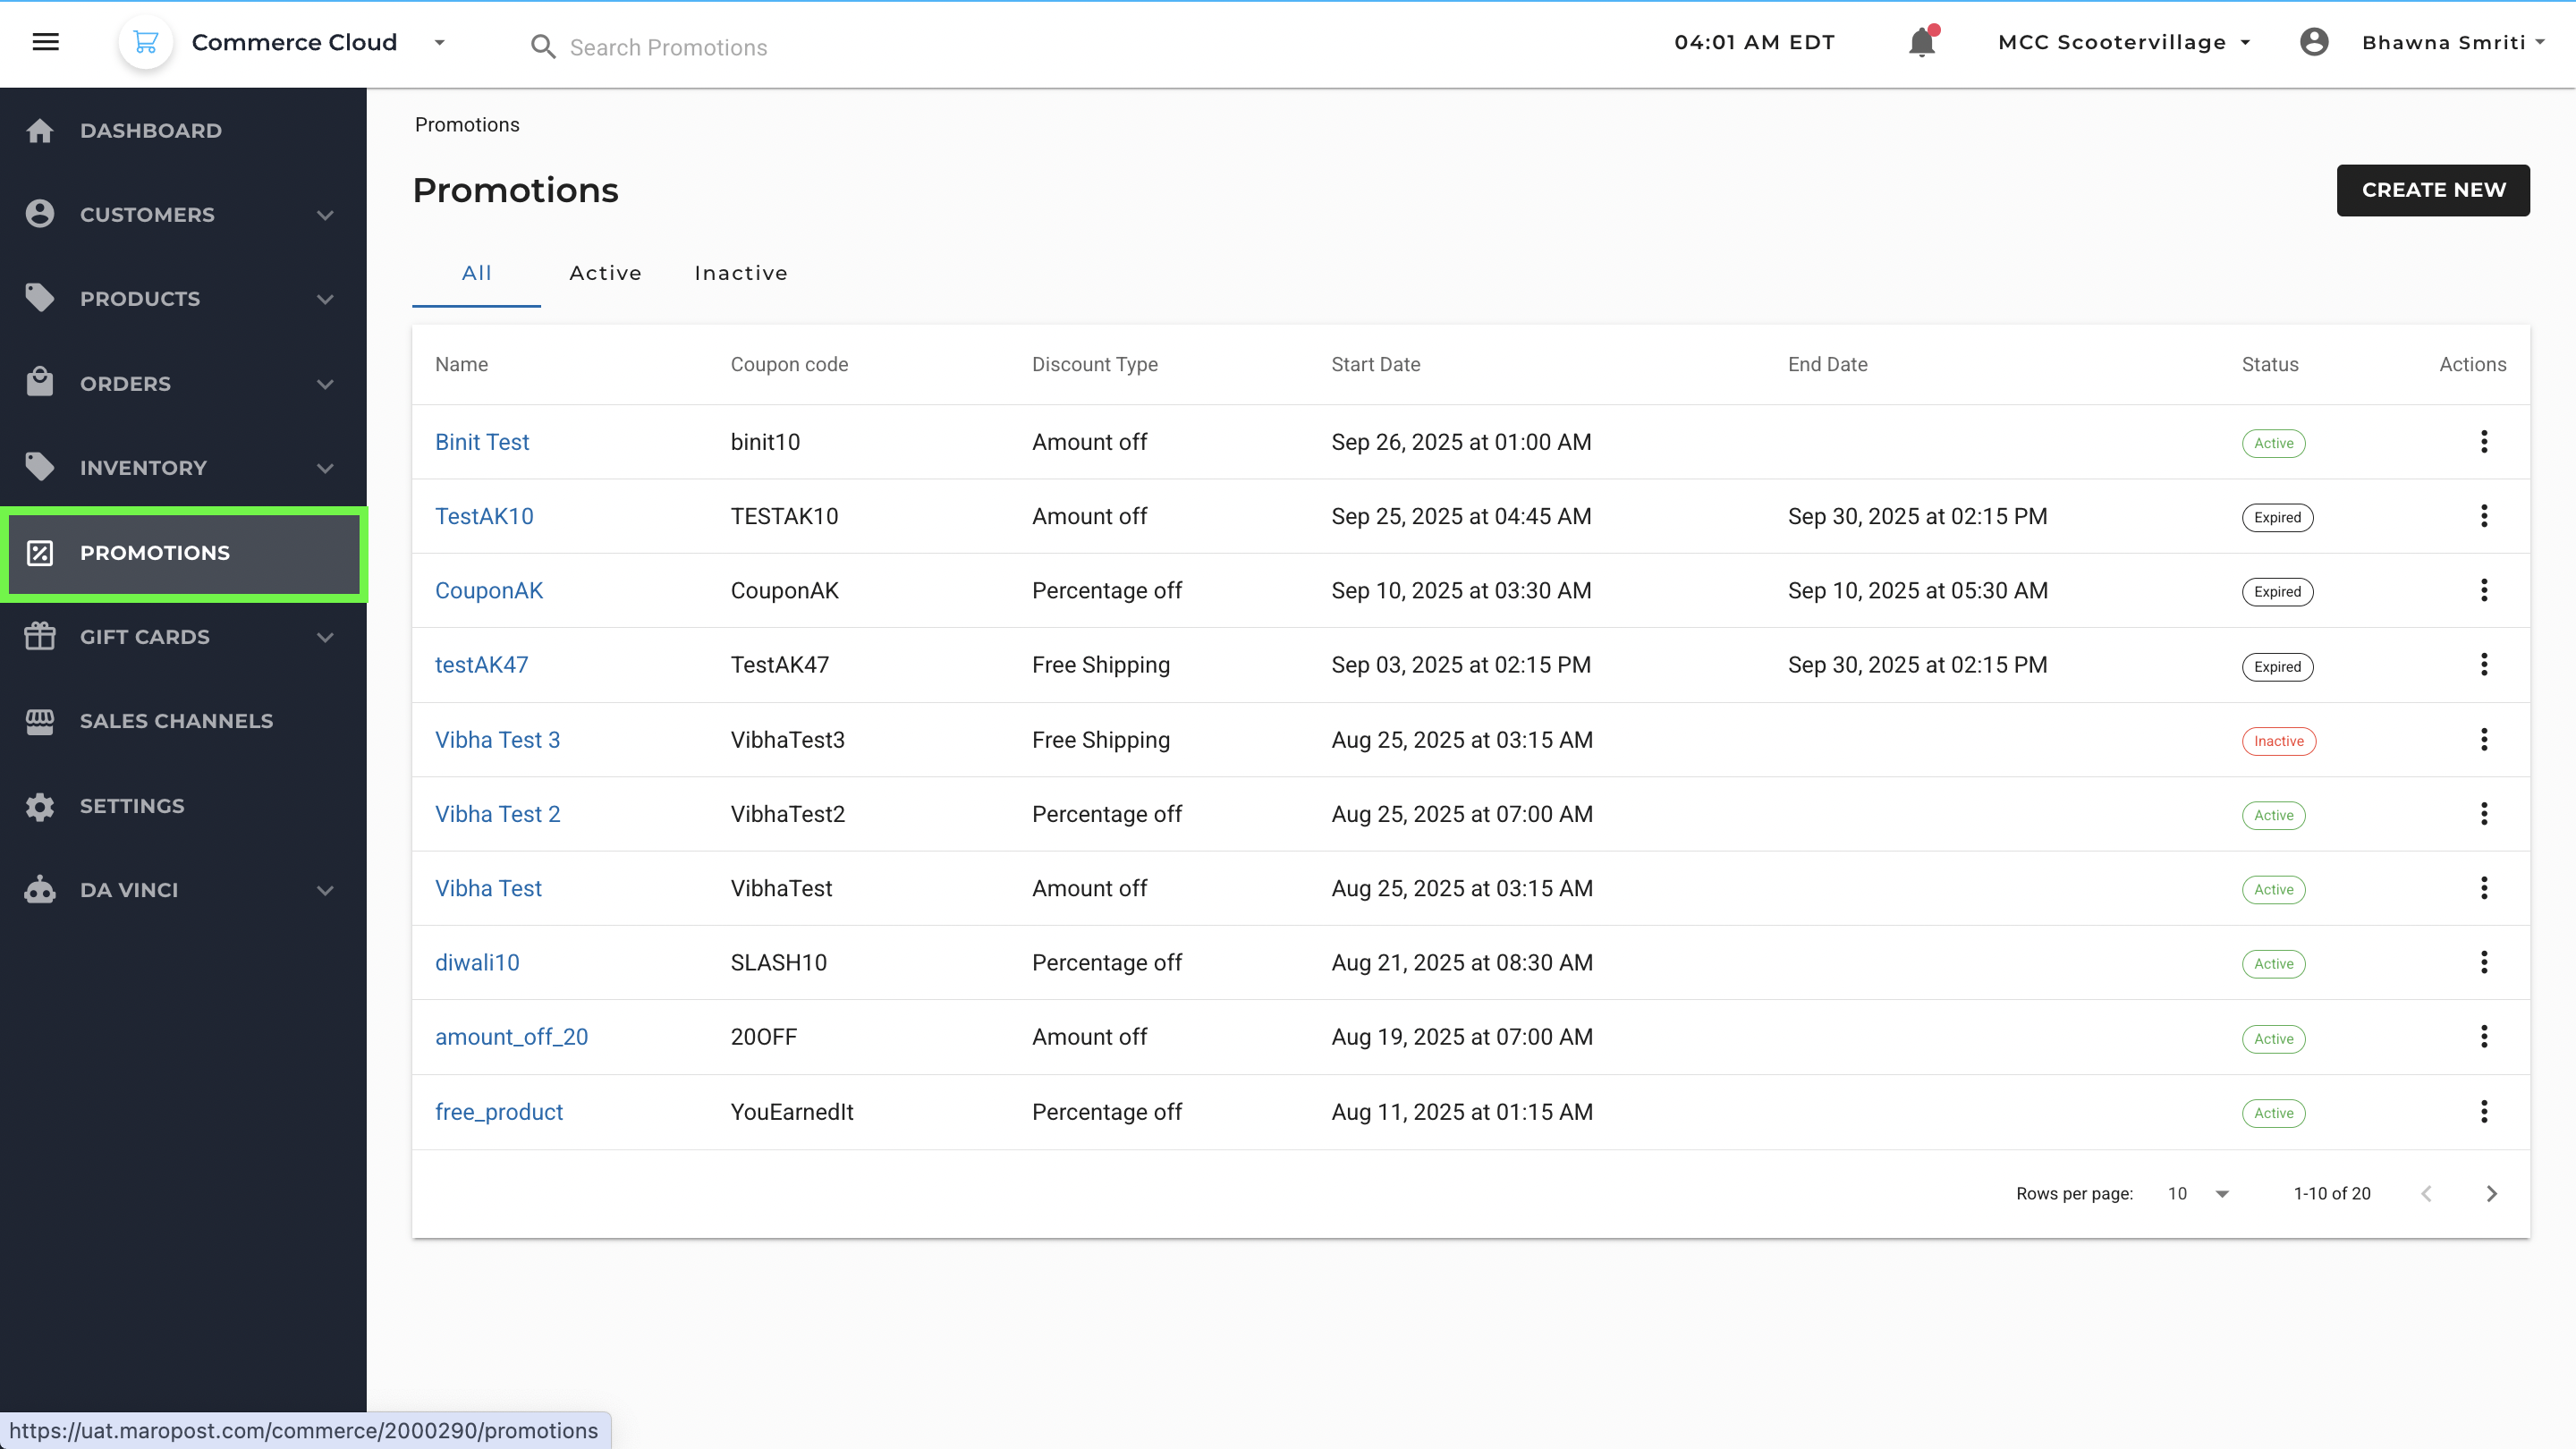
This section lists all the available promotions in a tabular format with the following key columns:
Column | Description |
|---|
Name | The internal title of the promotion (e.g., Binit Test, Vibha Test 3) |
Coupon Code | The code customers need to enter at checkout to avail the offer |
Discount Type | Type of discount applied — Amount off, Percentage off, Free Shipping, etc. |
Start Date | The scheduled start date and time of the promotion |
End Date | The scheduled end date and time of the promotion |
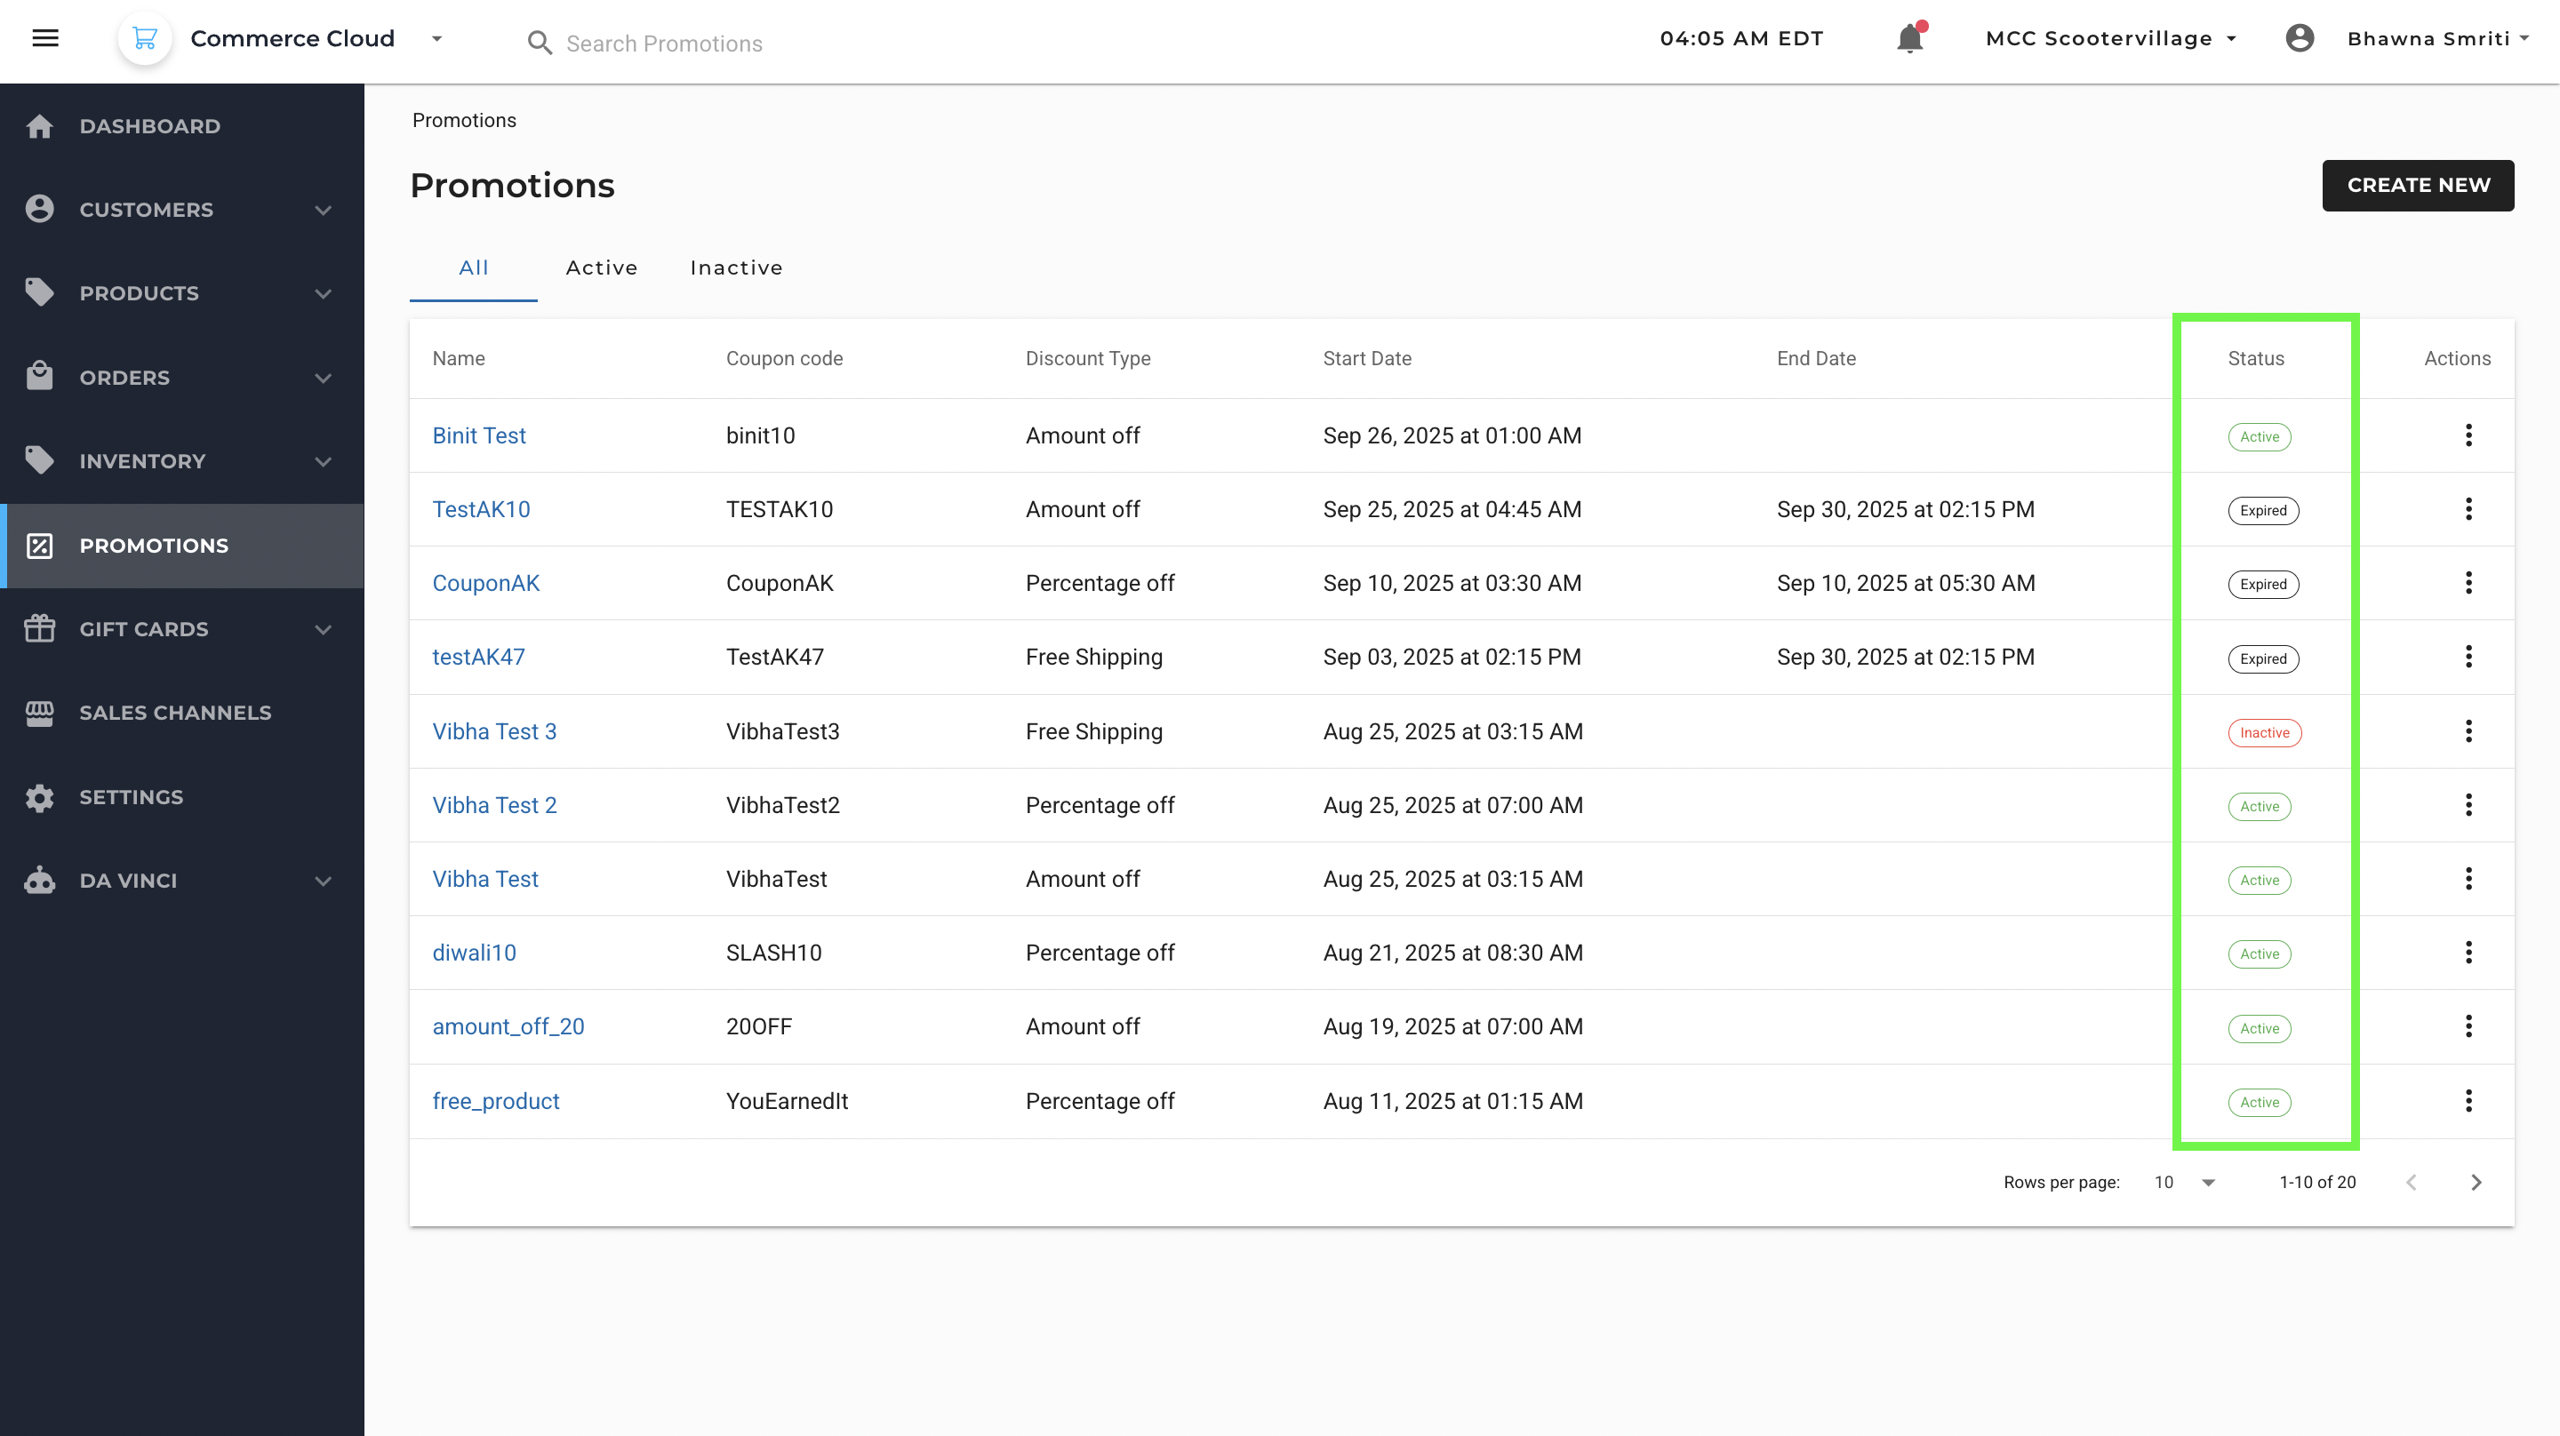
Status | Current status of the promotion — Active, Inactive, or Expired |
Actions (⋮) | Access edit or delete options from the three-dot menu |
Status Filters
At the top of the page, you can switch between:
- All: View all promotions
- Active: View promotions currently running
- Inactive: View promotions that have been disabled or not yet started
You will find status of each promotion code in the information Panel, each status is visually colour-coded:
- Active – Green
- Inactive – Red
- Expired – Grey
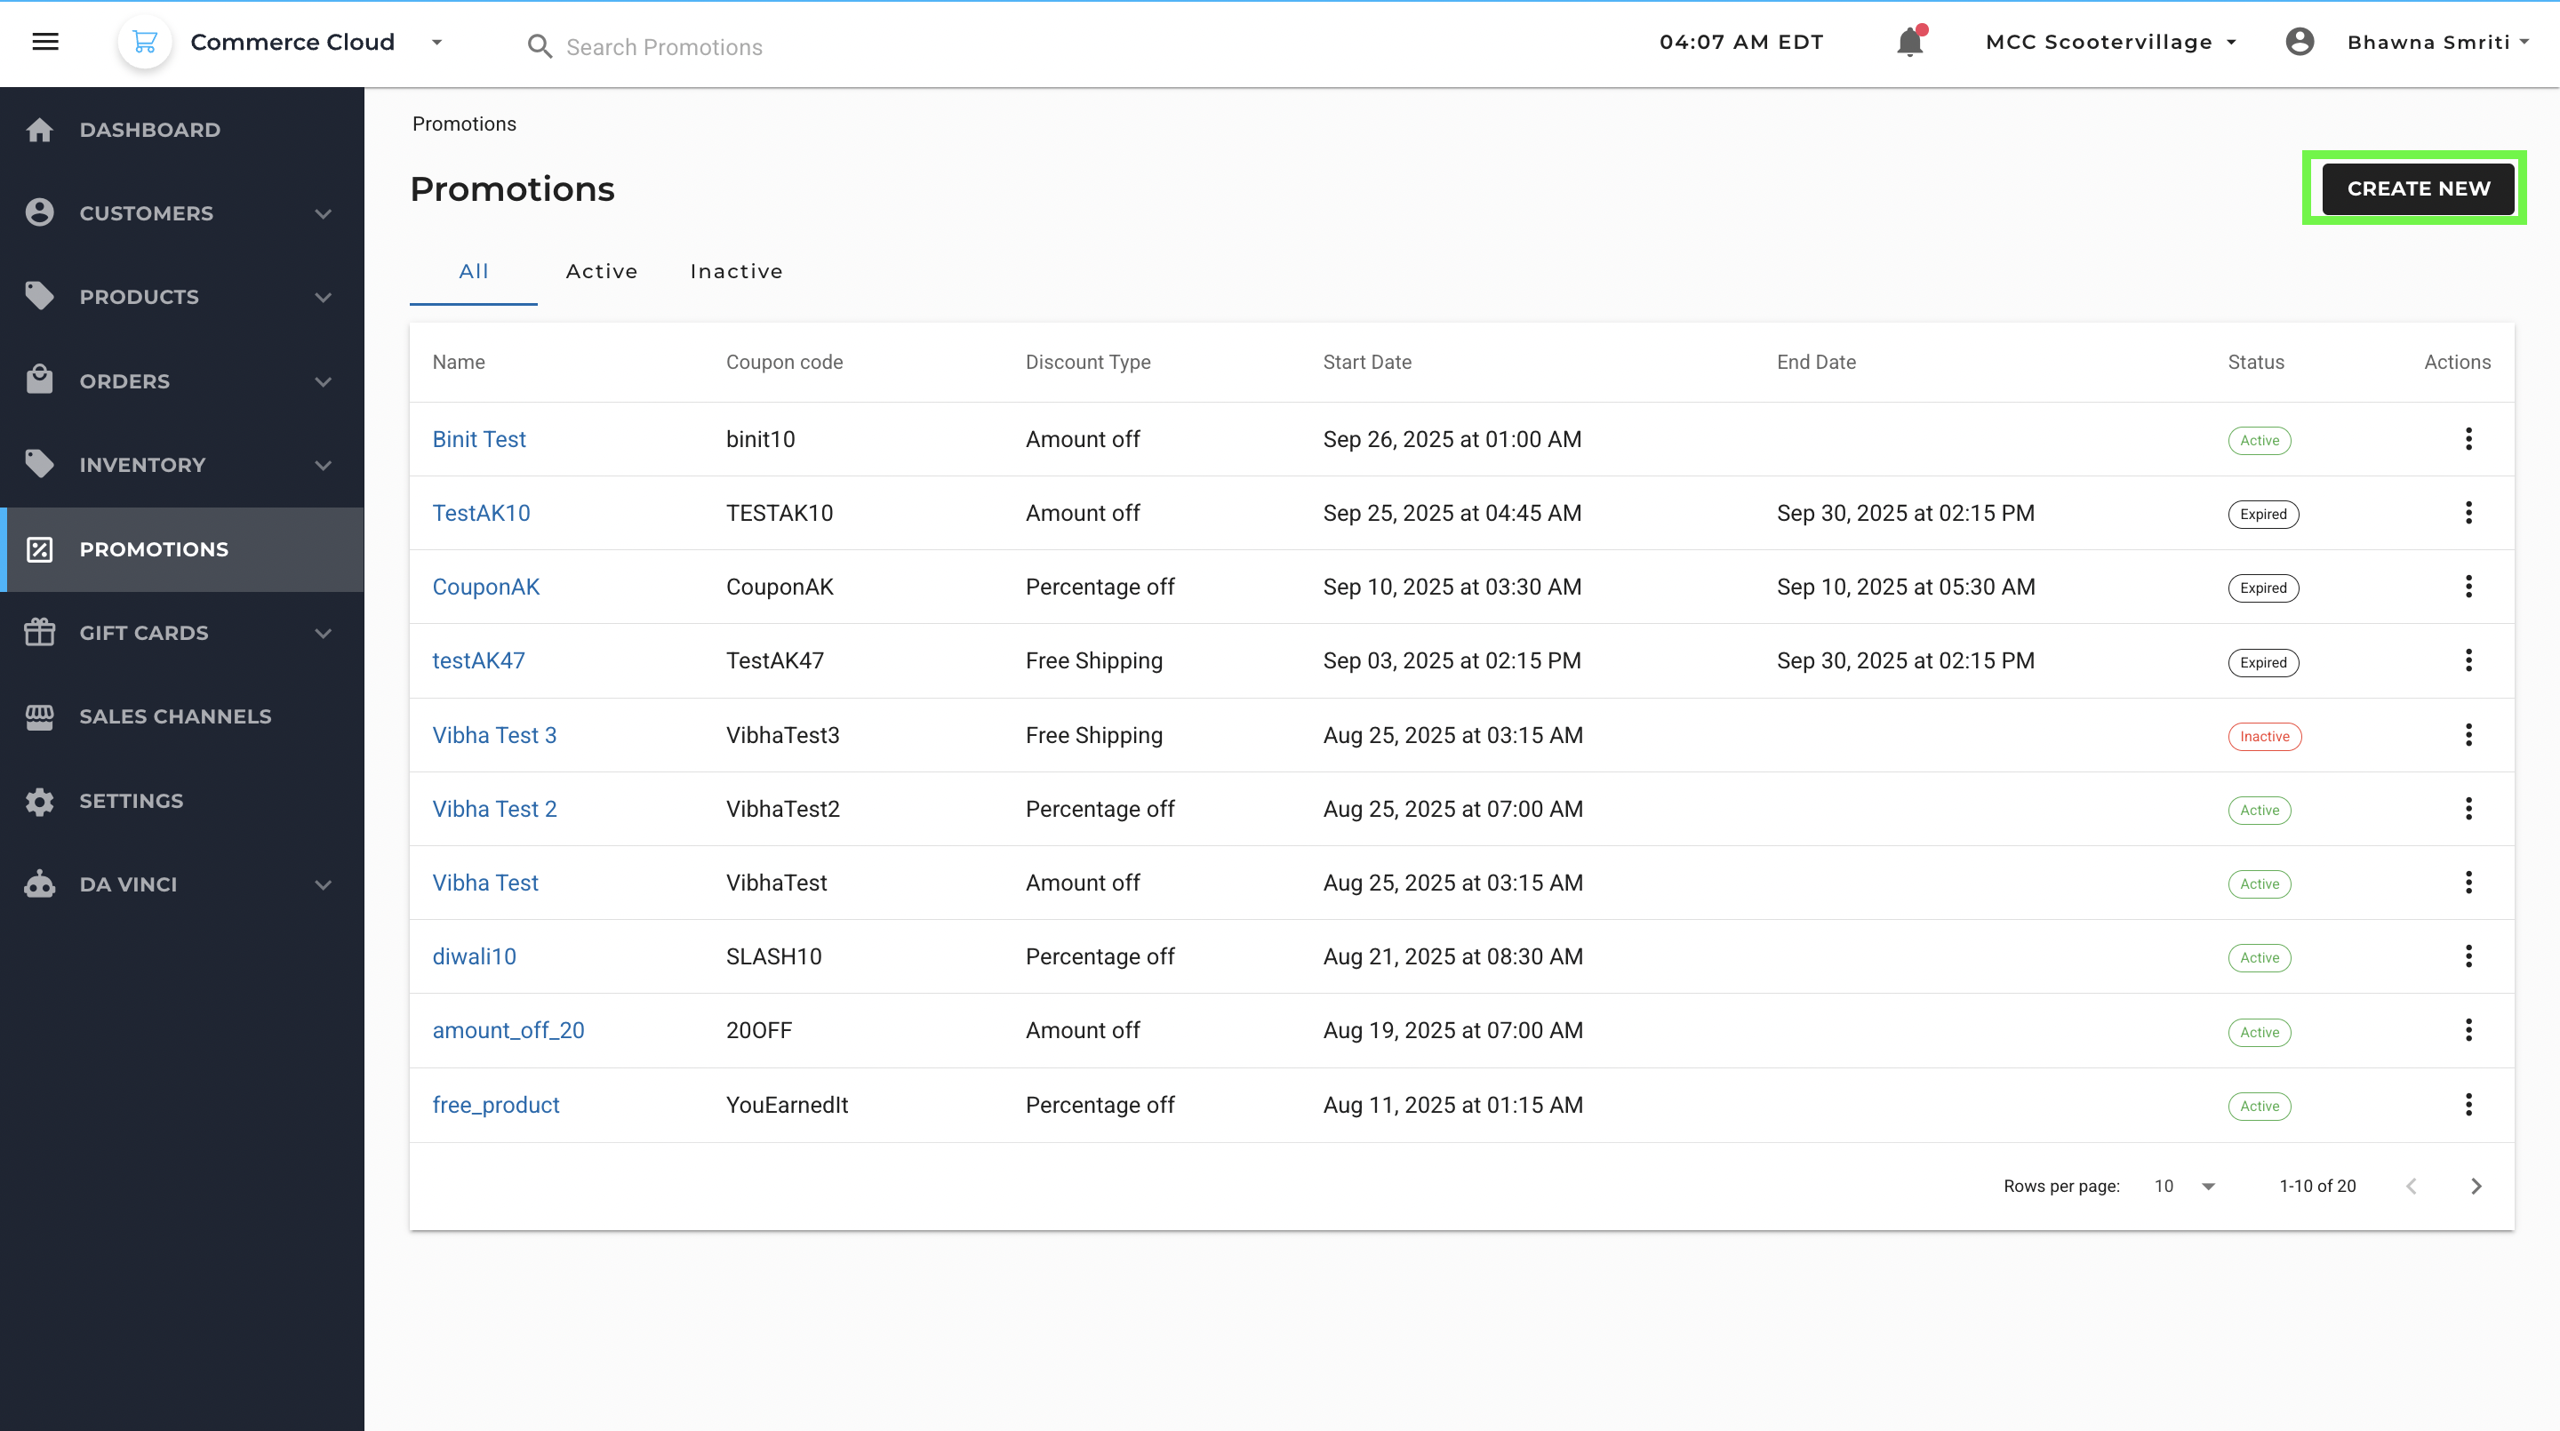
Creating a New Promotion
To create a new promotion, click the Create New button (top right) to launch the Promotion Wizard.
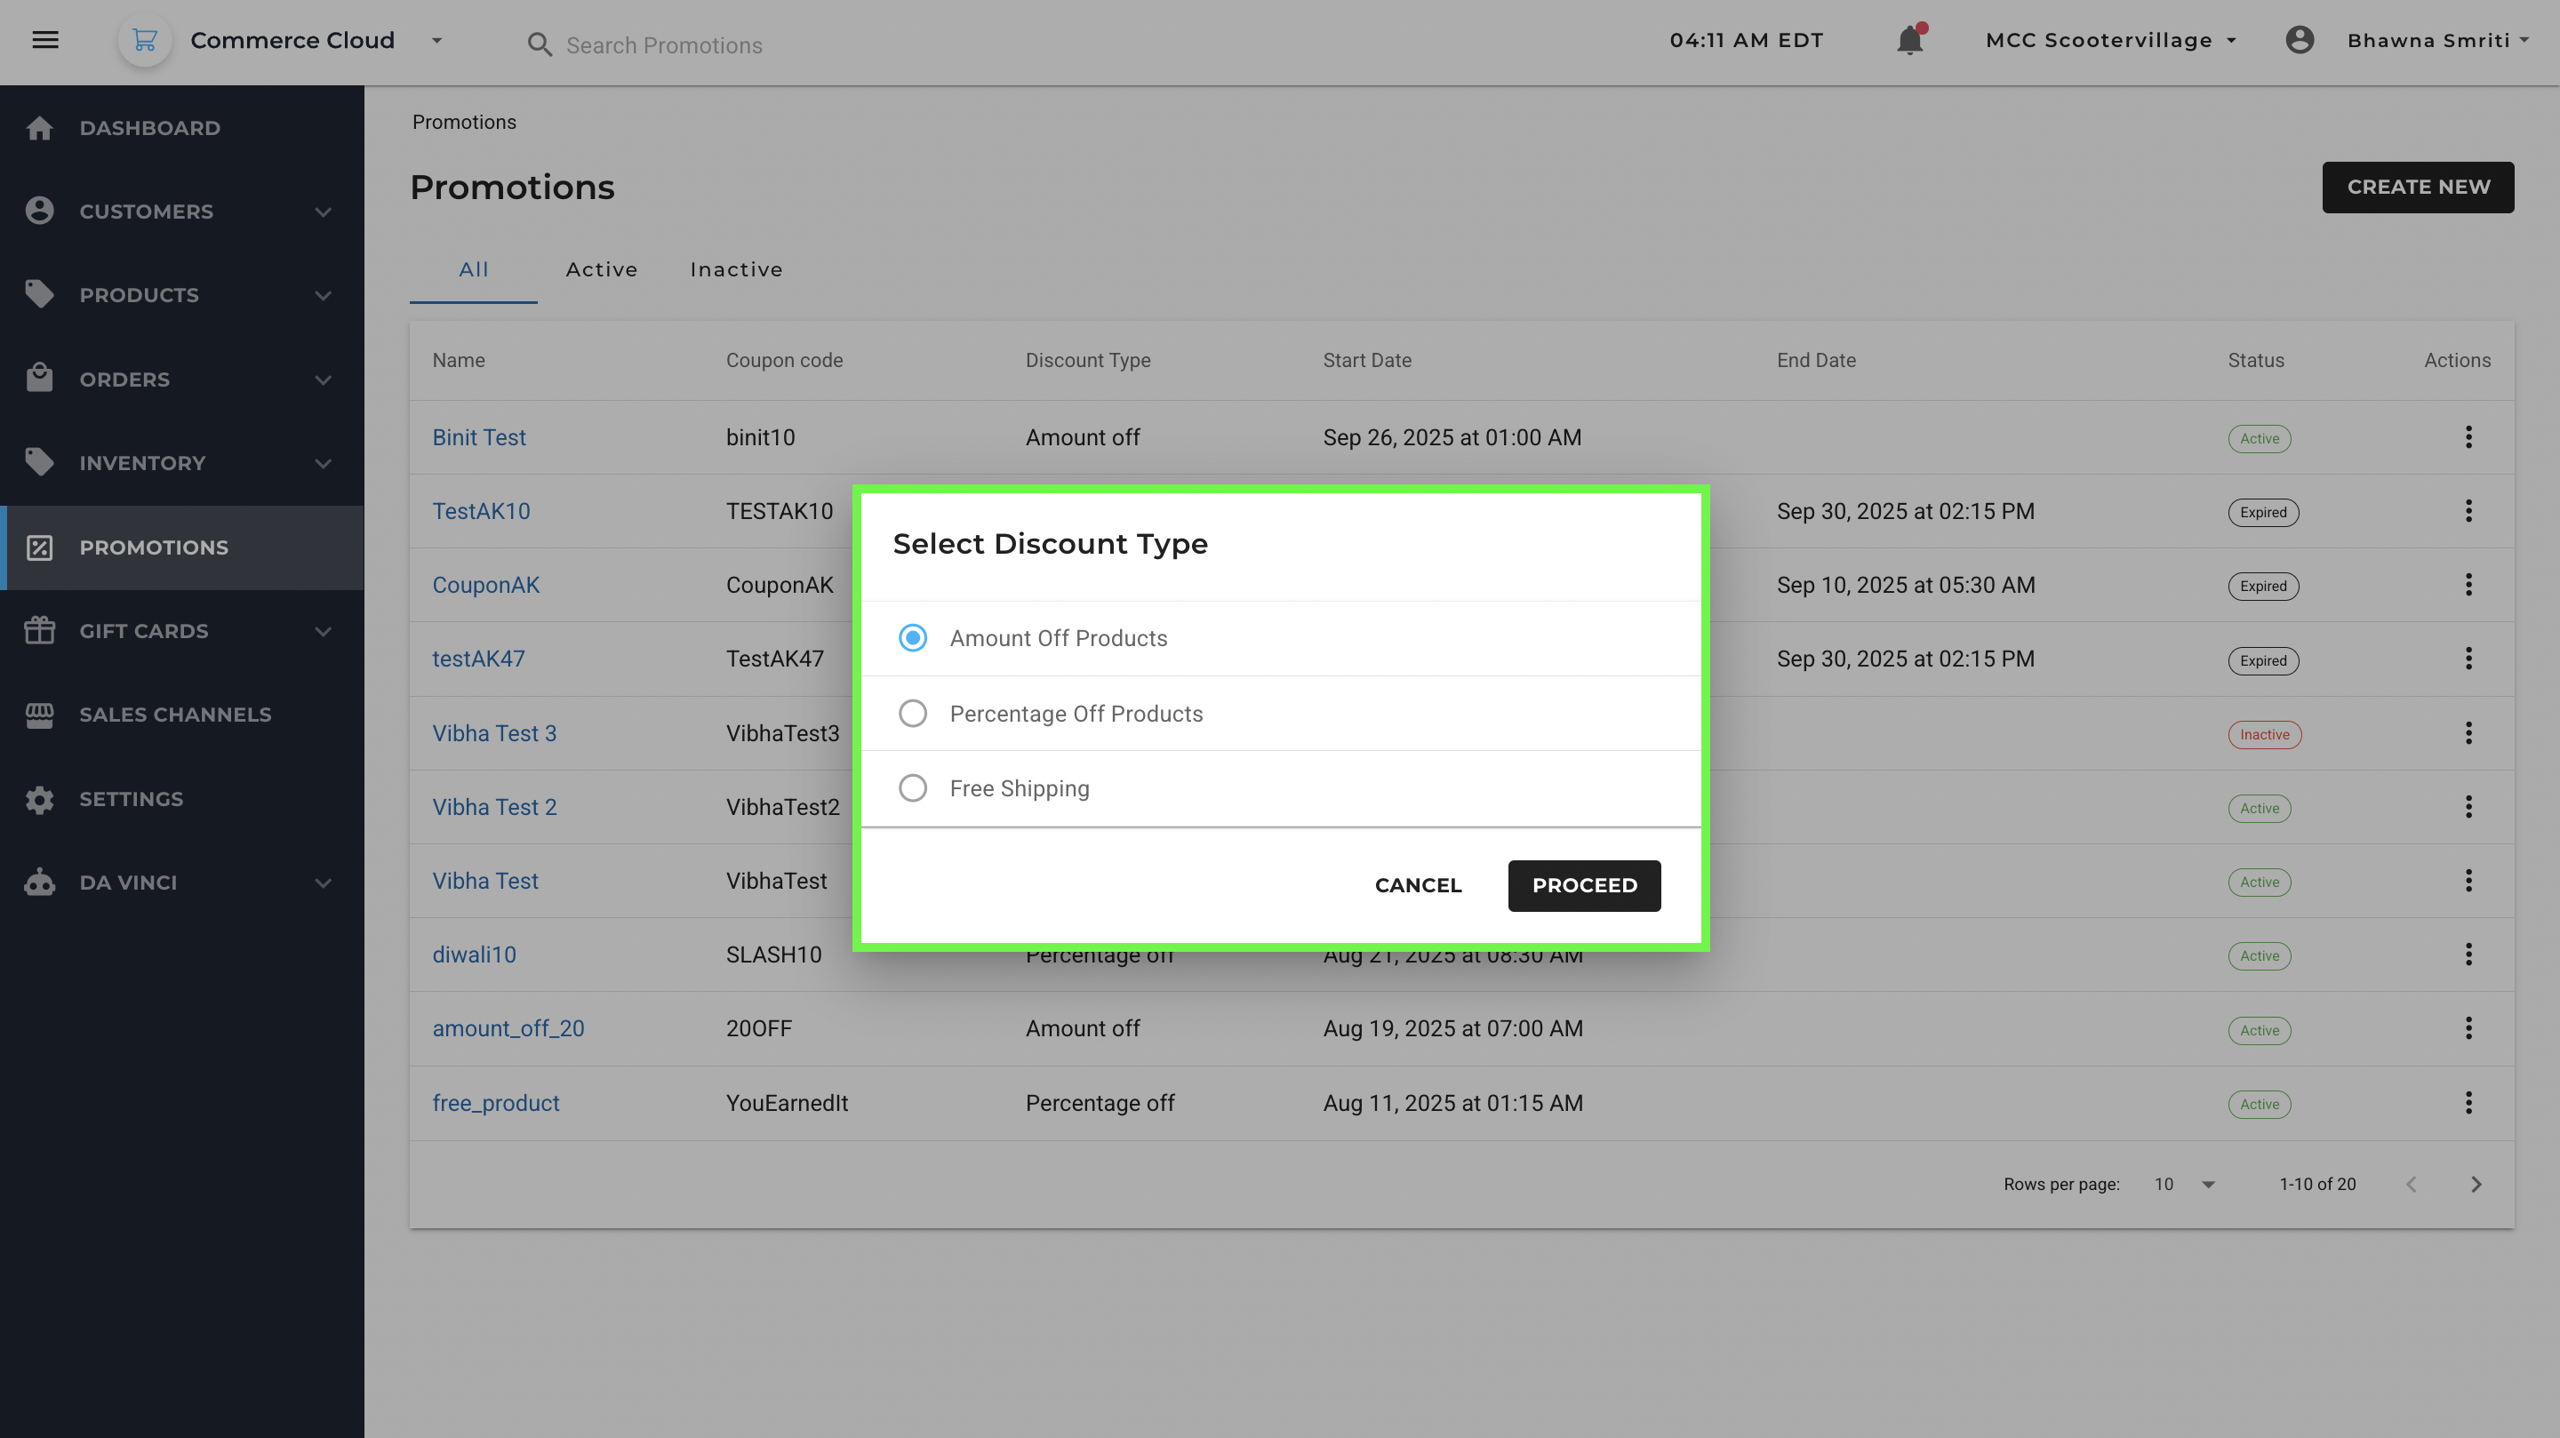
Step 1: Select Discount Type
You’ll first be asked to select a discount type. This determines the nature of the promotion you're setting up. You’ll see the following three options:
- Amount Off Products – Deducts a fixed amount from the product price.
- Percentage Off Products – Deducts a percentage from the product price.
- Free Shipping – Offers free shipping to customers.
After selecting the desired discount type, click Proceed to continue to the next step in the promotion setup process.
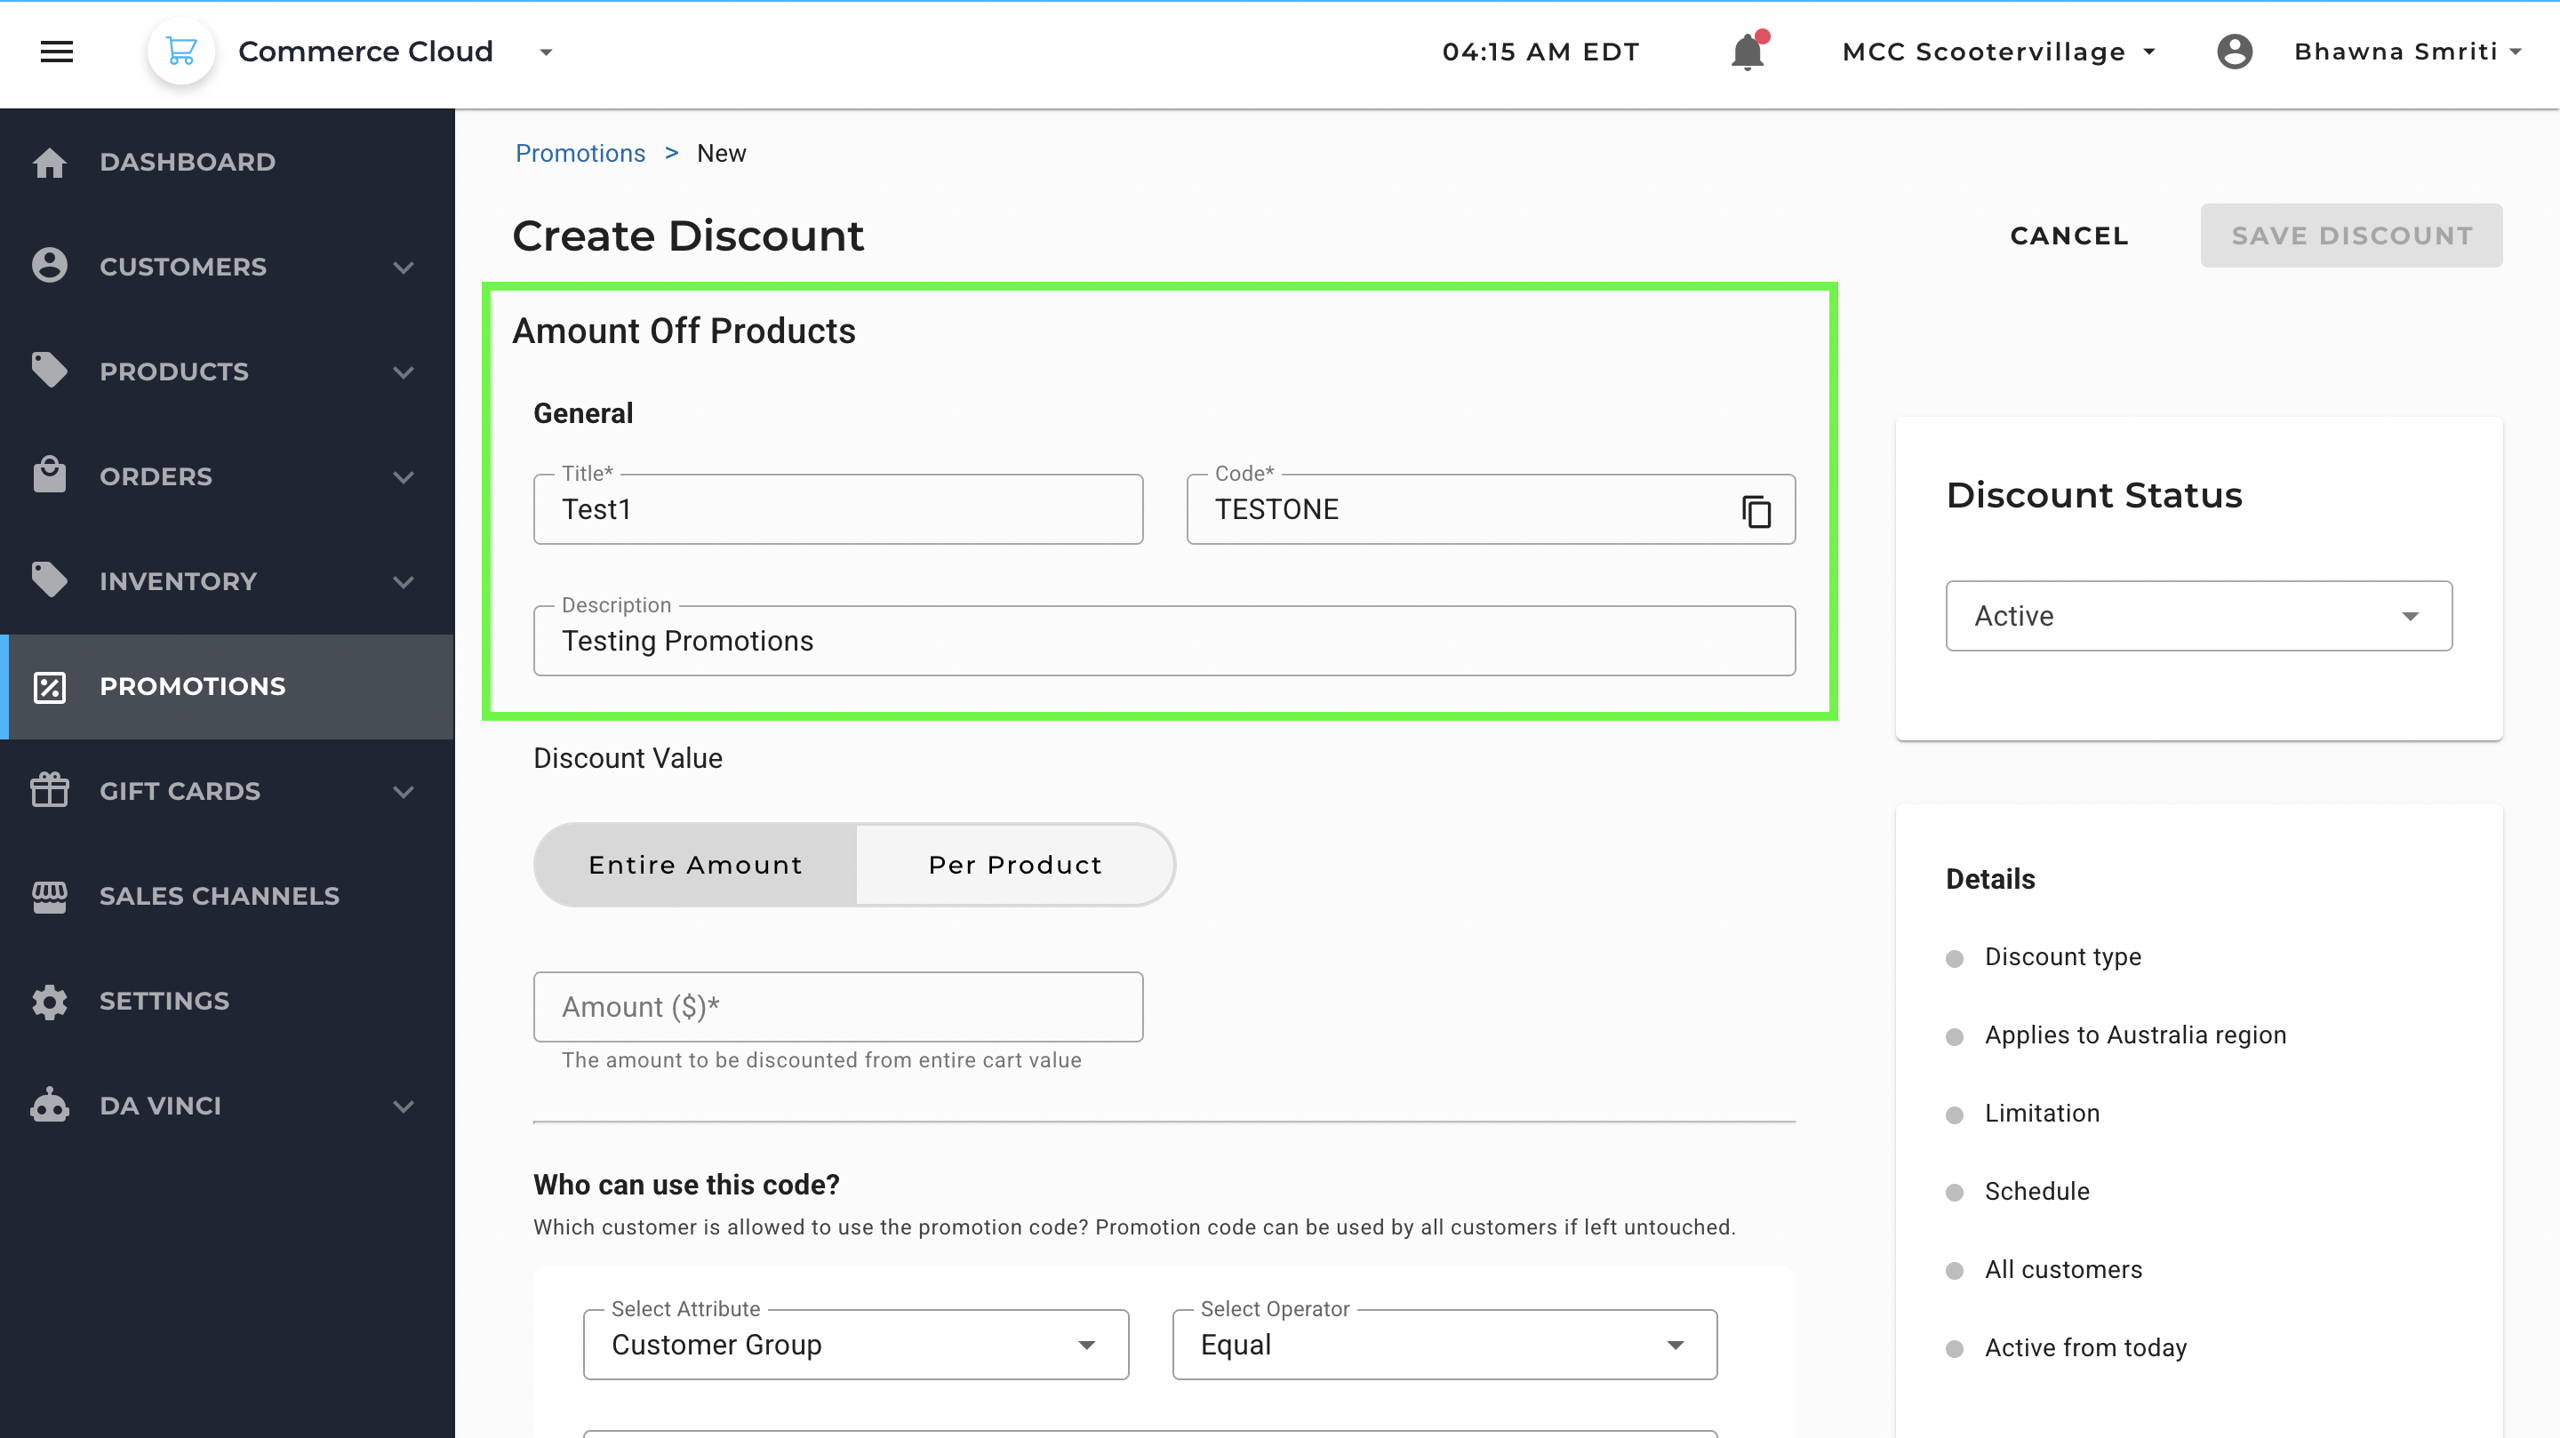
Step 2: Fill in General Details
On the Create Discount page, under the General section, fill in the following:
- Title: Internal name for the promotion (e.g., Summer Sale).
- Code: The actual promo code that customers will enter at checkout (e.g., SUMMER10).
- Description (Optional): Additional context for internal use.
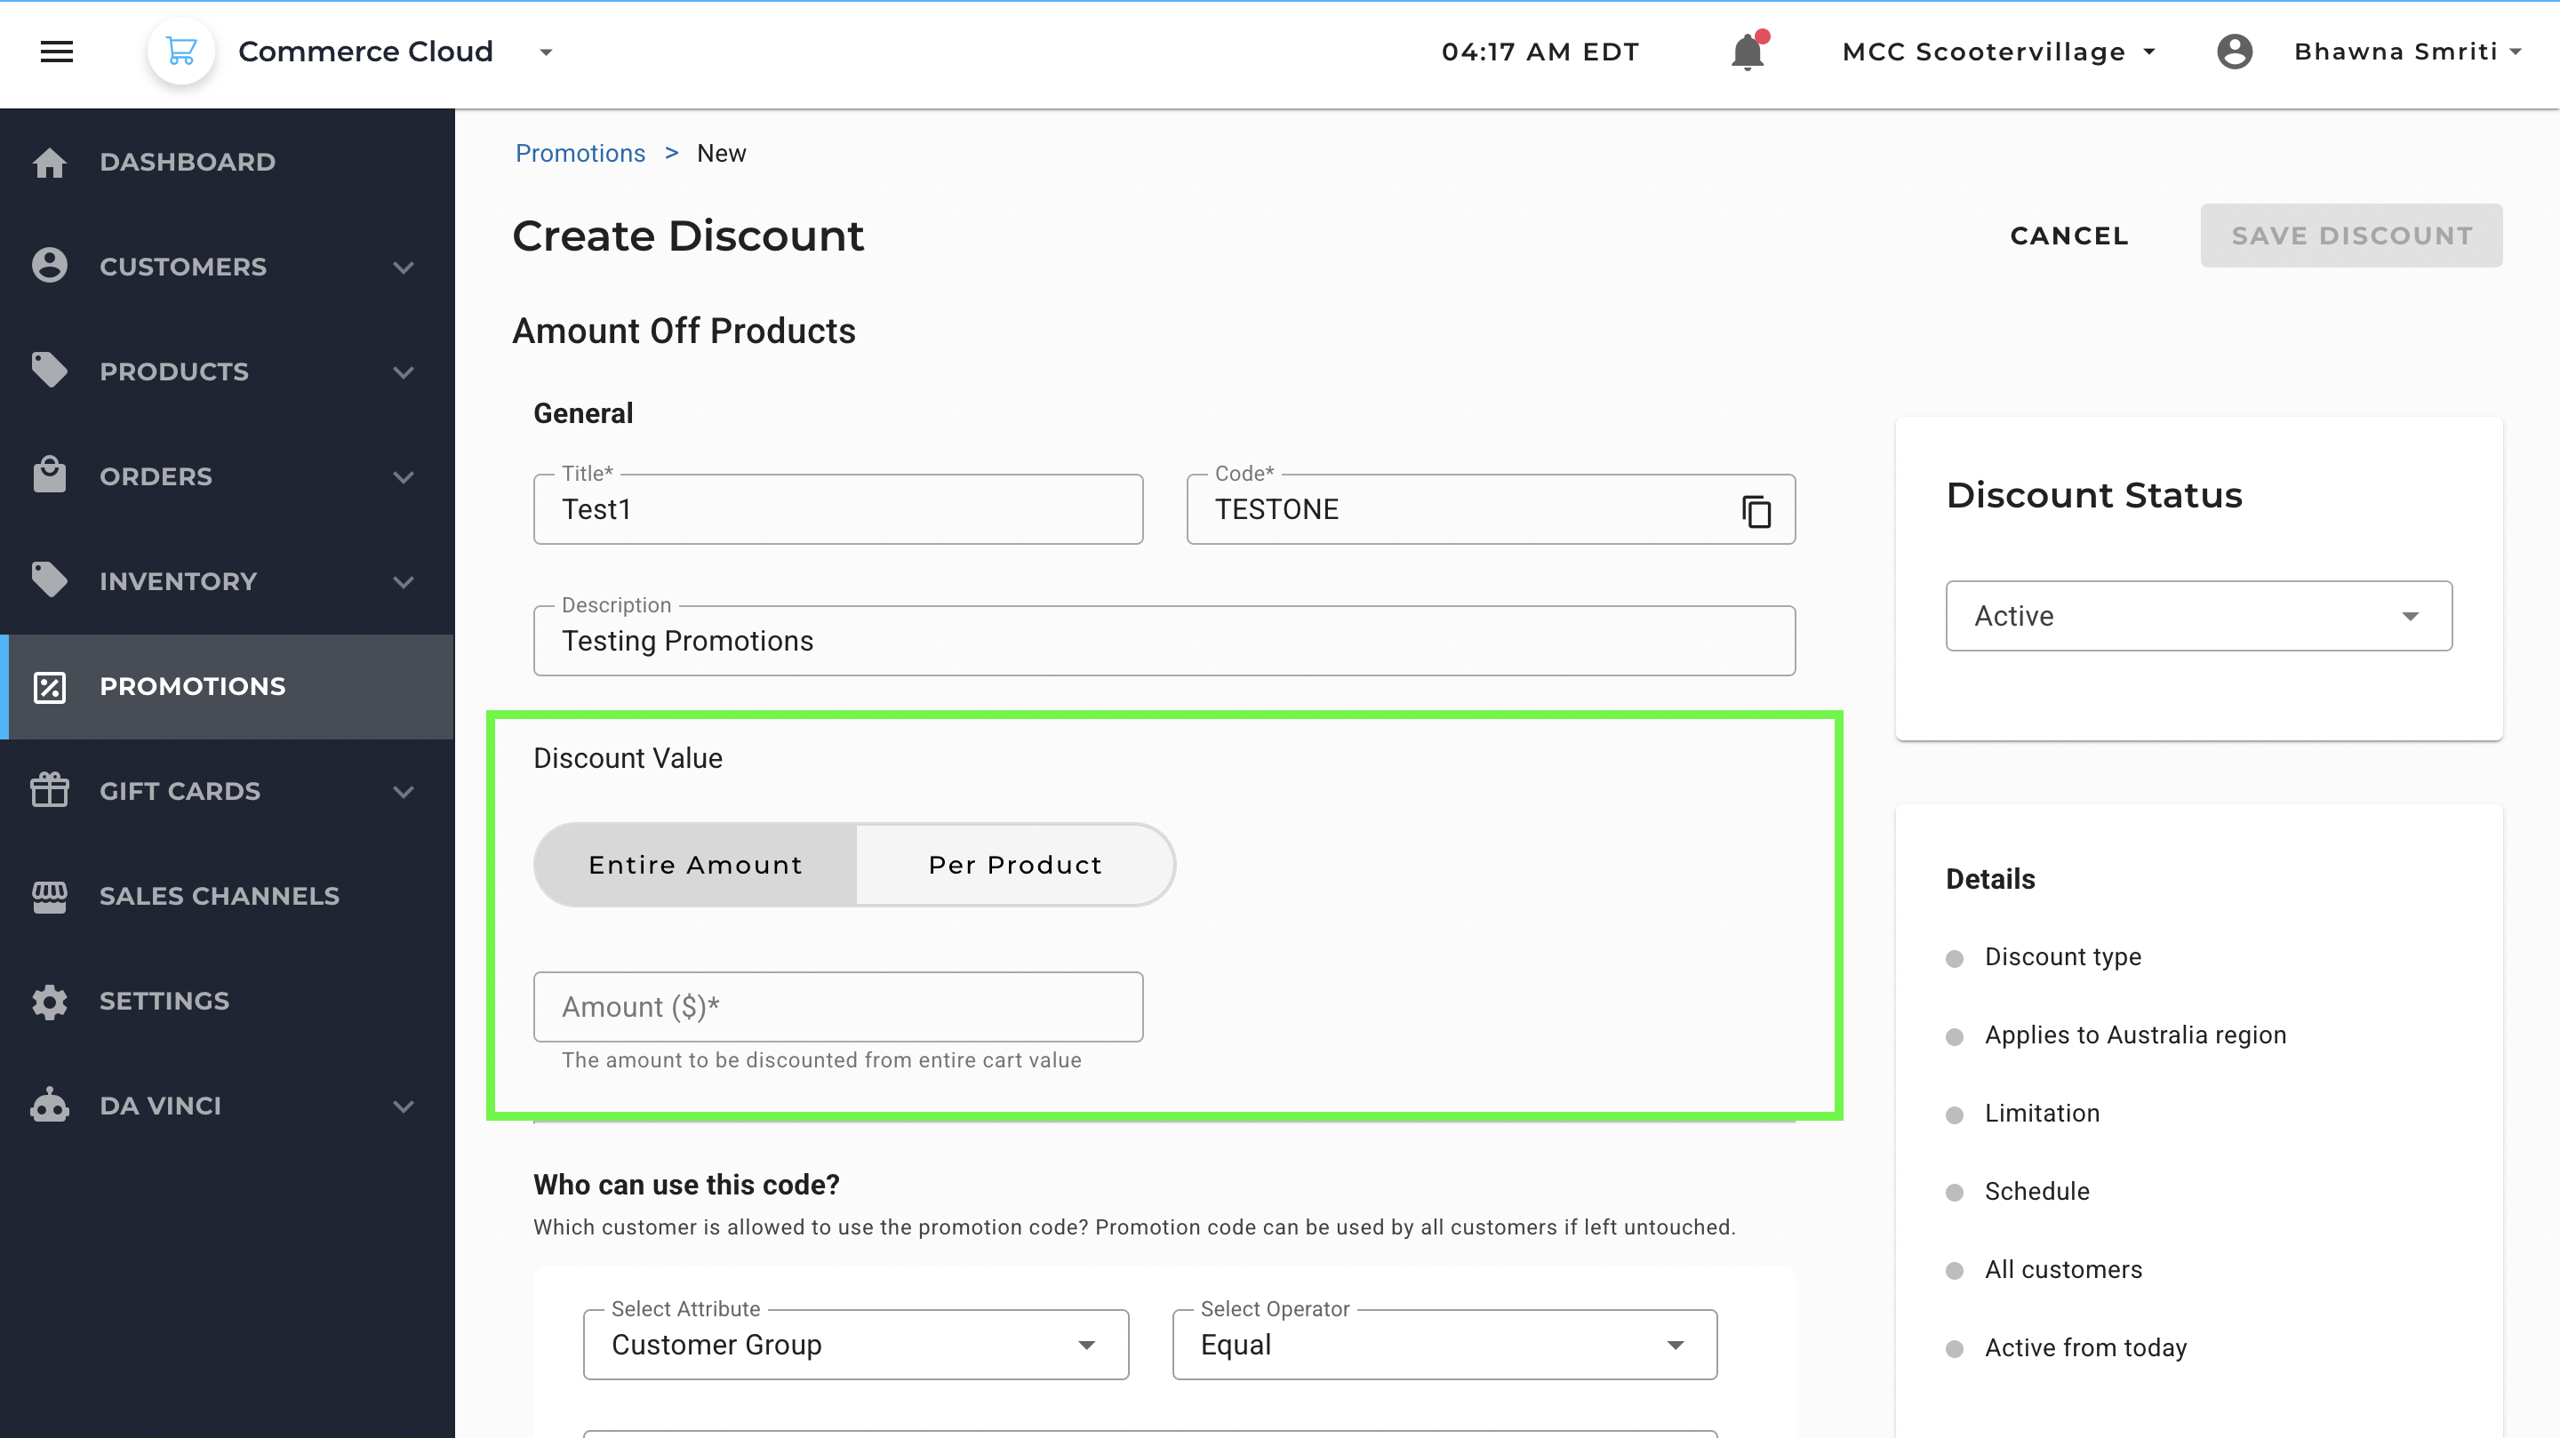
Step 3: Set the Discount Value
Choose whether the discount will apply to the total cart or per product, by clicking the desired option from:
- Entire Amount: Applies the discount to the whole order.
- Per Product: Applies the discount to each eligible product.
Then, enter the Amount ($) you want to discount.
Note: This amount will be deducted from the subtotal, not the total with tax or shipping.
Step 4: Define Customer Eligibility
This section defines who can use the promotion:
- Select Attribute: Choose a customer attribute (e.g., Customer Group).
- Select Operator: Generally Equal or Not Equal.
- Select Value: The value of the attribute (e.g., VIP Customers).

Leave this as it is if you want all customers to be eligible.
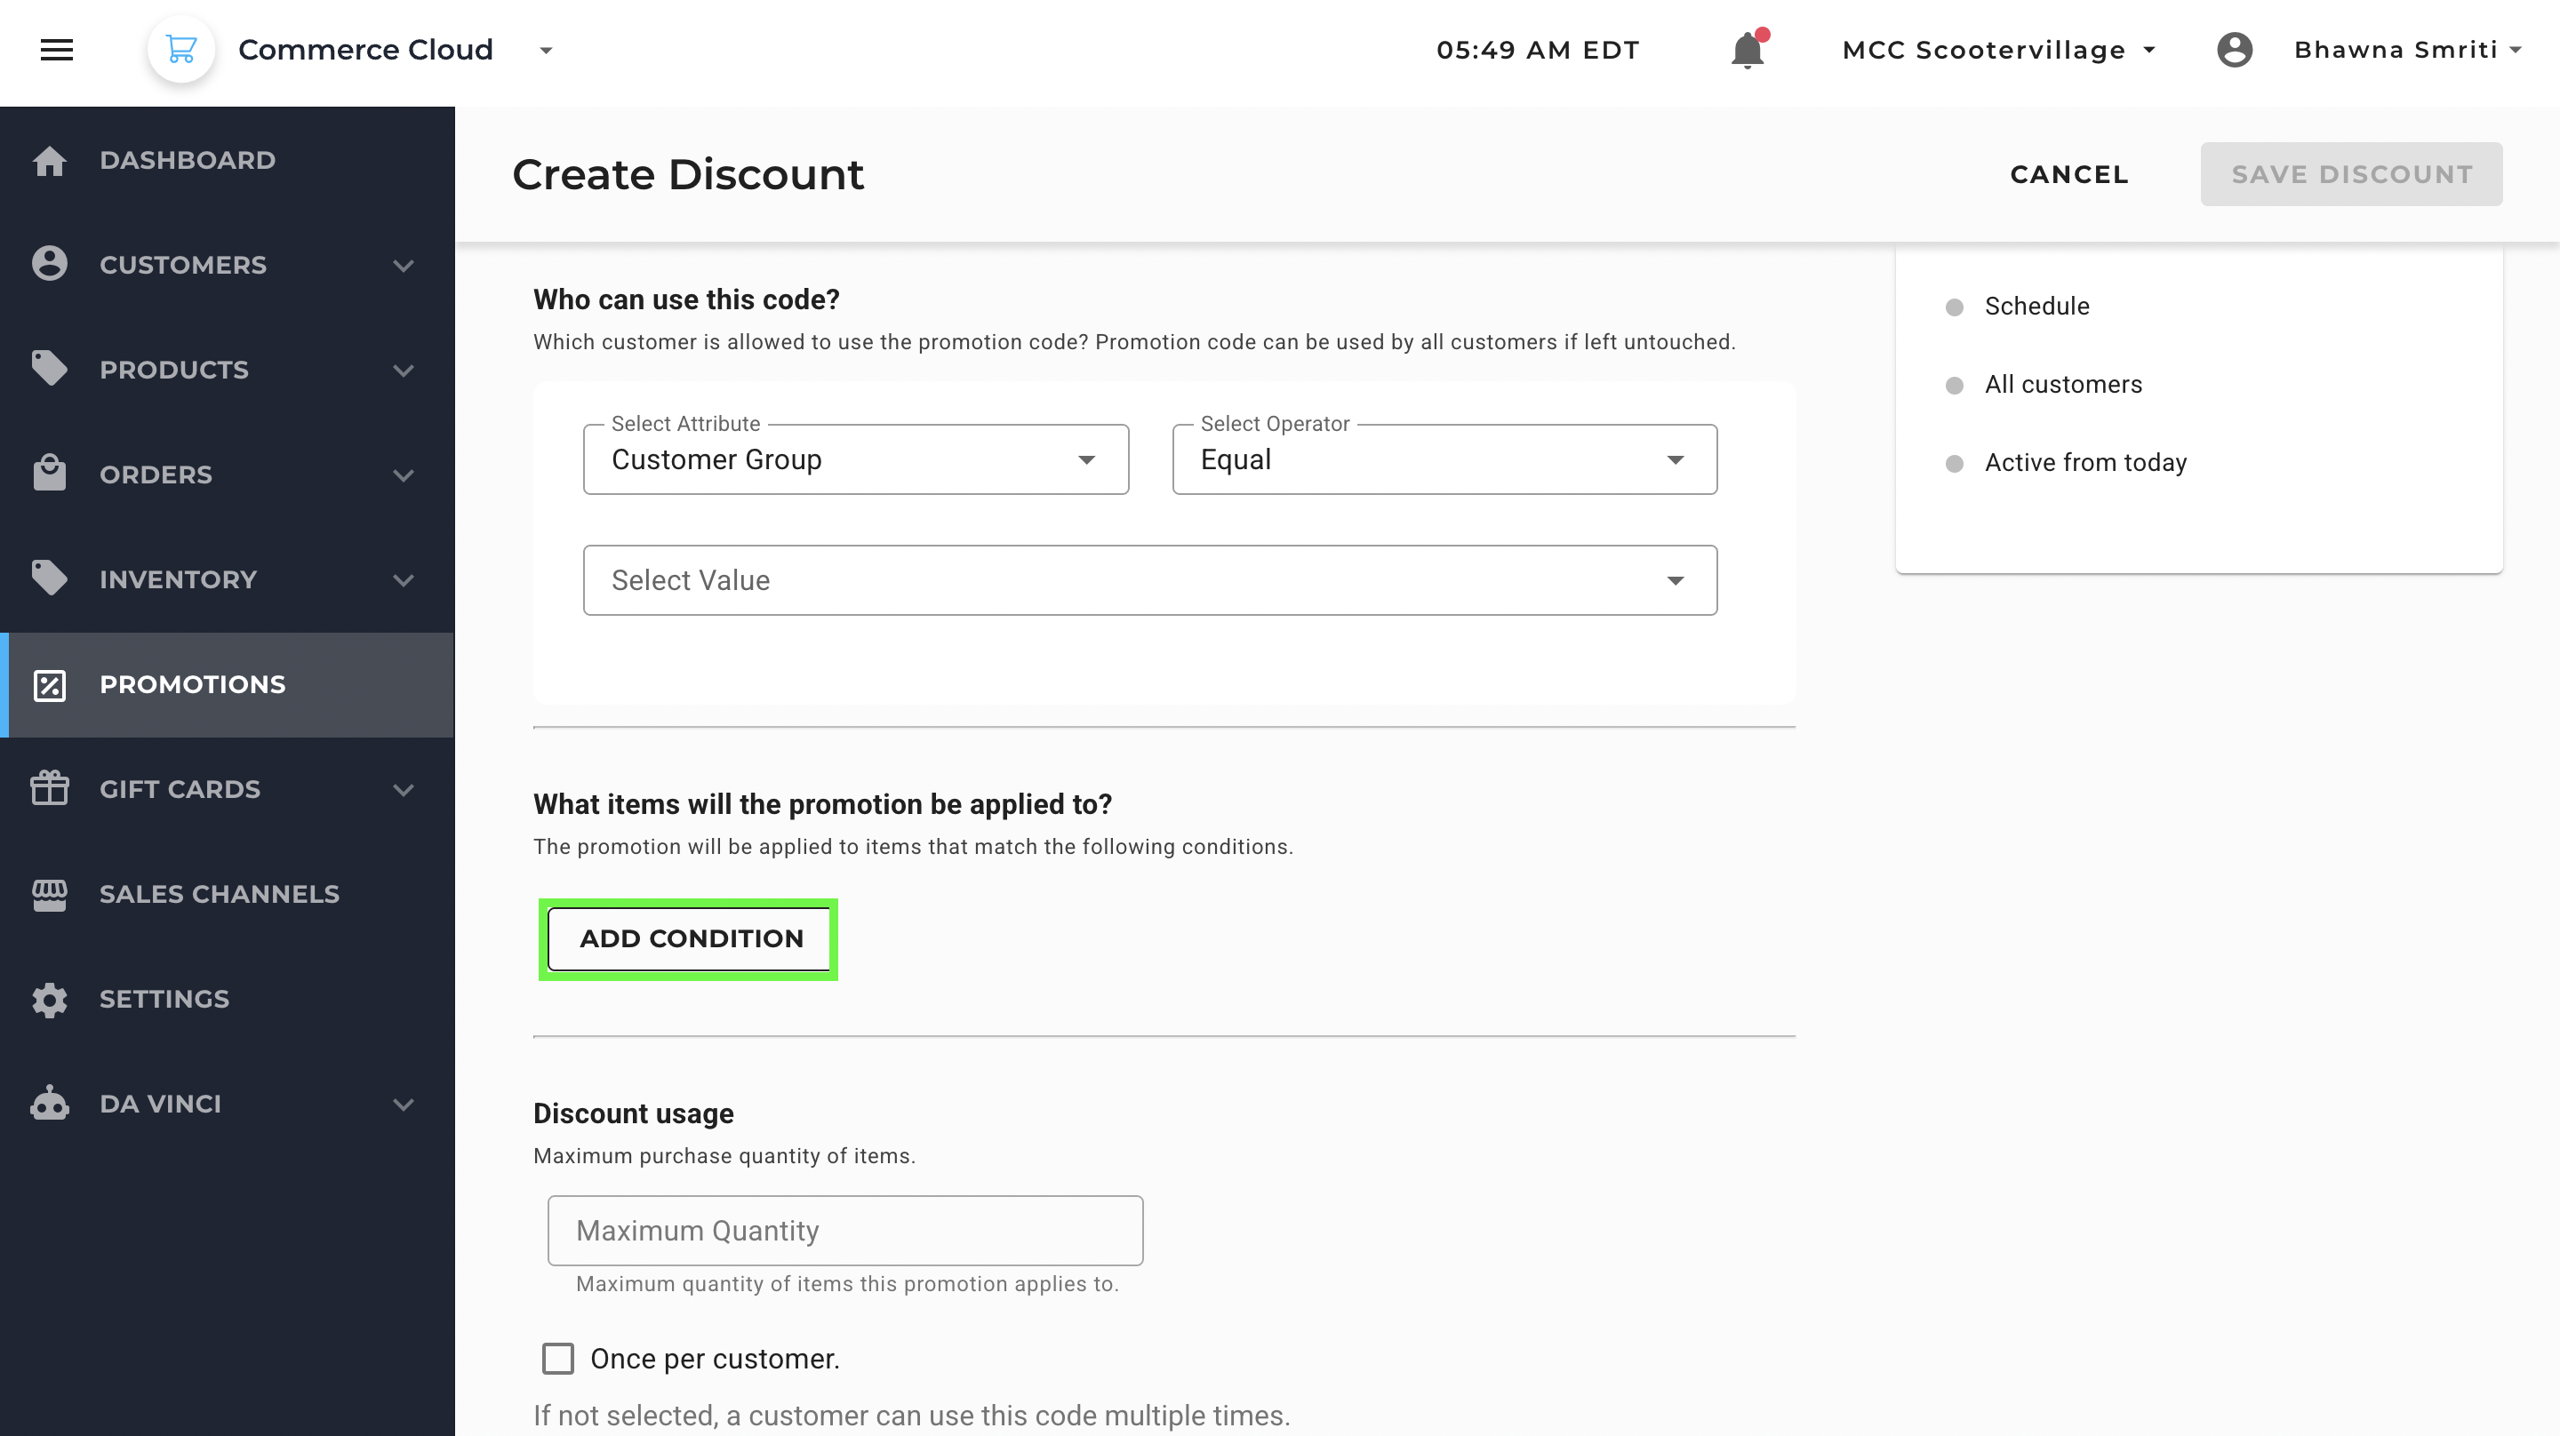
Step 5: Add Item-Specific Conditions (Optional)
You can configure item-specific rules to define exactly which products or collections a promotion should apply to. This ensures that discounts are only applied to relevant items in your catalog.
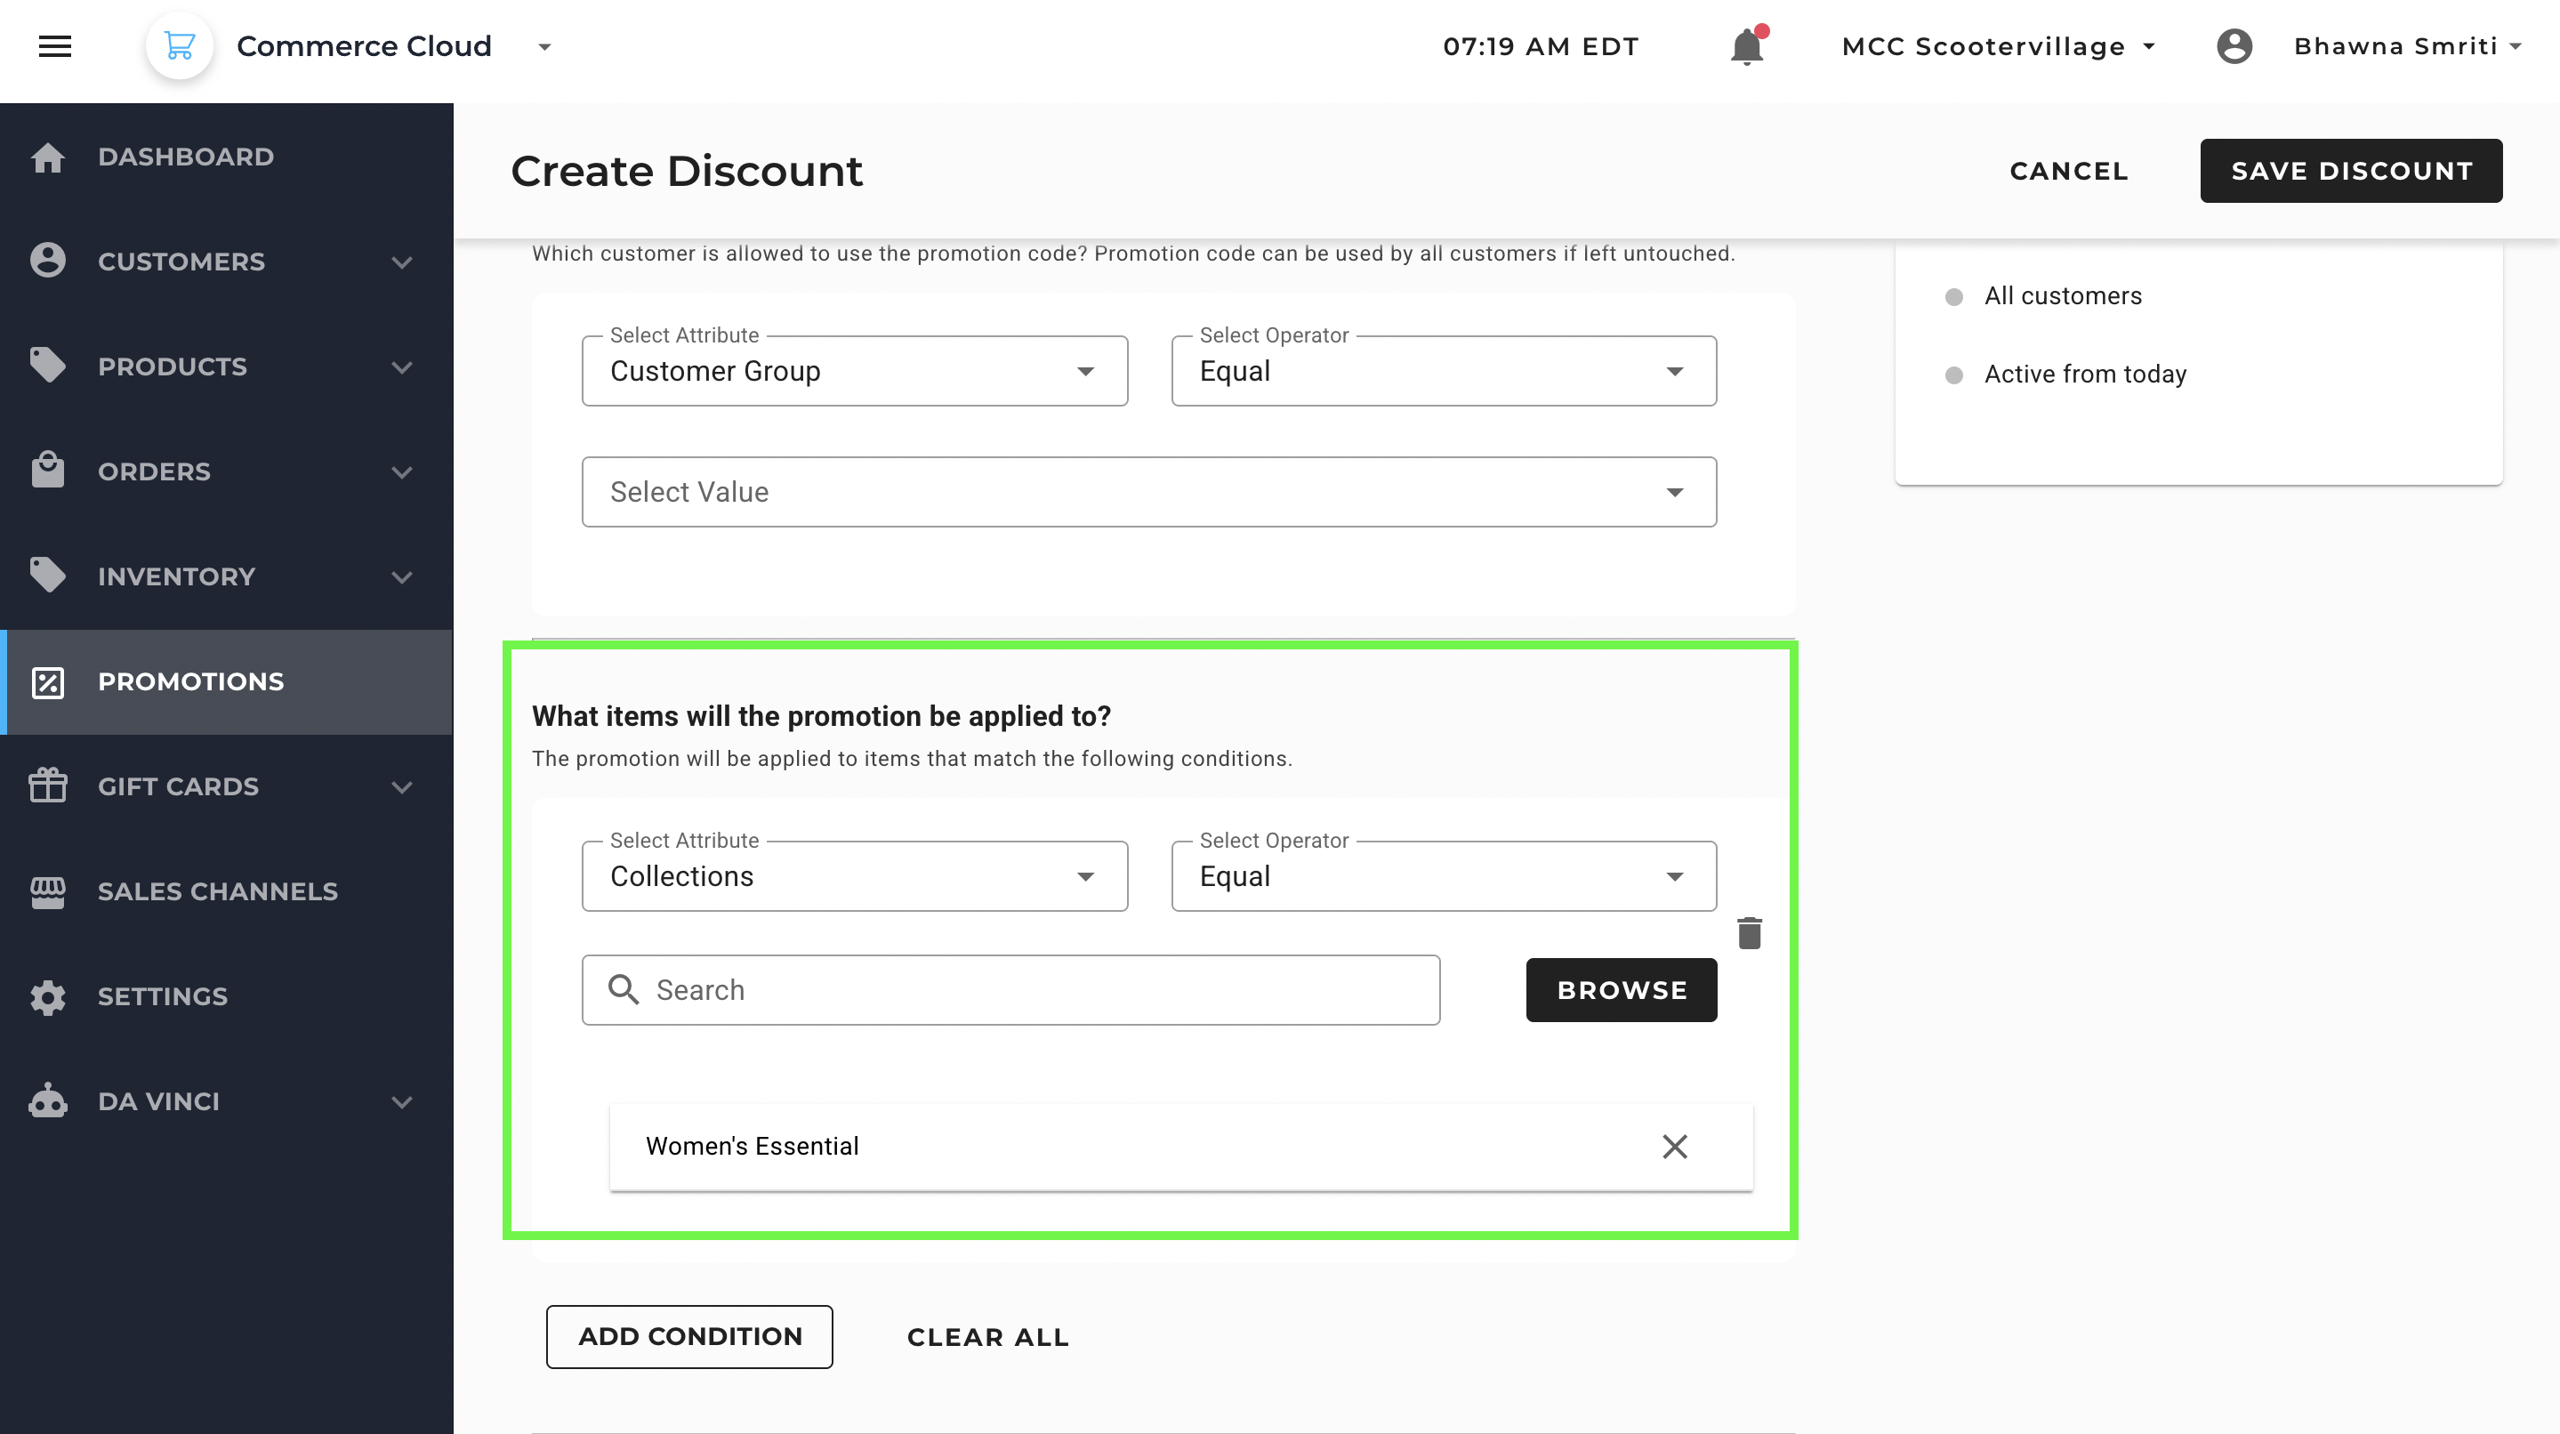
When setting conditions, you'll see a screen asking:
“What items will the promotion be applied to?”
To add a condition, click on: ADD CONDITION. This section lets you filter items using up to three conditions, using AND logic (i.e., all conditions must be met for the discount to apply).
How to set conditions:
- Attribute:
Choose whether you want to filter by Products or Collections (e.g., Tags, Category, etc.). - Operator:
Choose between:- Equal — to include specific items
- Not Equal — to exclude specific items
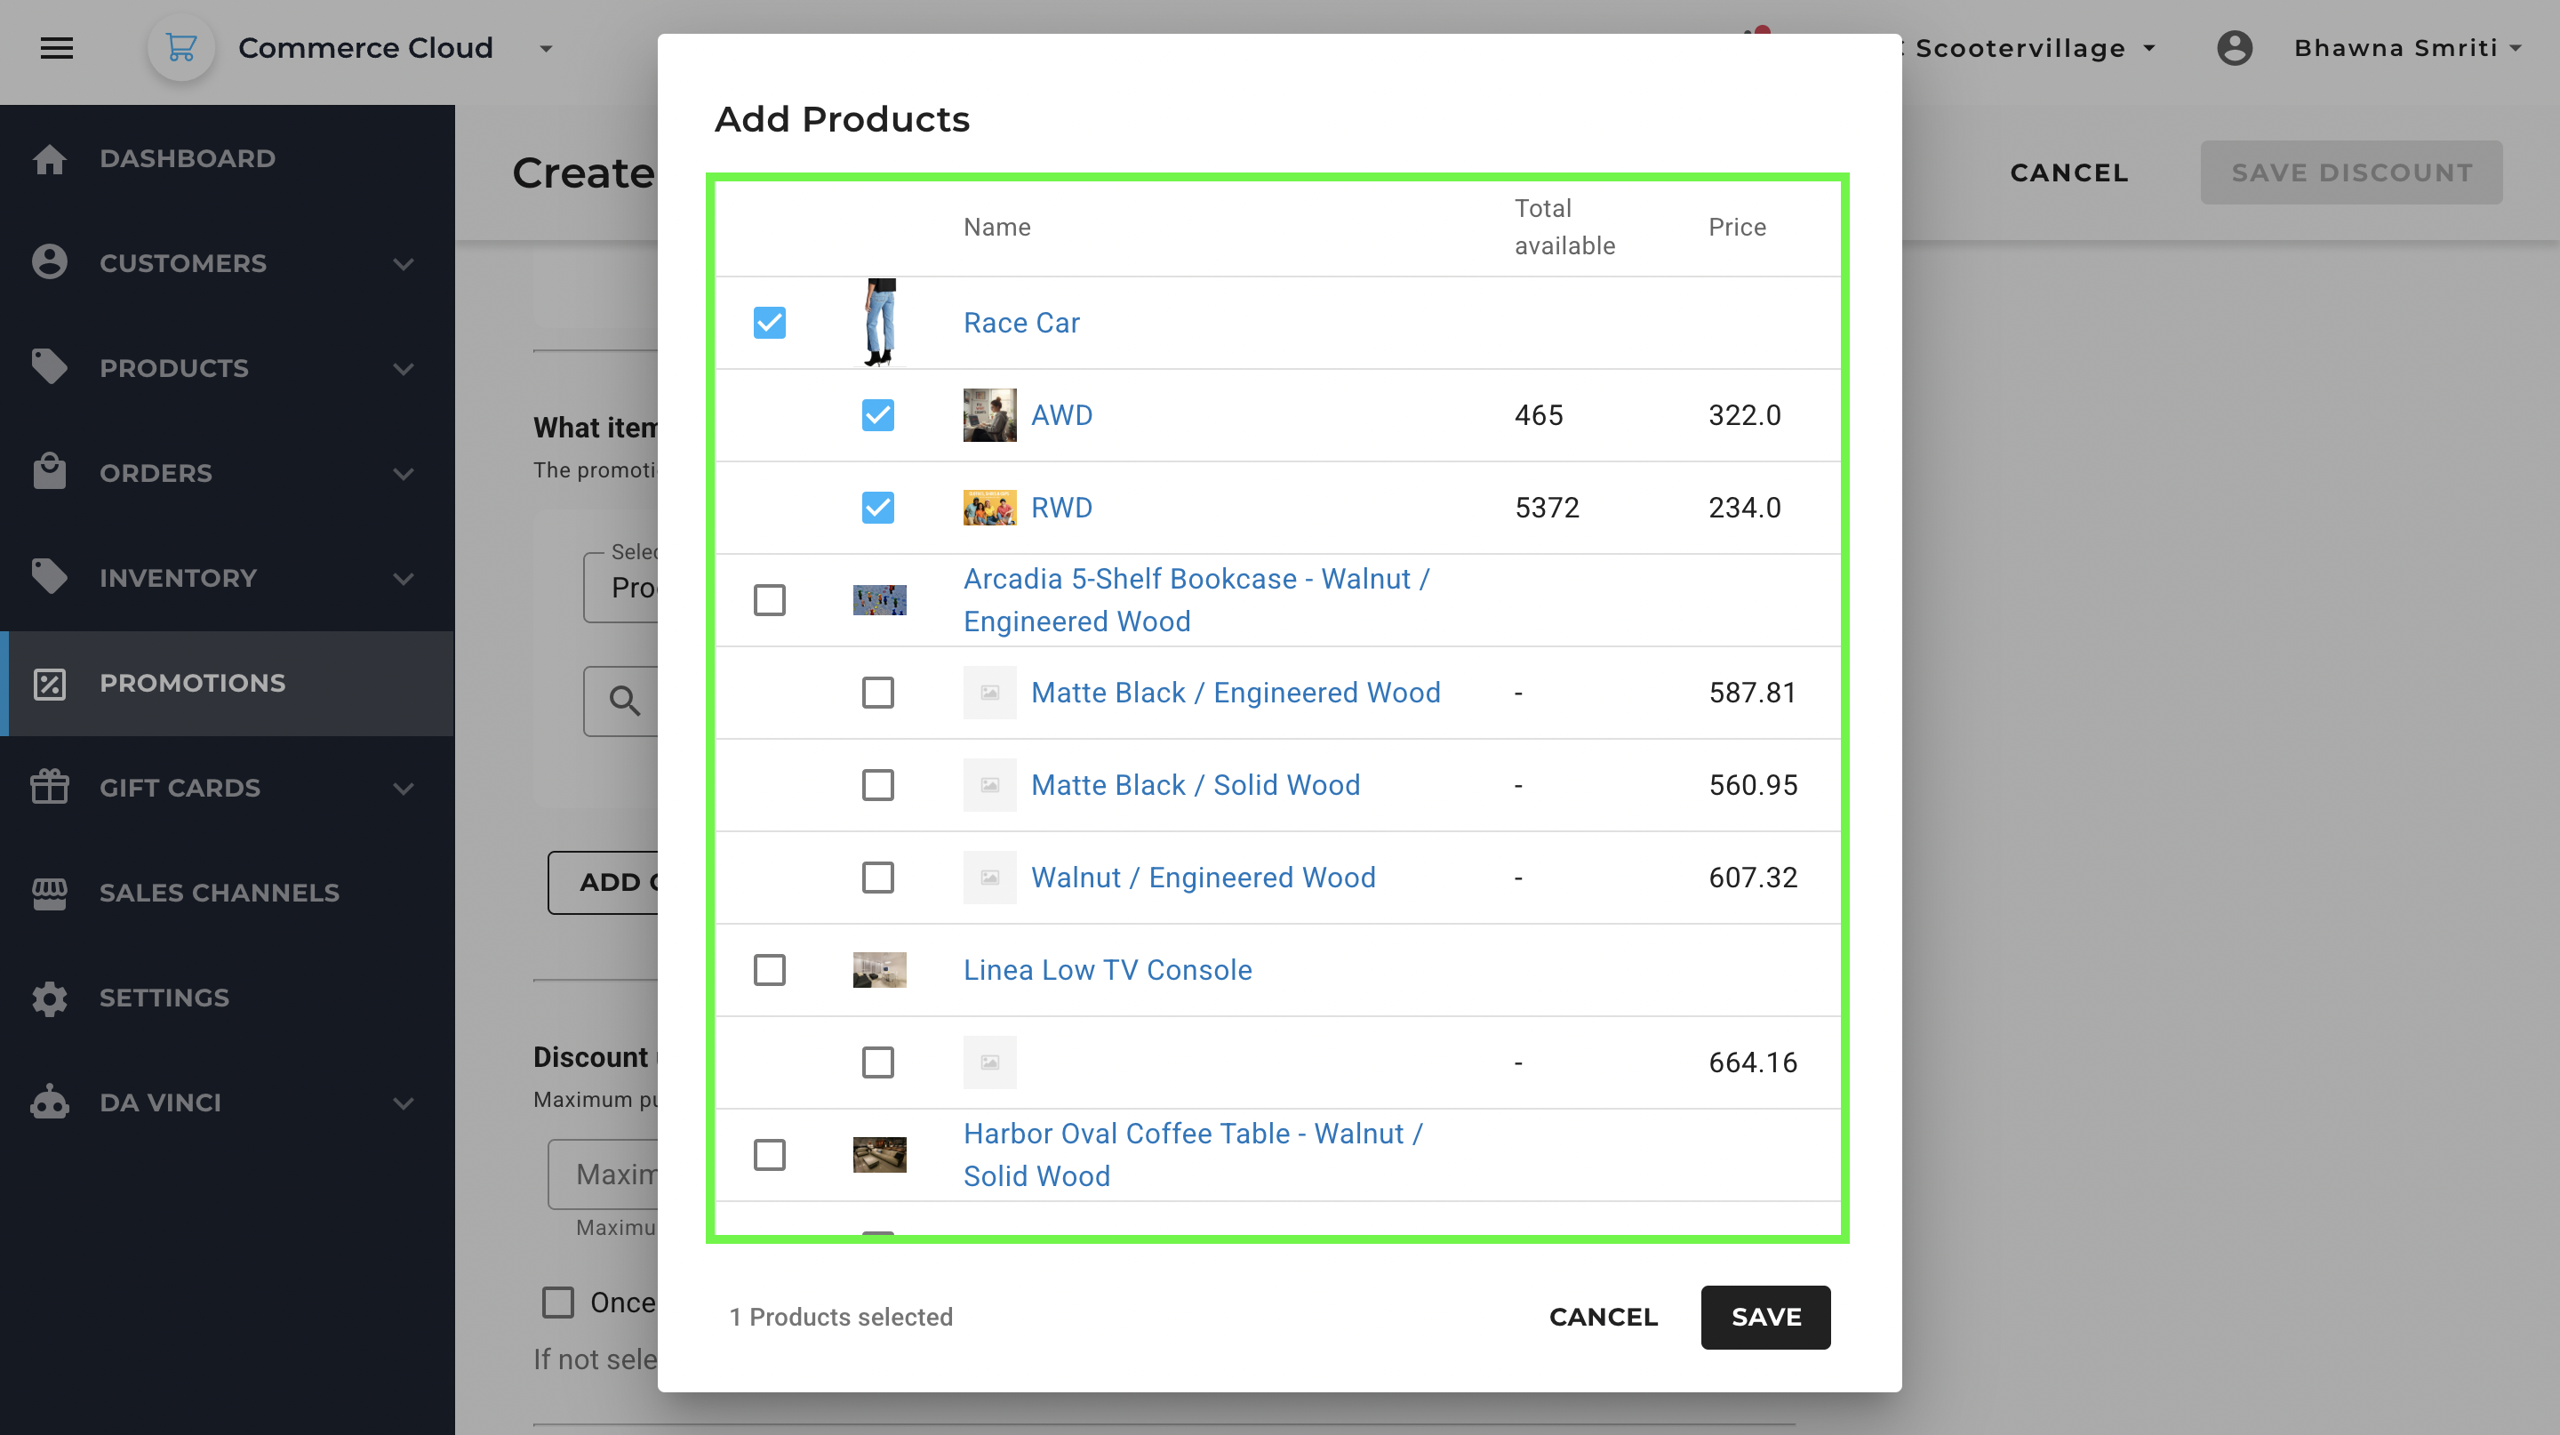
- Search/Browse Panel:
Start typing to search by name, or use Browse to select from a list.
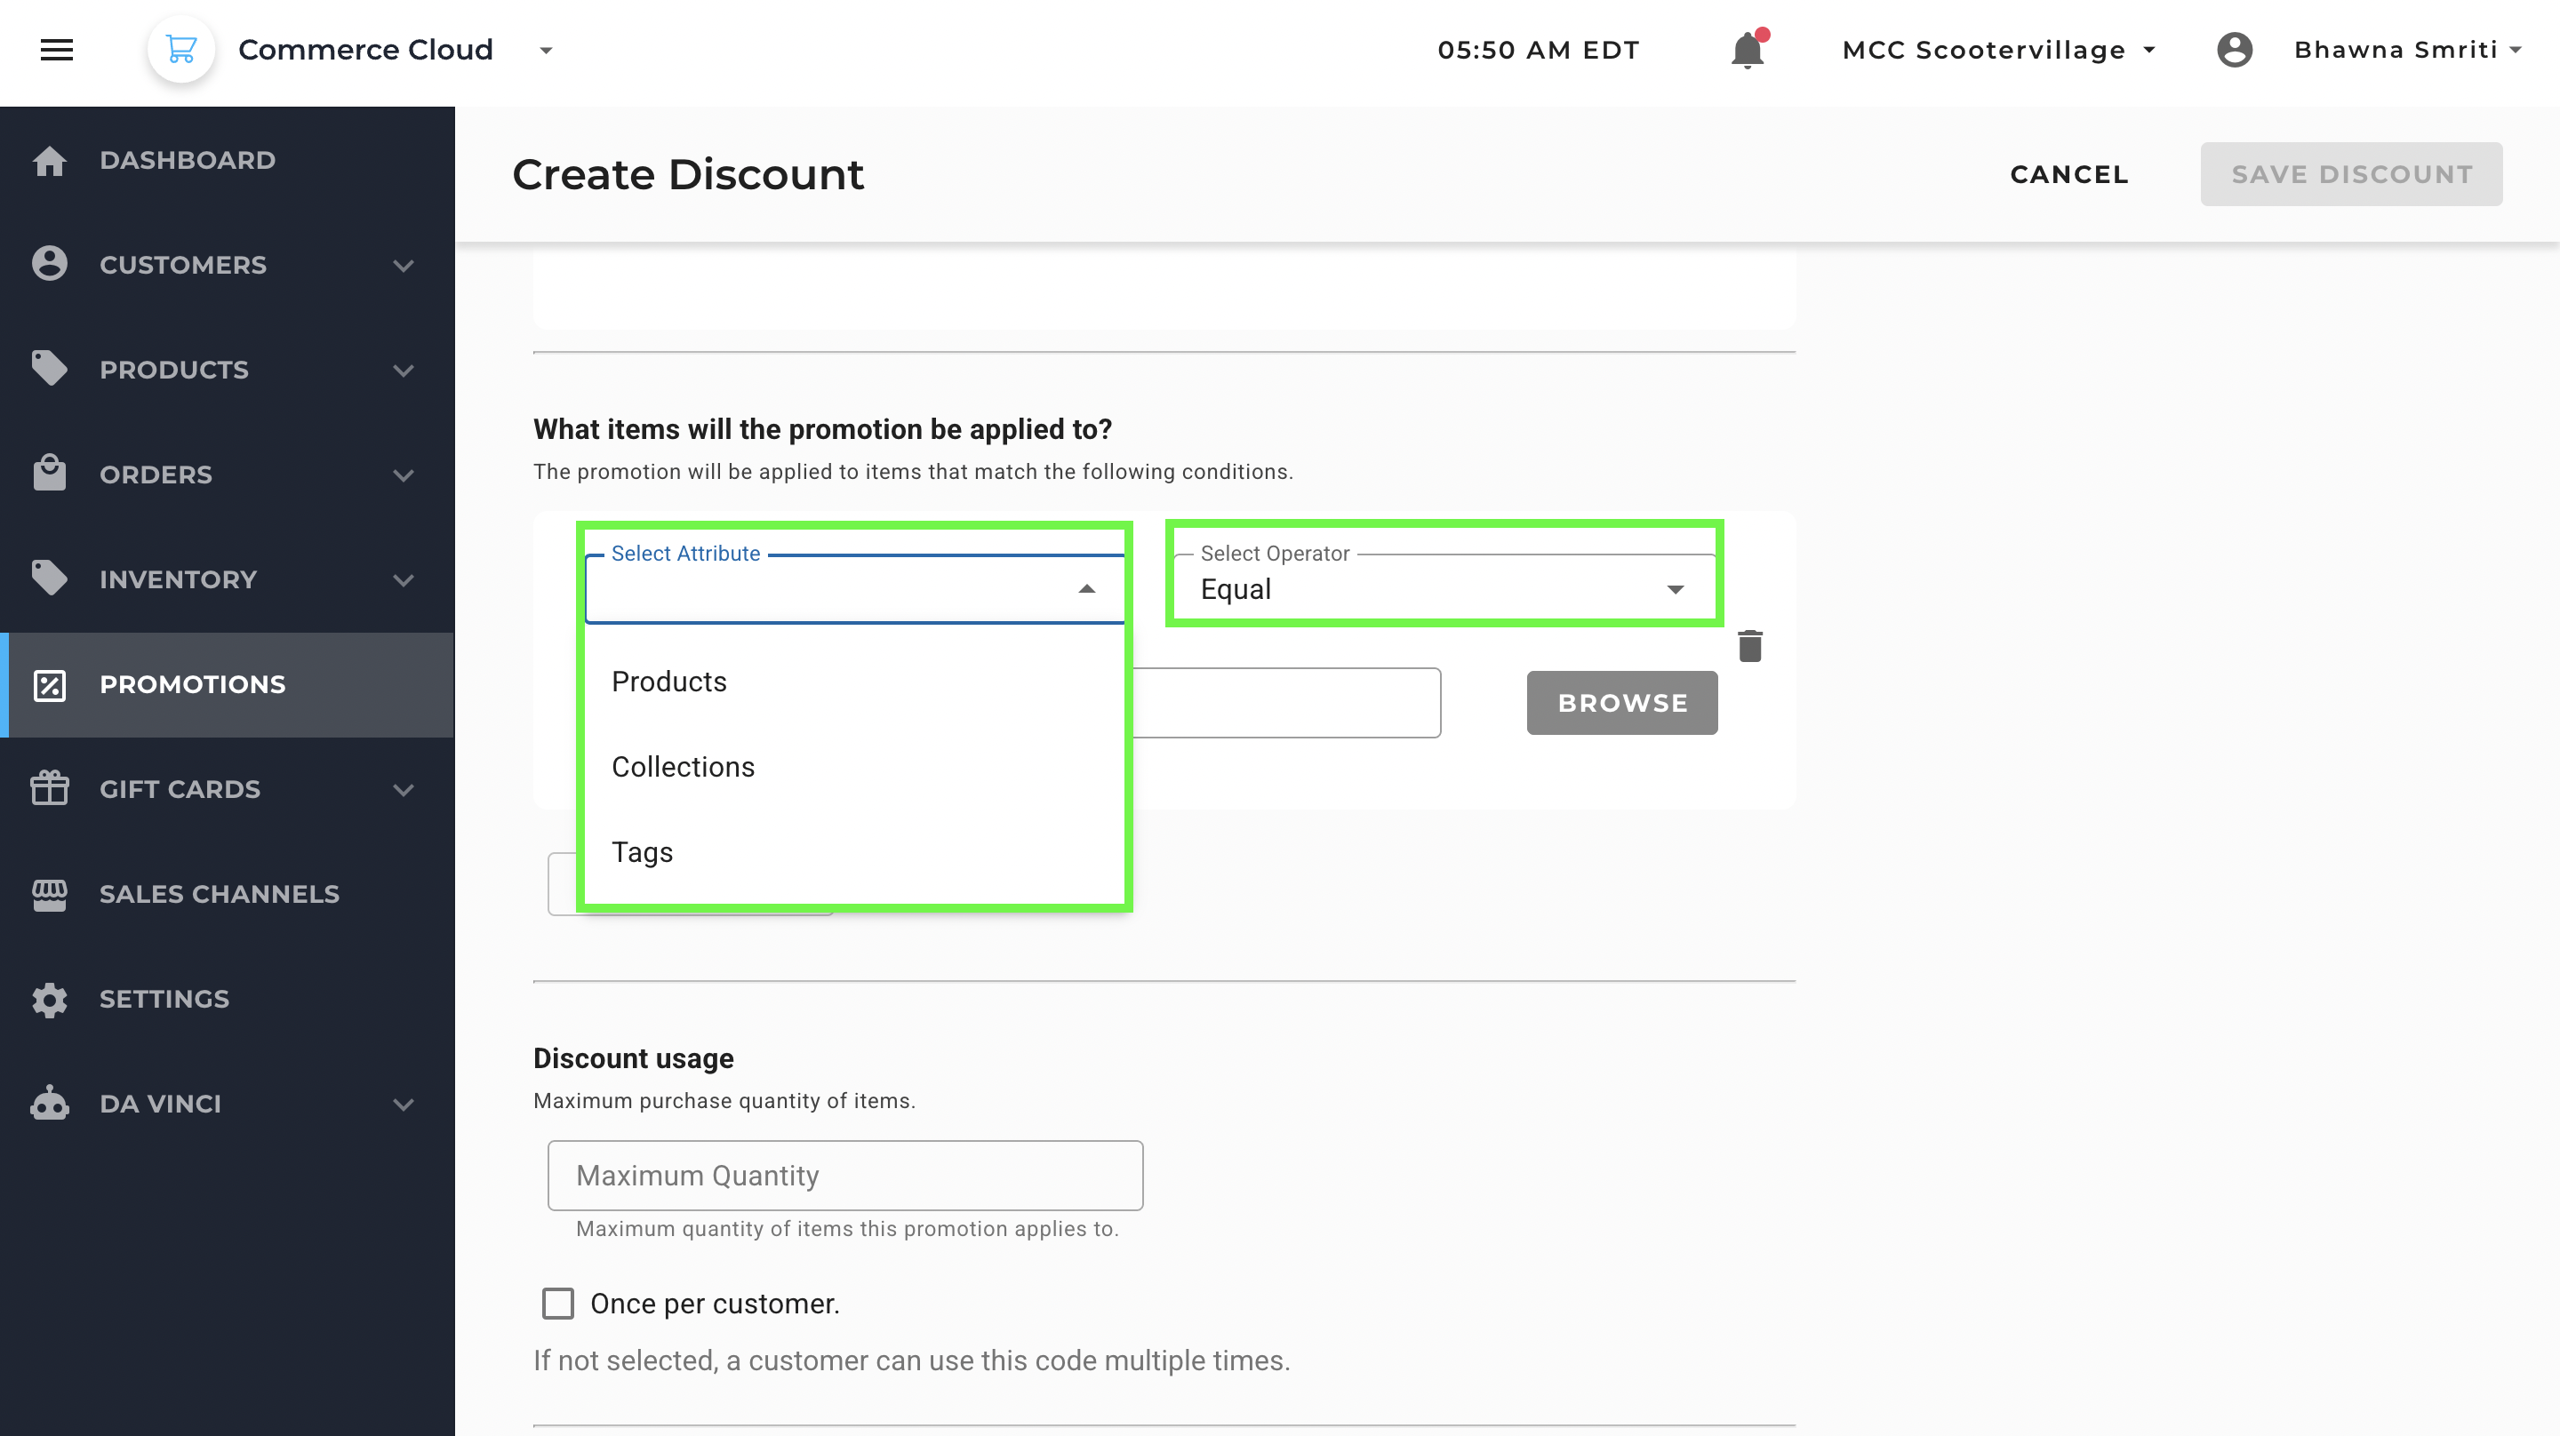
- For example, when selecting Products, you’ll see product names, available stock, and pricing, making it easier to choose exactly what qualifies for the promotion (see screenshot).
Example:
- Attribute: Collections
- Operator: Equal
- Select: Women's Essential
This selection applies discount to all products under Women’s Essential collection.
Example:
- Attribute: Tags
- Operator: Equal
- Search: New Arrivals
This means the promotion will only apply to products that has “New Arrival” tag within 'Women's Essentials' collection.
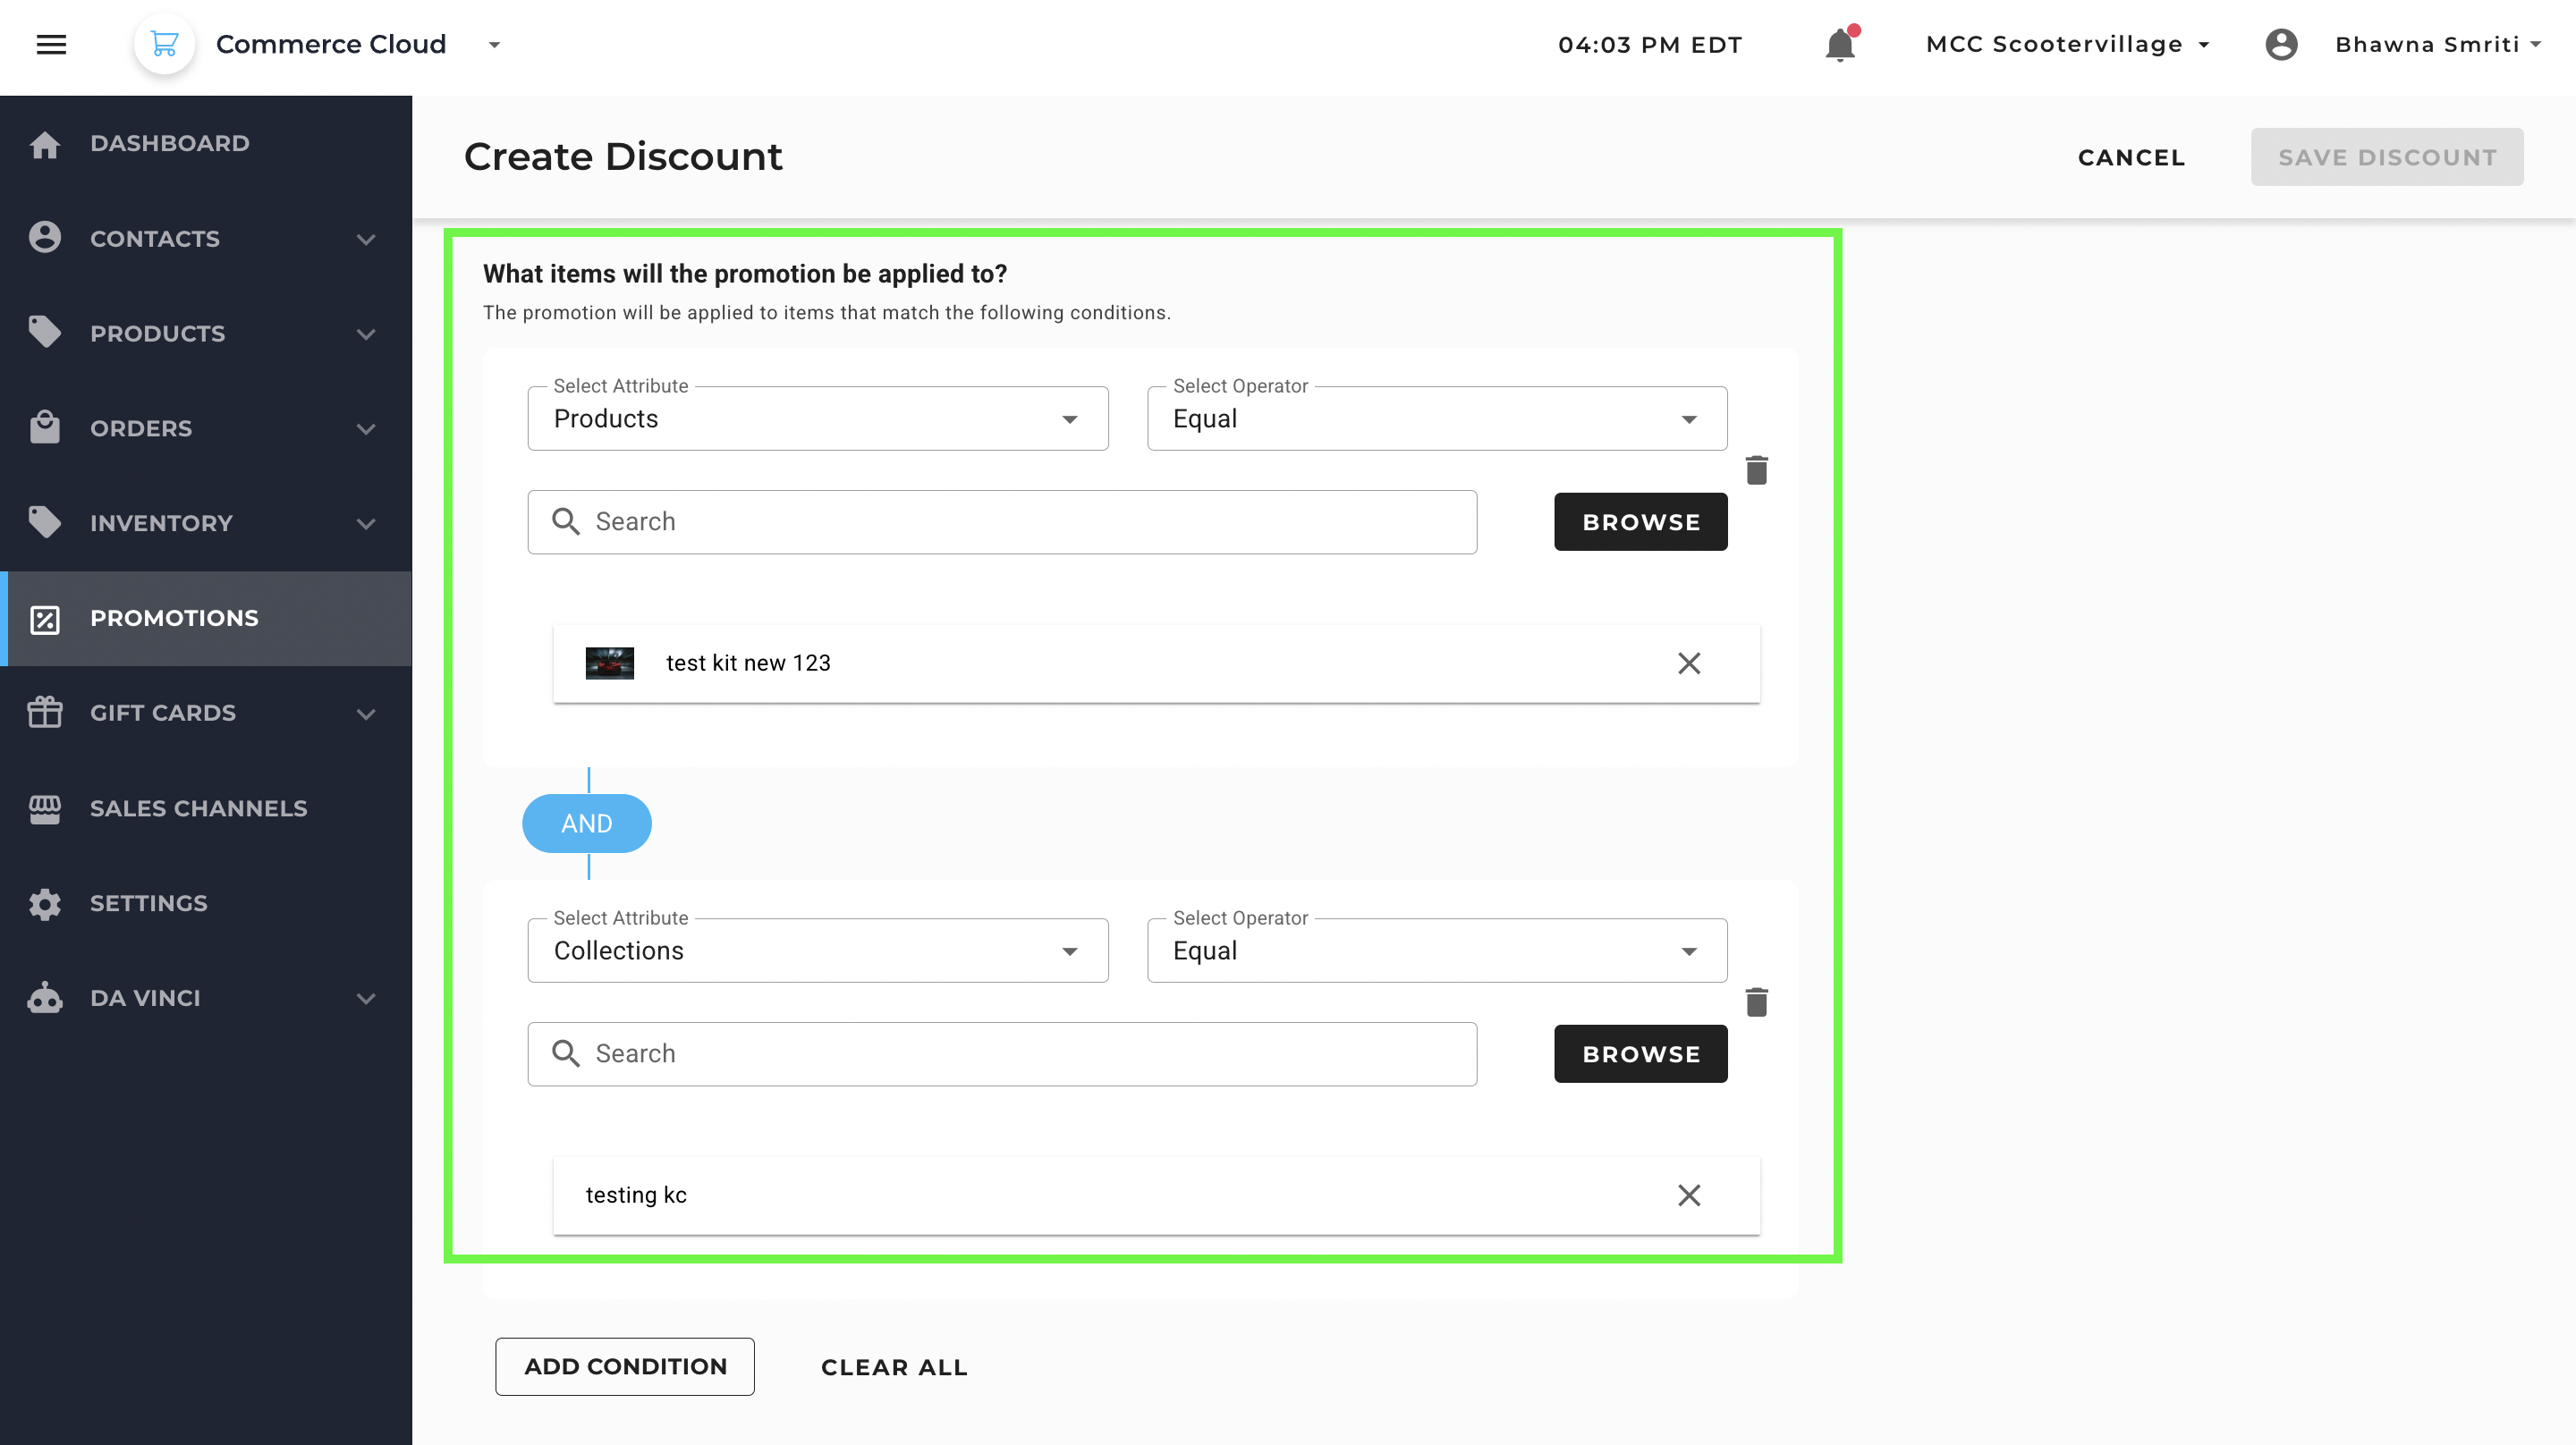
You can add up to three such conditions.
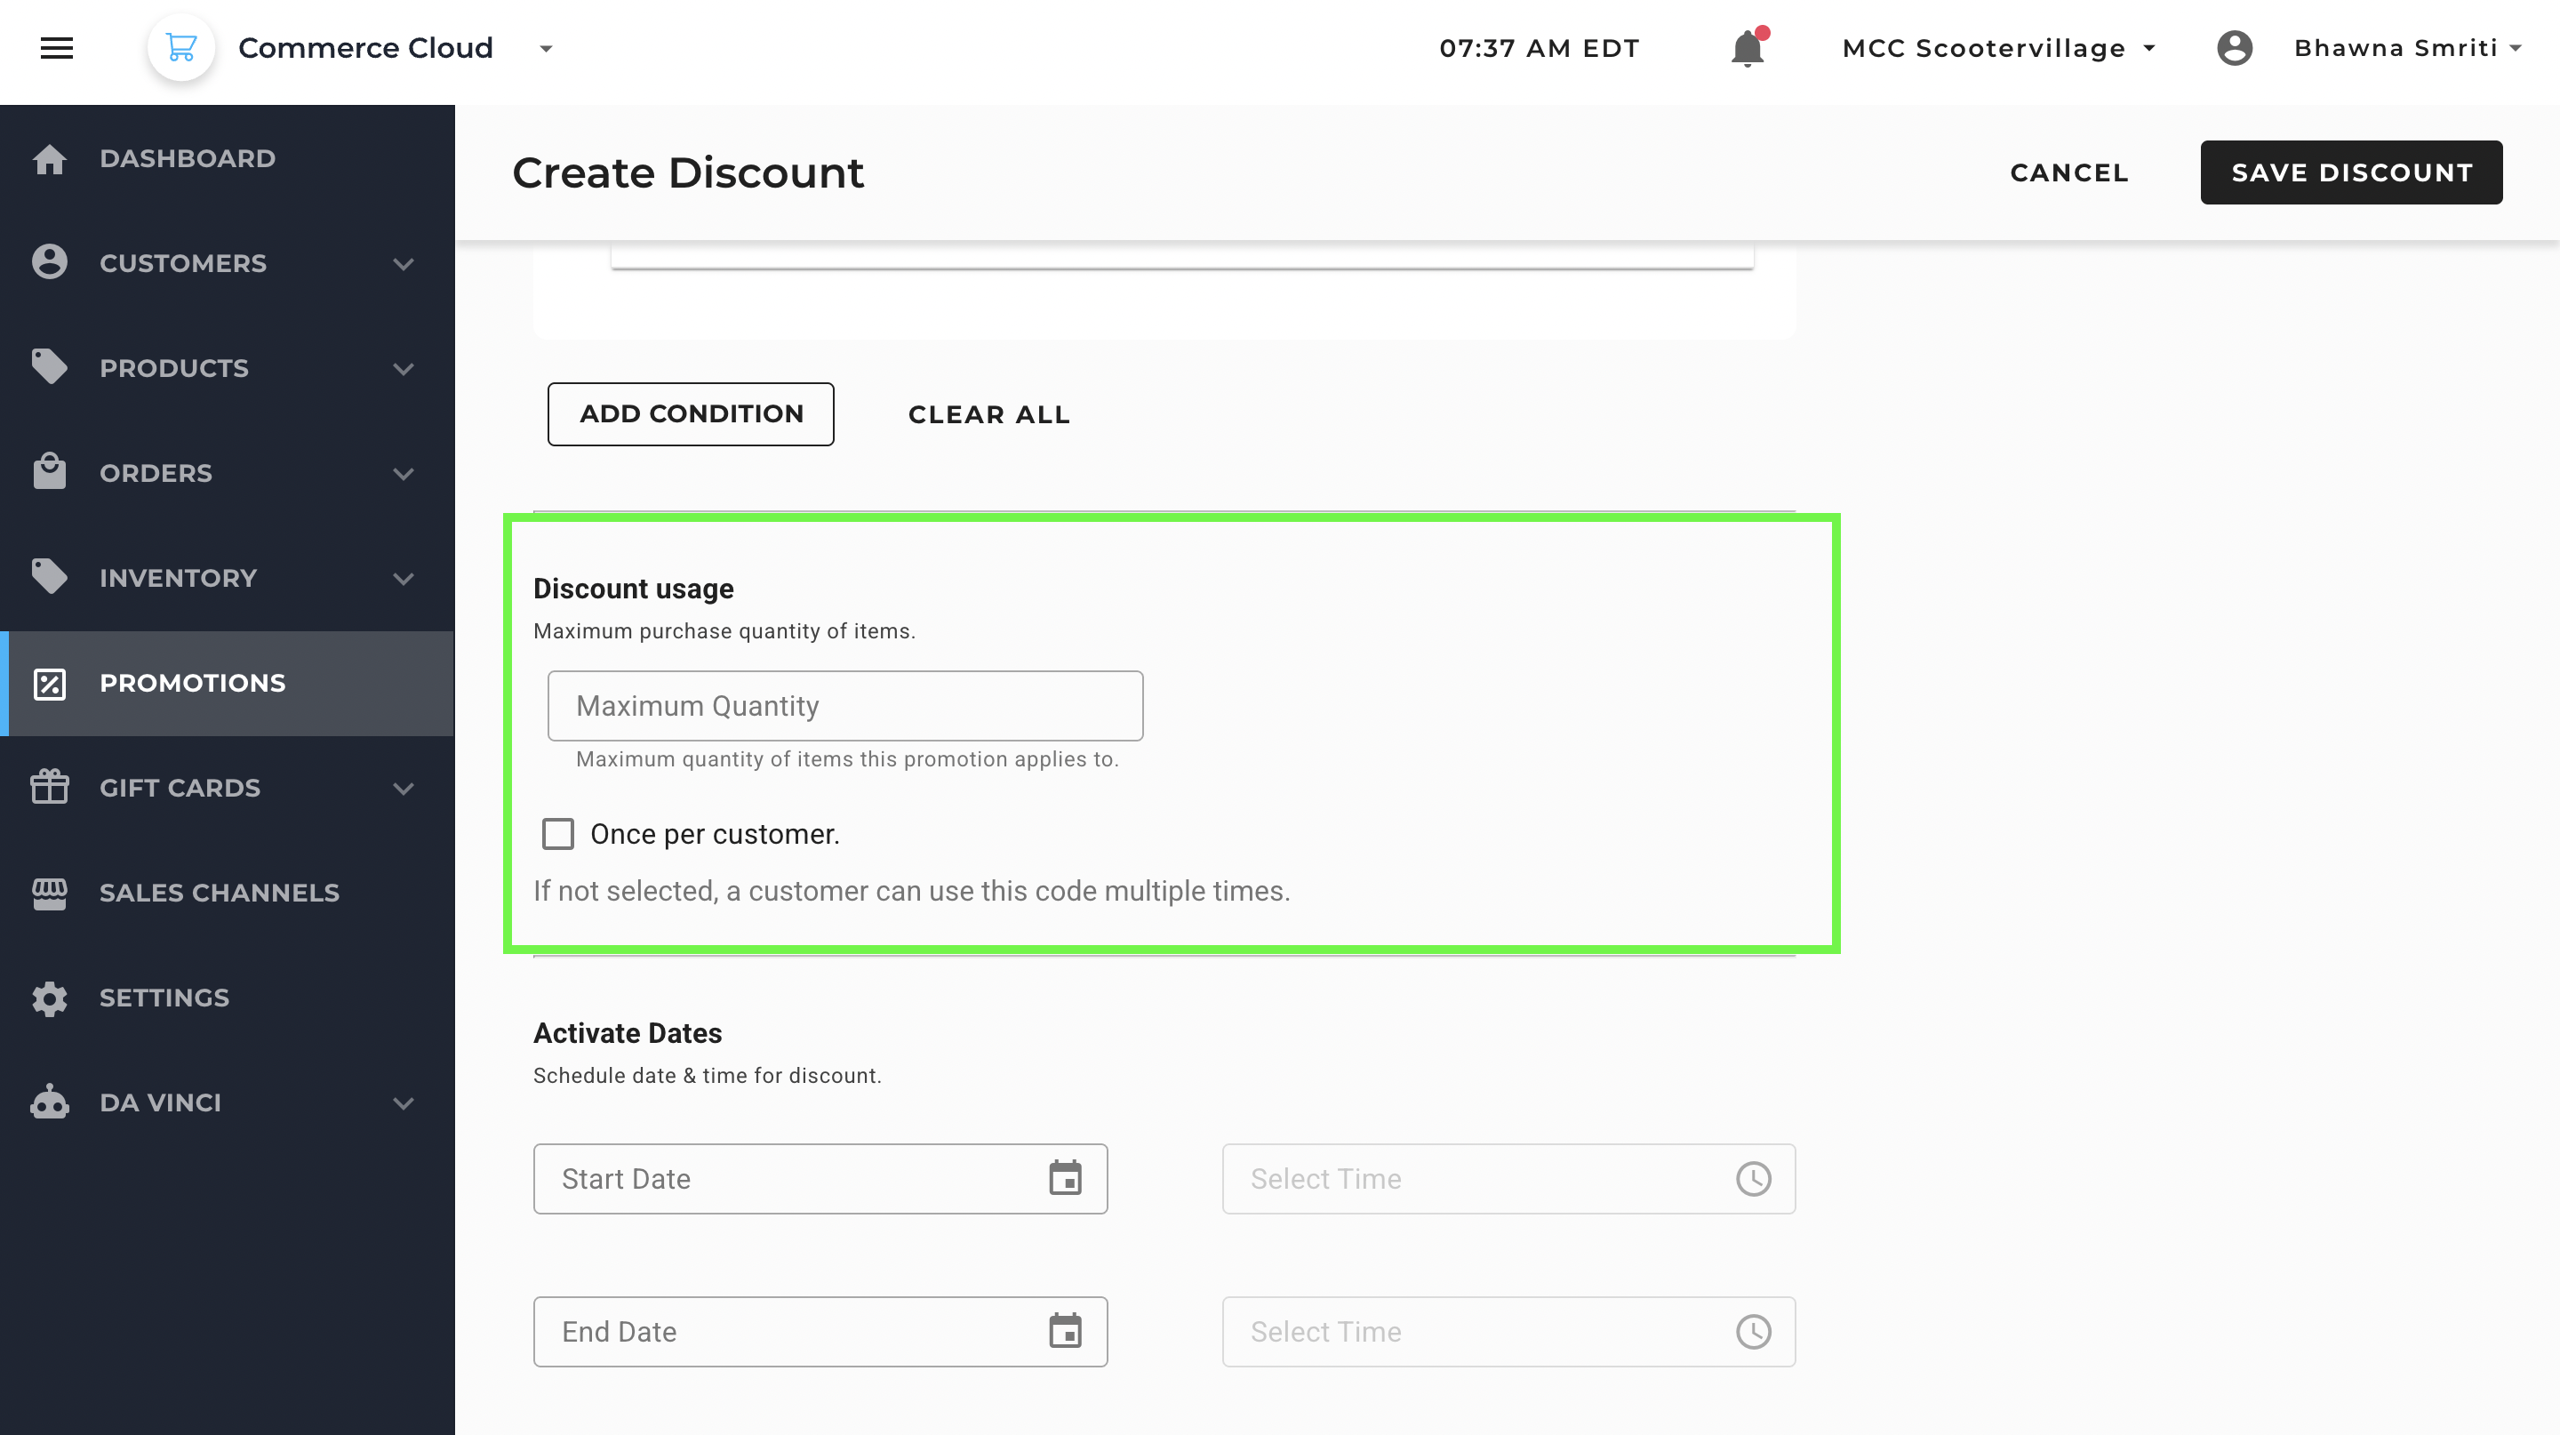
Step 6: Set Discount Usage Limits
This step allows you to define how many items a customer can purchase using the promotion and whether the promotion should be limited to a one-time use per customer.
1. Maximum Quantity
- Enter the maximum number of items that a customer can purchase with this promotion code.
- Leave blank if you don’t want to restrict quantity.
2. Once Per Customer
- Tick the checkbox if you want to limit the usage of this promotion to one time per customer.
- If left unchecked, customers can reuse the code multiple times as long as other conditions are met.
Step 7: Activate Dates Section
This section lets you schedule when your promotion starts and ends, including the specific time of day.
- Start Date & Time:
Choose the date and time you want the discount to go live. - End Date & Time:
Choose the date and time you want the discount to expire.
This is especially helpful for:
- Flash sales
- Seasonal campaigns
- Weekend offers or any time-bound discount
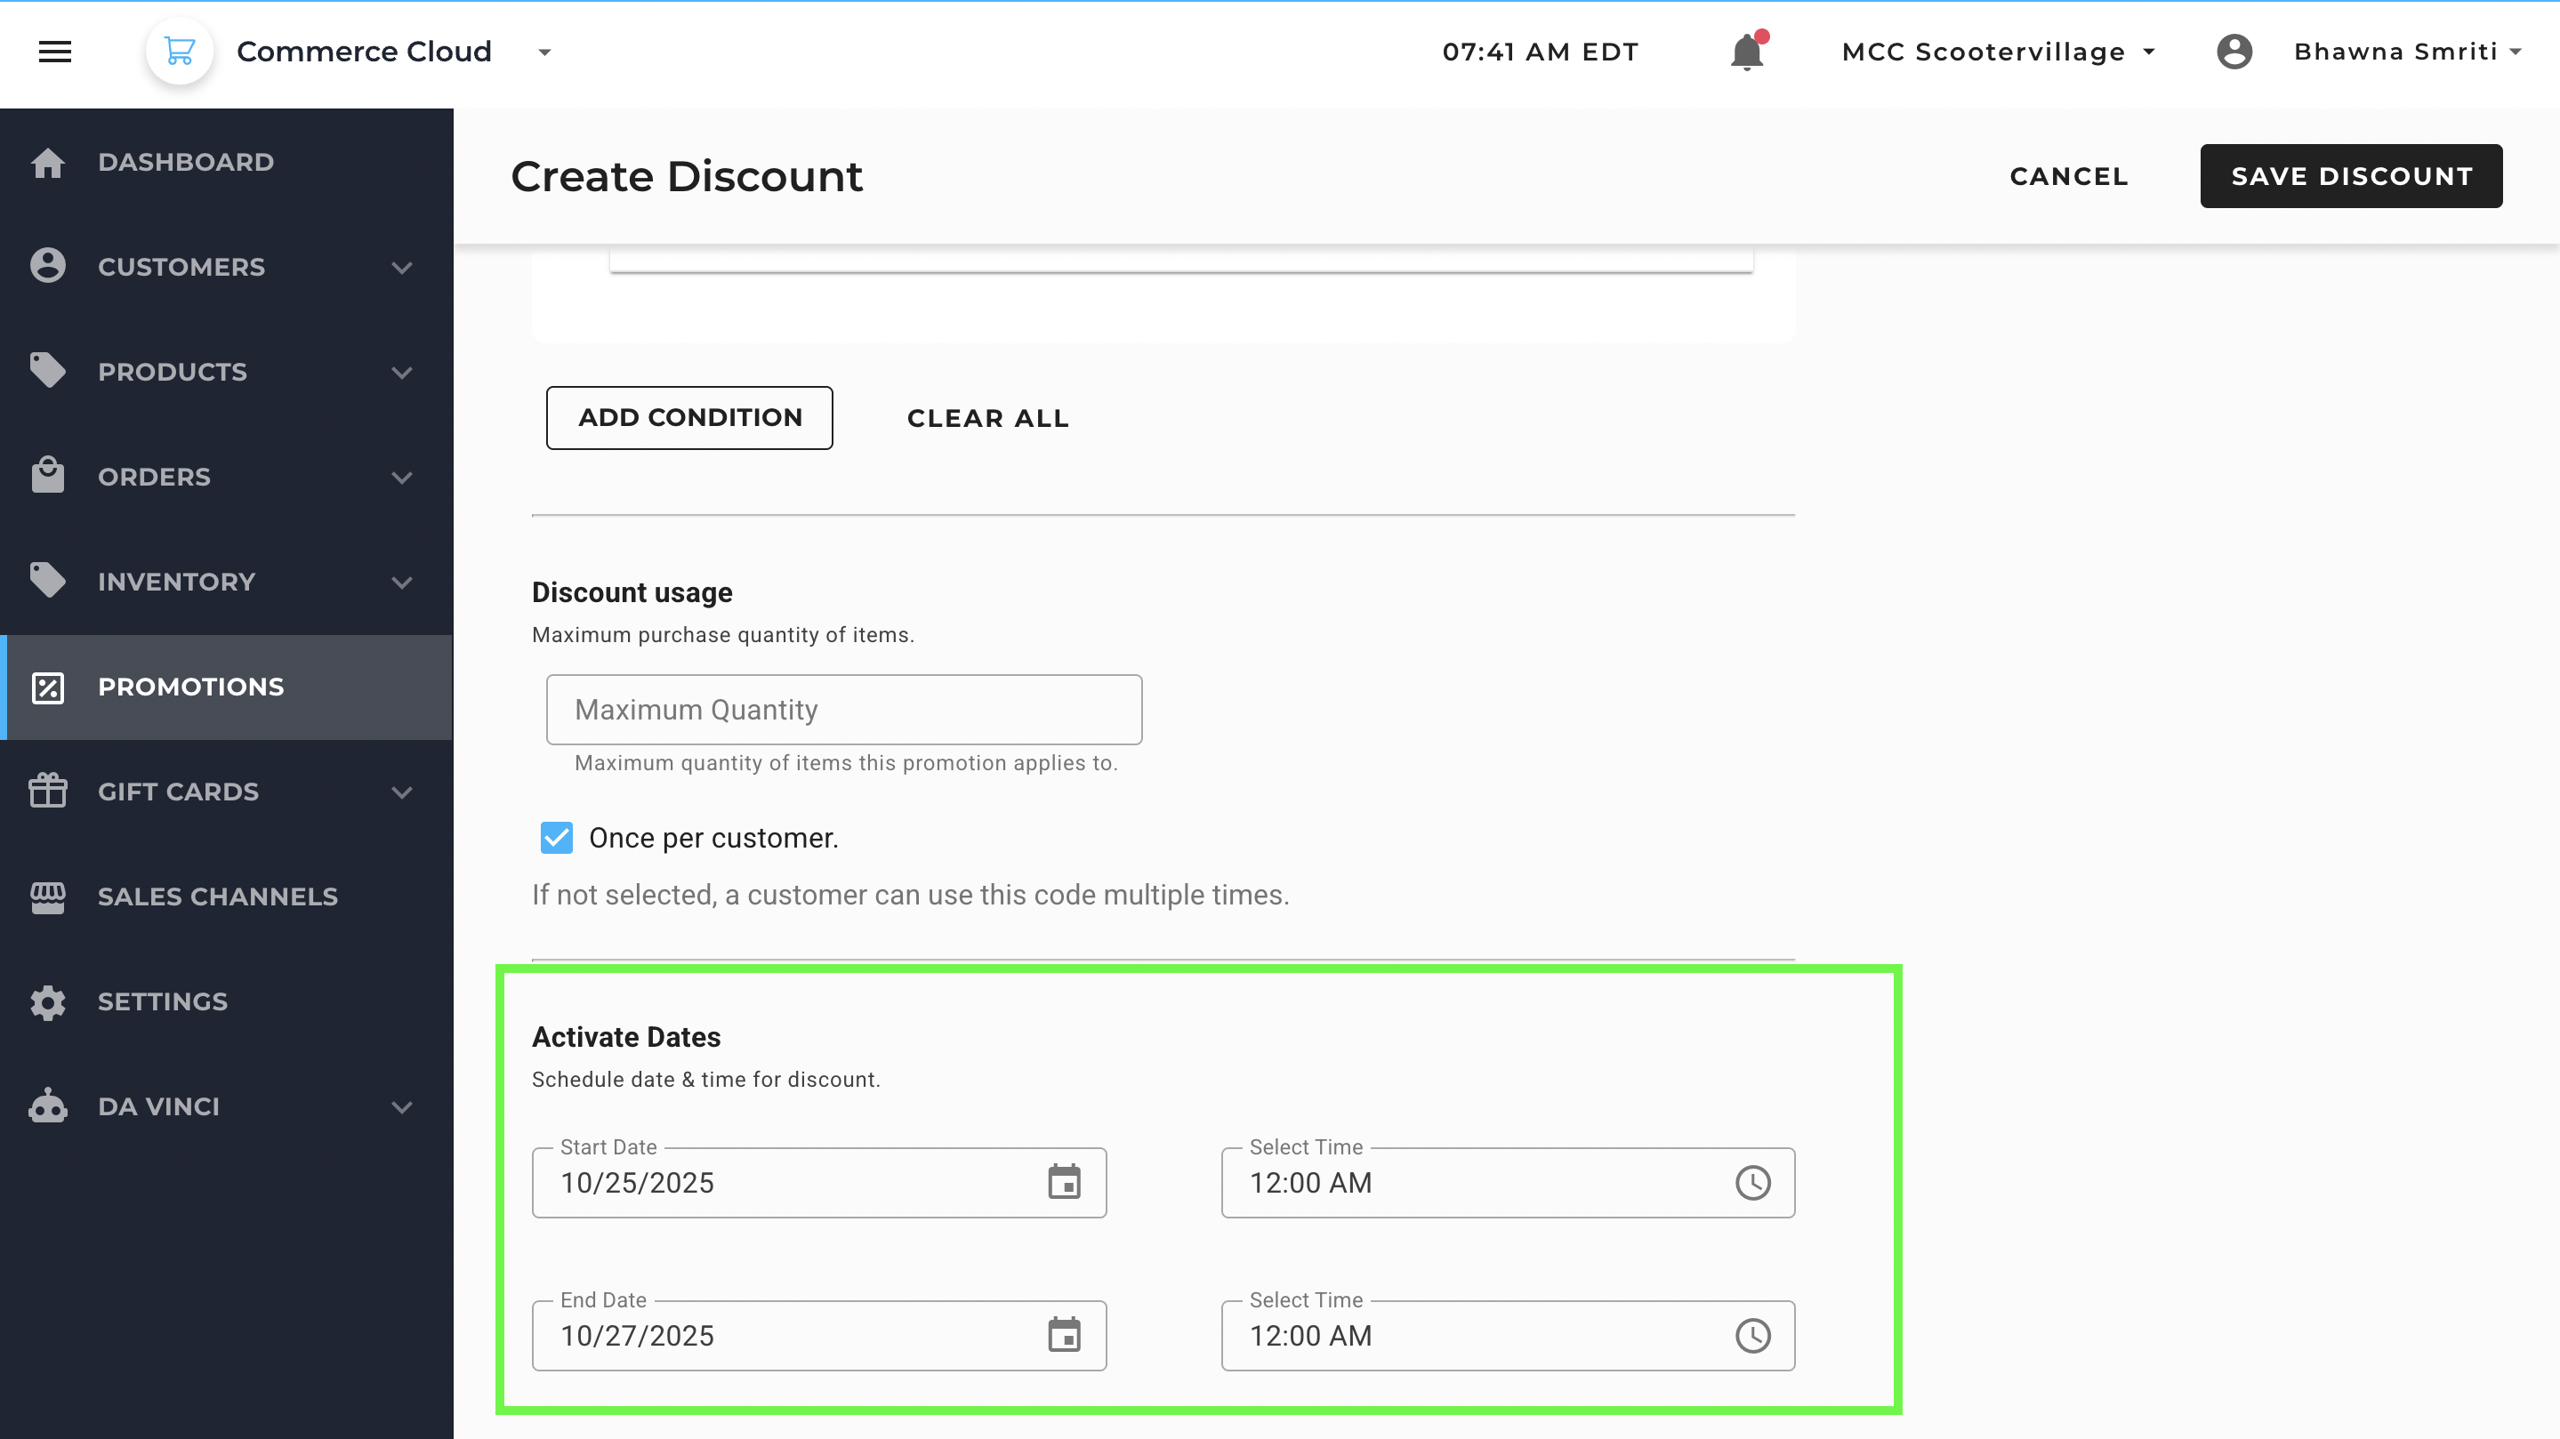
If you leave these blank, the promotion will start immediately and remain active indefinitely until manually disabled.
Final Step: Save the Promotion
Once all details (discount type, amount, usage limits, product eligibility, and active dates) are filled in:
- Click “Save Promotion”
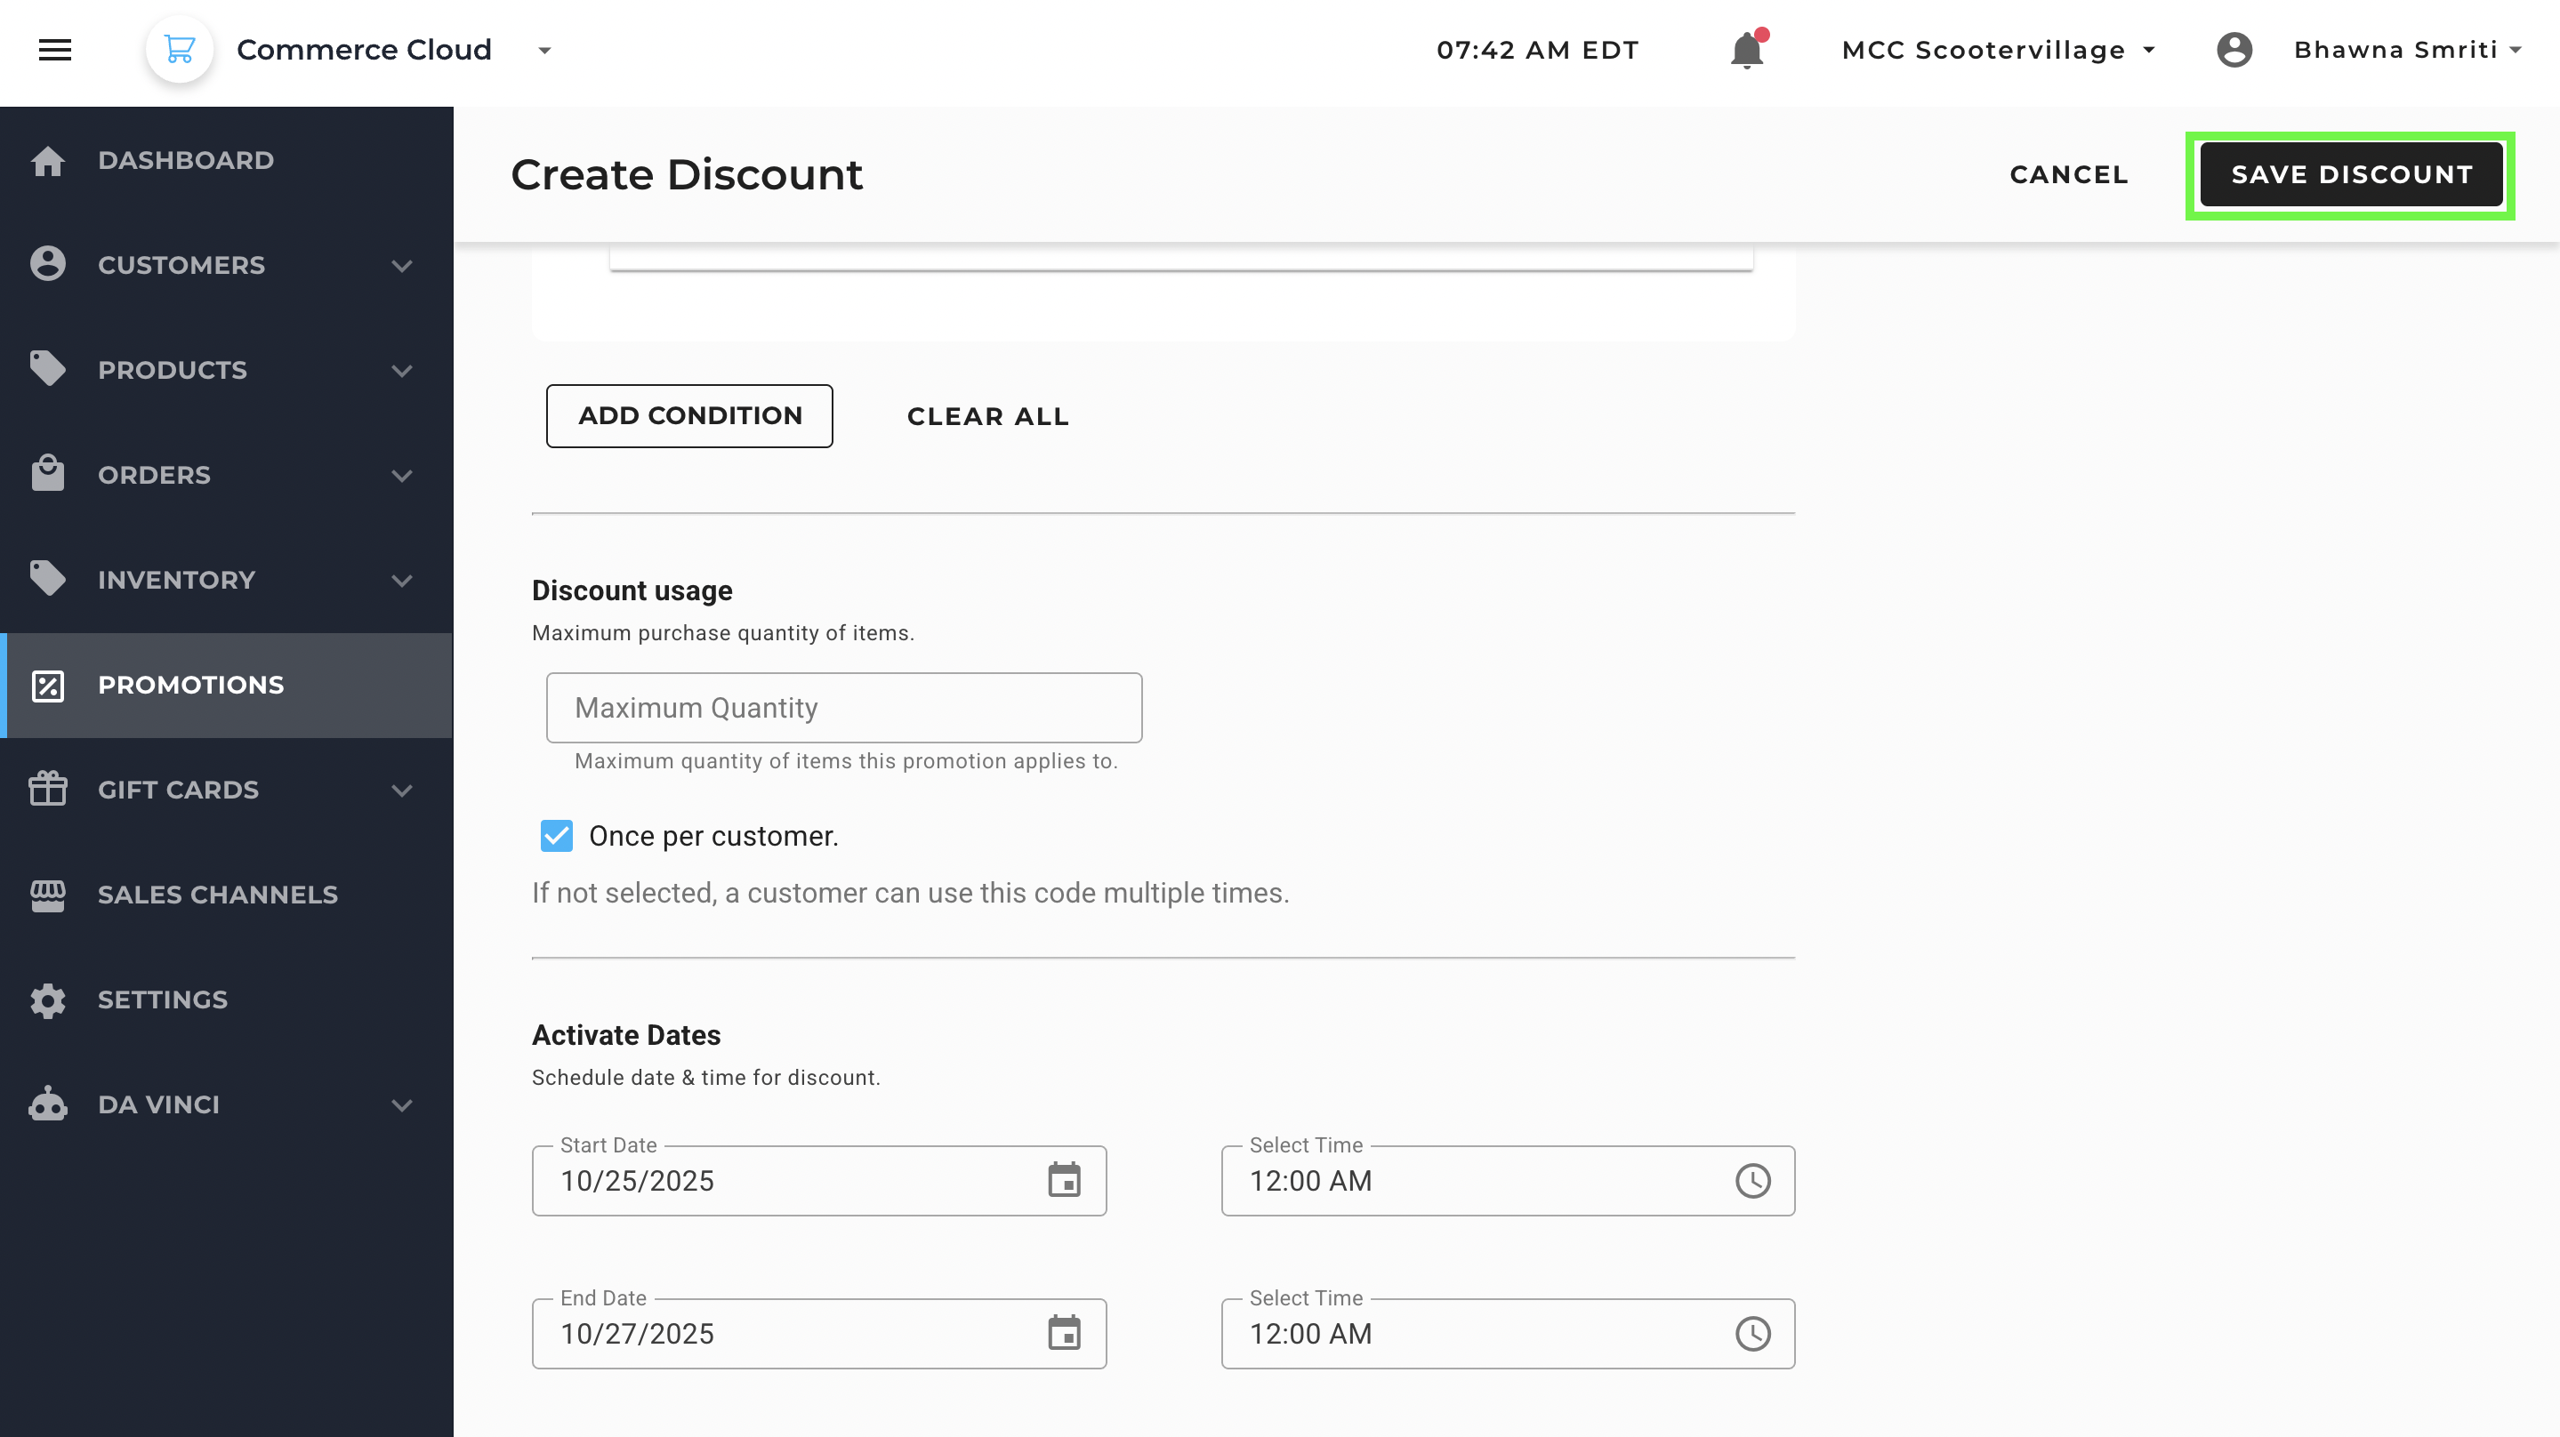
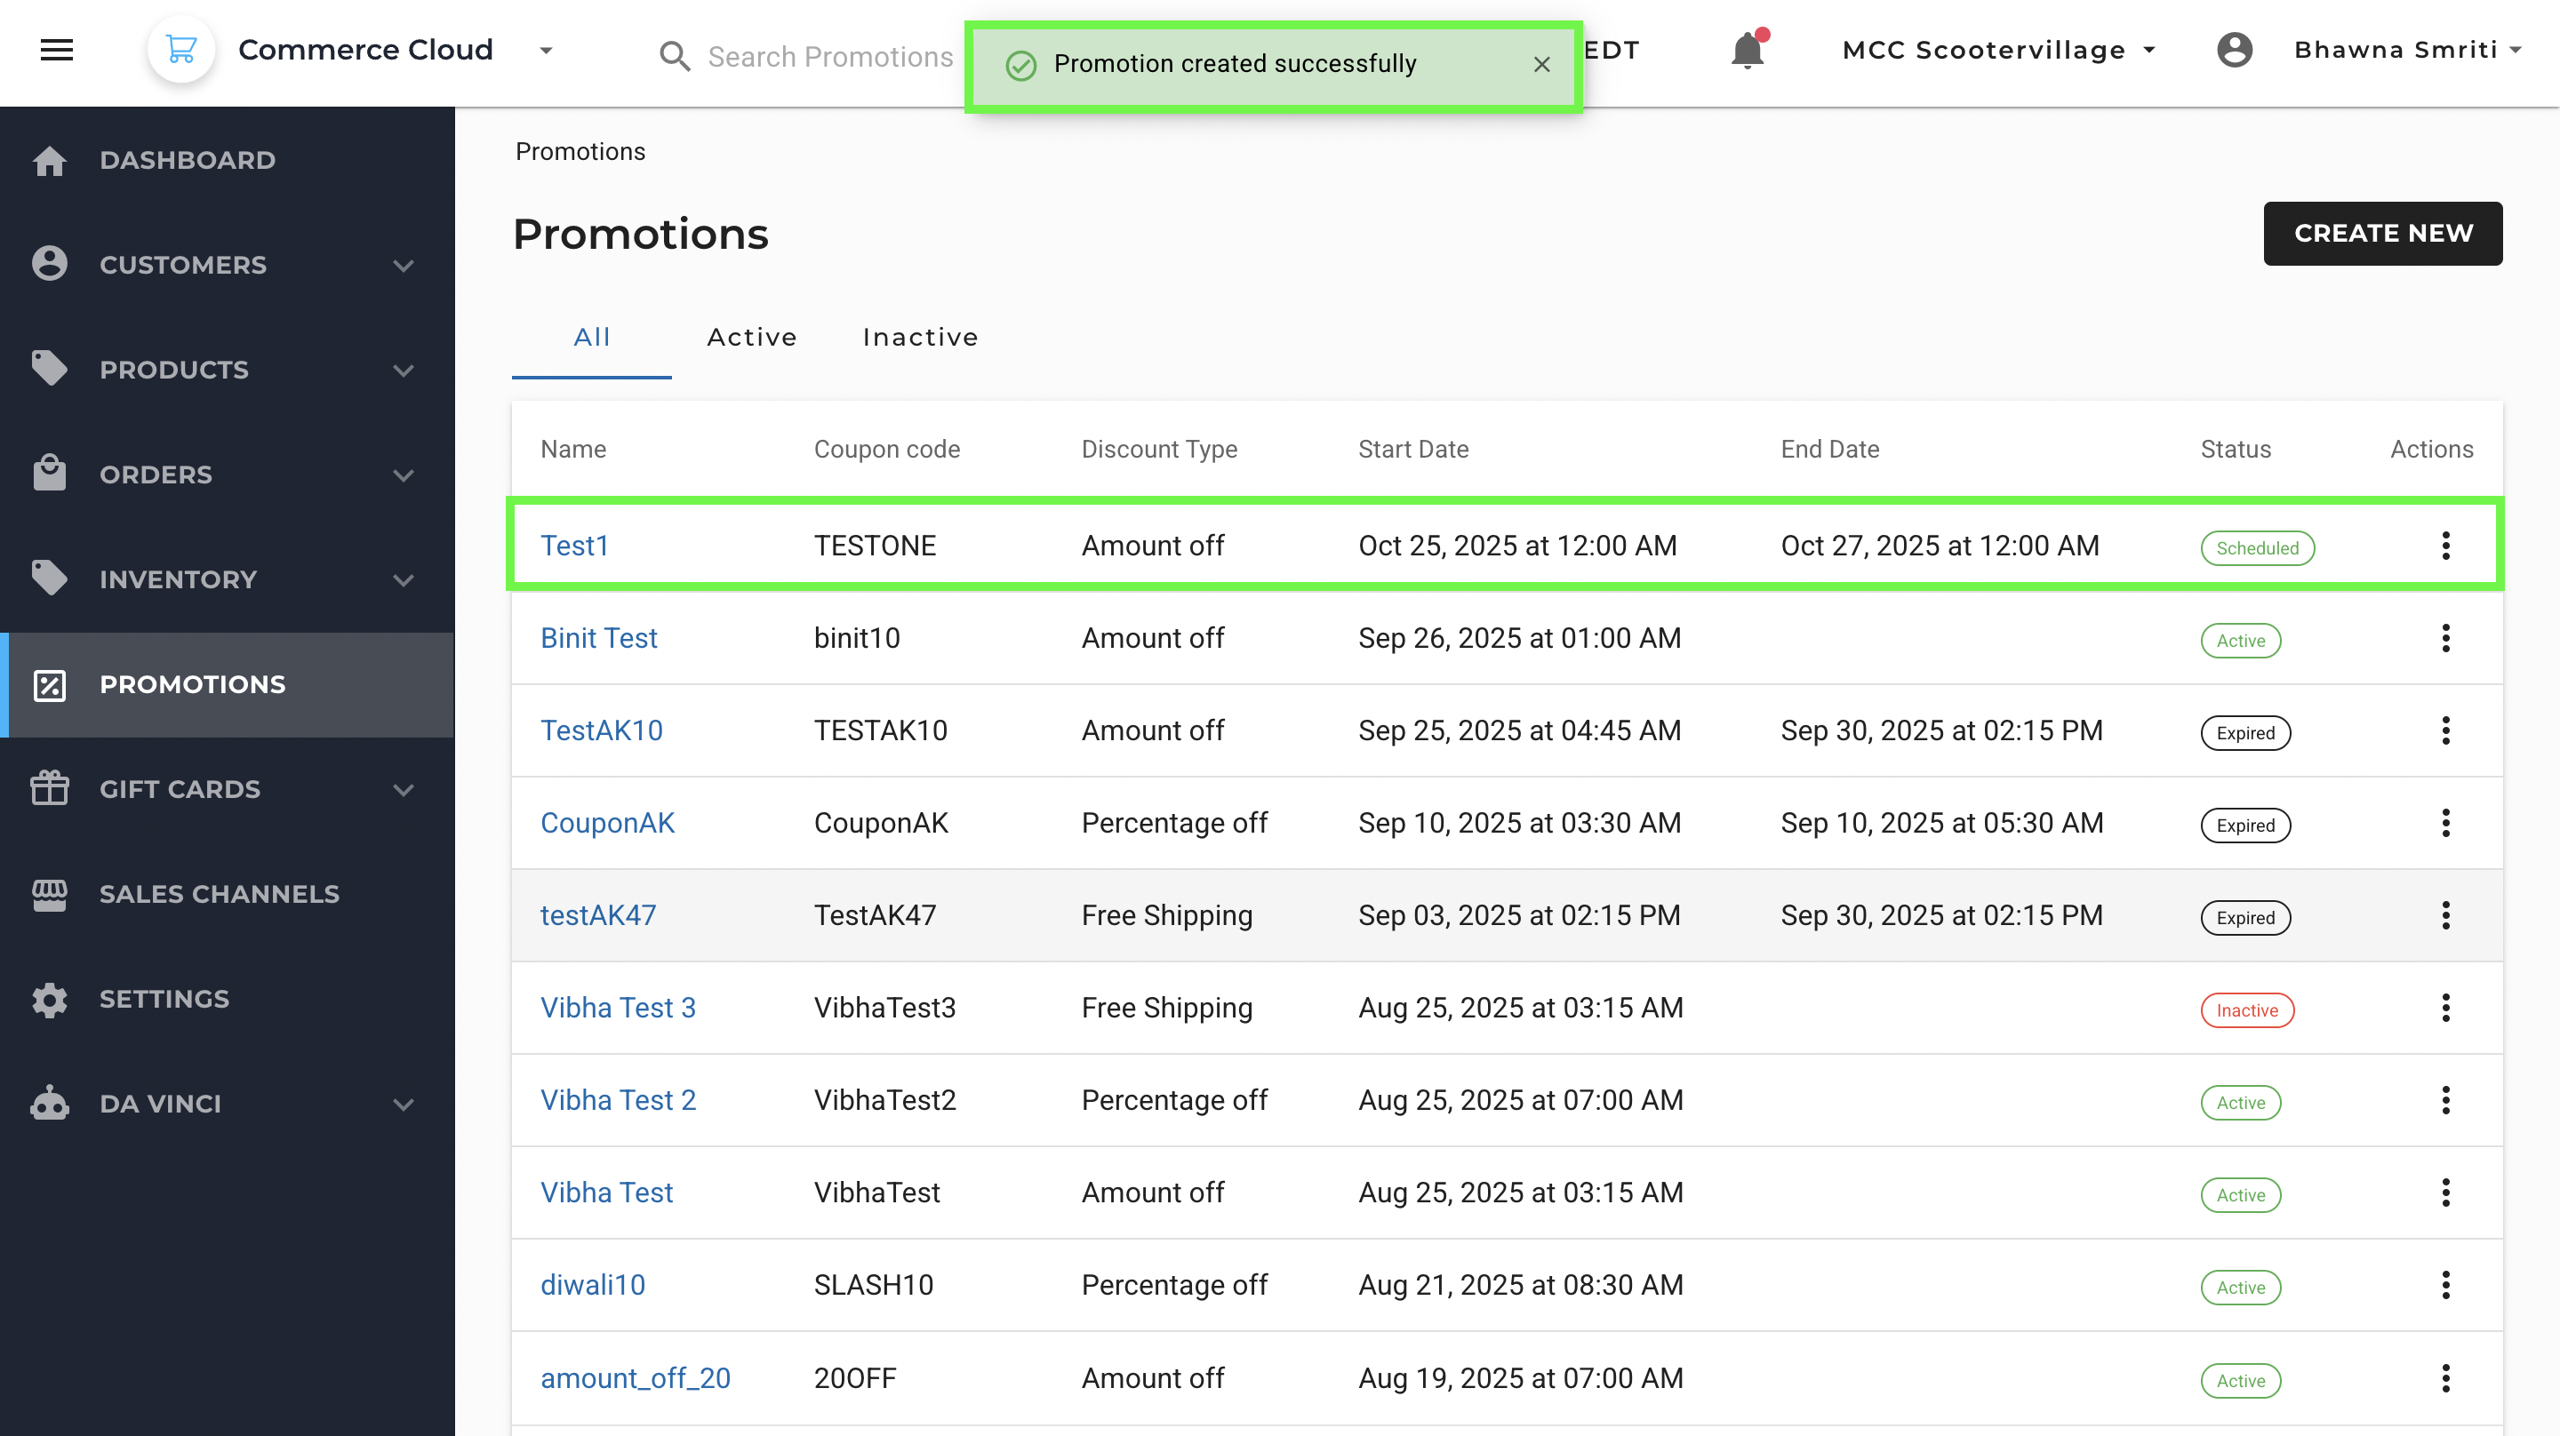
- You’ll see a confirmation notification: Promotion created successfully
- Your promotion will now be visible on the Promotions page
Managing Existing Promotions
- Click on the Name of a promotion to edit its details.
- Use the three-dot menu (⋮) under the Actions column to:
- Edit the promotion
- Delete the promotion (permanently remove it)
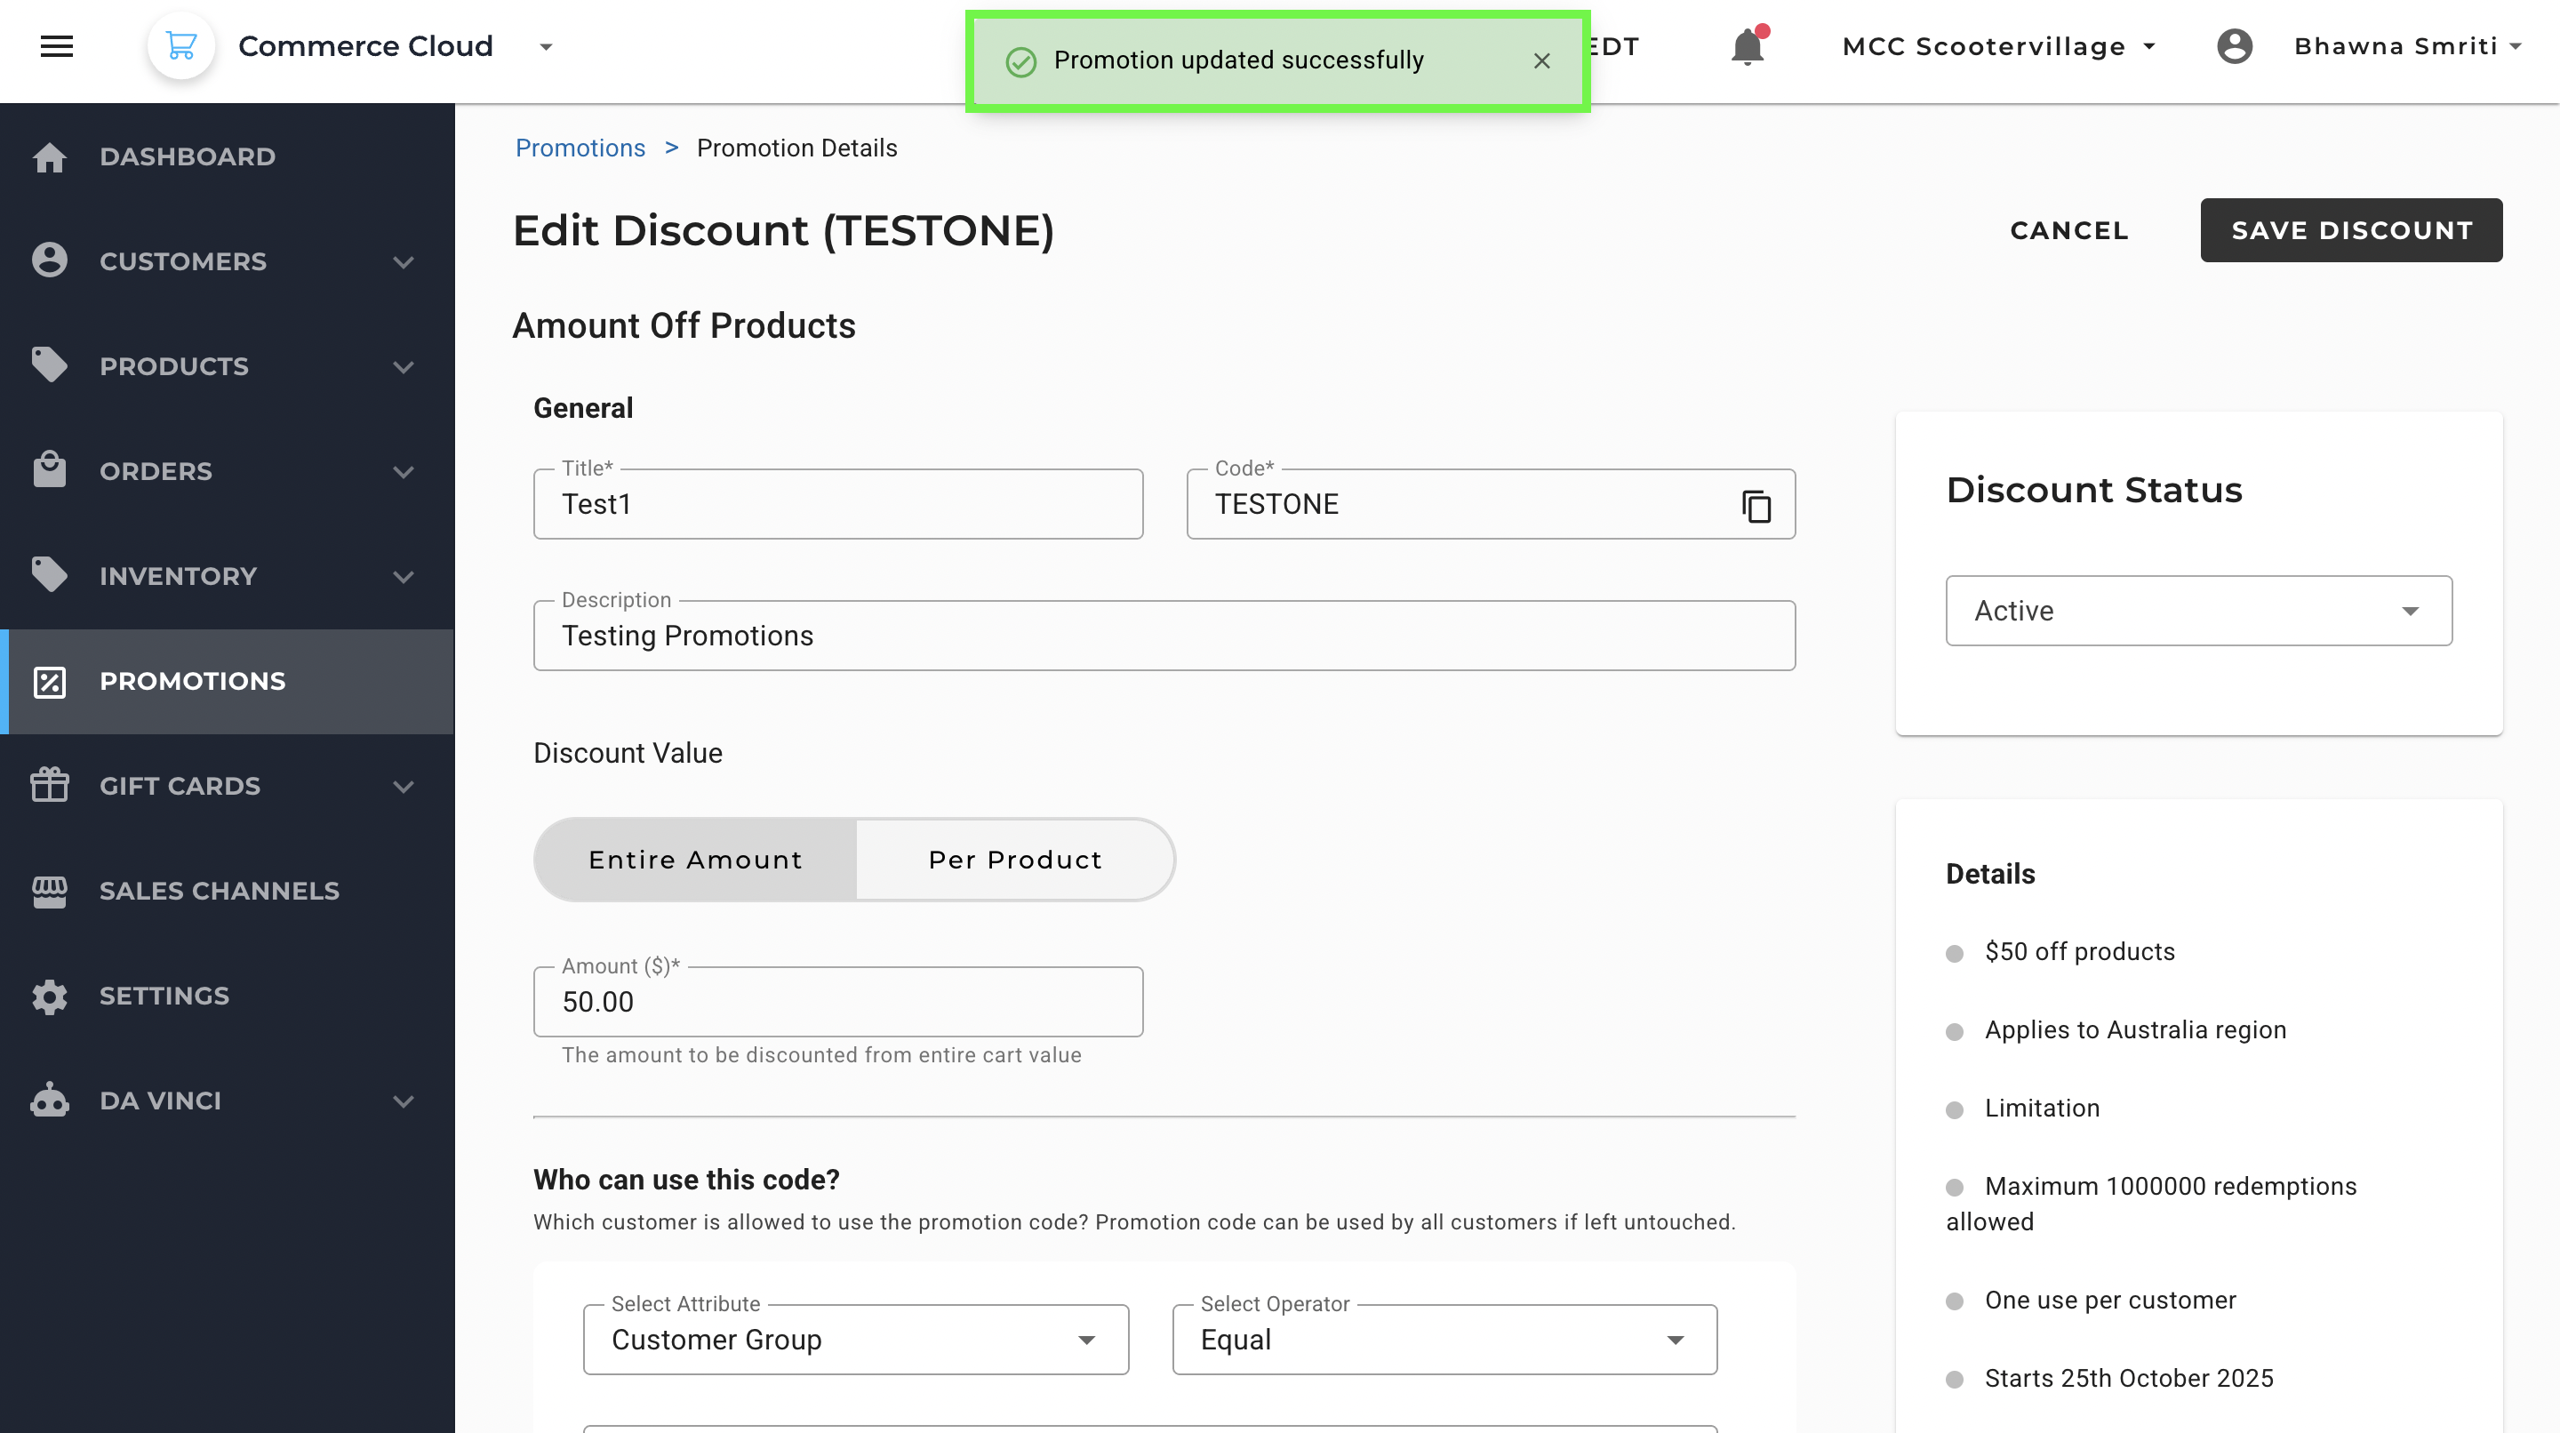
To Edit a Promotion:
- Go to the Edit Discount Page. It will reflect page as: Edit Discount (TESTONE)
- Make desired changes to the promotion
- Click “Save Discount”
- Once the Discount is saved, you will see a notification saying: Promotion updated successfully
Example Entries
Here are a few examples of how entries appear in the Promotions table:
Name | Coupon Code | Type | Start Date | End Date | Status |
|---|
Test1
| TESTONE | Amount off | Oct 25, 2025 at 12:00 AM | Oct 27, 2025 at 12:00 AM | Scheduled |
TestAK10
| TESTAK10 | Amount off | Sep 25, 2025 at 04:45 AM | Sep 30, 2025 at 02:15 PM | Active |
CouponAK
| CouponAK | Percentage off | Sep 10, 2025 at 03:30 AM | Sep 10, 2025 at 05:30 AM | Expired |
testAK47
| TestAK47 | Free Shipping | Sep 03, 2025 at 02:15 PM | Sep 30, 2025 at 02:15 PM | Active |