Draft Orders offer a convenient way to manually create sales — whether it’s for customer service over the phone, a back-office sale, or a special order that isn’t completed at the point of purchase. The system automatically saves your progress whenever a customer or product is added, so there’s no need to complete the entire order before saving. Any additional updates you make are continuously saved in real time, ensuring your draft is always up to date.
This guide walks you through the steps to create, modify, and finalize draft orders in the system. To create a draft order:
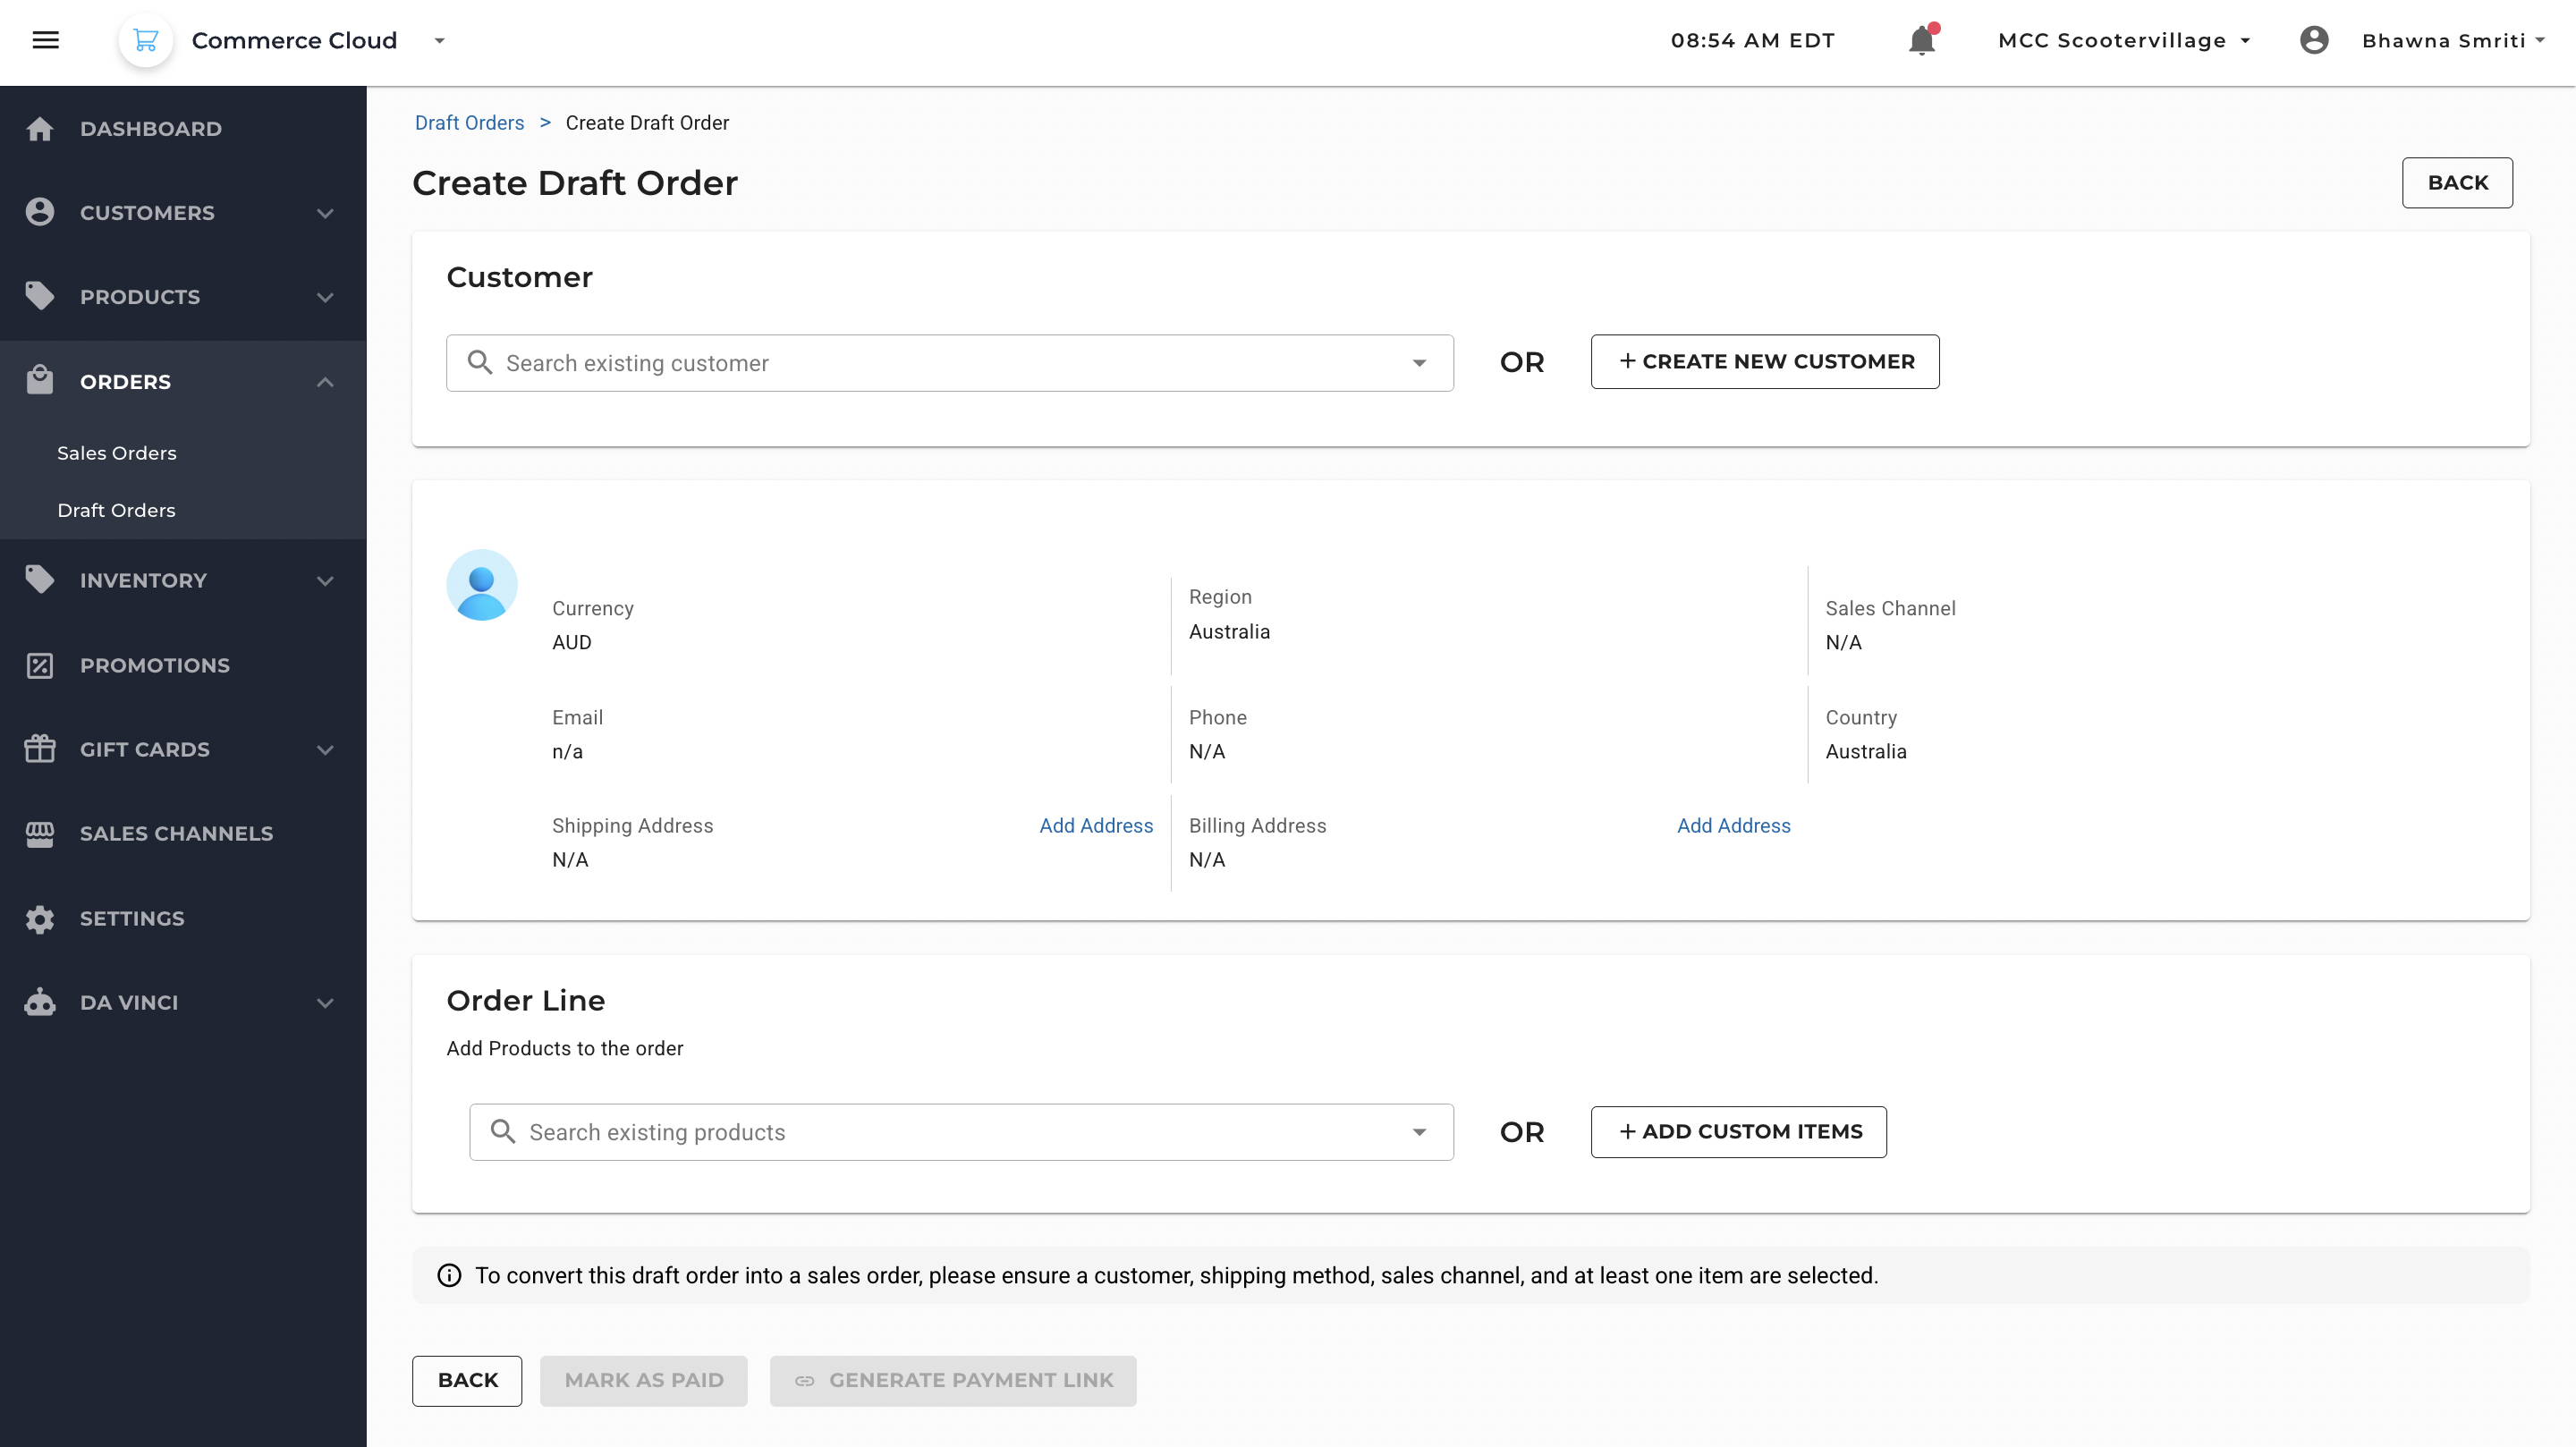
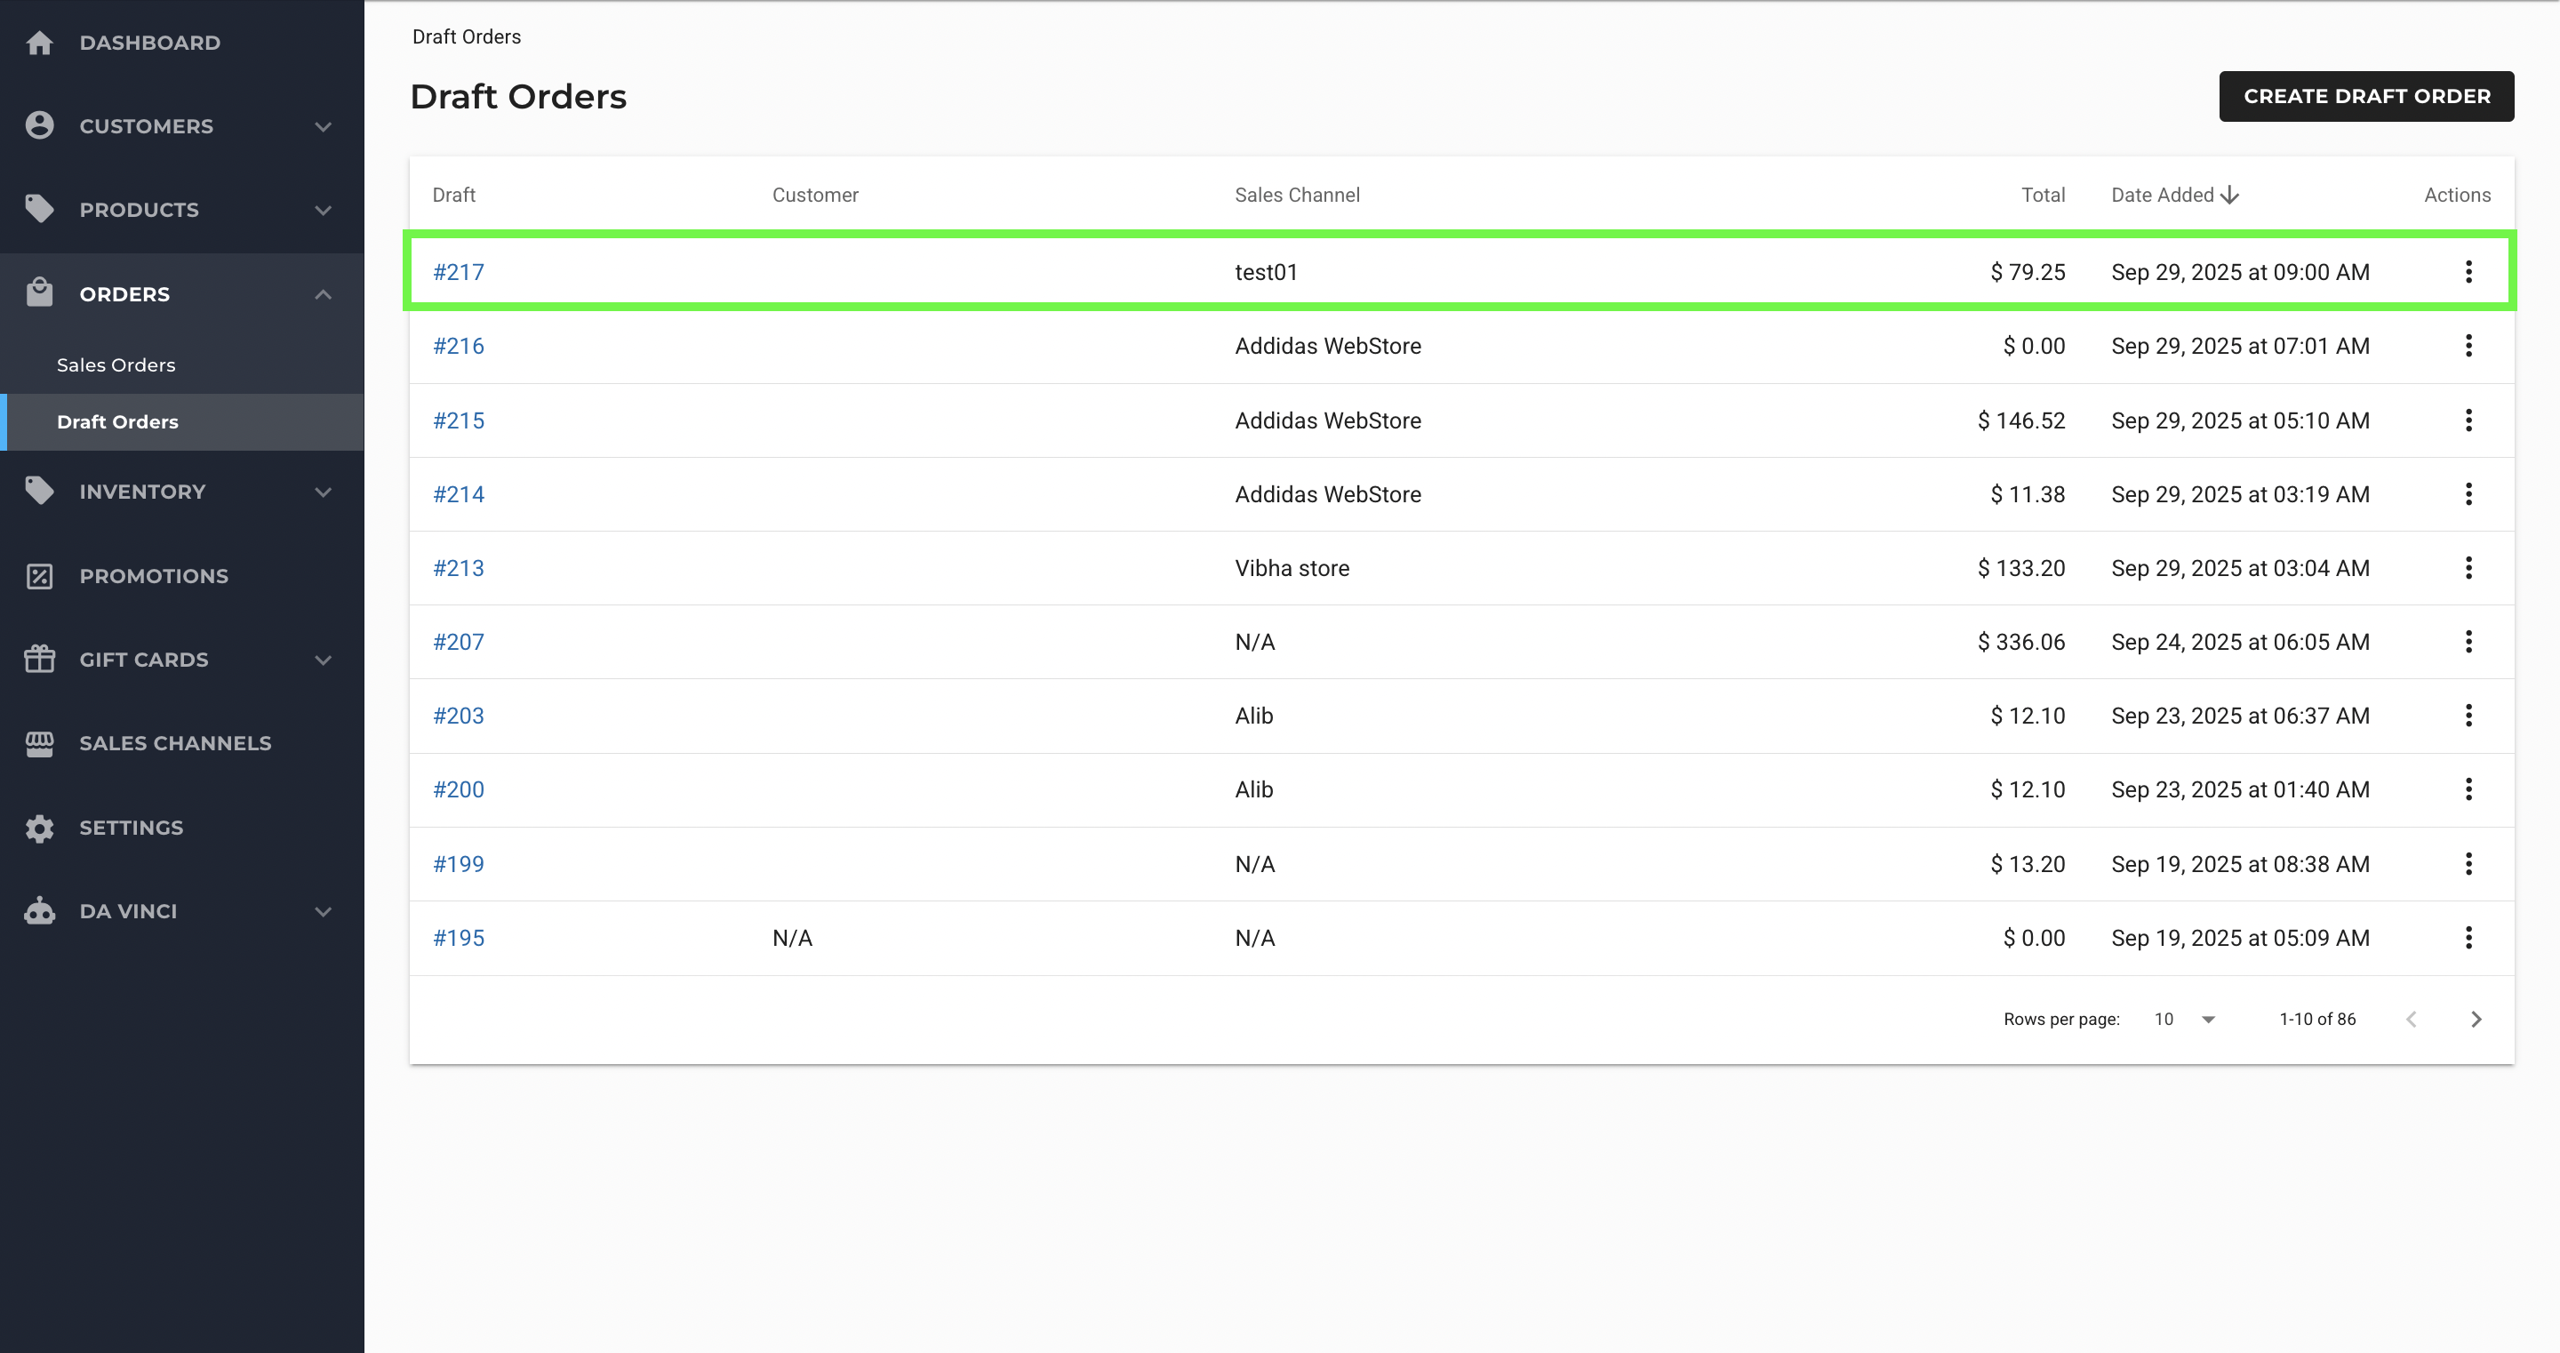
- Navigate to Sales > Orders > Draft Orders in the Back Office.
- Click Create Draft Order to open the default draft order page.
Creating a Draft Order
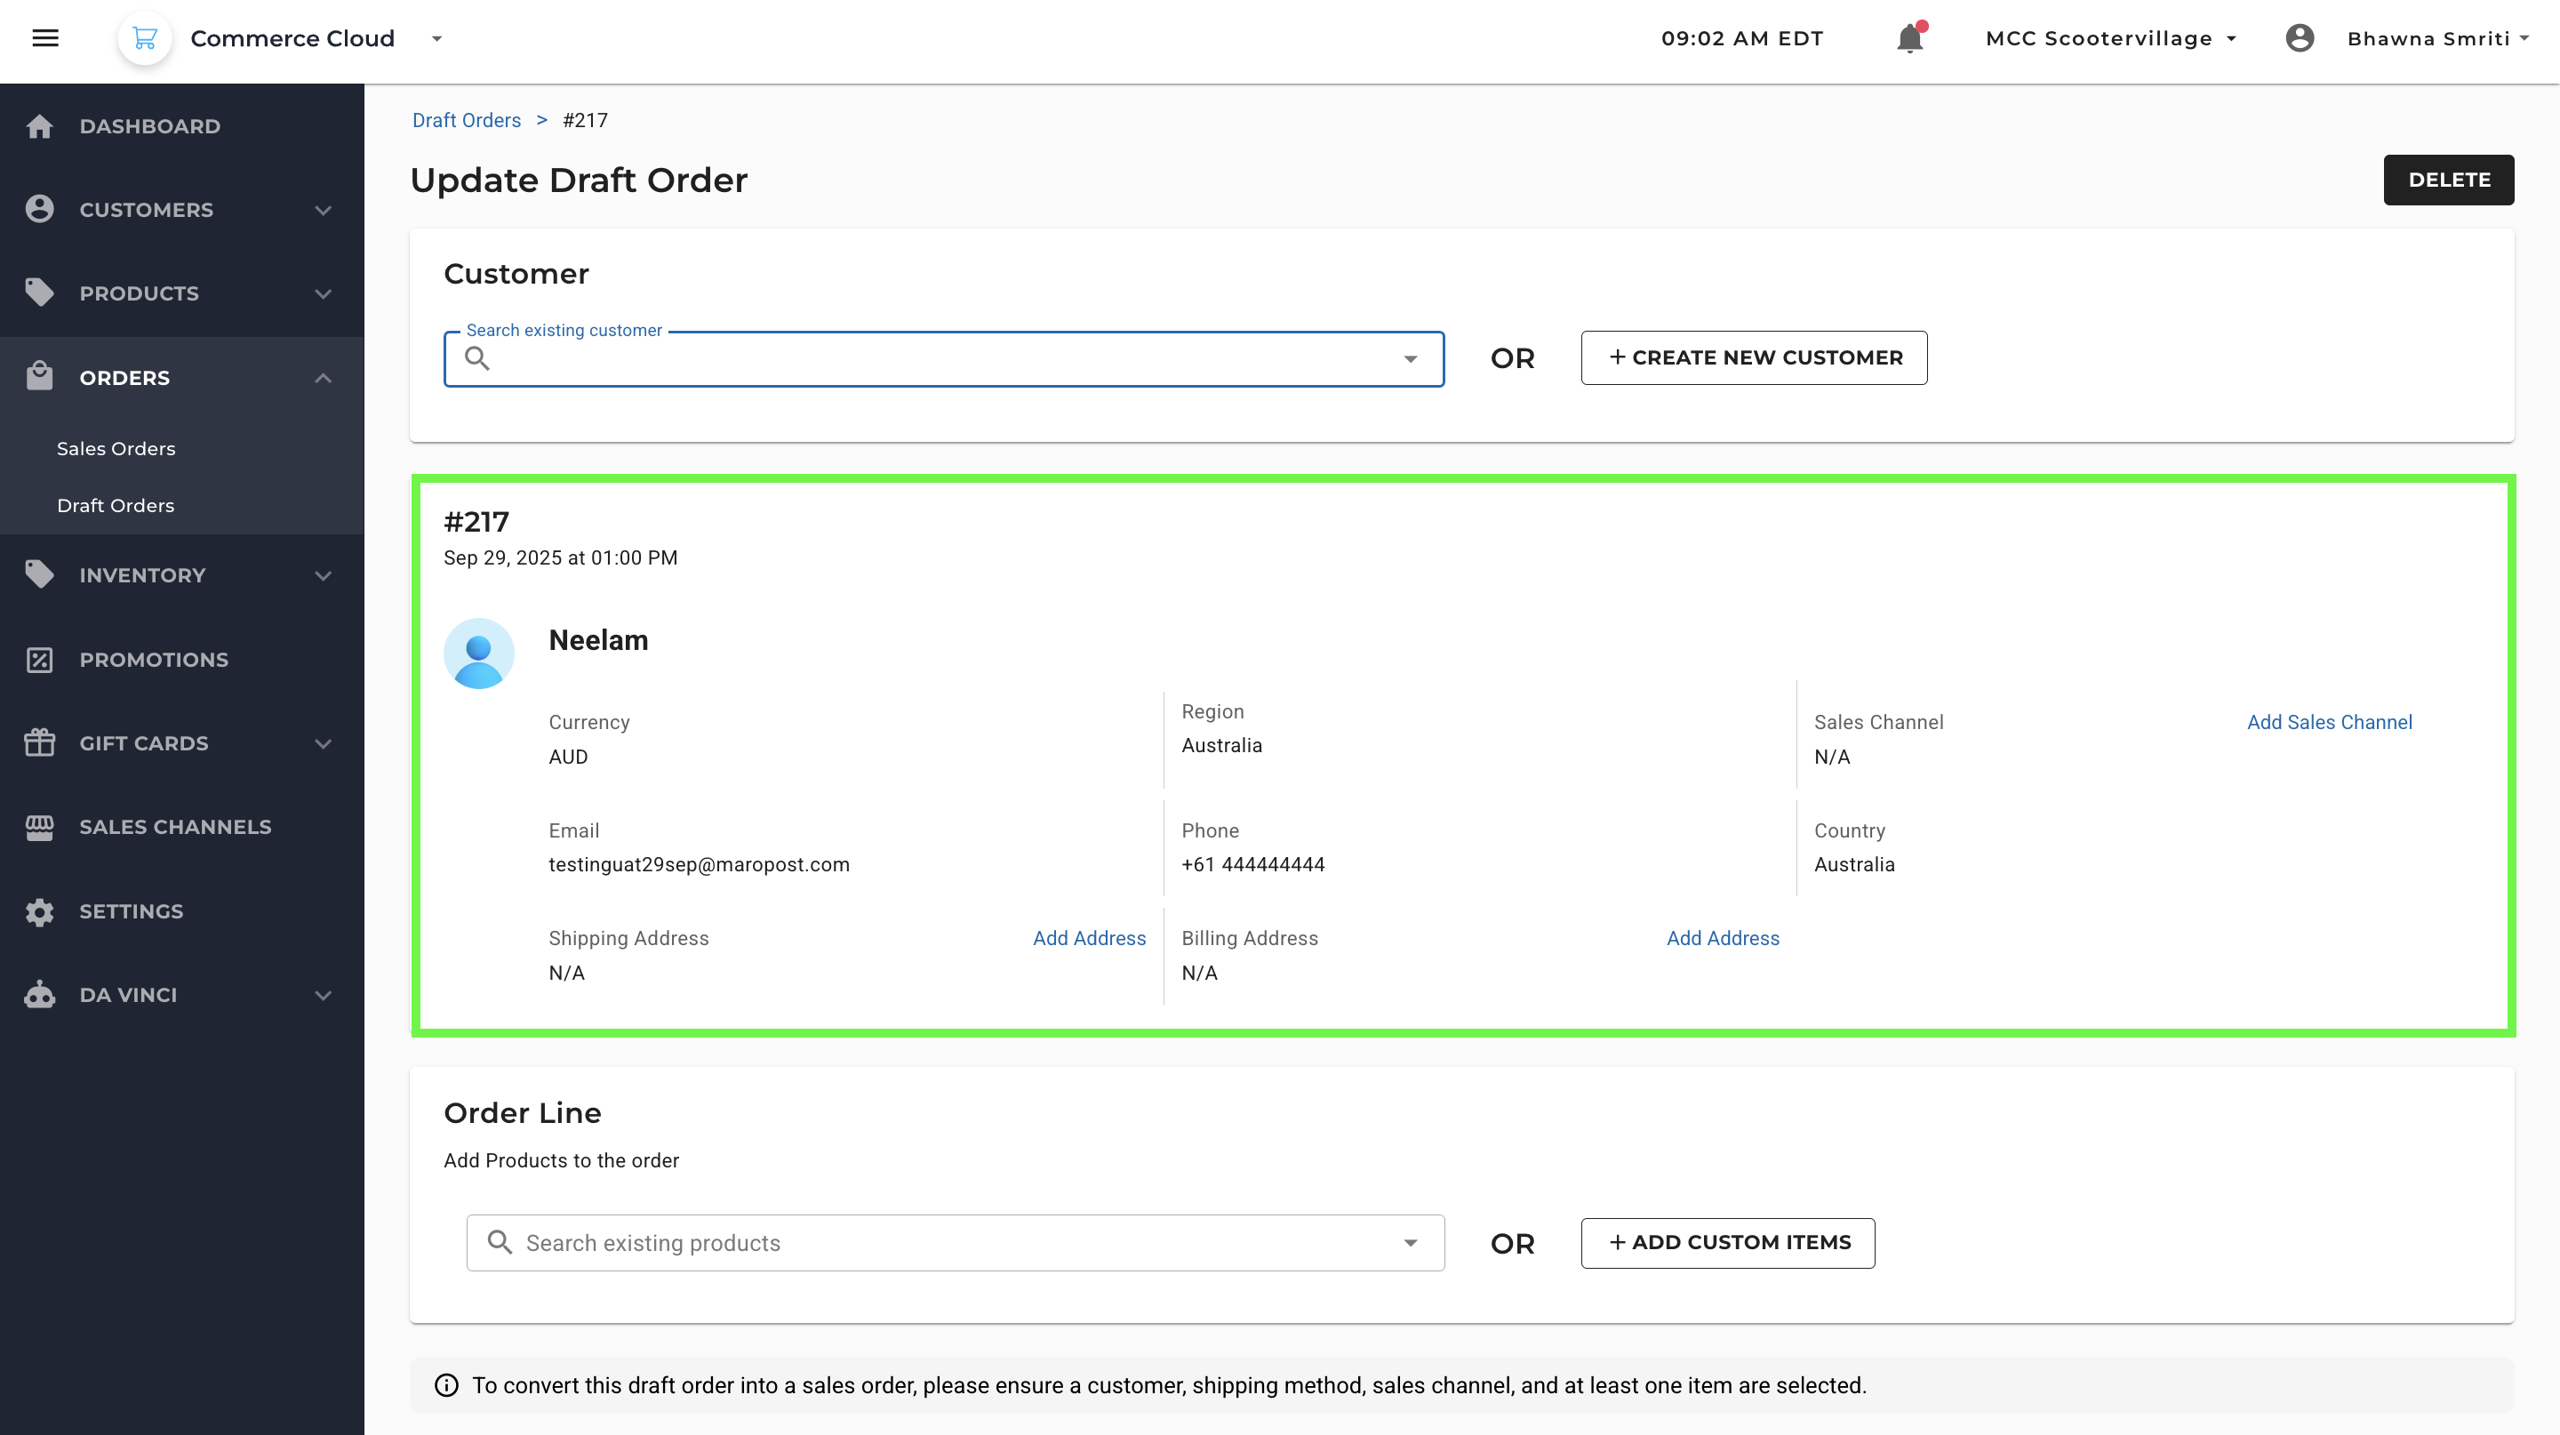
1. Add or Create a Customer
At the top of the draft order screen:
- Use the Search existing customer field to select a customer from your database.
- Or click + Create New Customer to manually enter new customer details.
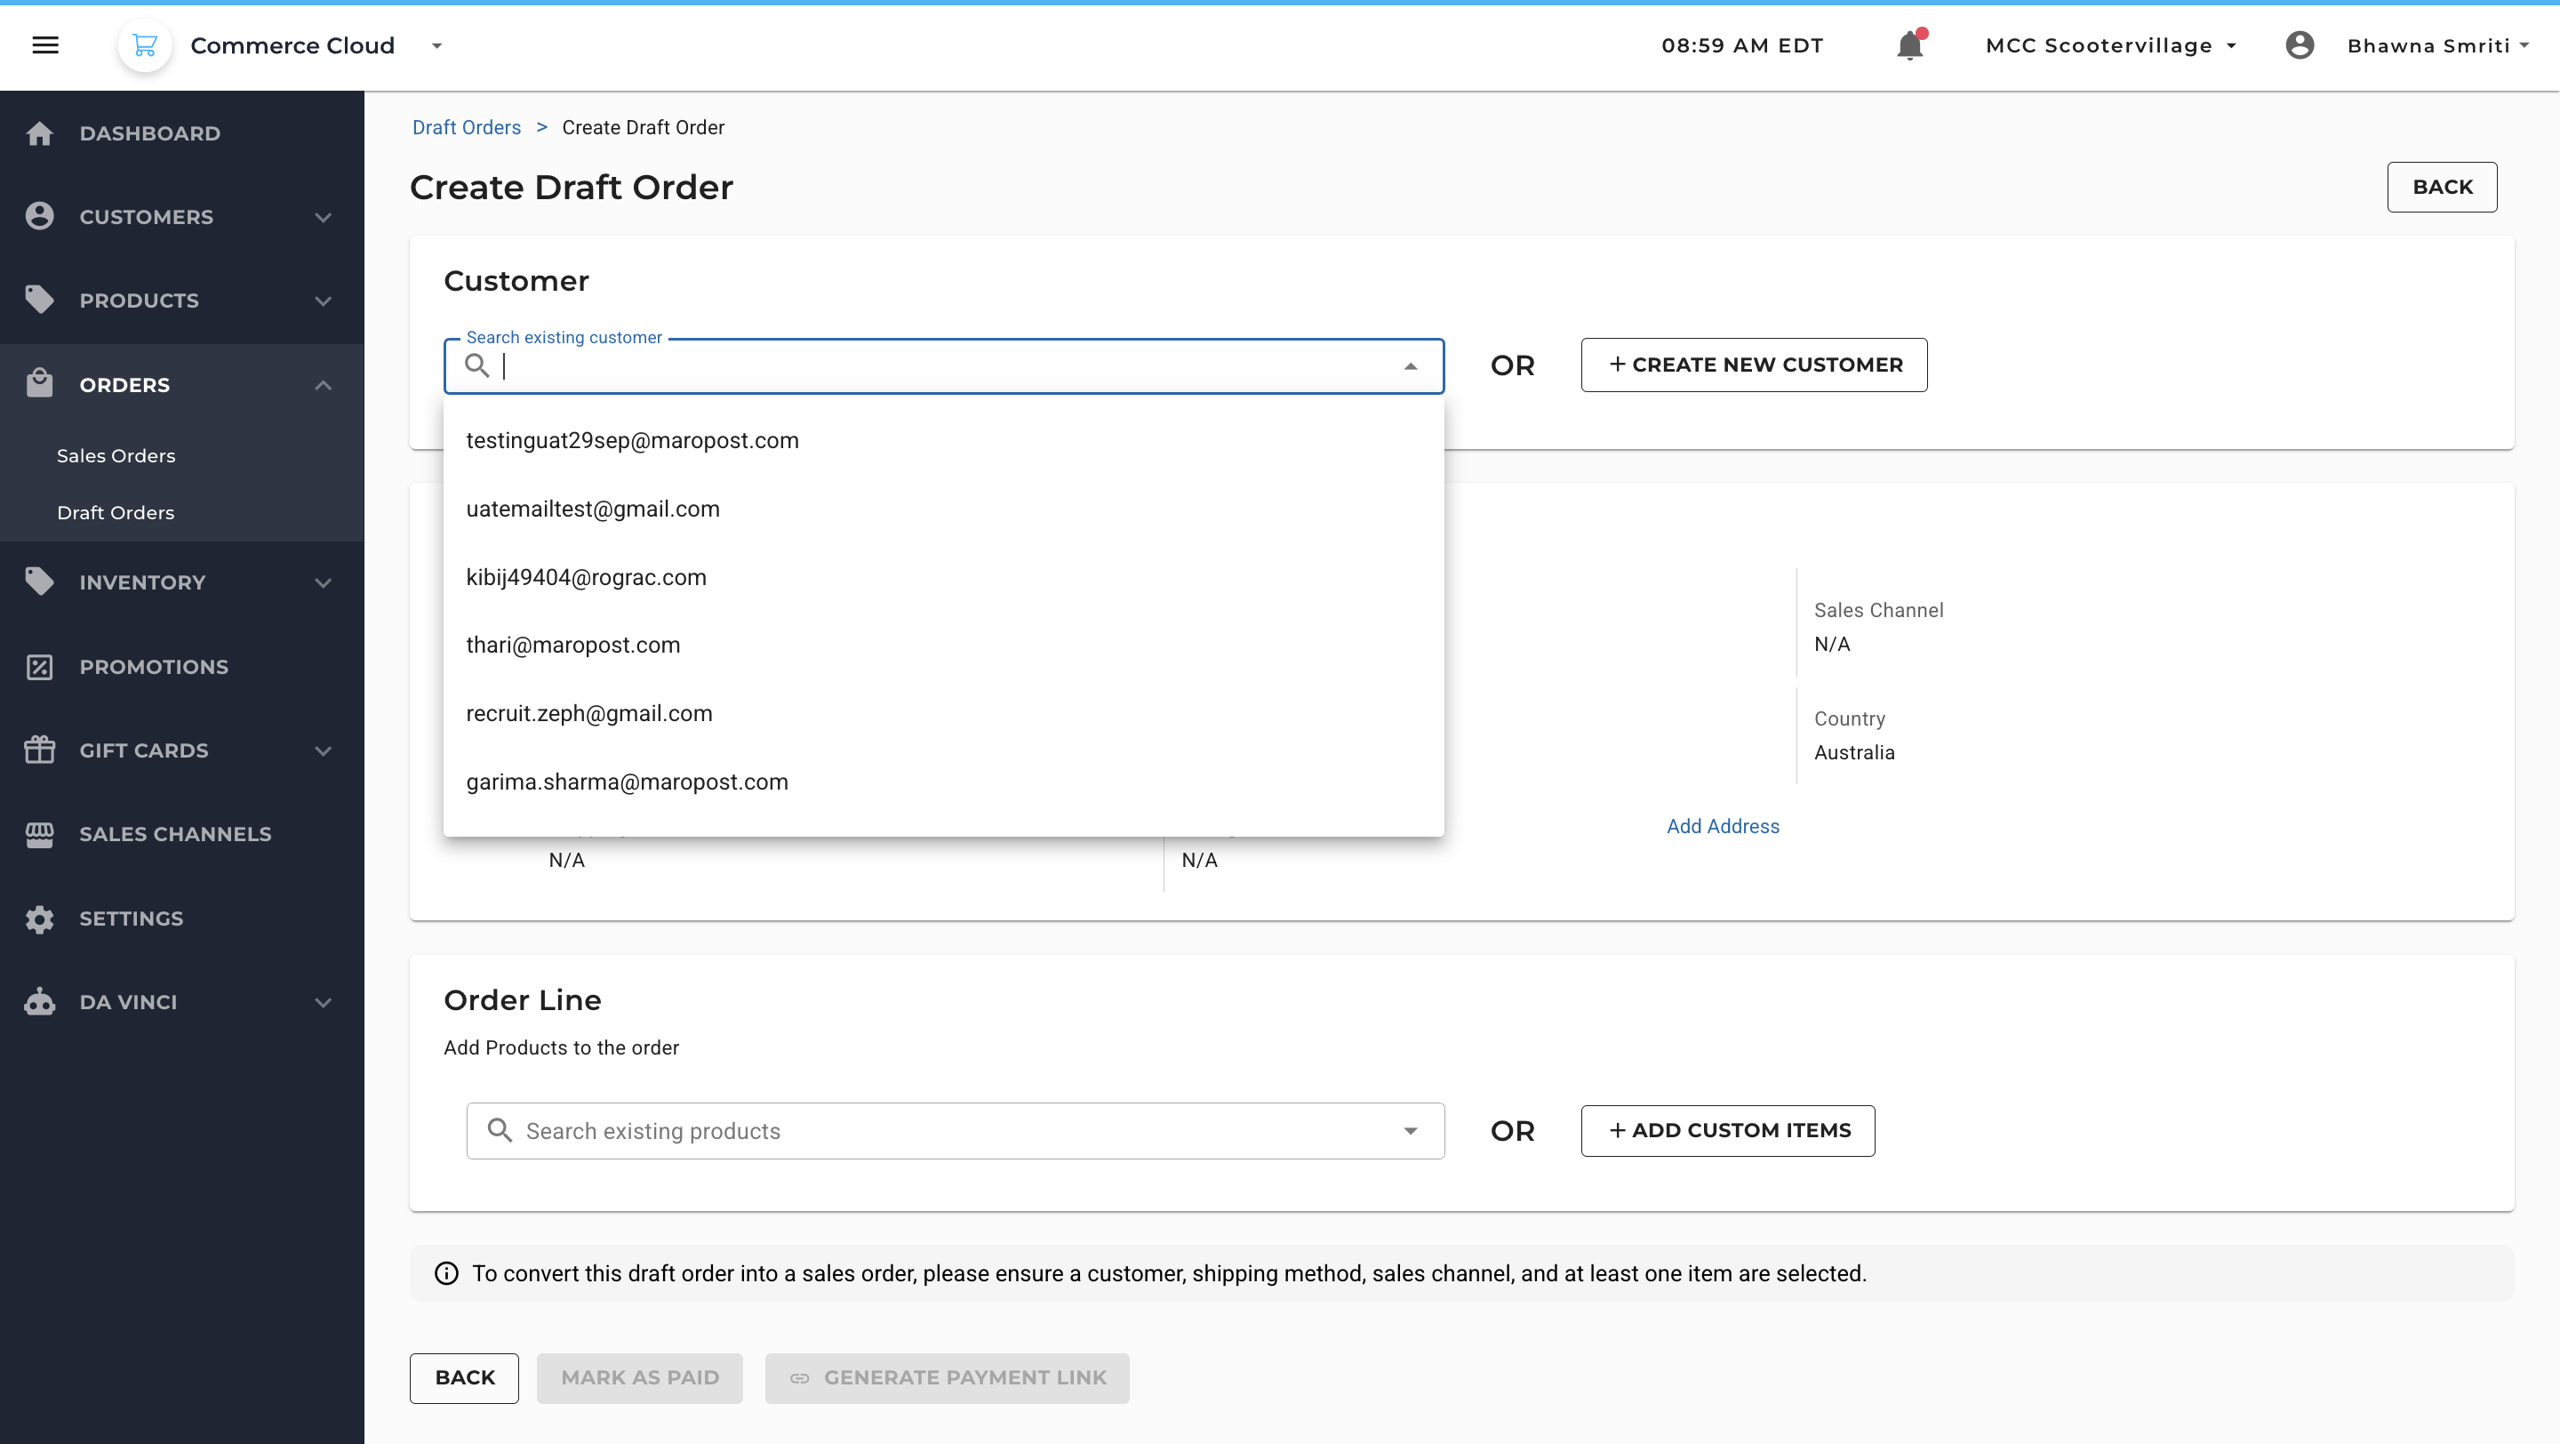
Search Existing Customers
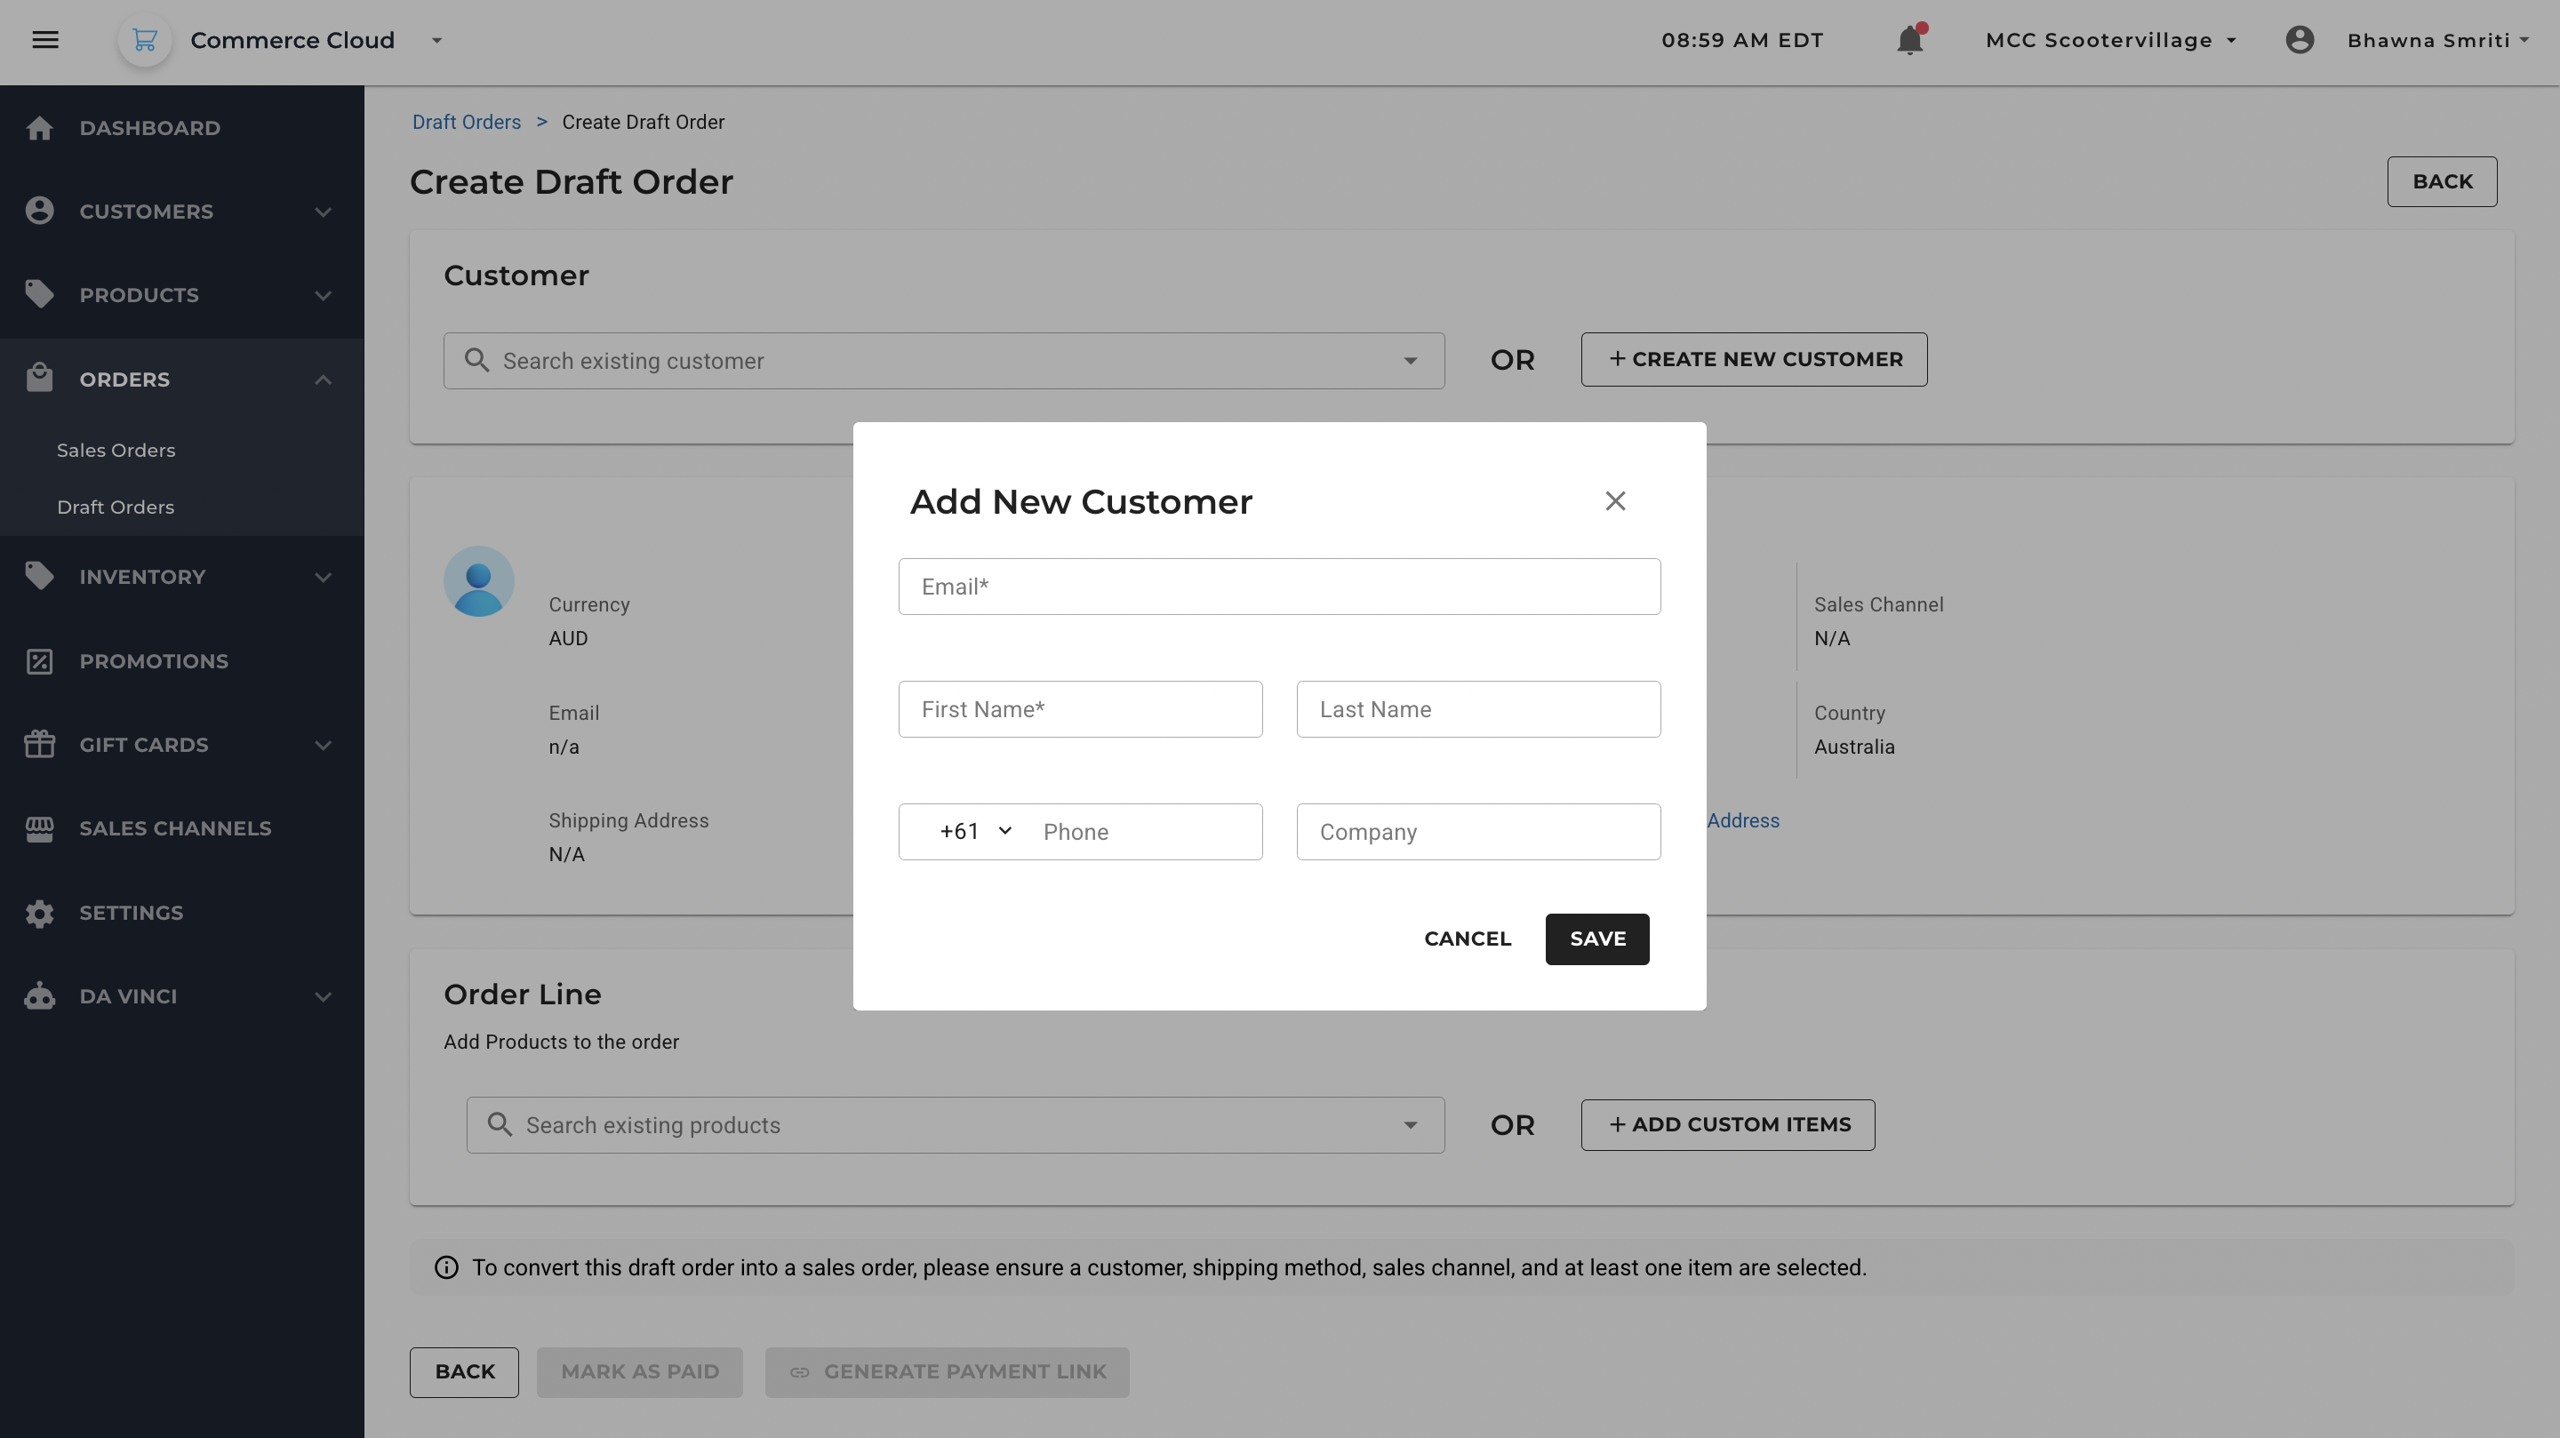
Add New Customer
Once customer details populate in the system, a notification will reflect: Draft Order created successfully and customer’s detail will pop-up in the following section:
Add Order Line
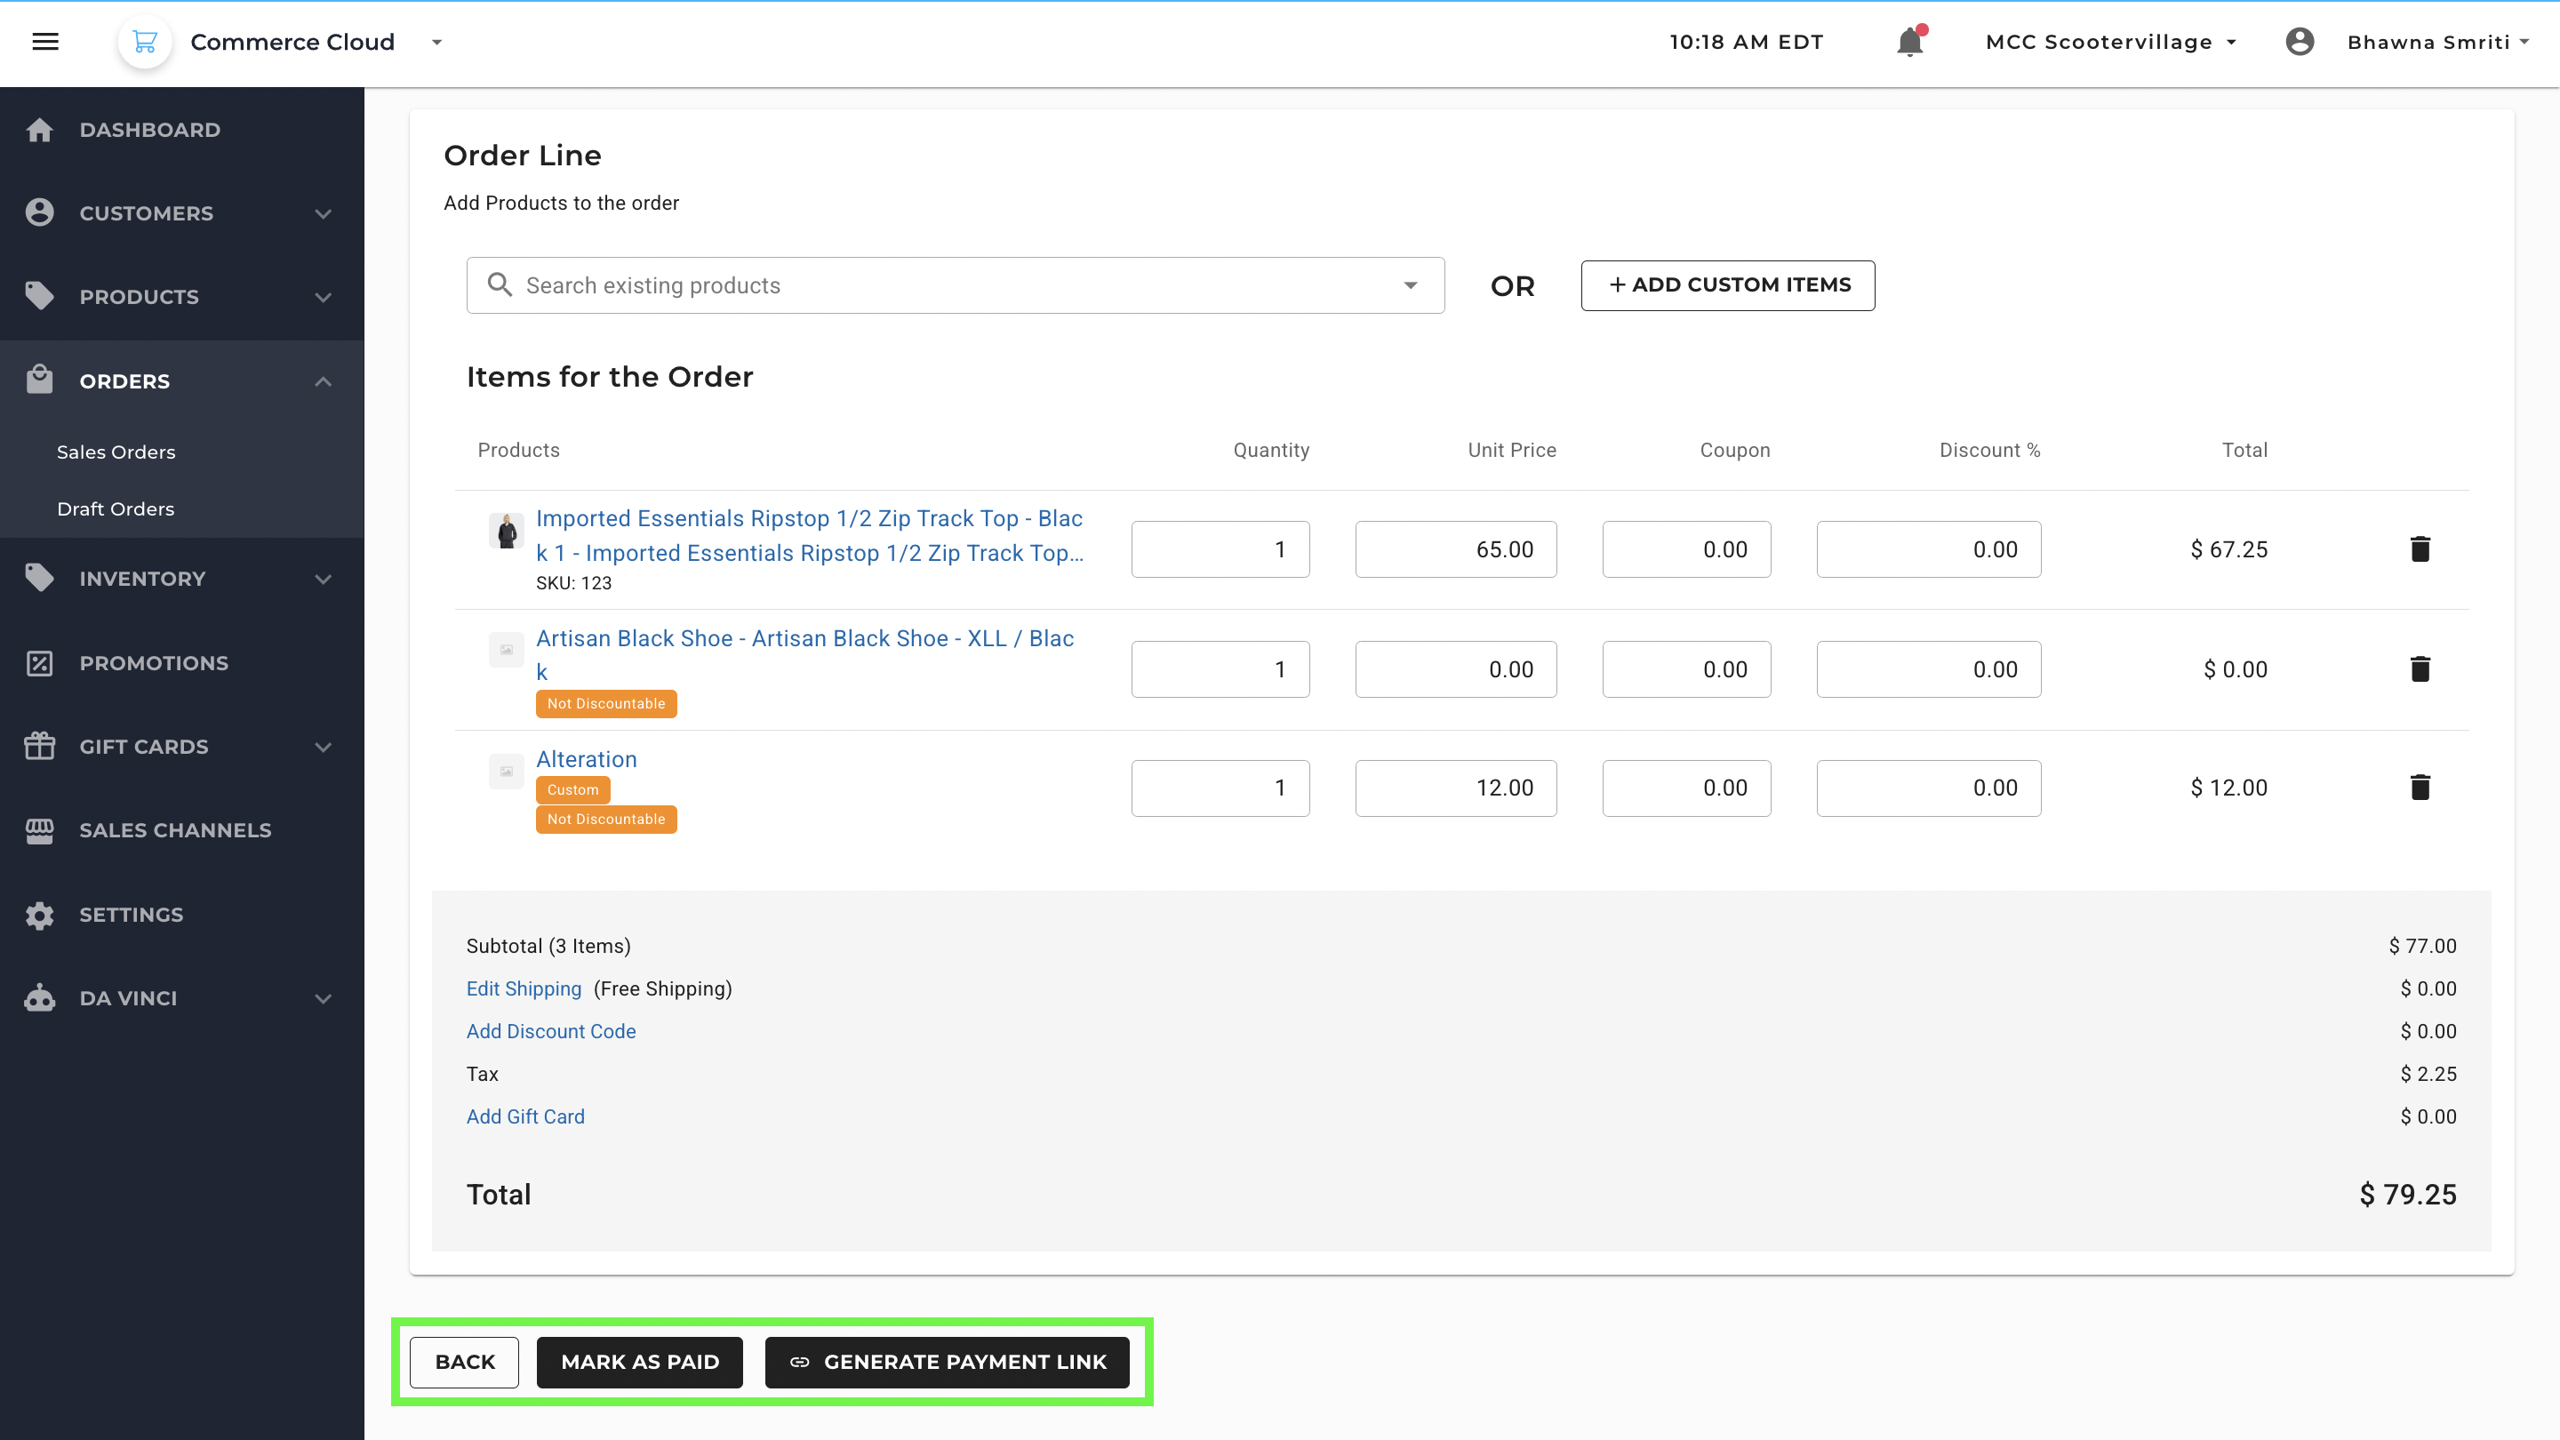
The Order Line section allows you to add products or custom items to the draft order. This step is required to convert the draft into a valid sales order.
You can either:
- Search Existing Products: Use the search bar to find products that already exist in your catalog.
- + Add Custom Items: Add one-off items that may not be part of your standard product list (e.g., special services or unlisted products).
At least one product or custom item must be added before you can complete or convert the draft order.
Once the products or custom items are added, they become visible in the order summary along with the total amount the customer needs to pay.
After that, you can proceed to:
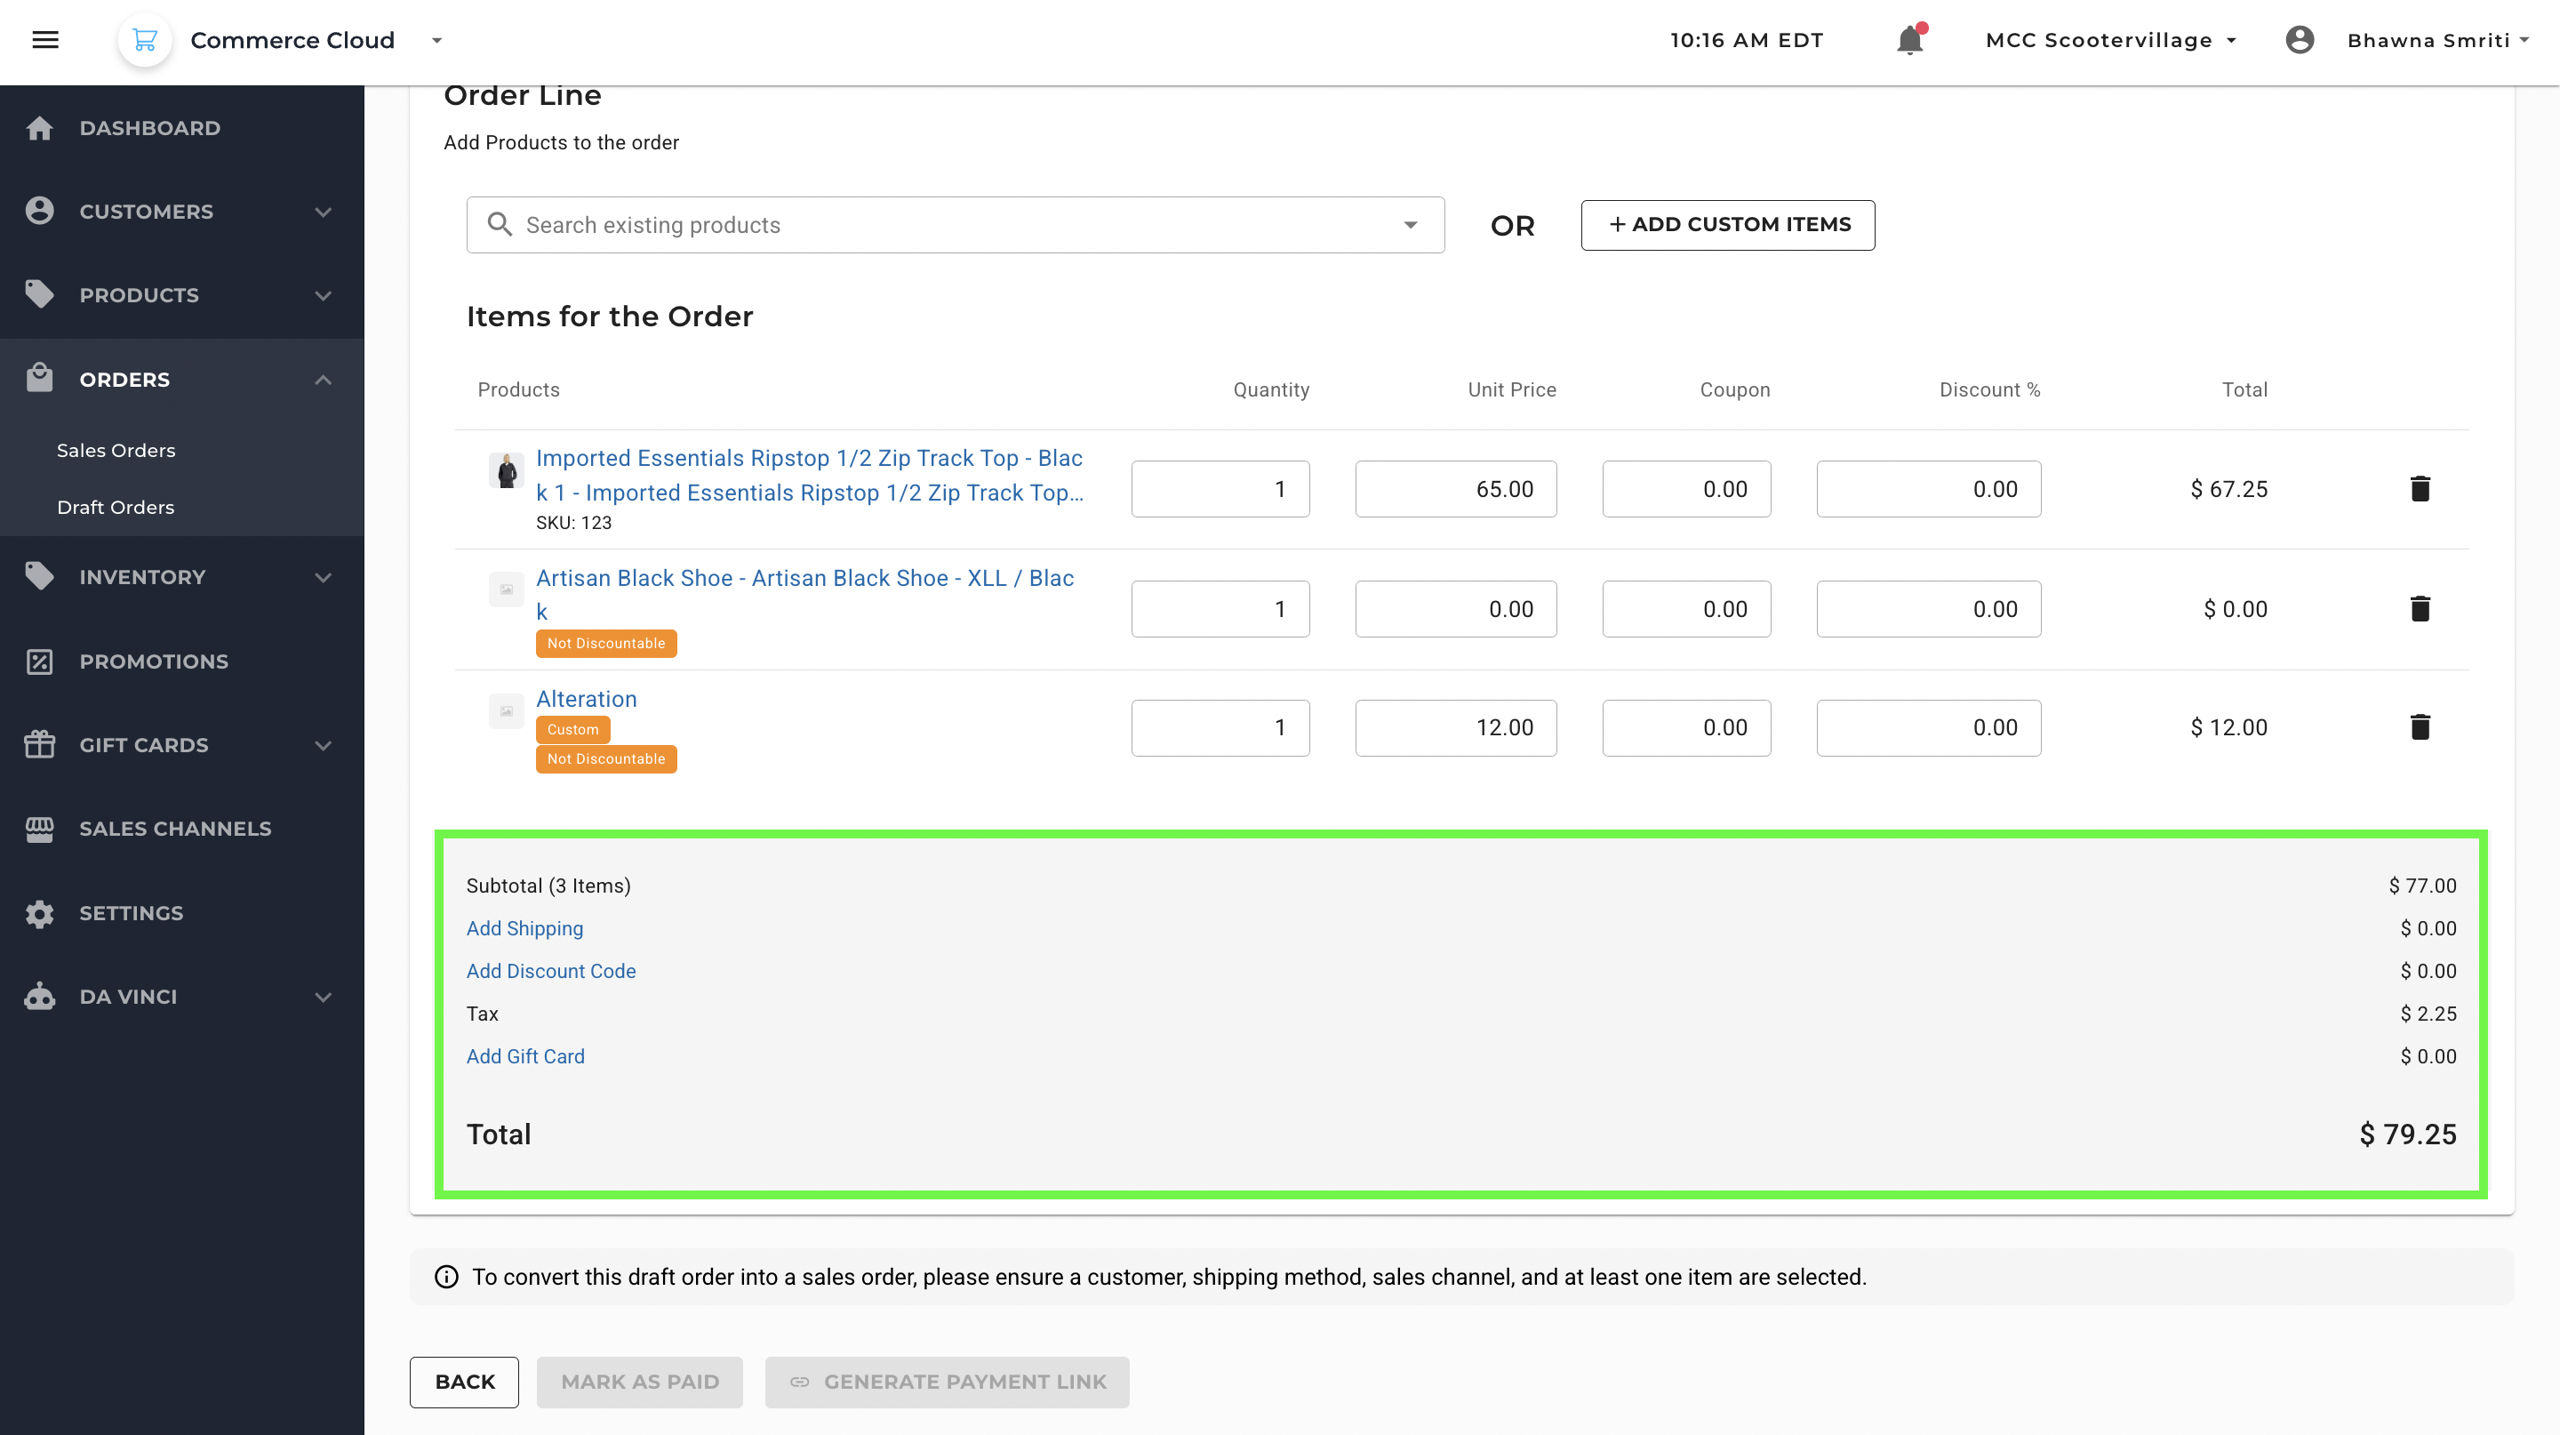
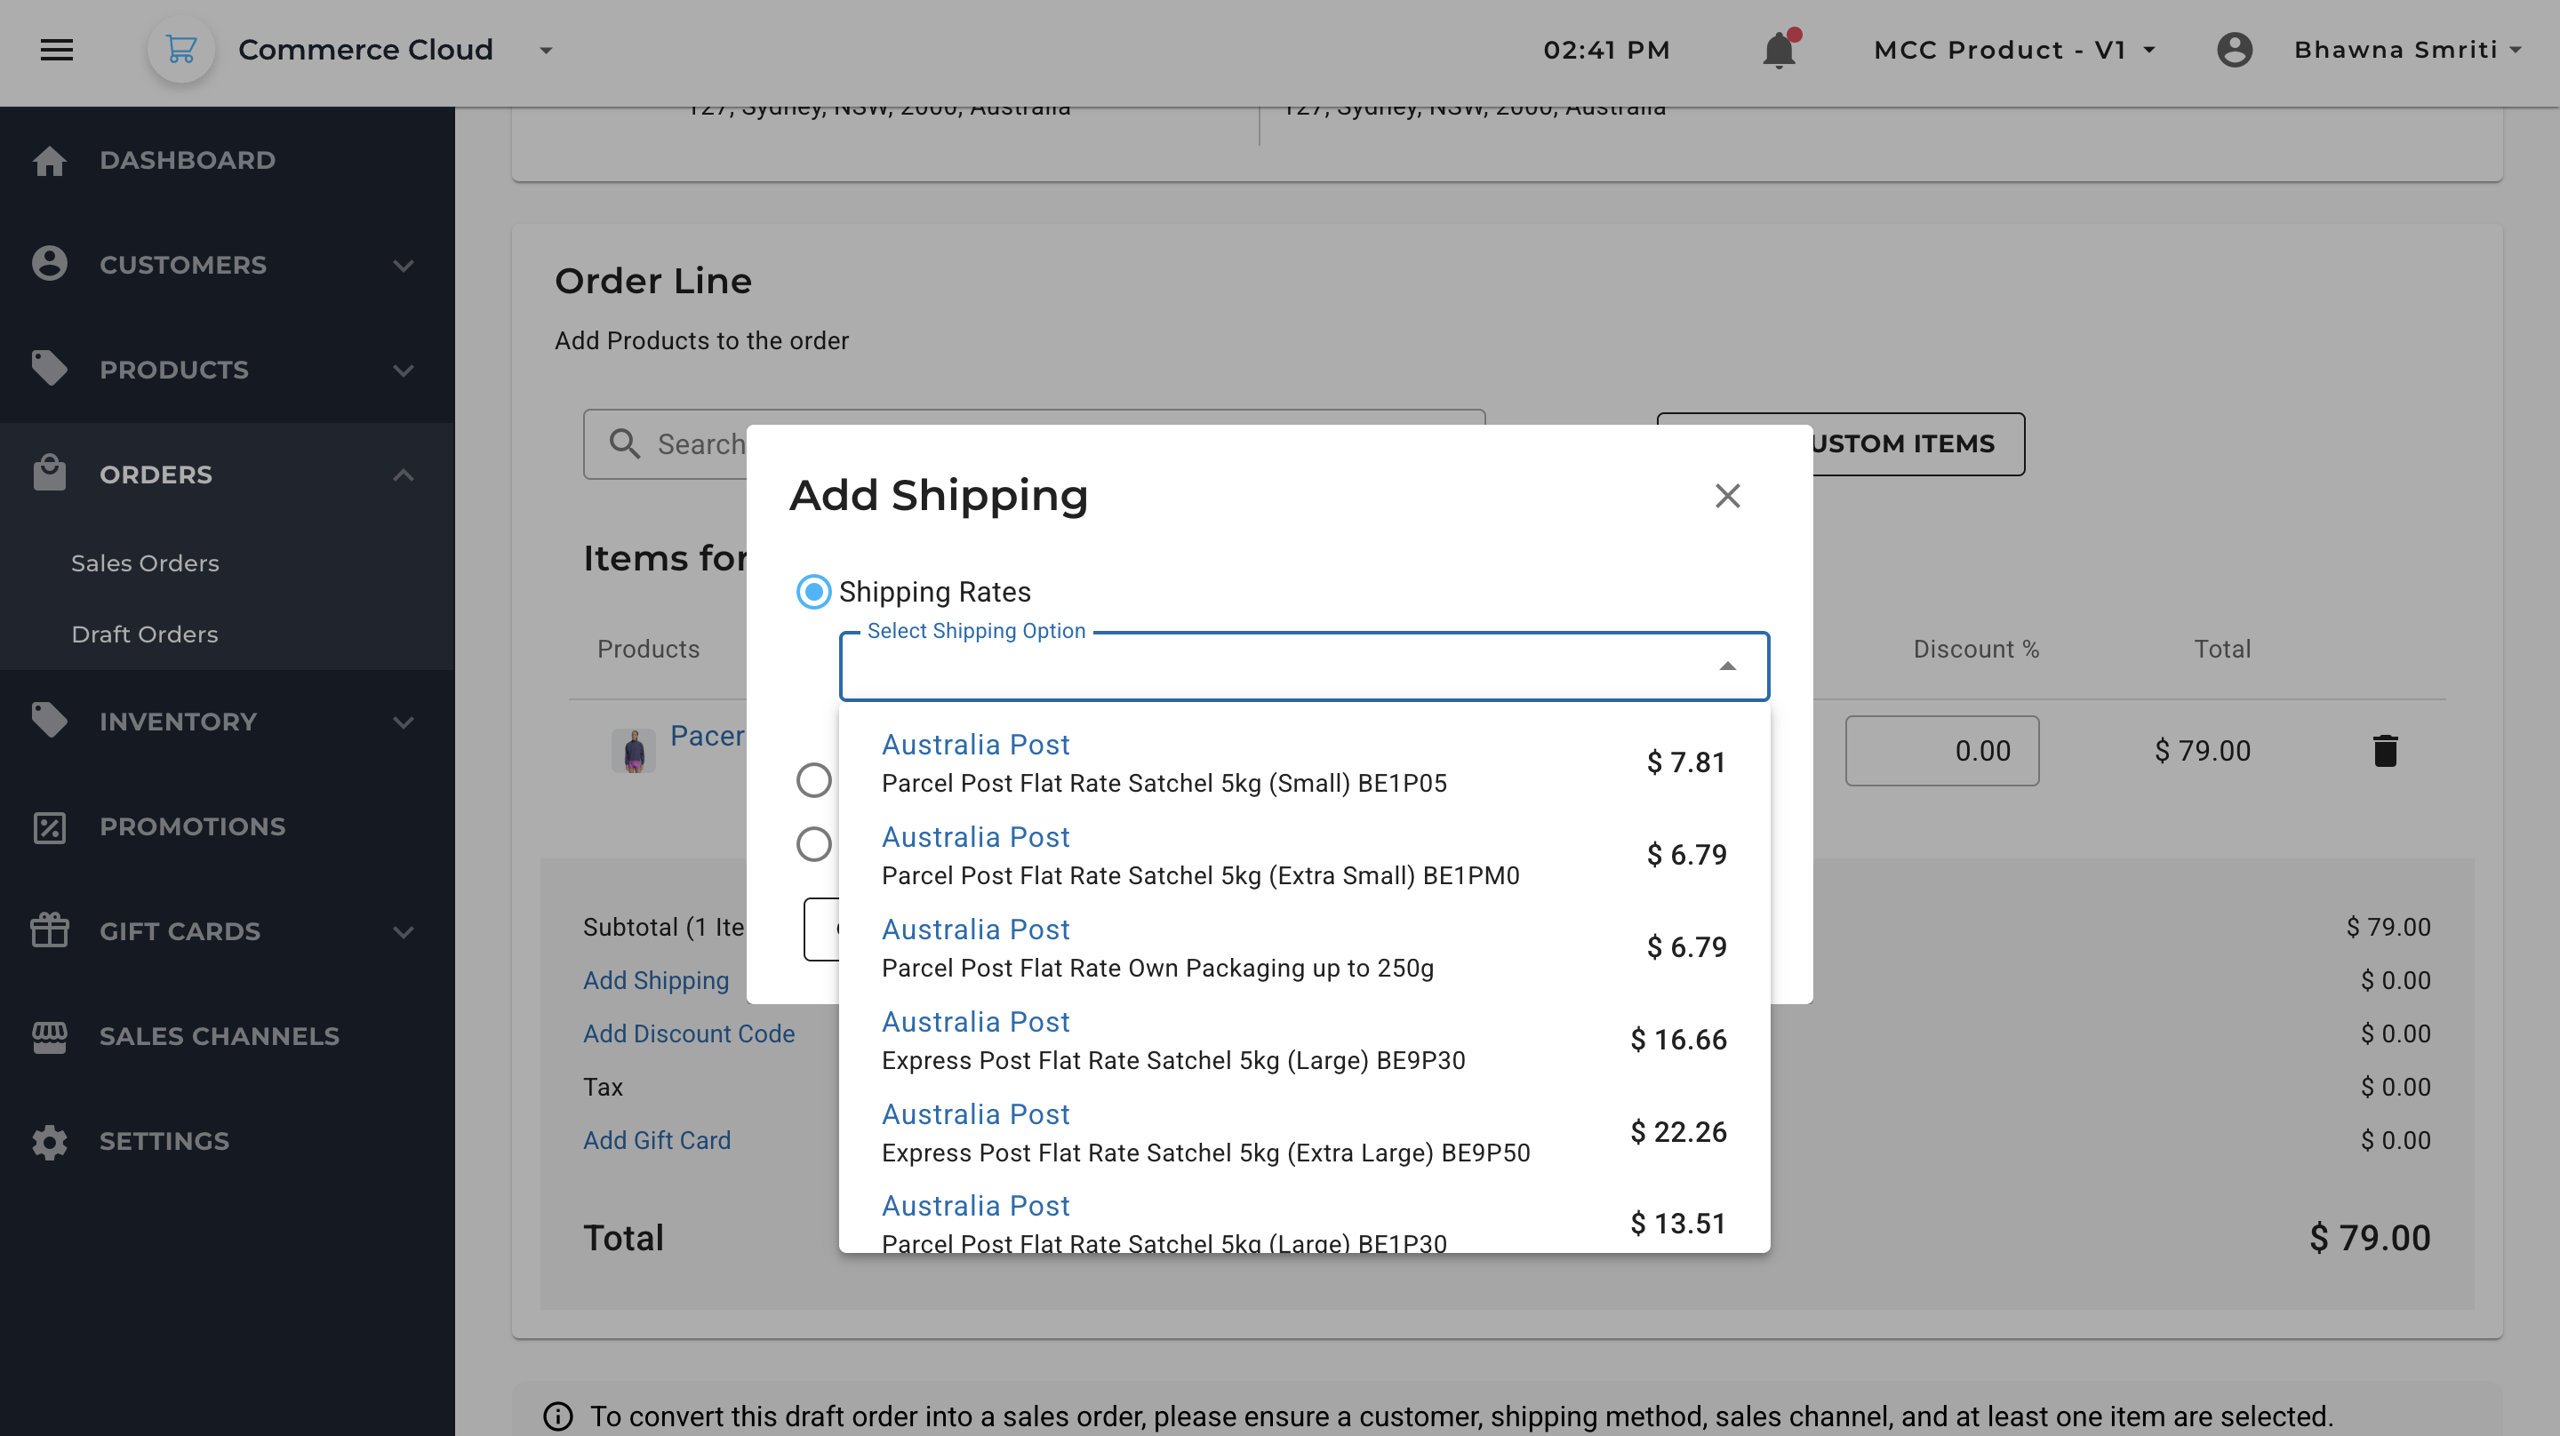
Add Shipping: To add shipping details, click Add Shipping under the order summary section.
- Apply Discount Code: Once you click on the Apply Discount Code, all available discount codes specific to your account will be displayed. Simply select the desired code, and the corresponding discount will be applied automatically.

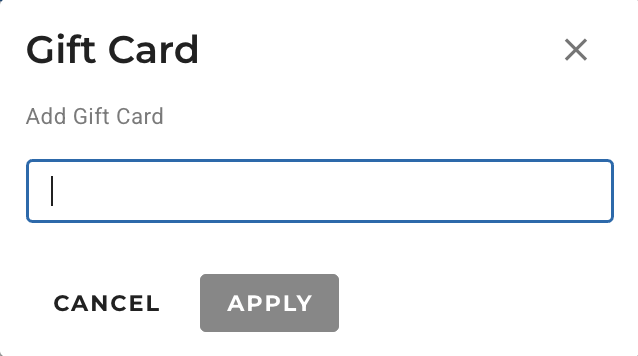
- Add Gift Card: Enter a valid gift card code here to apply its balance to the draft order’s total amount.
- If you wish to keep the order in the draft form, click on the “Back” option and you will be redirected to the Draft Order Page and the order will reflect on top.
Finalizing the Order Payment
Once you’ve reviewed and added all necessary details to the draft order — including items, discounts, shipping, or gift cards — you’ll see three key action buttons appear:
Each of these options serves a specific purpose based on how you want to proceed with the order.
- Back: Clicking Back will return you to the main Draft Orders page. The newly created draft order will be saved automatically and will appear at the top of the list, making it easy to revisit or continue editing at any time.
- Generate Payment Link: Click this to generate a checkout link that can be sent to the customer via email, chat, or other communication tools.
- Mark as Paid: By clicking Mark as Paid, the system updates the order status to “Paid” and moves it out of the draft stage, treating it as a confirmed sale. This option is useful when payment has been collected through offline or non-checkout methods, such as a bank transfer, cash payment, or manual invoice settlement.