What are Collections?
Collections are flexible product groupings that let you curate and display products based on rules or manual selection. Unlike categories, which follow a single hierarchy to structure products, collections can be arranged in hierarchies with far greater flexibility.
They can be based on multiple dimensions such as category values, brand, tags, price ranges, or a combination of these. It makes collections especially useful for campaigns, promotions, or personalized shopping experiences where you need to dynamically group products.
Examples:
- “New Arrivals” – automatically adds products tagged with new.
- “Holiday Sale” – includes products marked down during a sale period.
- “Summer Essentials” – manually curated by the merchant.
Types of Collections
- Manual Collections – Merchants hand-pick which products belong.
- Automated Collections – Products are automatically included when they match predefined conditions (e.g., tag = “Sale” or Brand = Nike).
How to Create an Automated Collection
Automated Collections let merchants group products dynamically based on rules and conditions. Instead of manually adding items, you set criteria, and products that match are automatically included. This ensures your collections stay up to date without ongoing manual work.
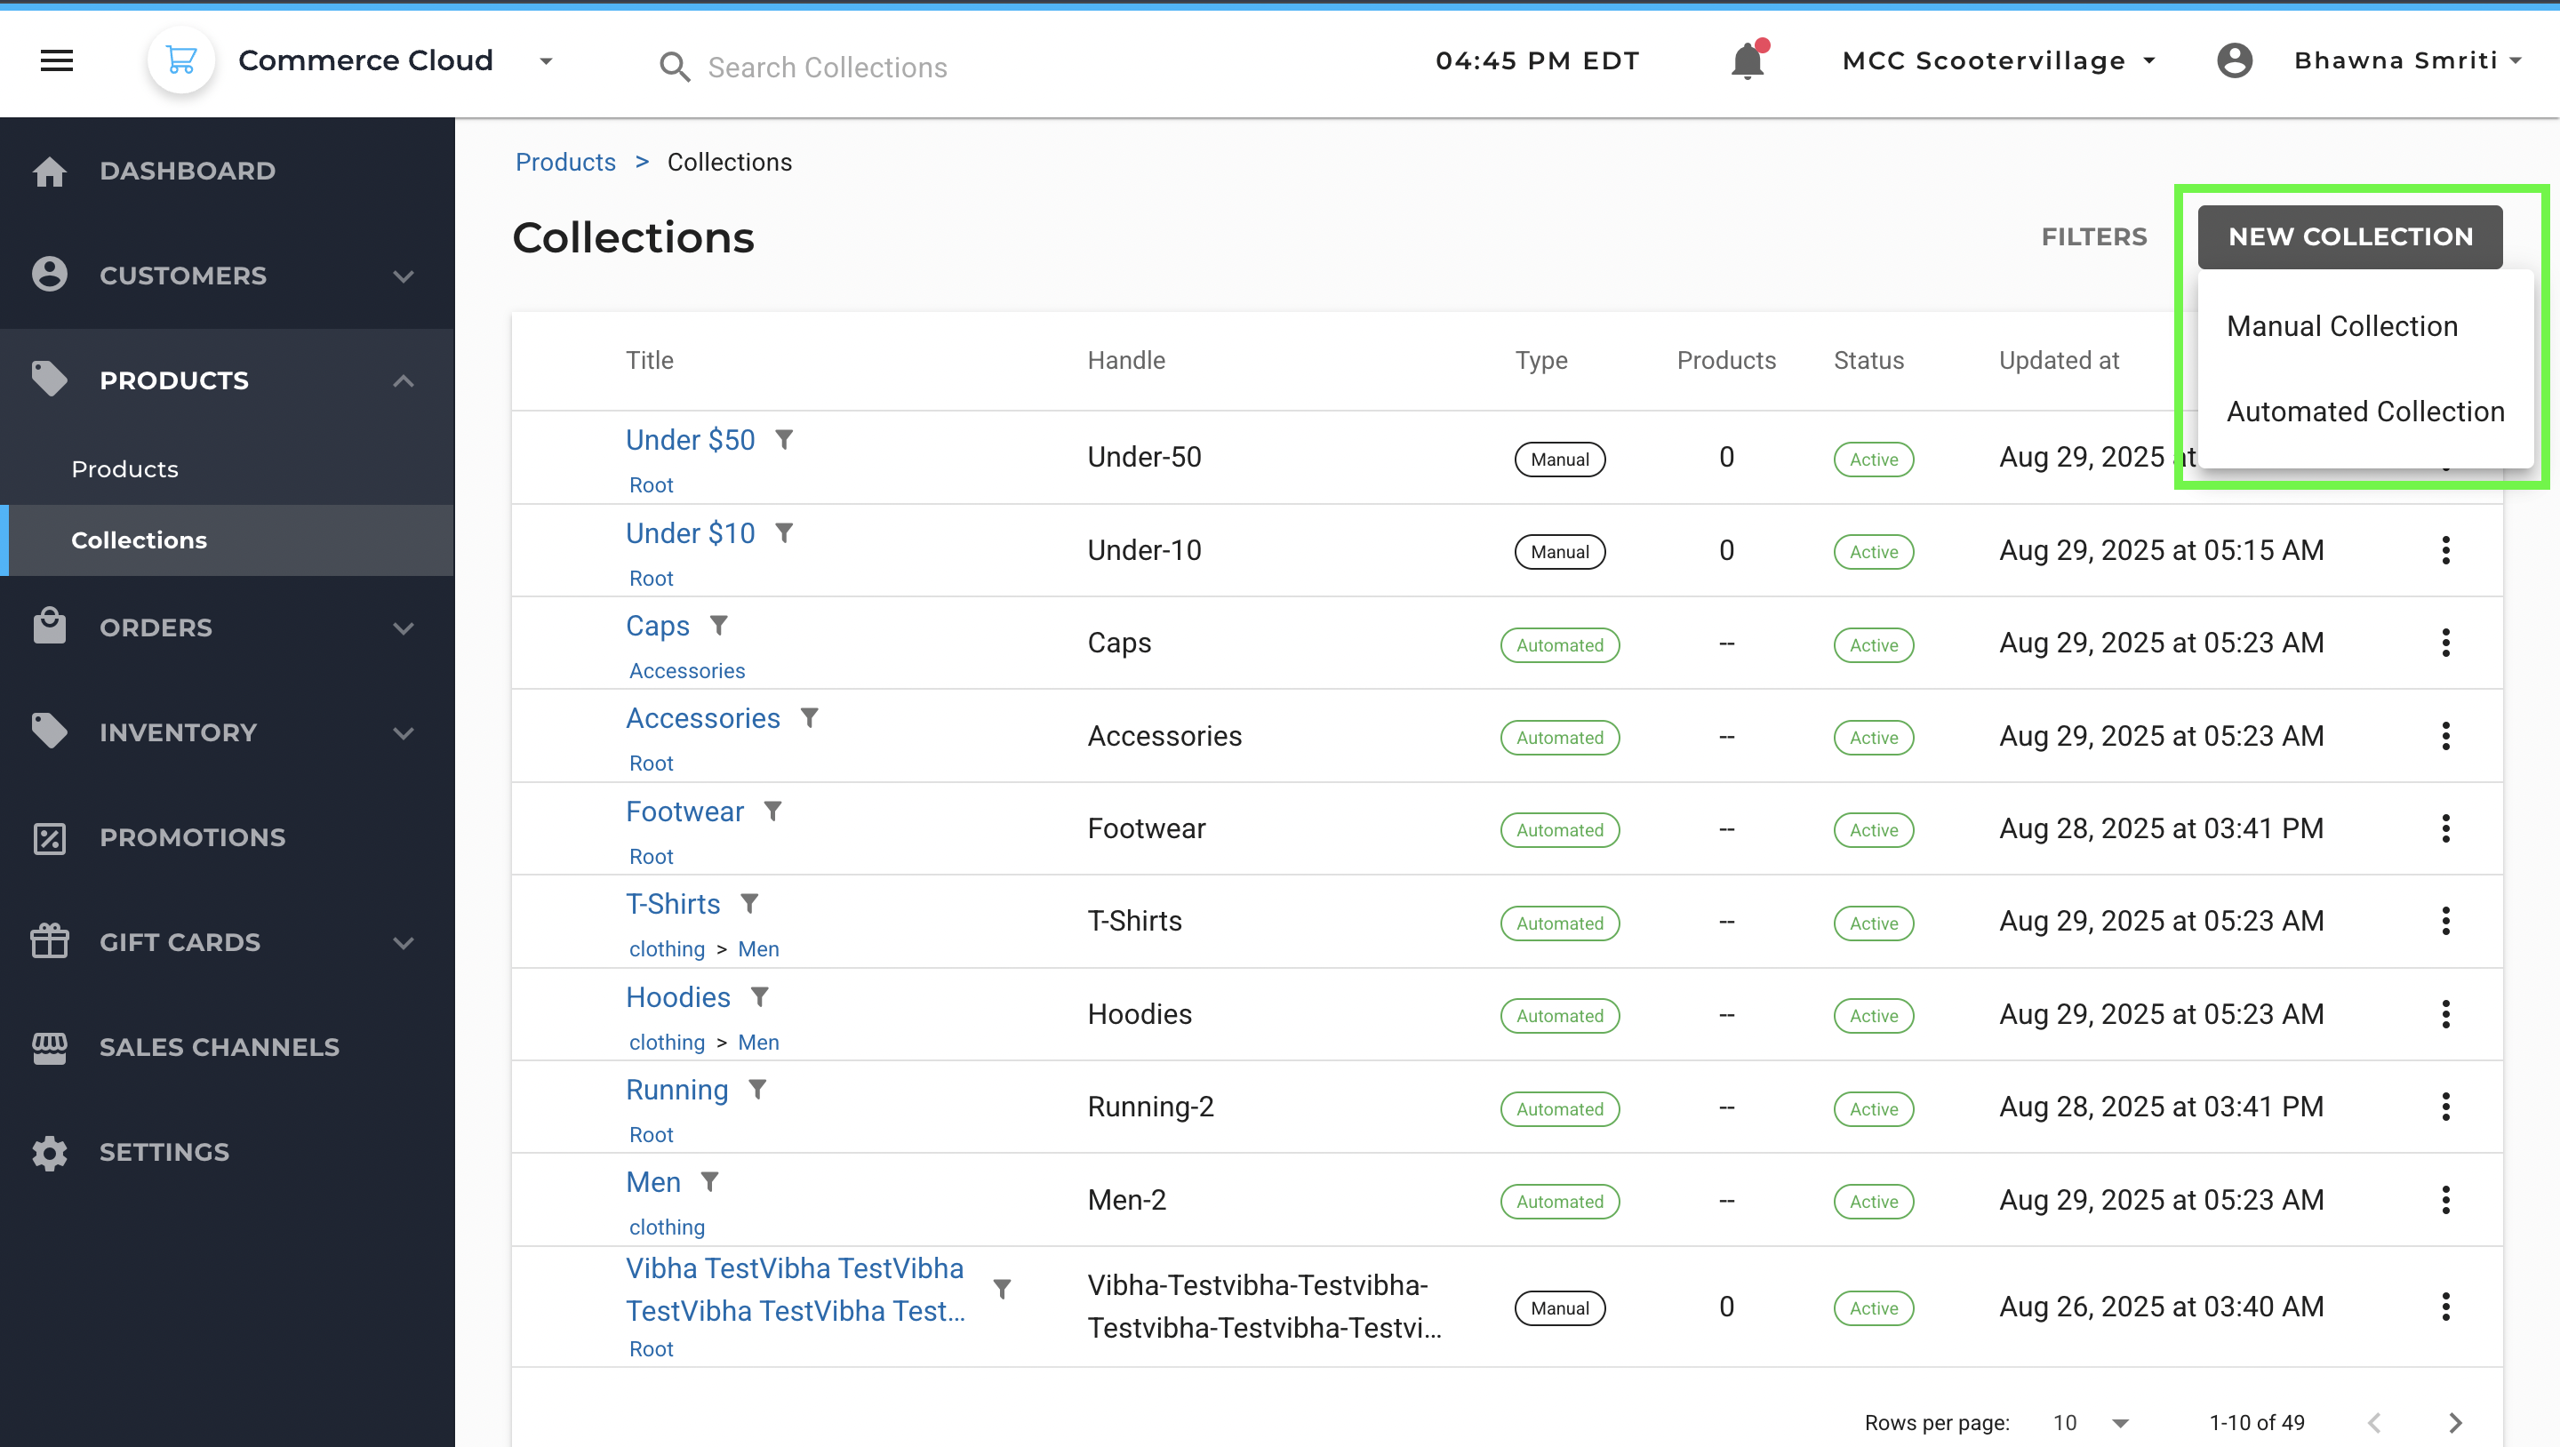
Step 1: Navigate to Back Office → Products → Collections.
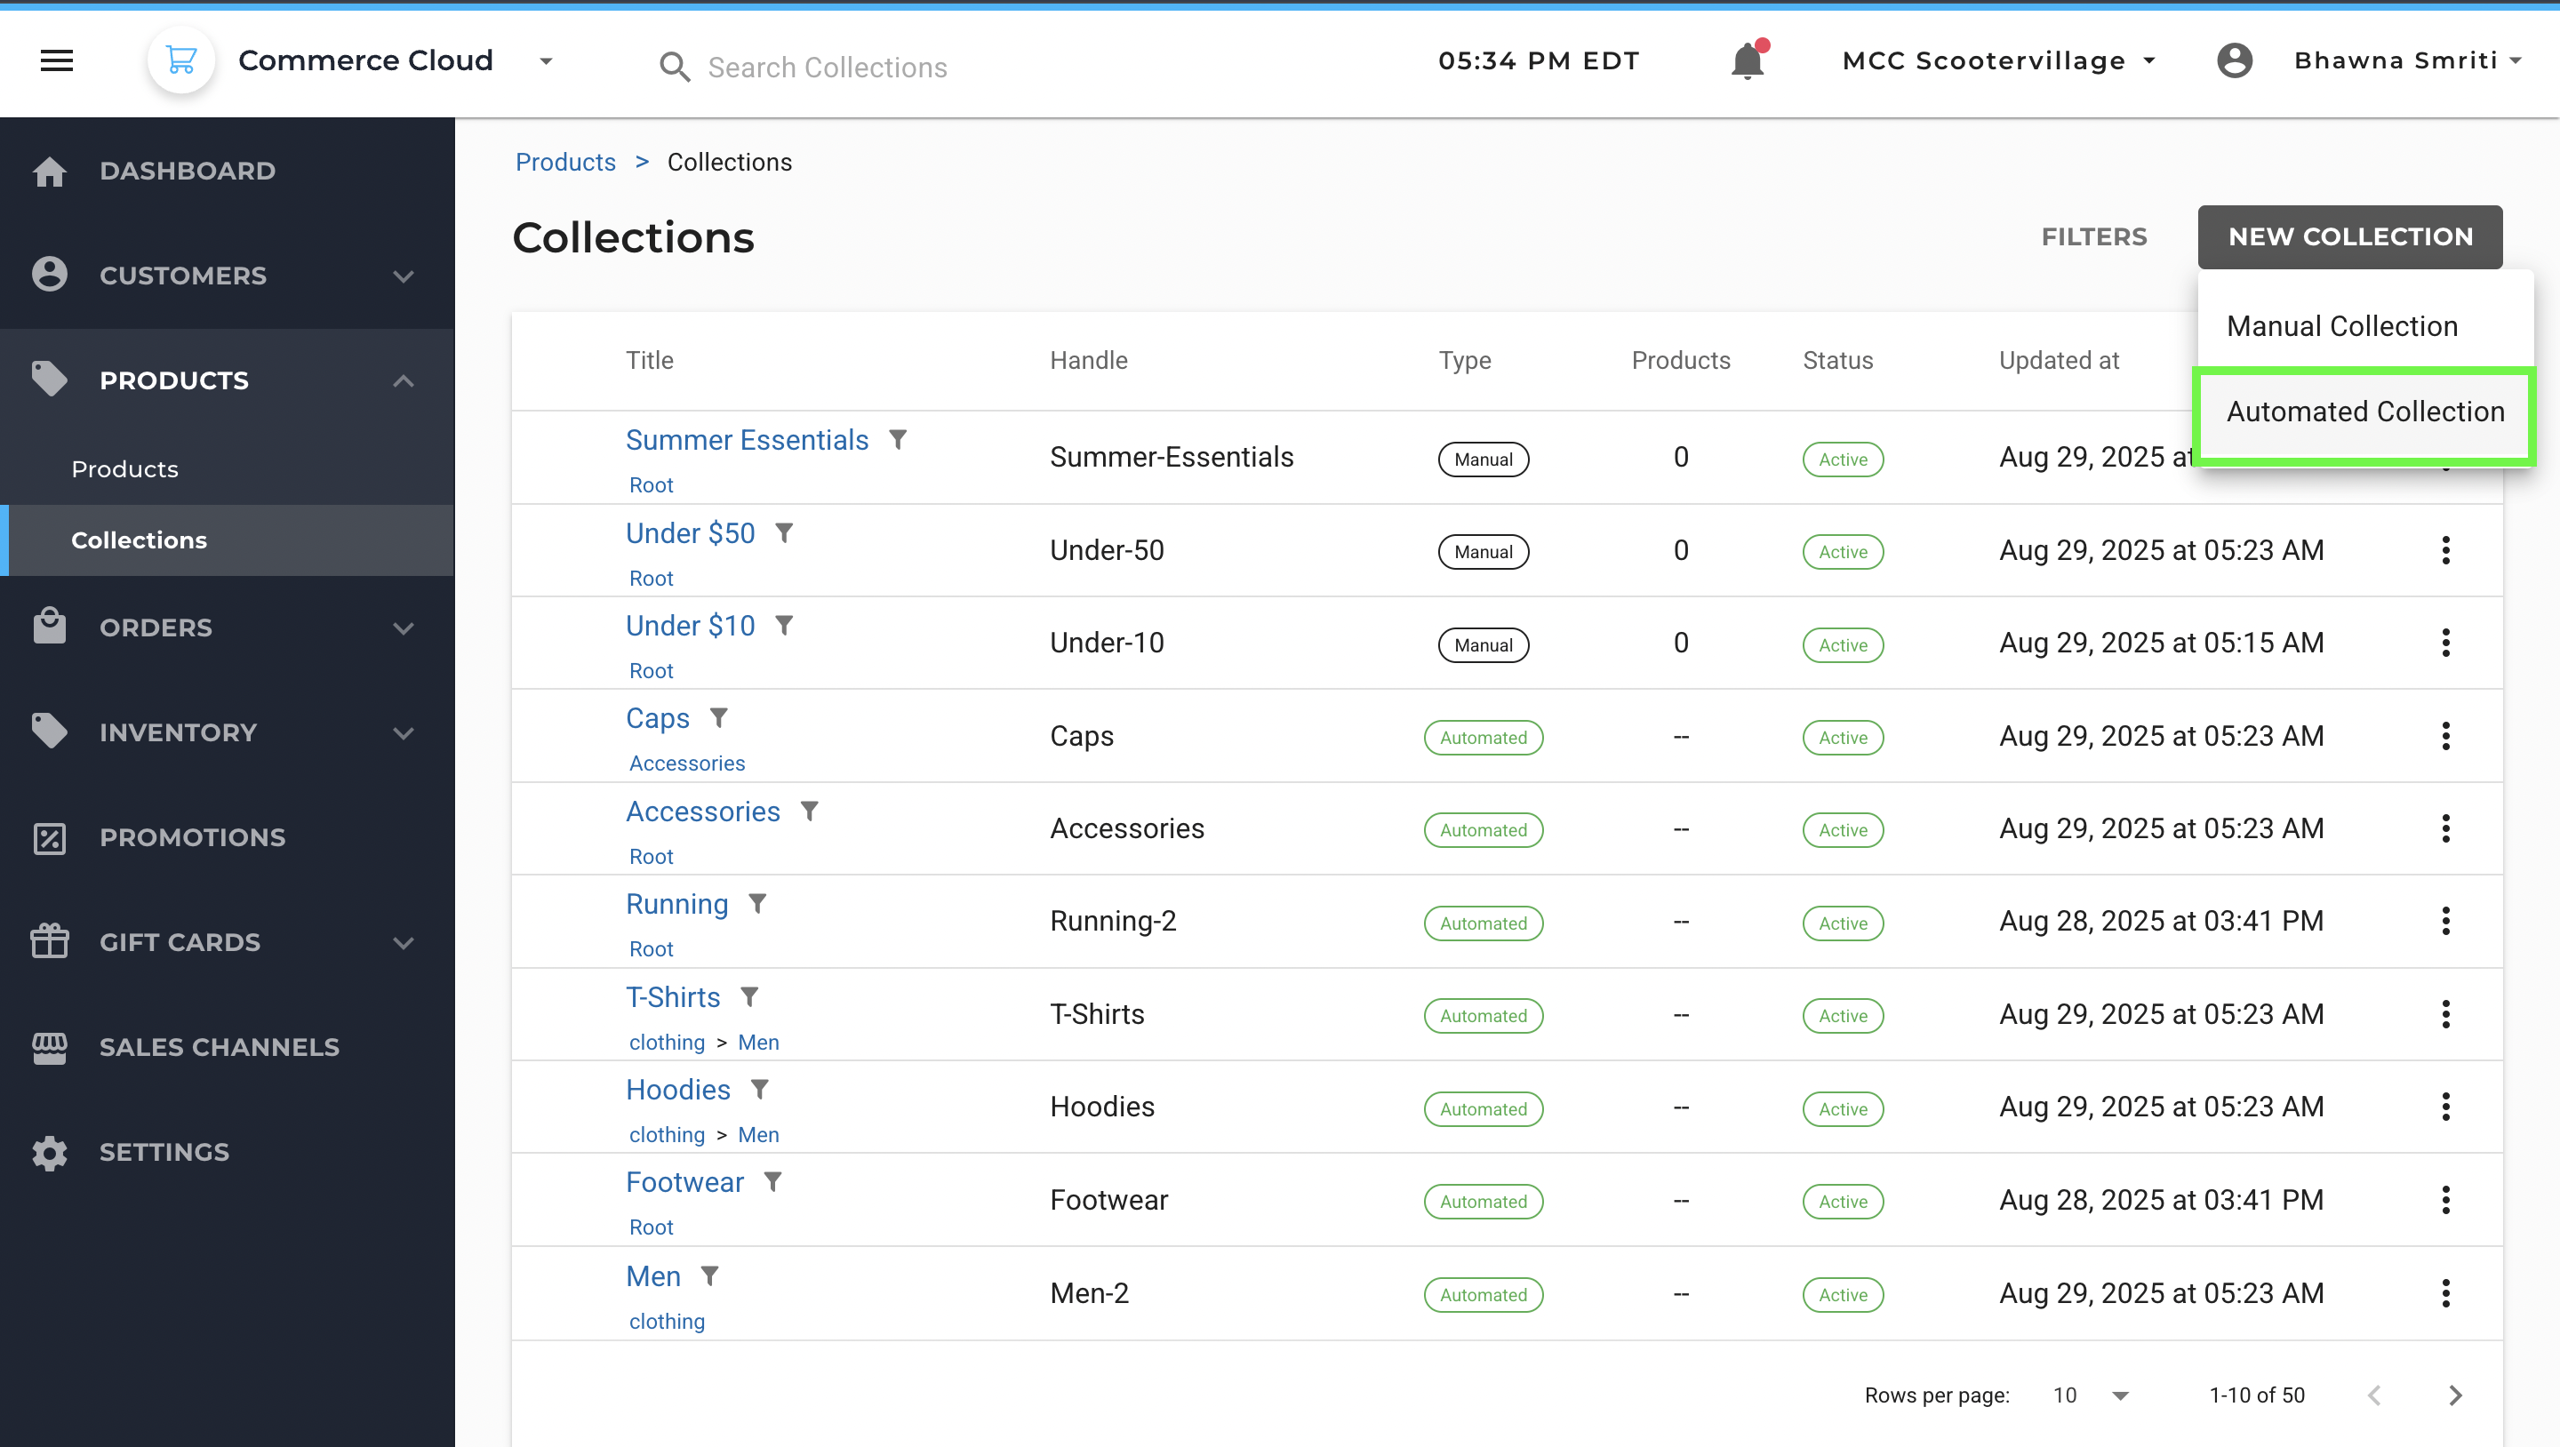
Step 2: Click New Collection and select Automated Collection
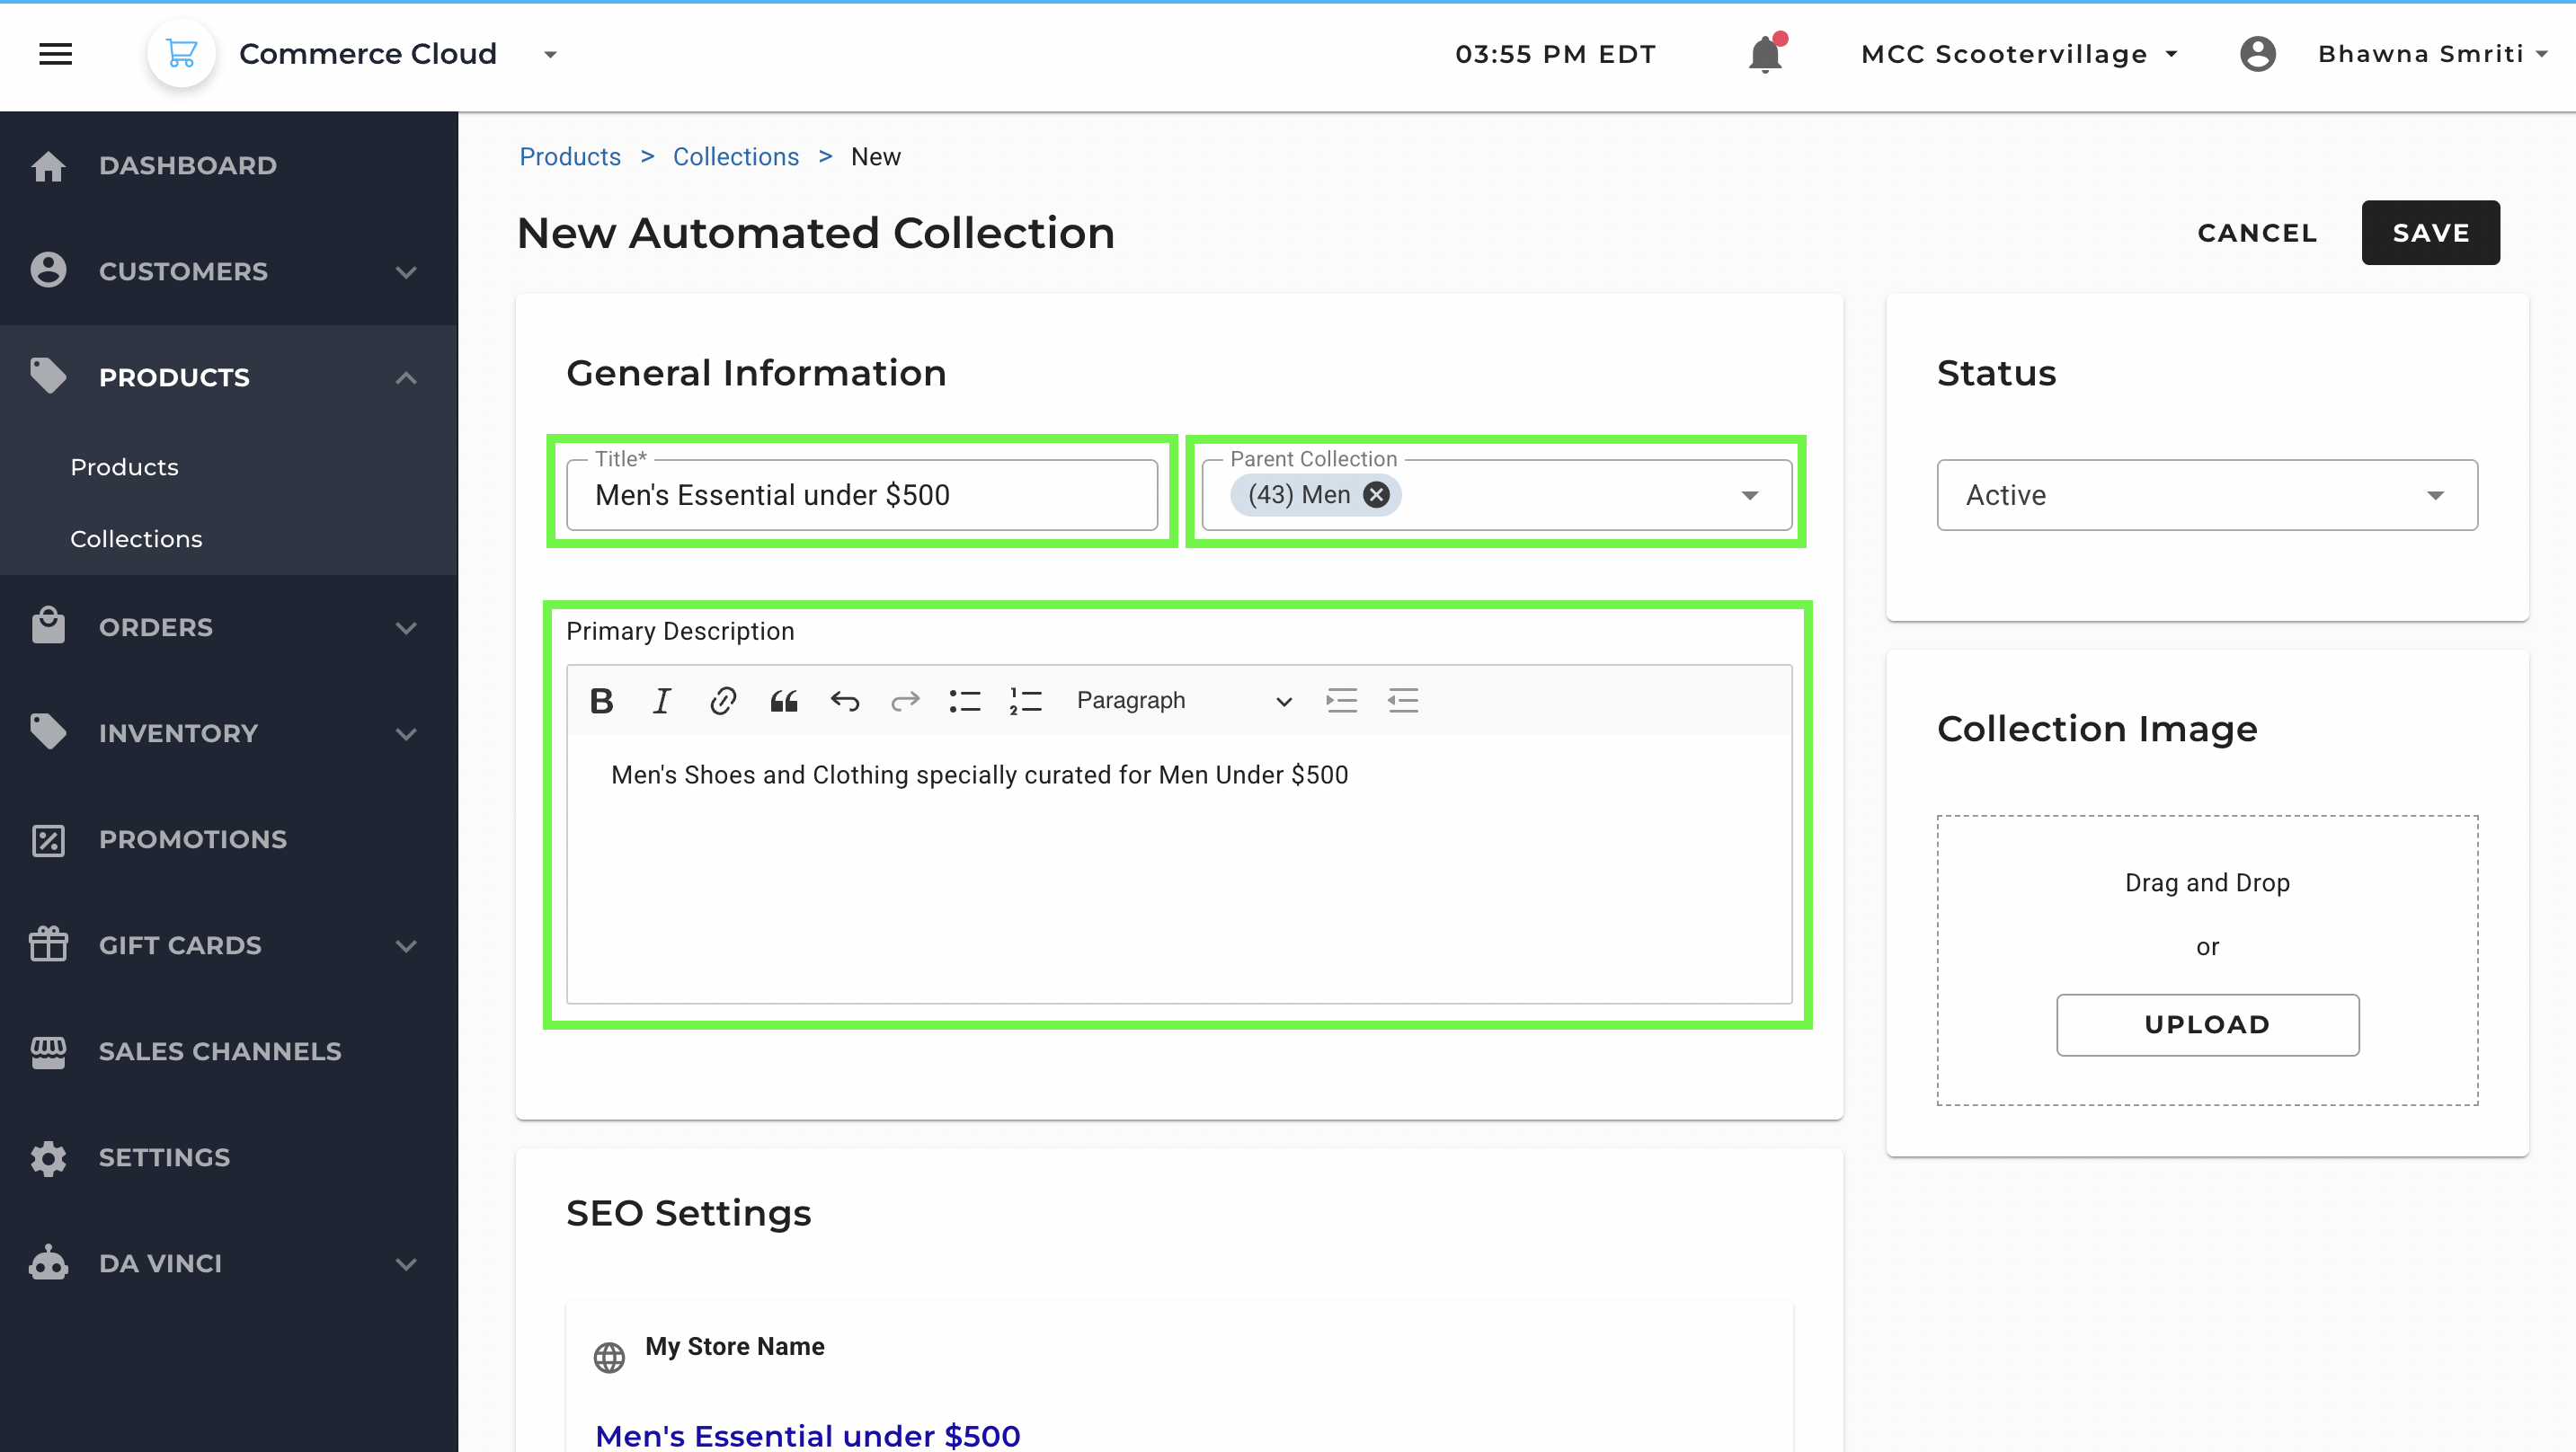
Step 3: Enter General Information
- Title: Name of the collection for internal reference and display.
- Parent Collection: Field to nest this collection under an existing category
- Primary Description: Short summary explaining the purpose or content of the collection
Step 4: Configure SEO Settings same an manual collection.
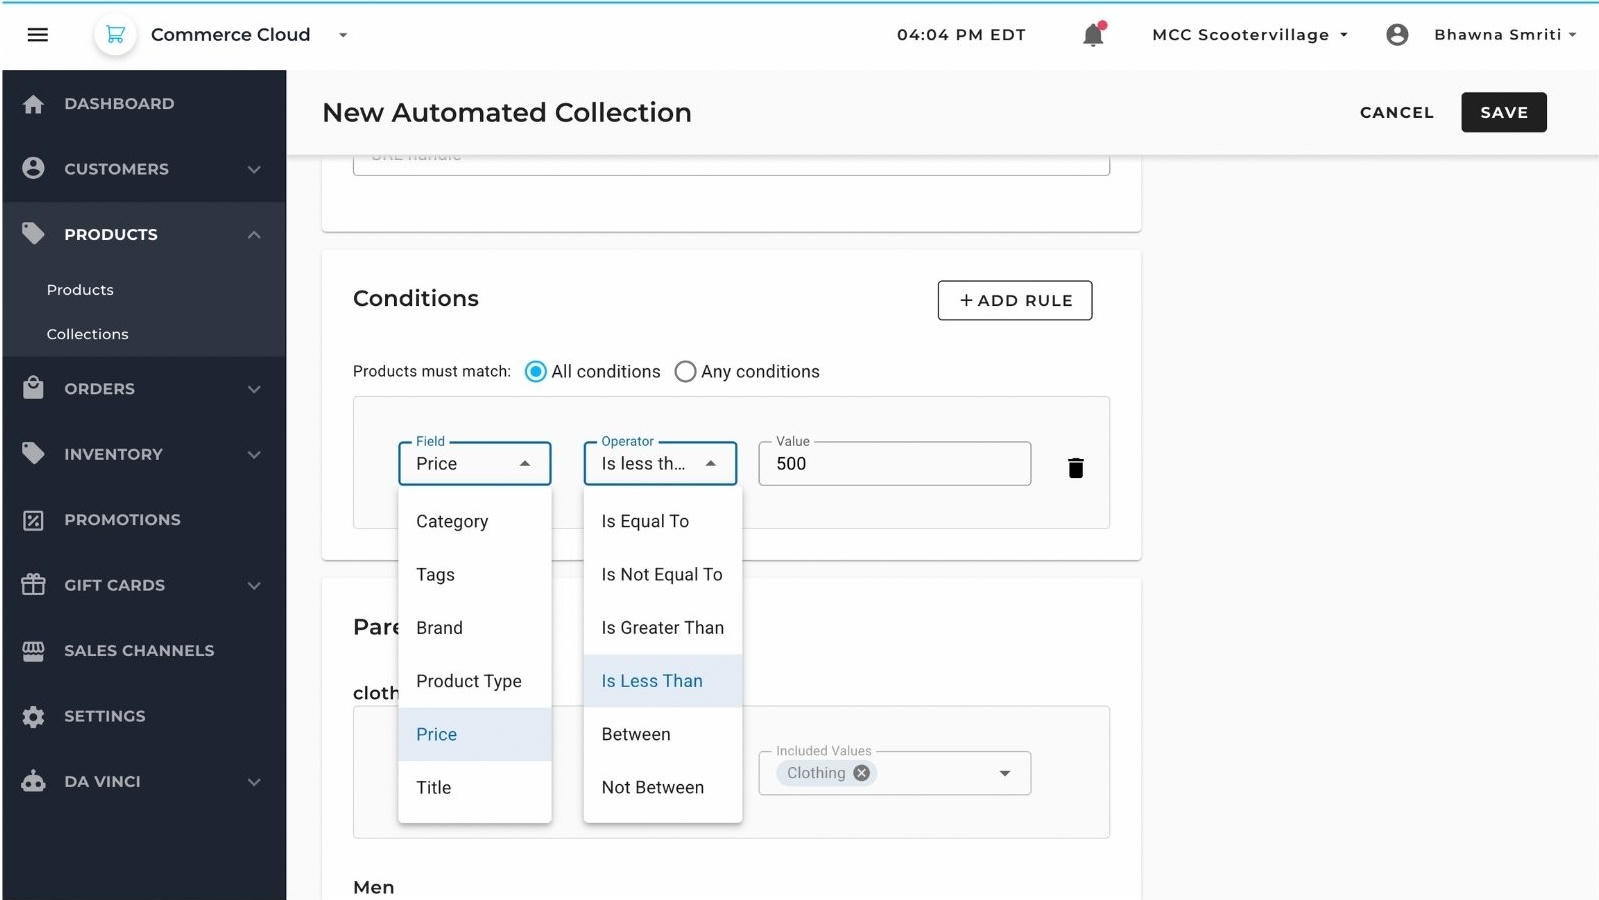
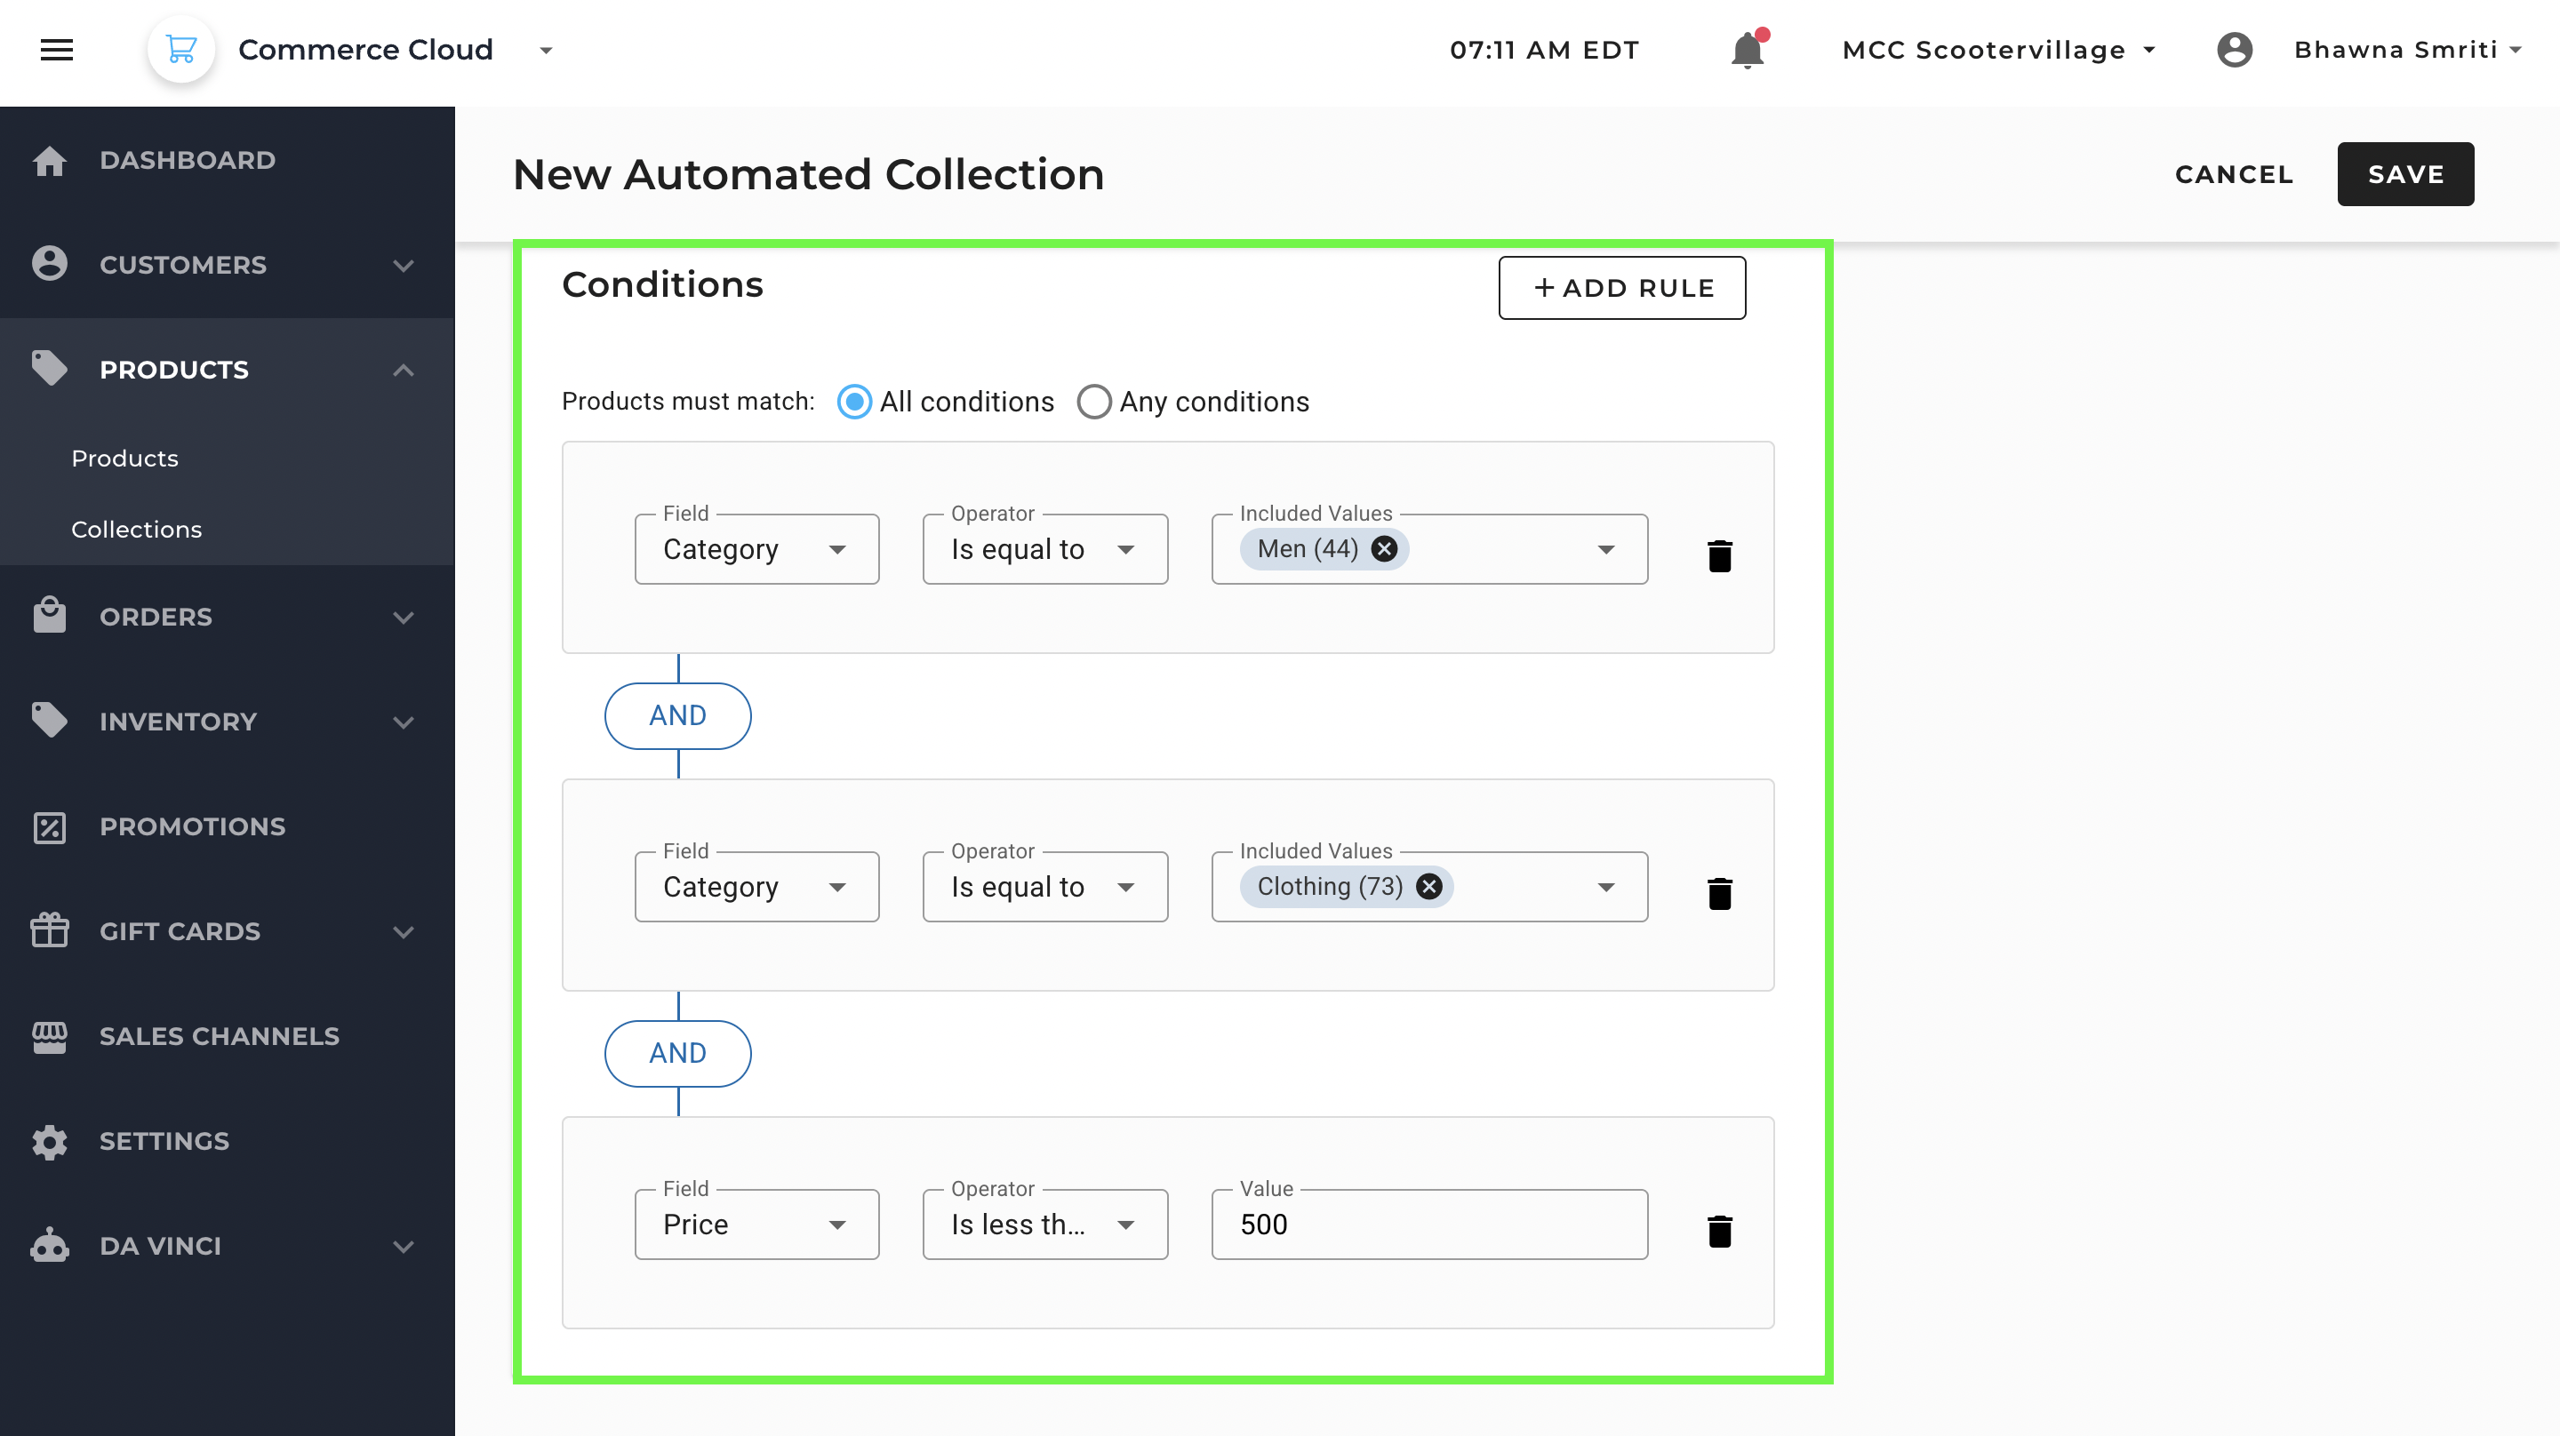
Step 5: Scroll down to Conditions Tab to set Condition for the collection.
The core of Automated Collections is rule-setting.
You can add one or multiple rule for a collection. You can also choose if the collection should be created to match all the conditions or any one of the condition.
To add only one condition – enter details for the default condition section.
You can enter:
- Fields: Product attribute to filter by
- Choose from options: Category, Tag, Brand, Product Types, Price & Title
- Operator: Comparison logic
- Choose from options: Is Equal to, Is not Equal to, Greater Than, Less Than, Between, Not Between
- Included Values: These depend on the Field you choose. For example:
- For Category, values might be: Men, Clothing, Shoes
- For Price, you can enter a numeric value (e.g., 500)
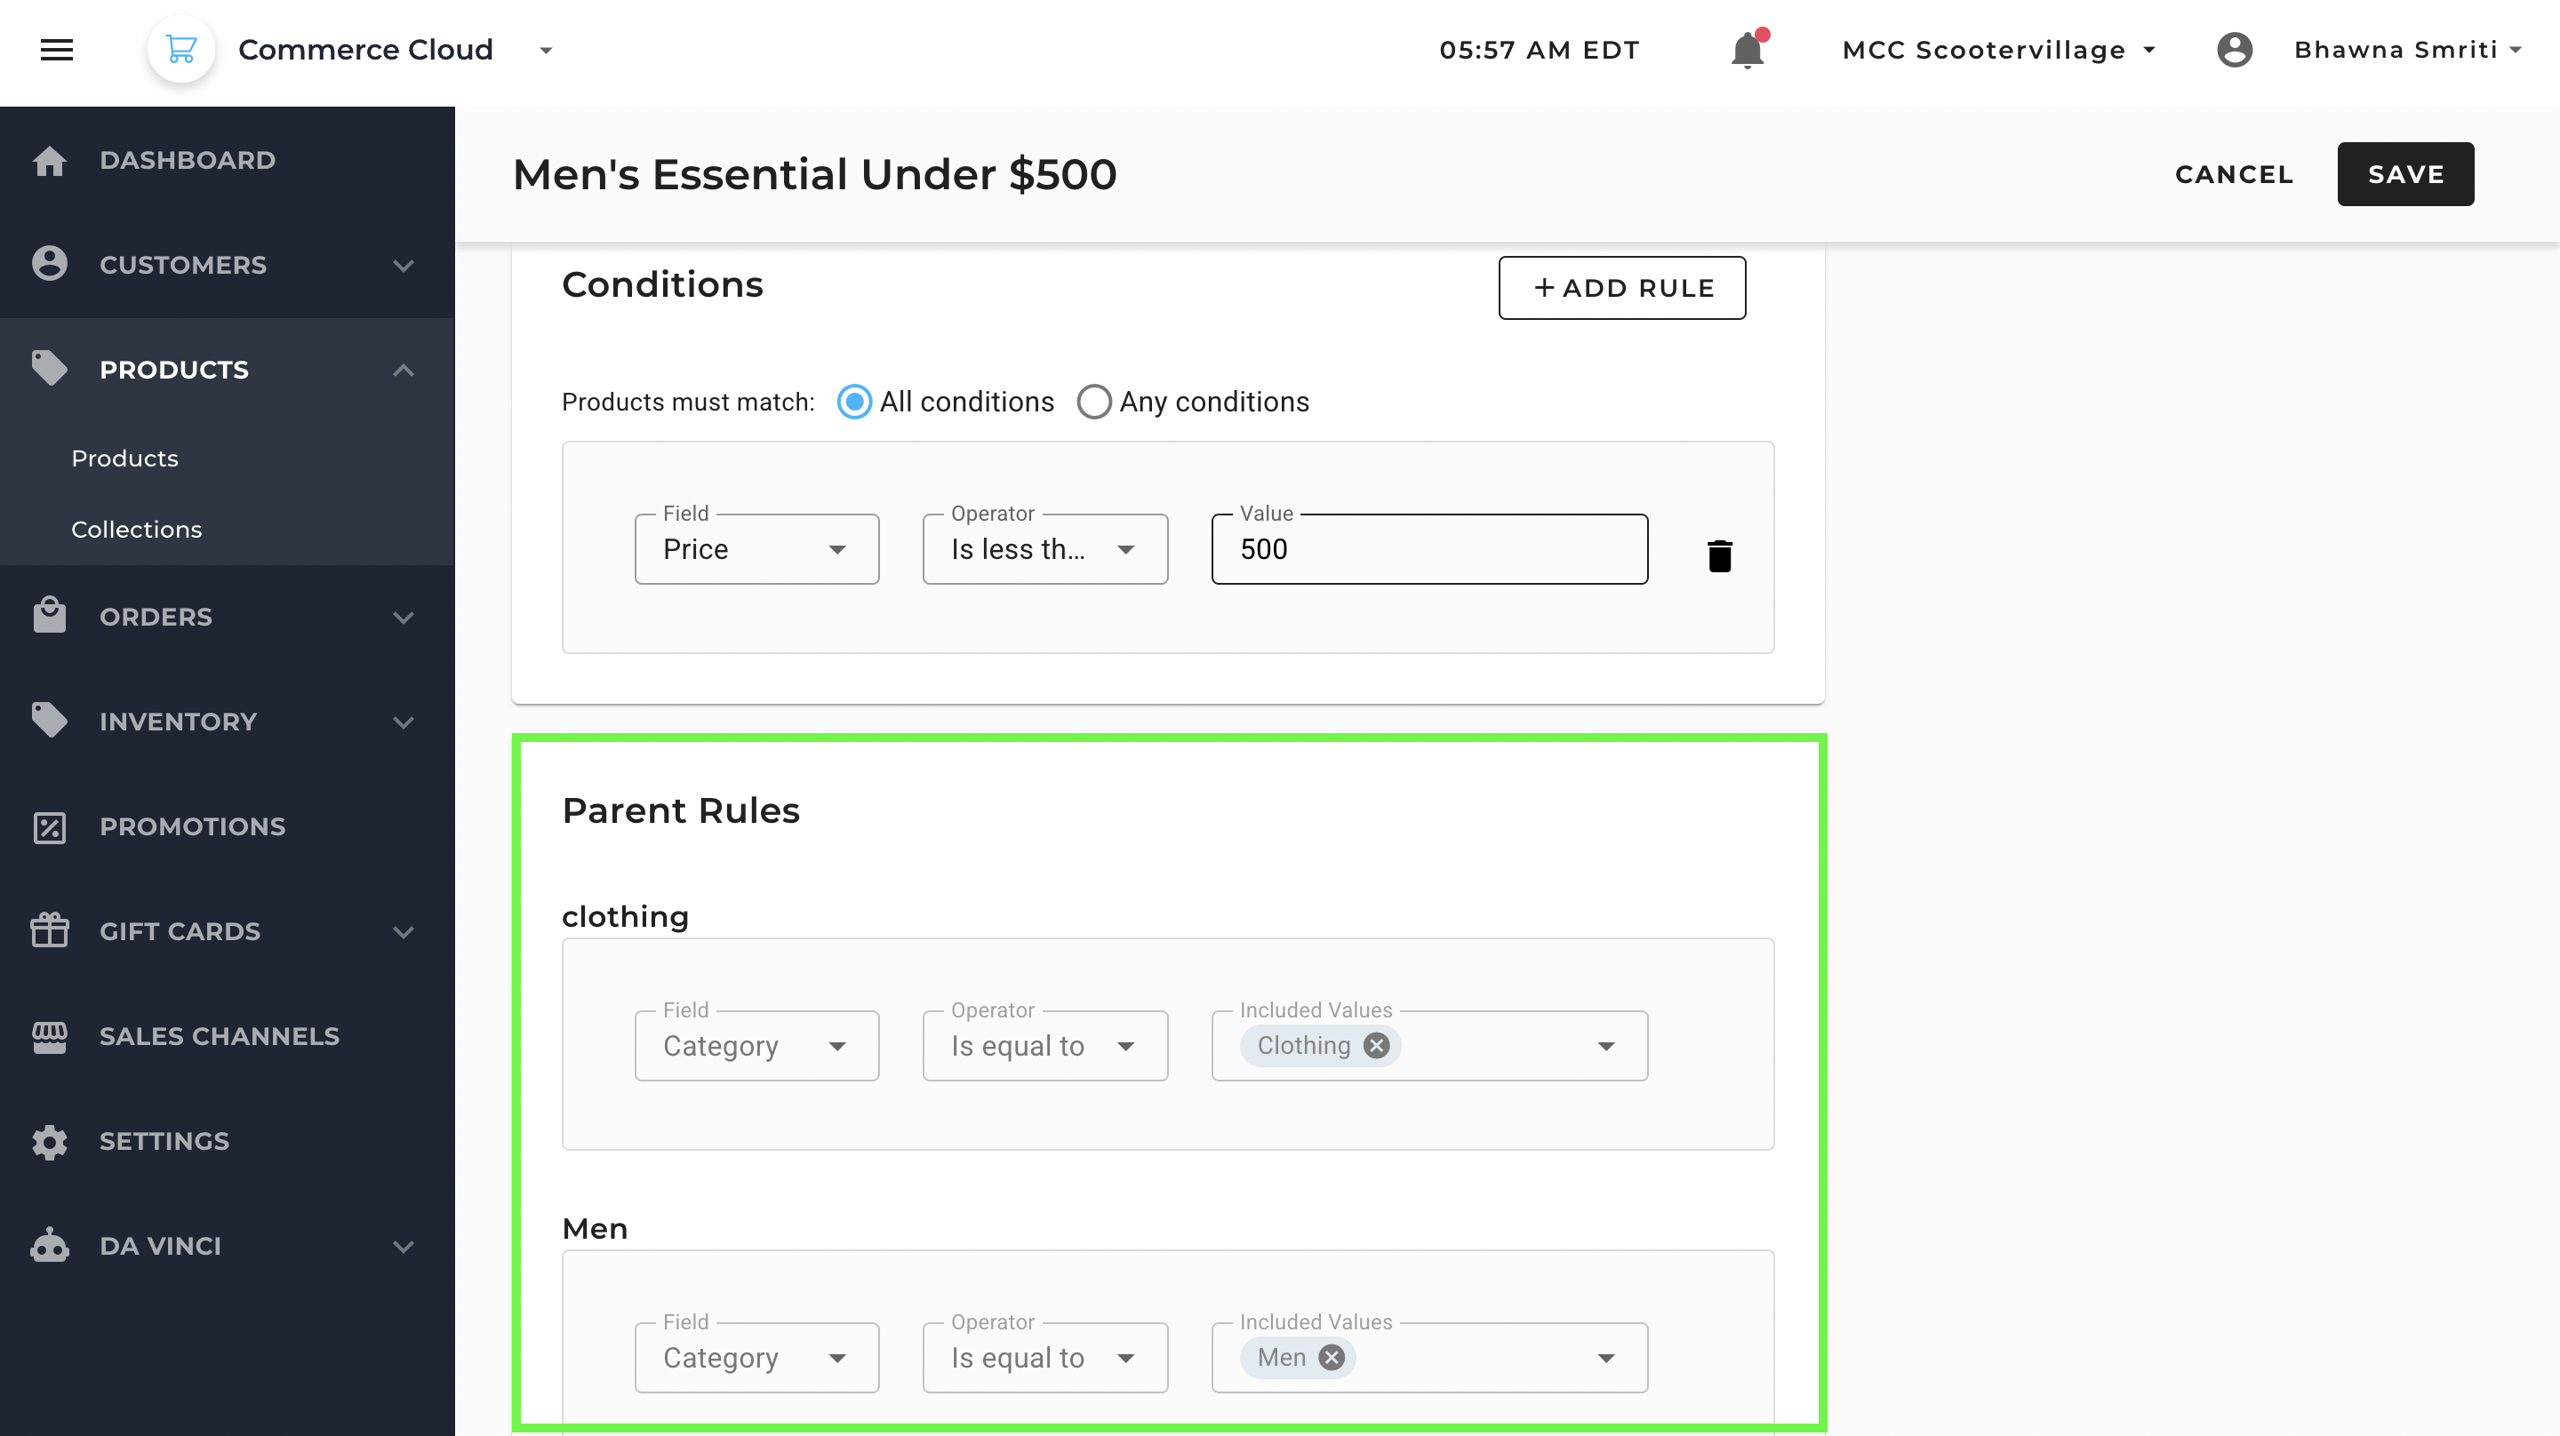
Example: Men’s Essentials under $500
To create a collection for affordable men’s fashion :
➕ Add Rules
Use the + Add Rule button to define product filters.
- Rule 1: Category = Clothing
- Rule 2: Category = Men
- Rule 3: Price < 500
Match Conditions
- Select All Conditions to apply an AND logic — the product must match all rules to be included.
Operators
- Use:
- Category → Is Equal To → Men
- Category → Is Equal To → Clothing
- Price → Is Less Than → 500
Combine Rules with AND Logic
This setup will ensure only those products appear that are:
- Tagged as Men
- Under the Clothing category
- Priced under ₹500
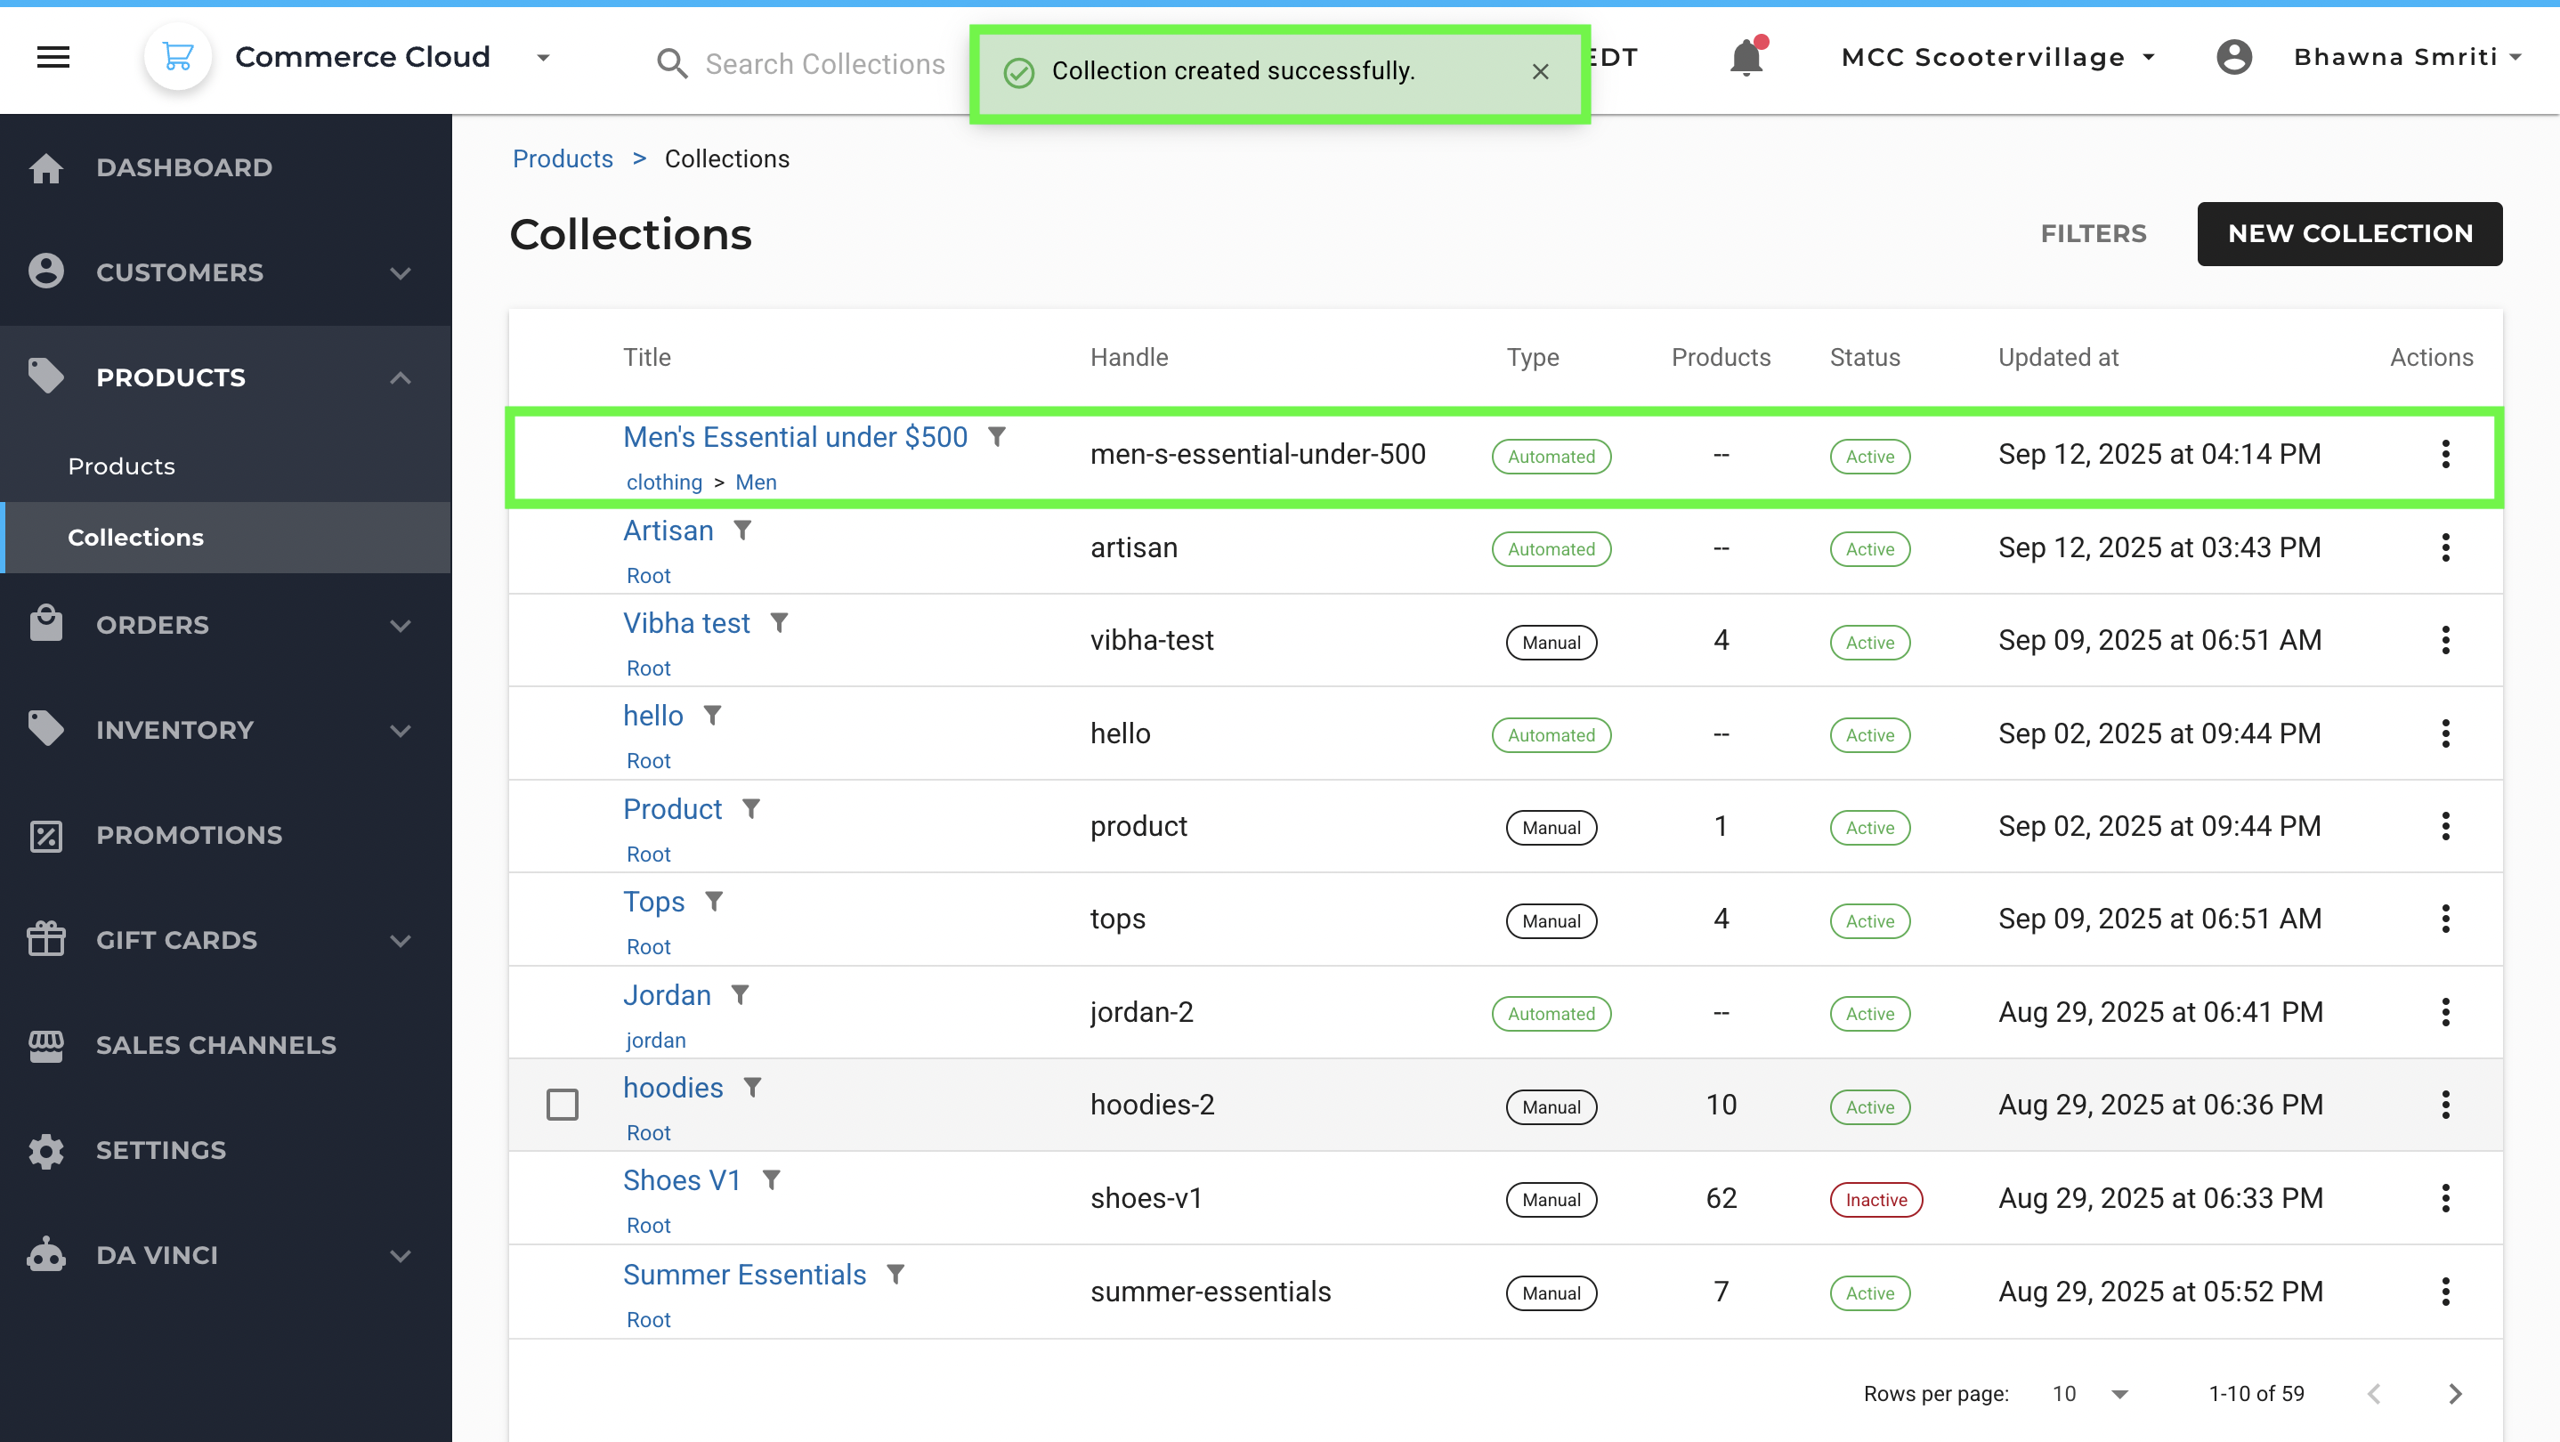
Step 6: Once all the rules are added, click on Save to create collection.
- Once the collection is saved, you will see the notification saying Collection Created successfully. Your New Collection will be visible under the collections tab.
How to Modify Existing Collection
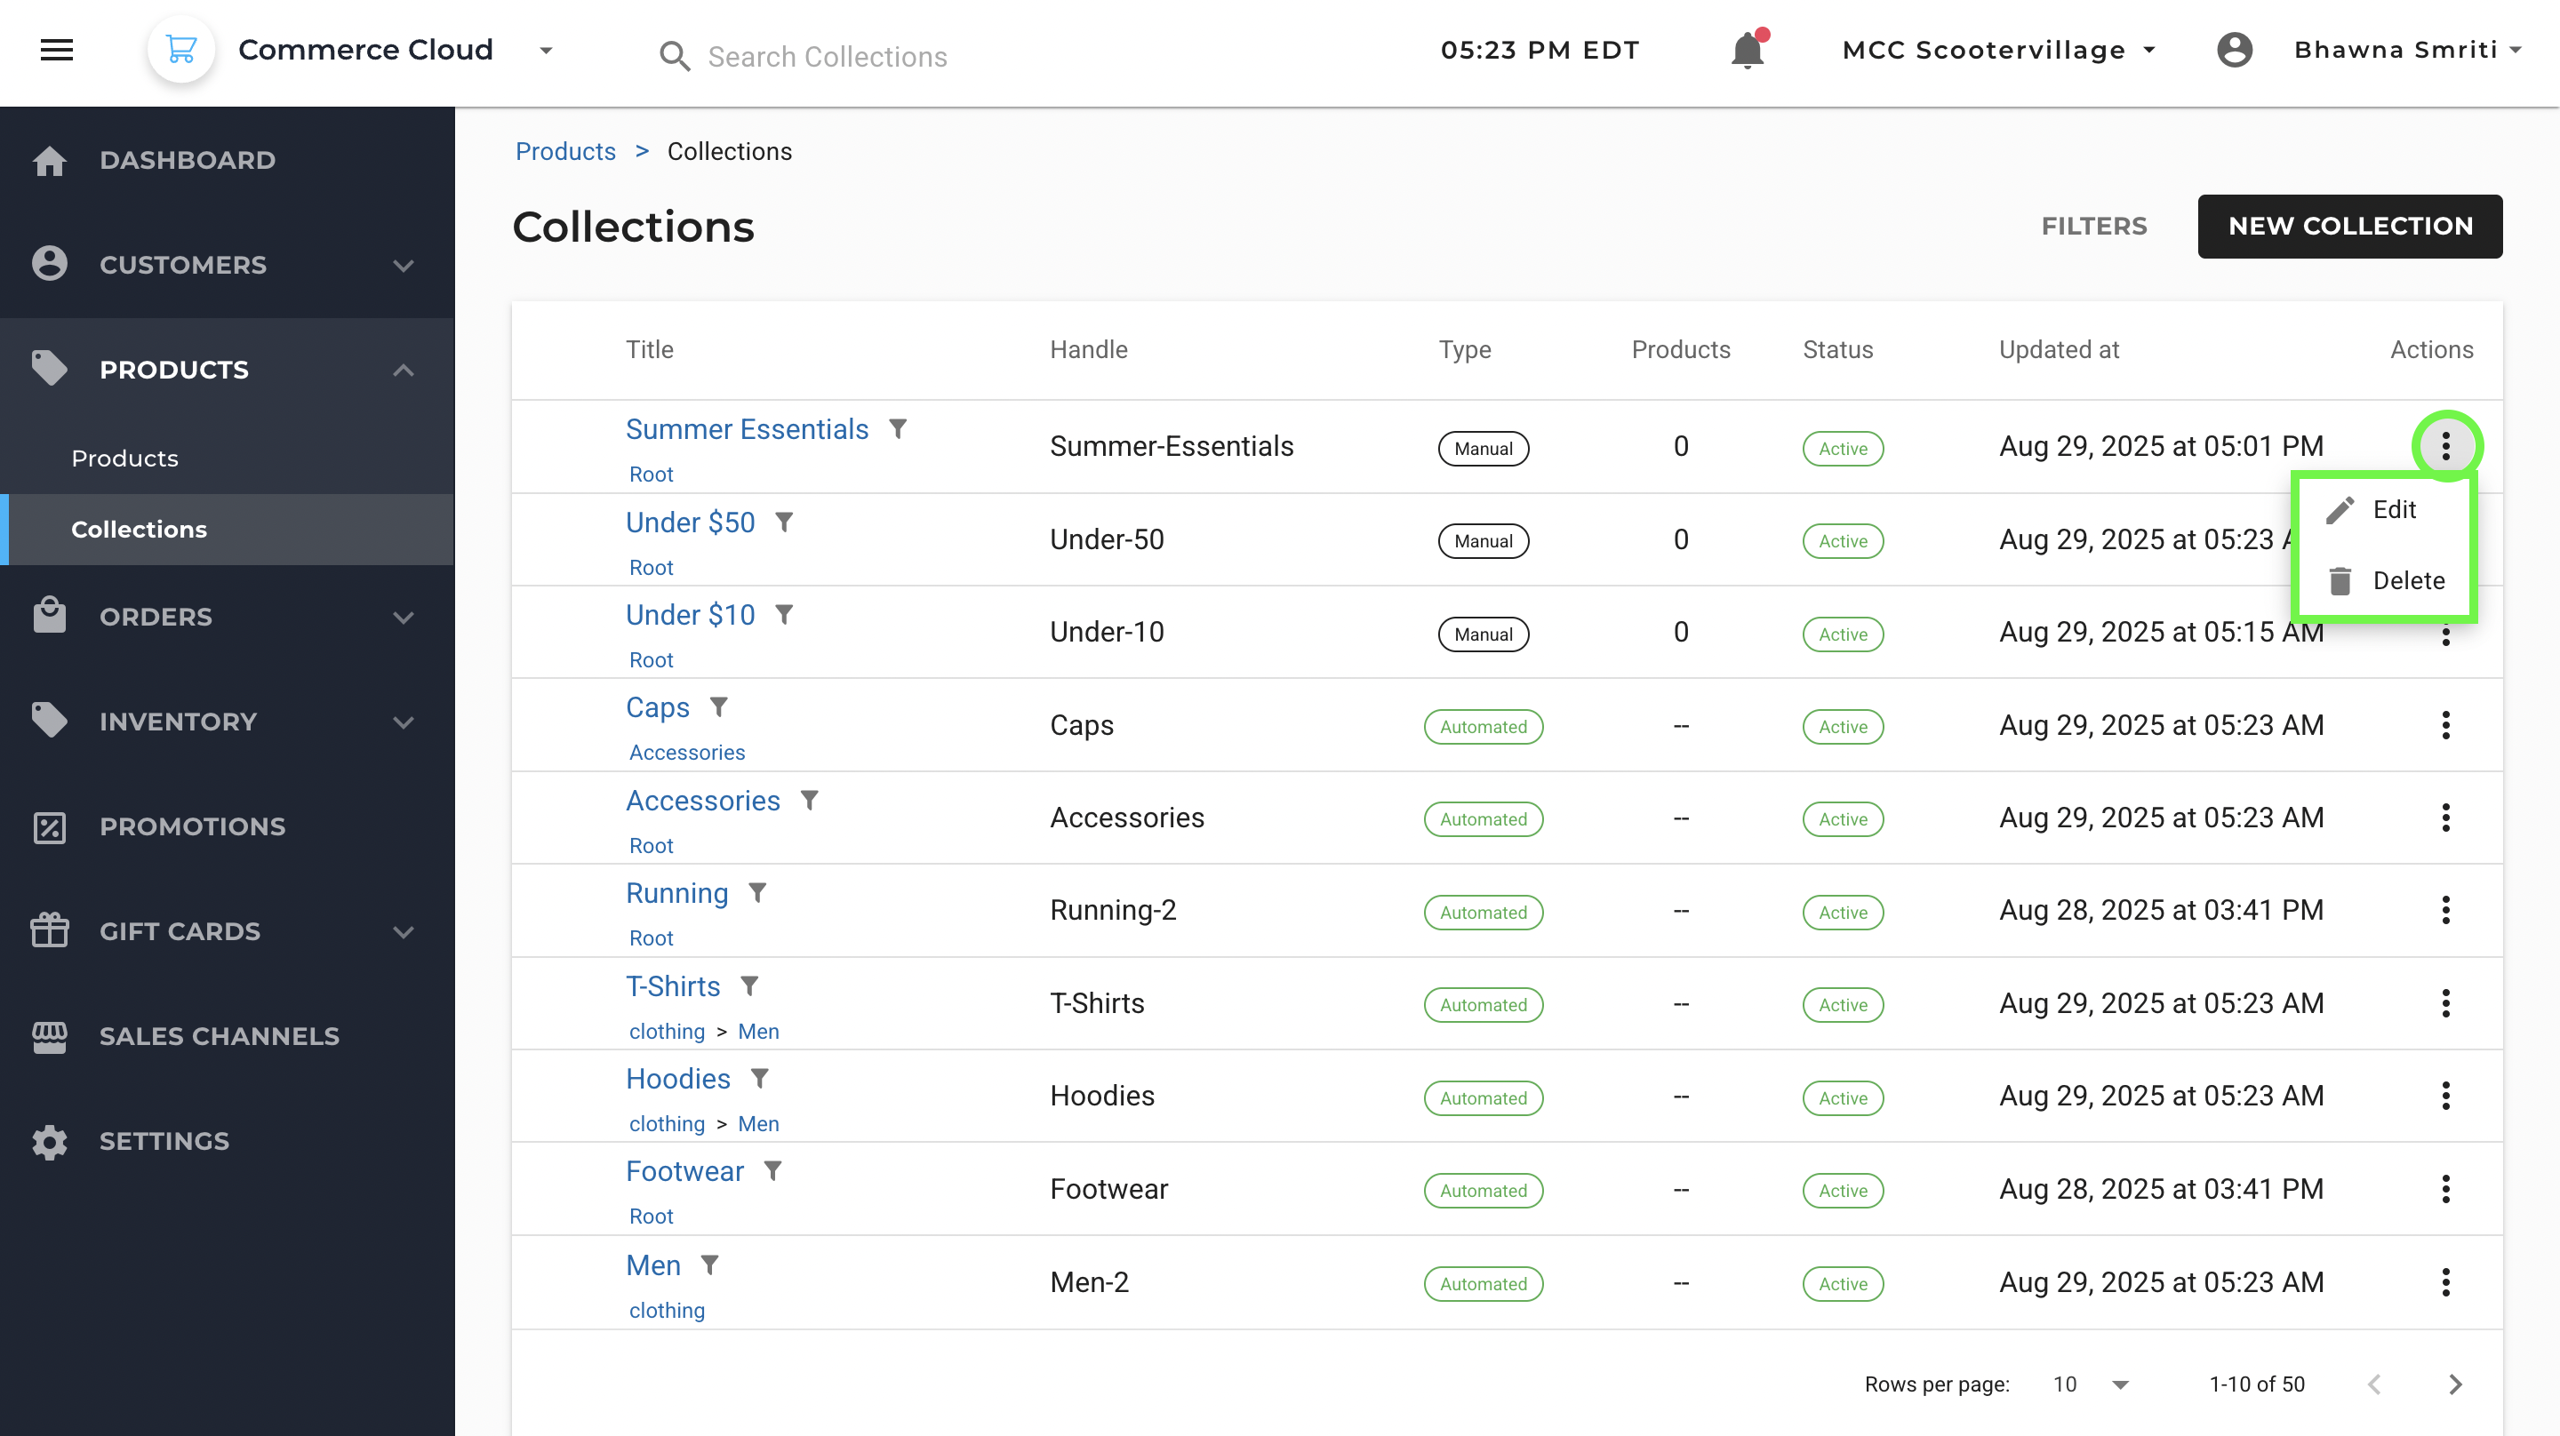
Step 1: To Edit/delete existing collection, navigate to Back Office → Products → Collections.
Step 2: Identify the collection you want to edit/delete and click on three dots under Actions
Step 3: Choose Action as per the requirement
- Select “Edit” to make changes to the existing collection.
- Select “Delete” to remove the collection from the system.
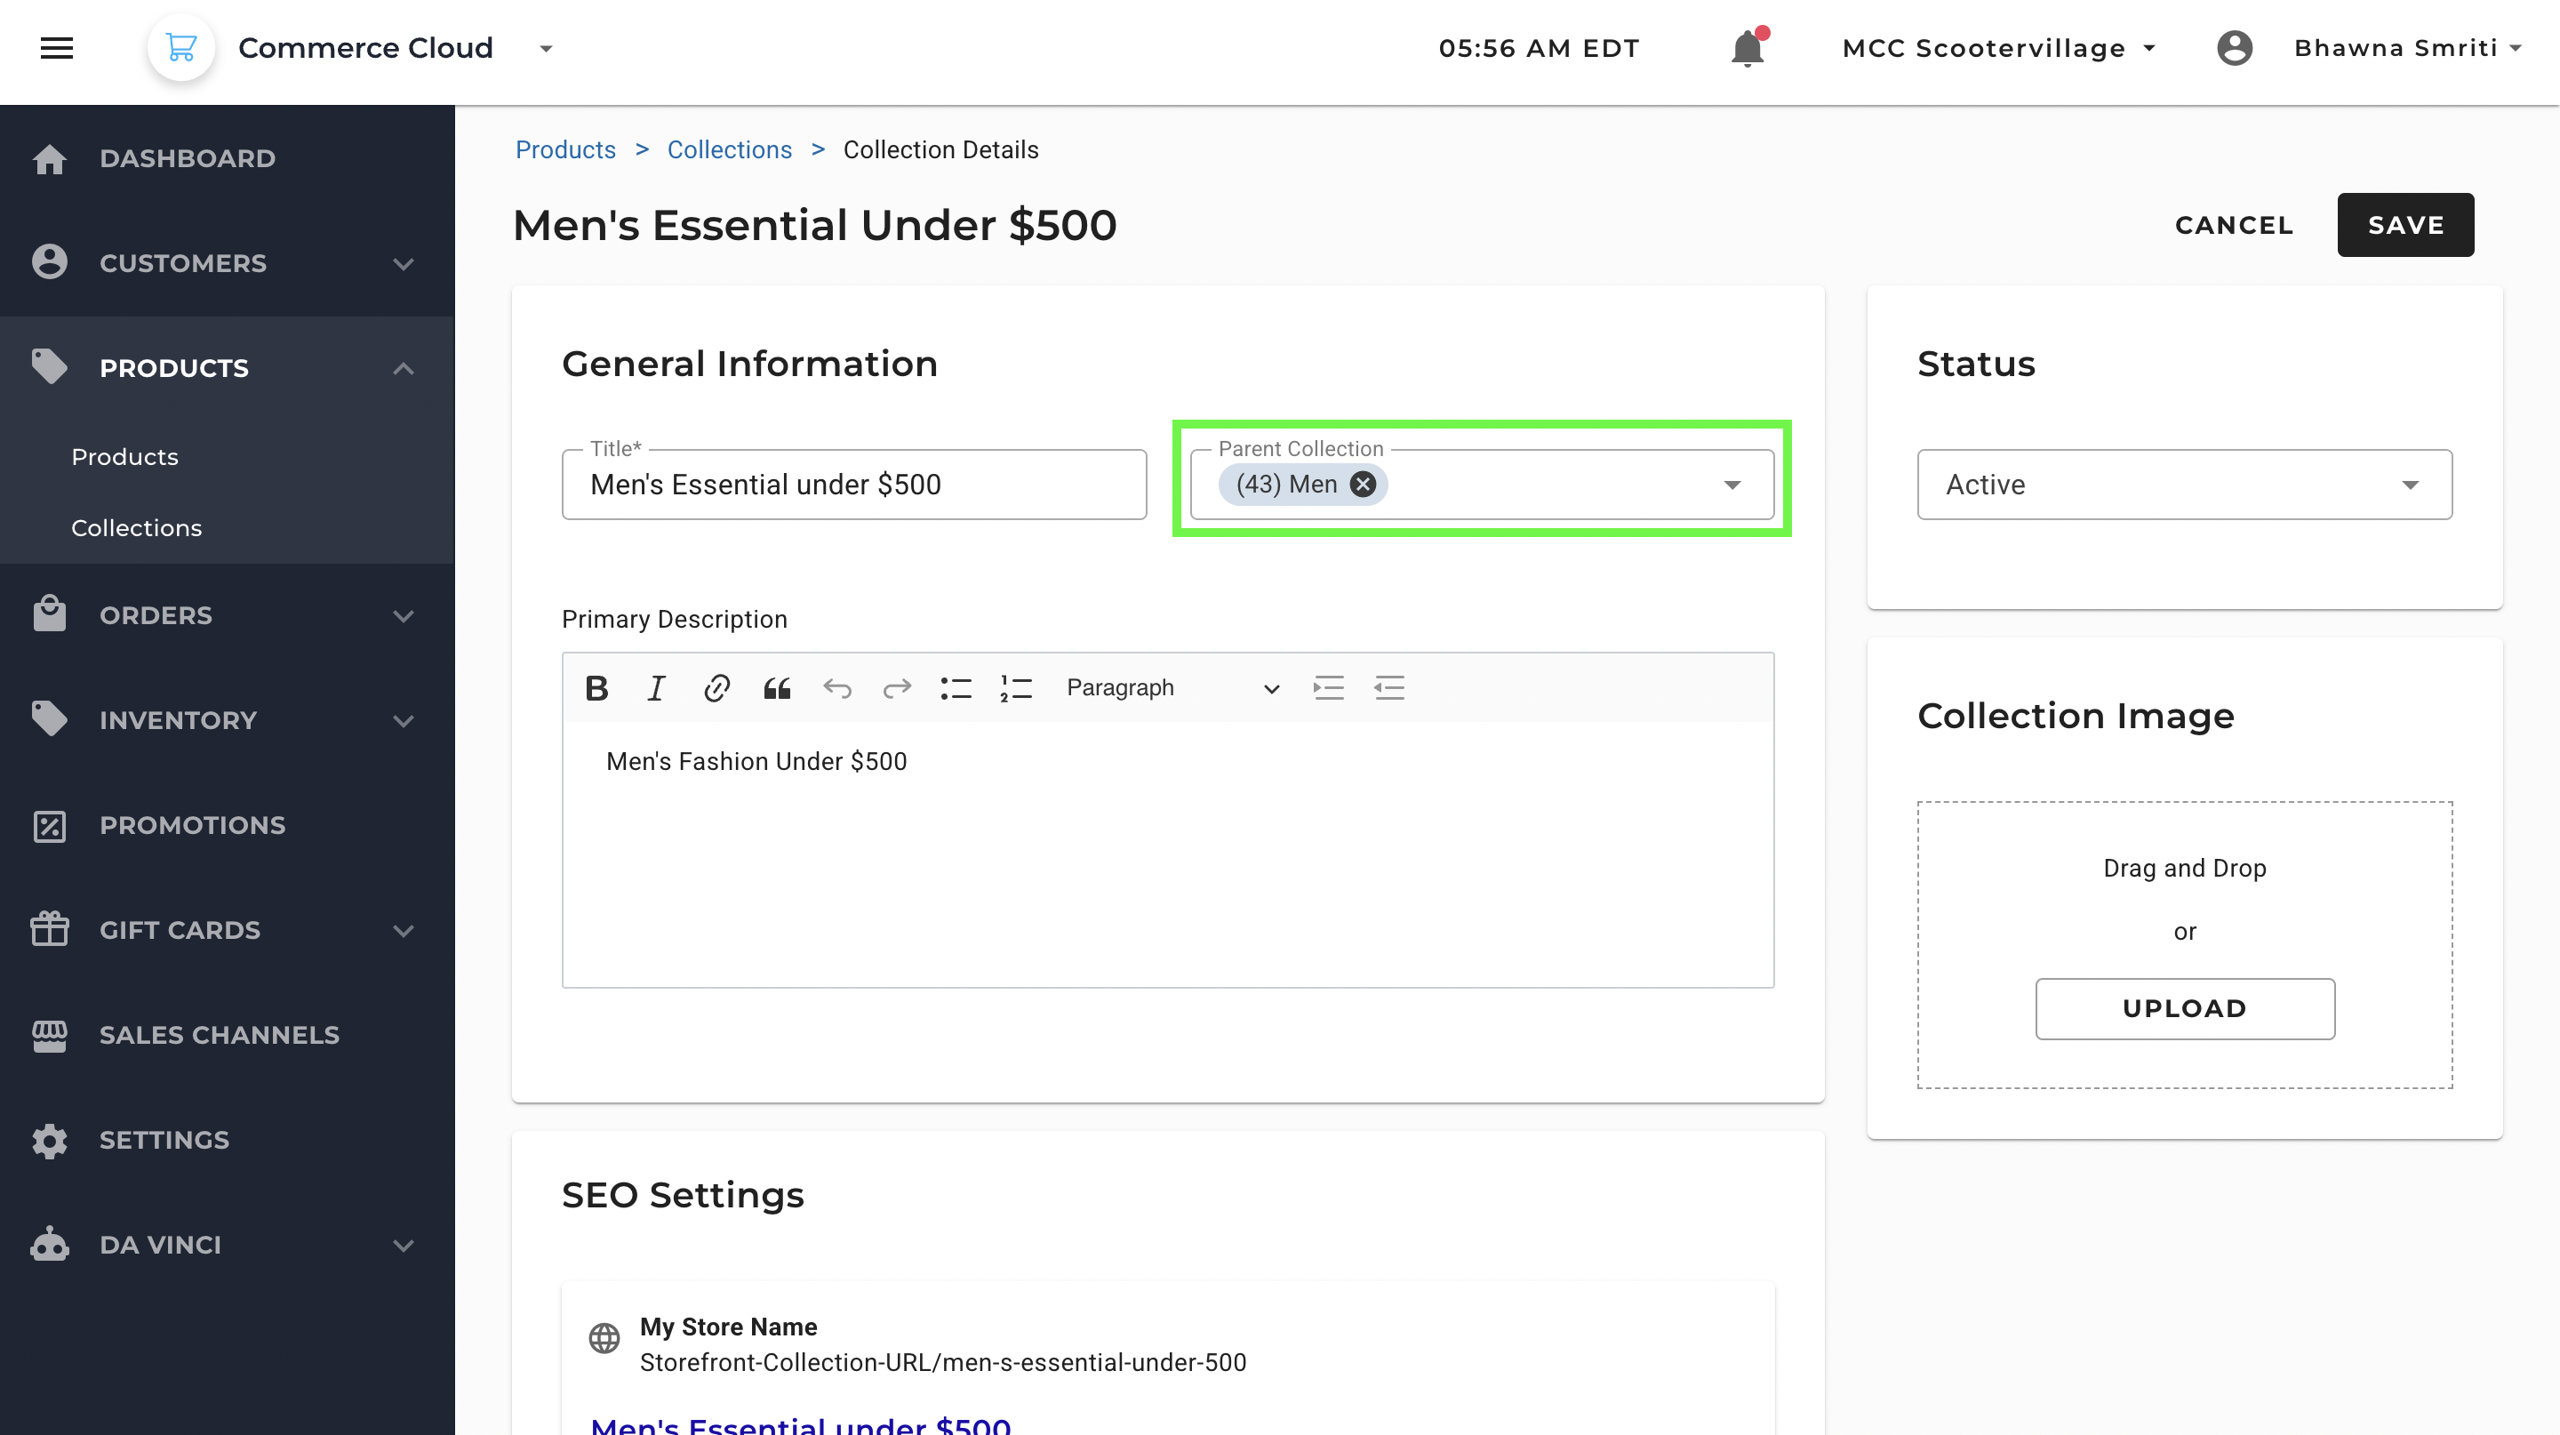
Step 4: Once you click on Edit, you will be able to make changes to all segments of the collection.
Step 5: After making the changes, click on Save.
Nested Dynamic Categories
If your store uses nested category structures, MCC supports inherited logic between parent and child collections.
- When you create a dynamic (rule-based) collection for a parent category, all child categories automatically inherit the parent’s rules.
- You can still apply additional rules at the child level if needed.
Example: If your parent collection is Men, and you create a child collection like Men’s Essential Under $500, the child will automatically inherit the rules from the parent.
This setup helps you build layered merchandising logic without repeating rule configurations across collections.
If a collection is marked as a child, inherited rules are applied automatically. You can still add new conditions specific to the child collection.
Auto-Generated Collections from Category Imports
When you import products with new category values, MCC automatically creates a collection matching the category name.
This helps clients coming from category-driven platforms (like Neto) by maintaining a familiar structure.
- Add a new category via product import or manually in the dashboard
- MCC detects the new category and creates a collection with the same name
- You can then apply merchandising rules, pinning, and sorting under this collection.
Auto-Creation of Collections via Product Import
Additionally, you can automatically create both categories and their matching collections while importing products that reference new category values.
This is especially useful during catalog setup or migration from platforms like Neto, where categories are used to group products.
How It Works
When you upload a product feed that includes a new category (i.e., a category value that doesn’t already exist in your system):
- MCC automatically creates the new category under Settings > Product Categories
- Simultaneously, it creates a collection using the same name under Products > Collections
Example Scenario
Let’s say your product import includes:
Product Title: Handball Spezial Category: Adventure
If "Adventure" doesn’t exist as a category yet:
- A new category named Adventure will be created
- A collection named Adventure will also be generated
- All products with this category will automatically appear in that collection
This saves time and ensures a 1:1 structure between your product categories and merchandising collections — with no extra setup needed.
Tip: You can still go into the generated collection later and apply merchandising rules, SEO settings, or images as needed.
Important: Make sure to put the collection in “Active” to activate the collection for further use. To activate the collection, go to Collections >> Your Collection >> Edit >> Status >> Active
How to Create a Manual Collection
Step 1: Navigate to Back Office → Products → Collections.
Step 2: Click New Collection and select Manual Collection
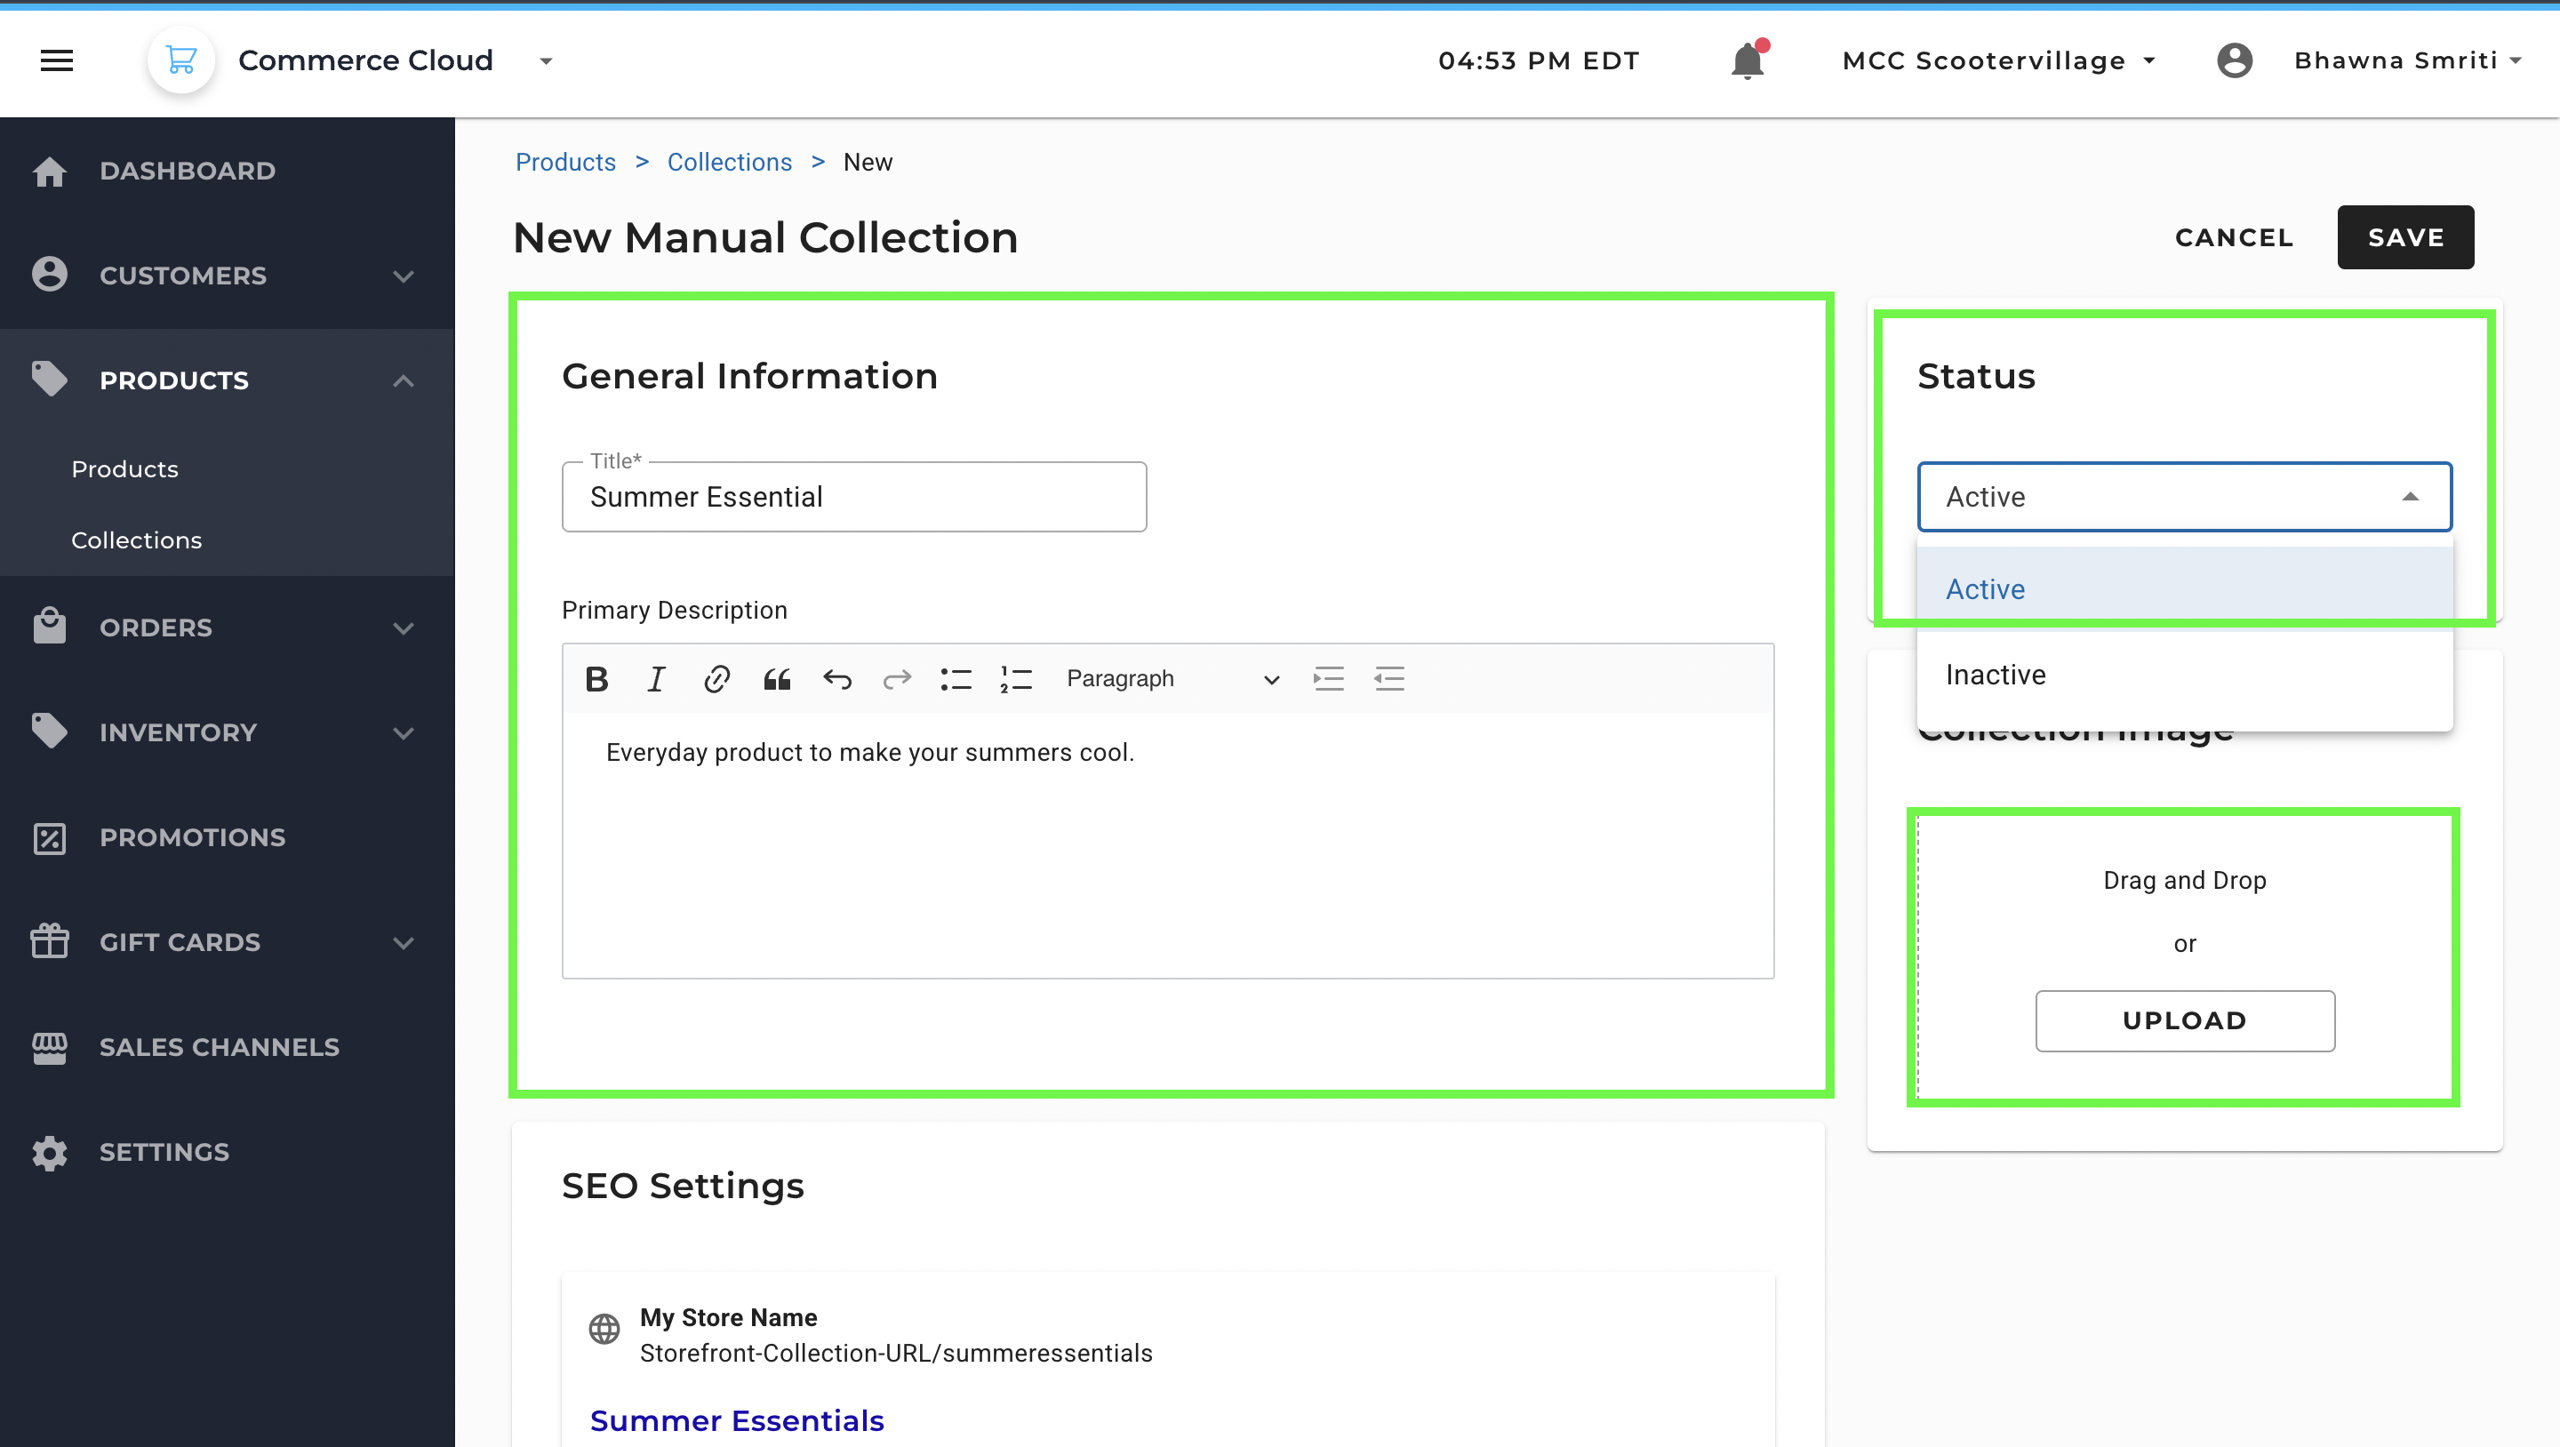
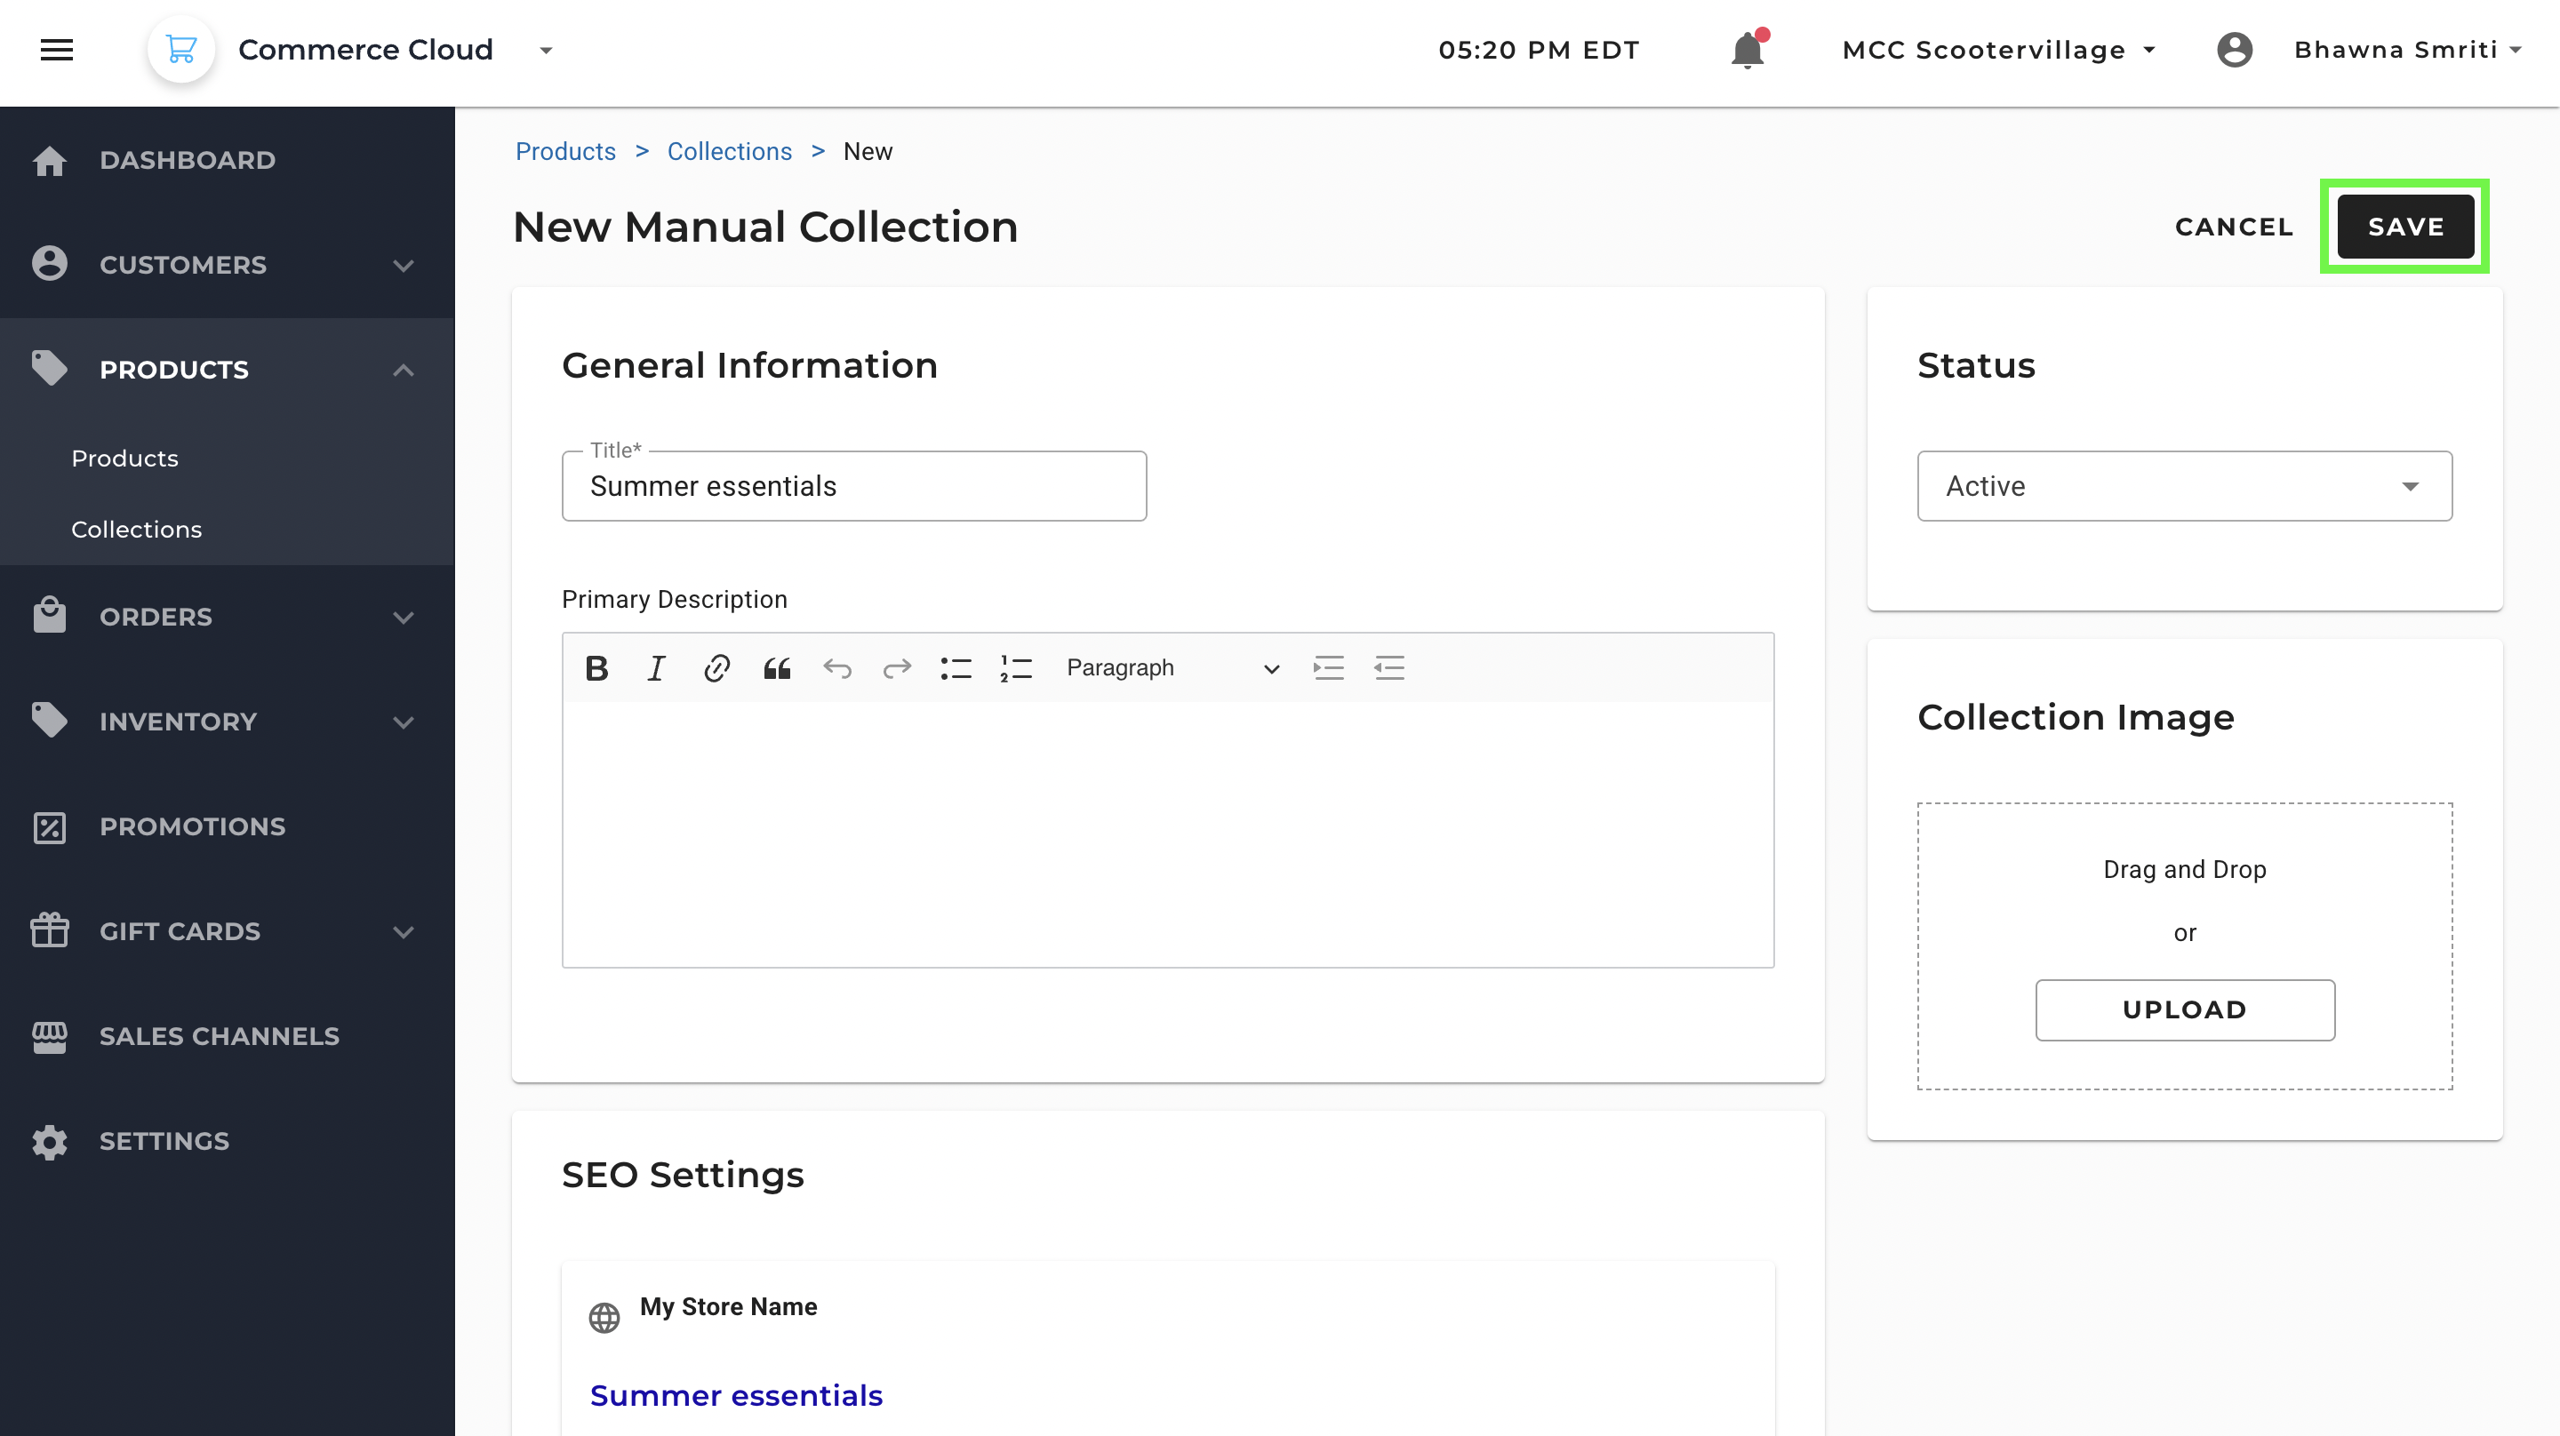
Step 3: Step 3: Fill in General Information
- Title – Enter the collection name (e.g., Summer Essentials).
- Primary Description – Add a short description that explains the collection.
- Status – Choose Active to make it visible on the storefront or Inactive to hide it.
- Collection Image – Upload an image to visually represent the collection.
Step 4: Configure SEO Settings
- SEO Title – Title to display in search engines.
- Meta Description – Short description for SEO visibility.
URL Handle – Define the URL slug (e.g., /summer-essentials).
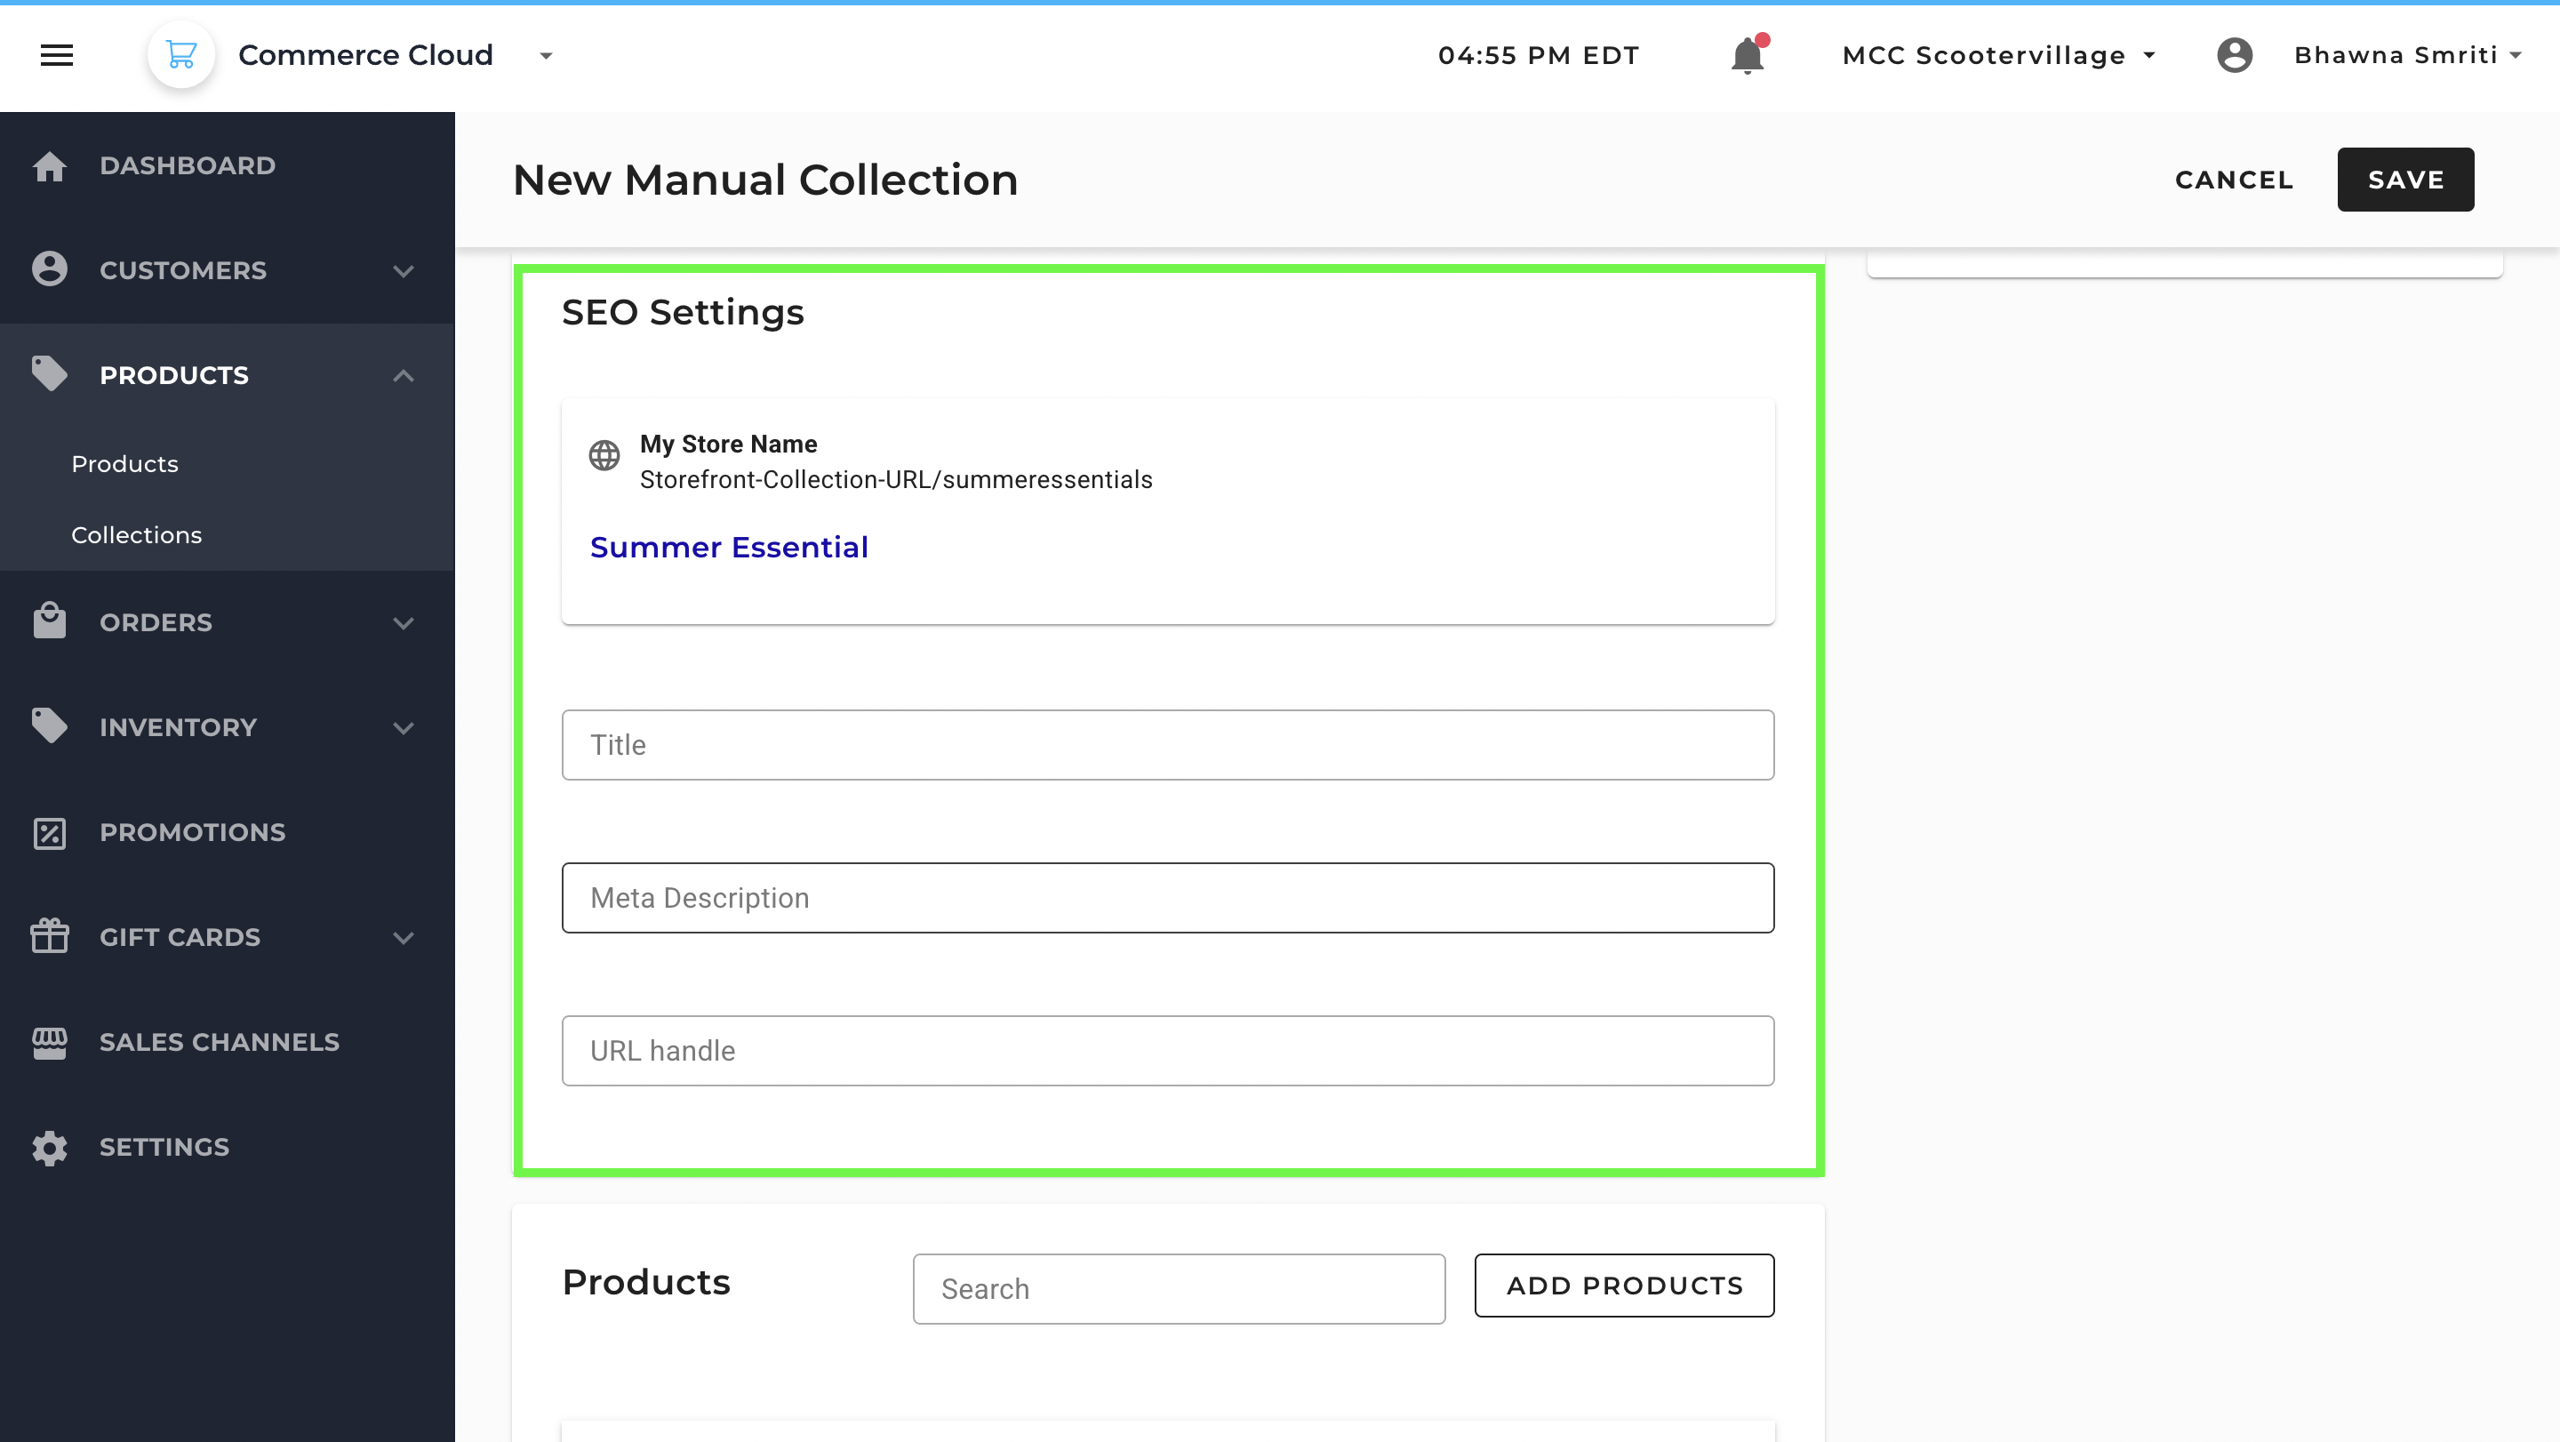
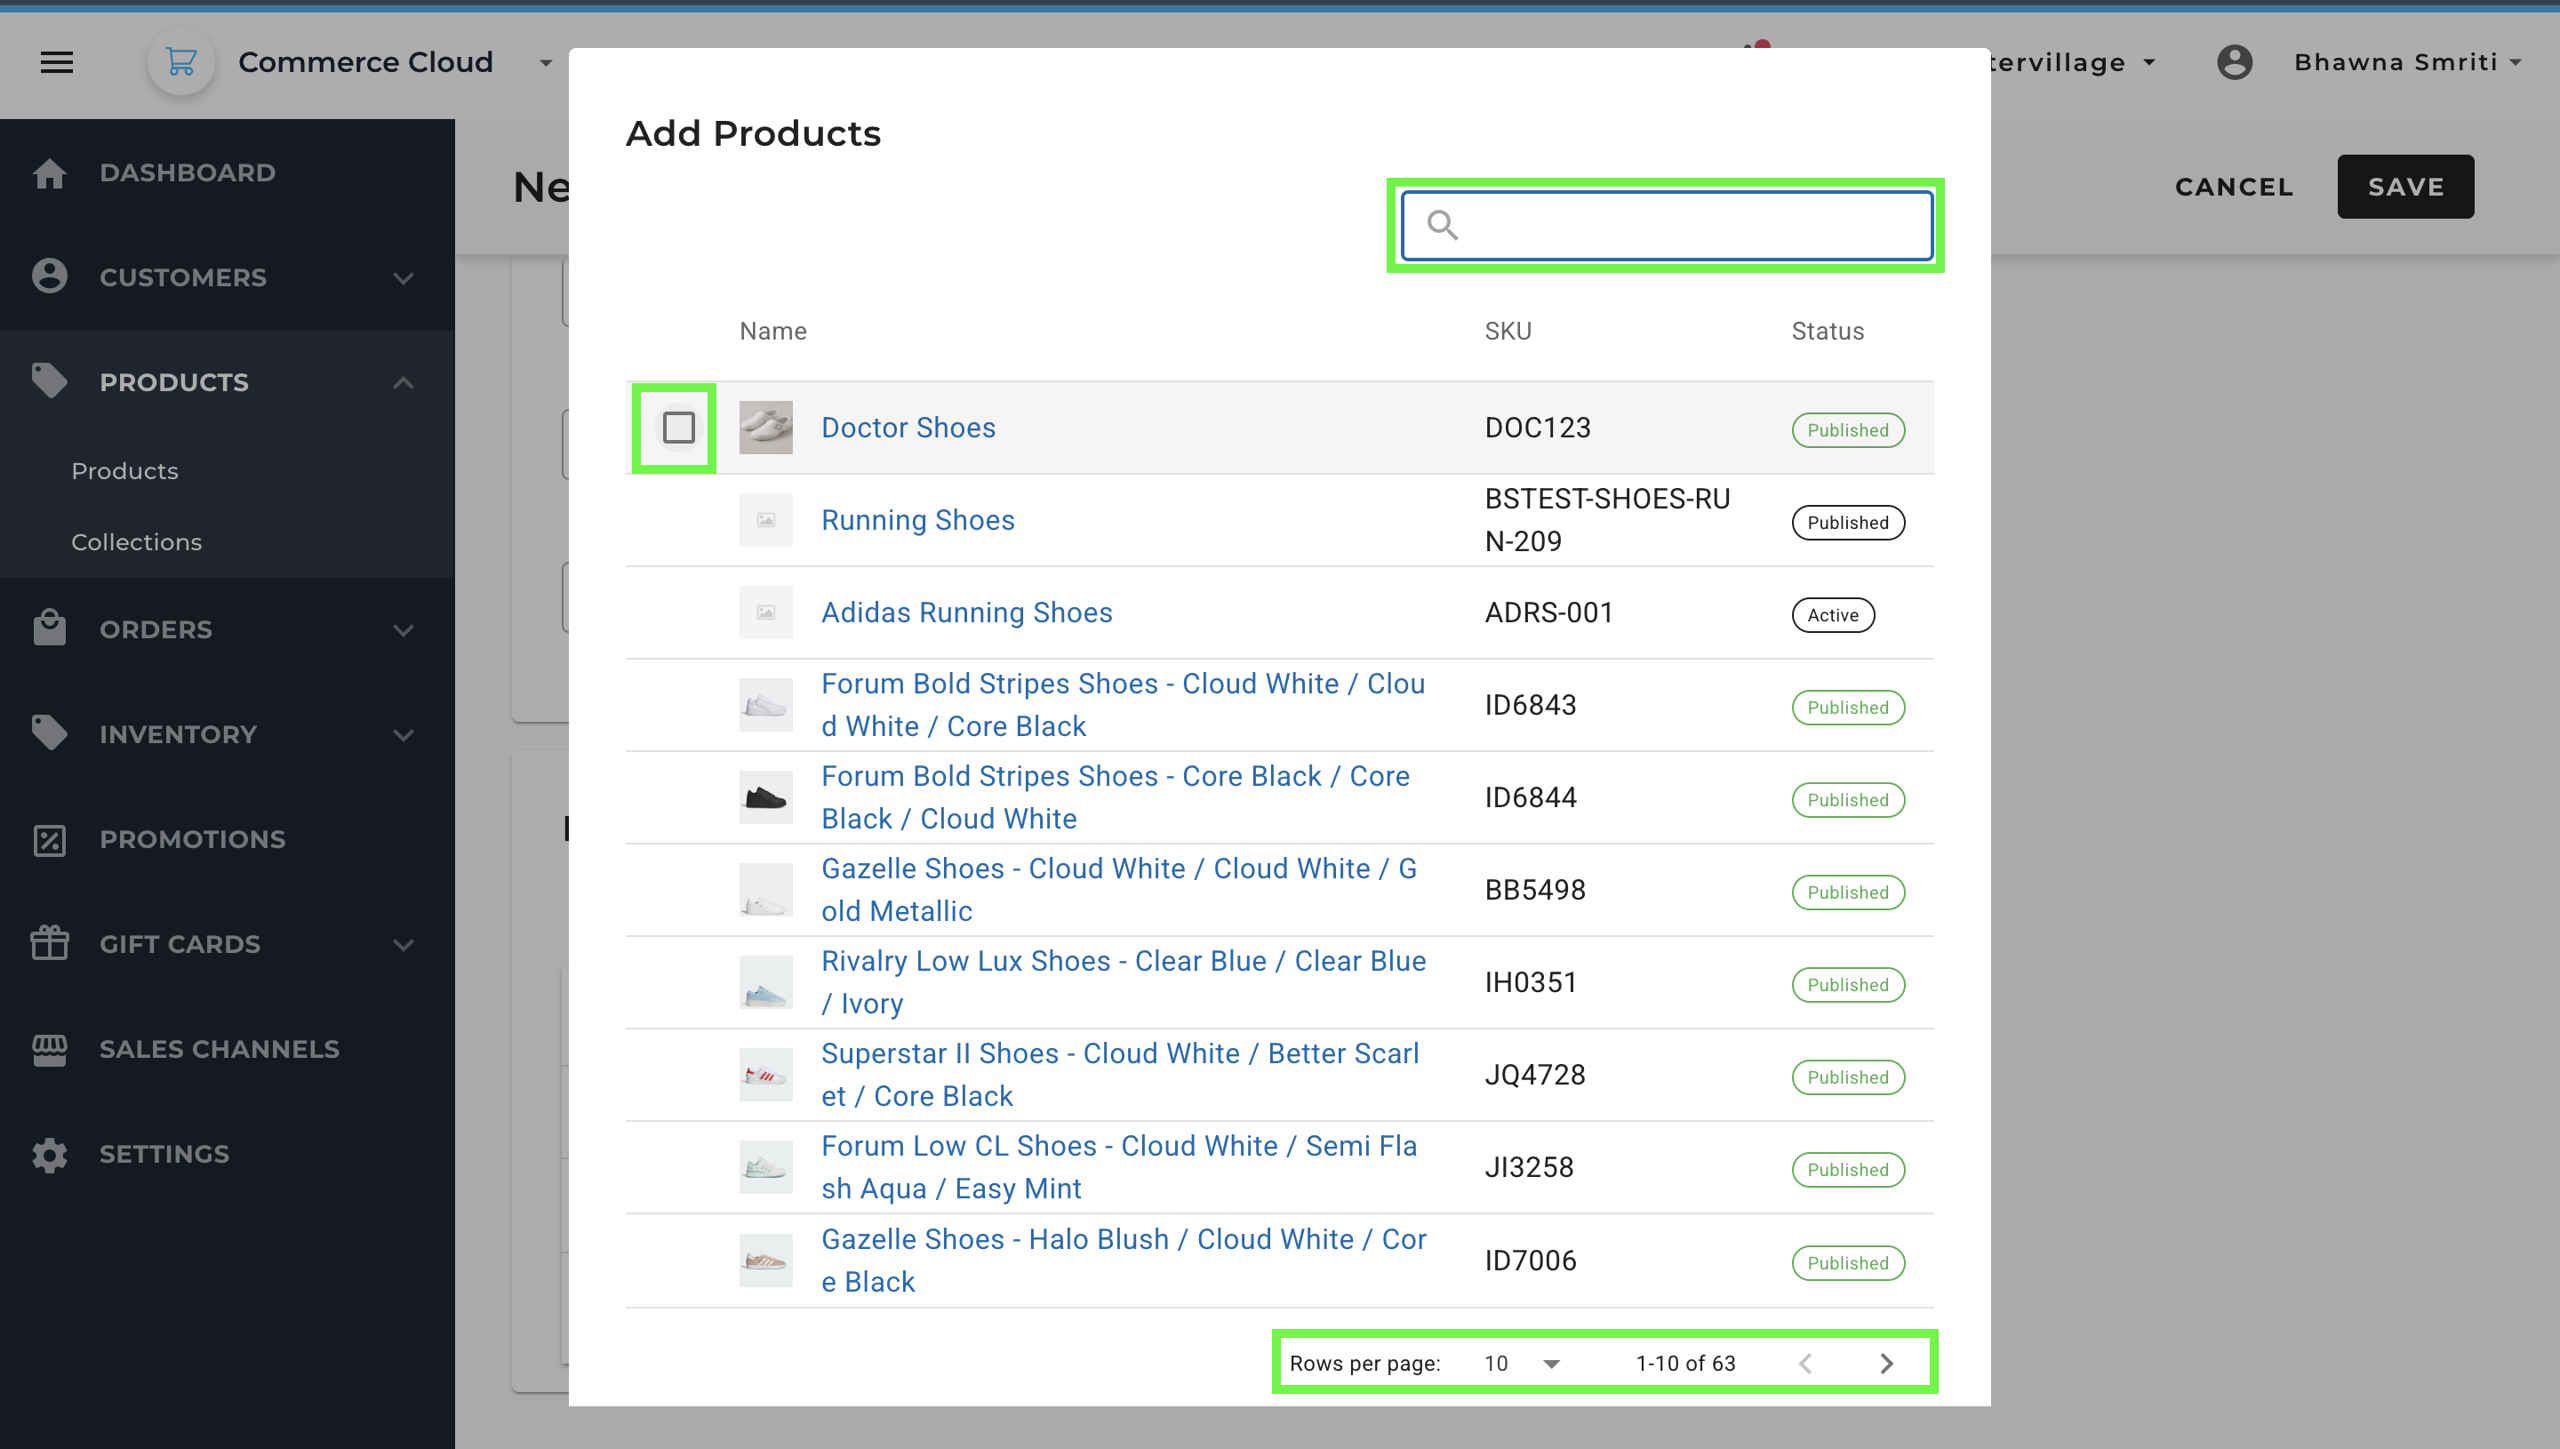
Step 5: Add Products
- Click on Add Product to browse from all product list.
- Select products by checking the boxes next to them.
- Once all desired products are added, scroll at the bottom and click Save.
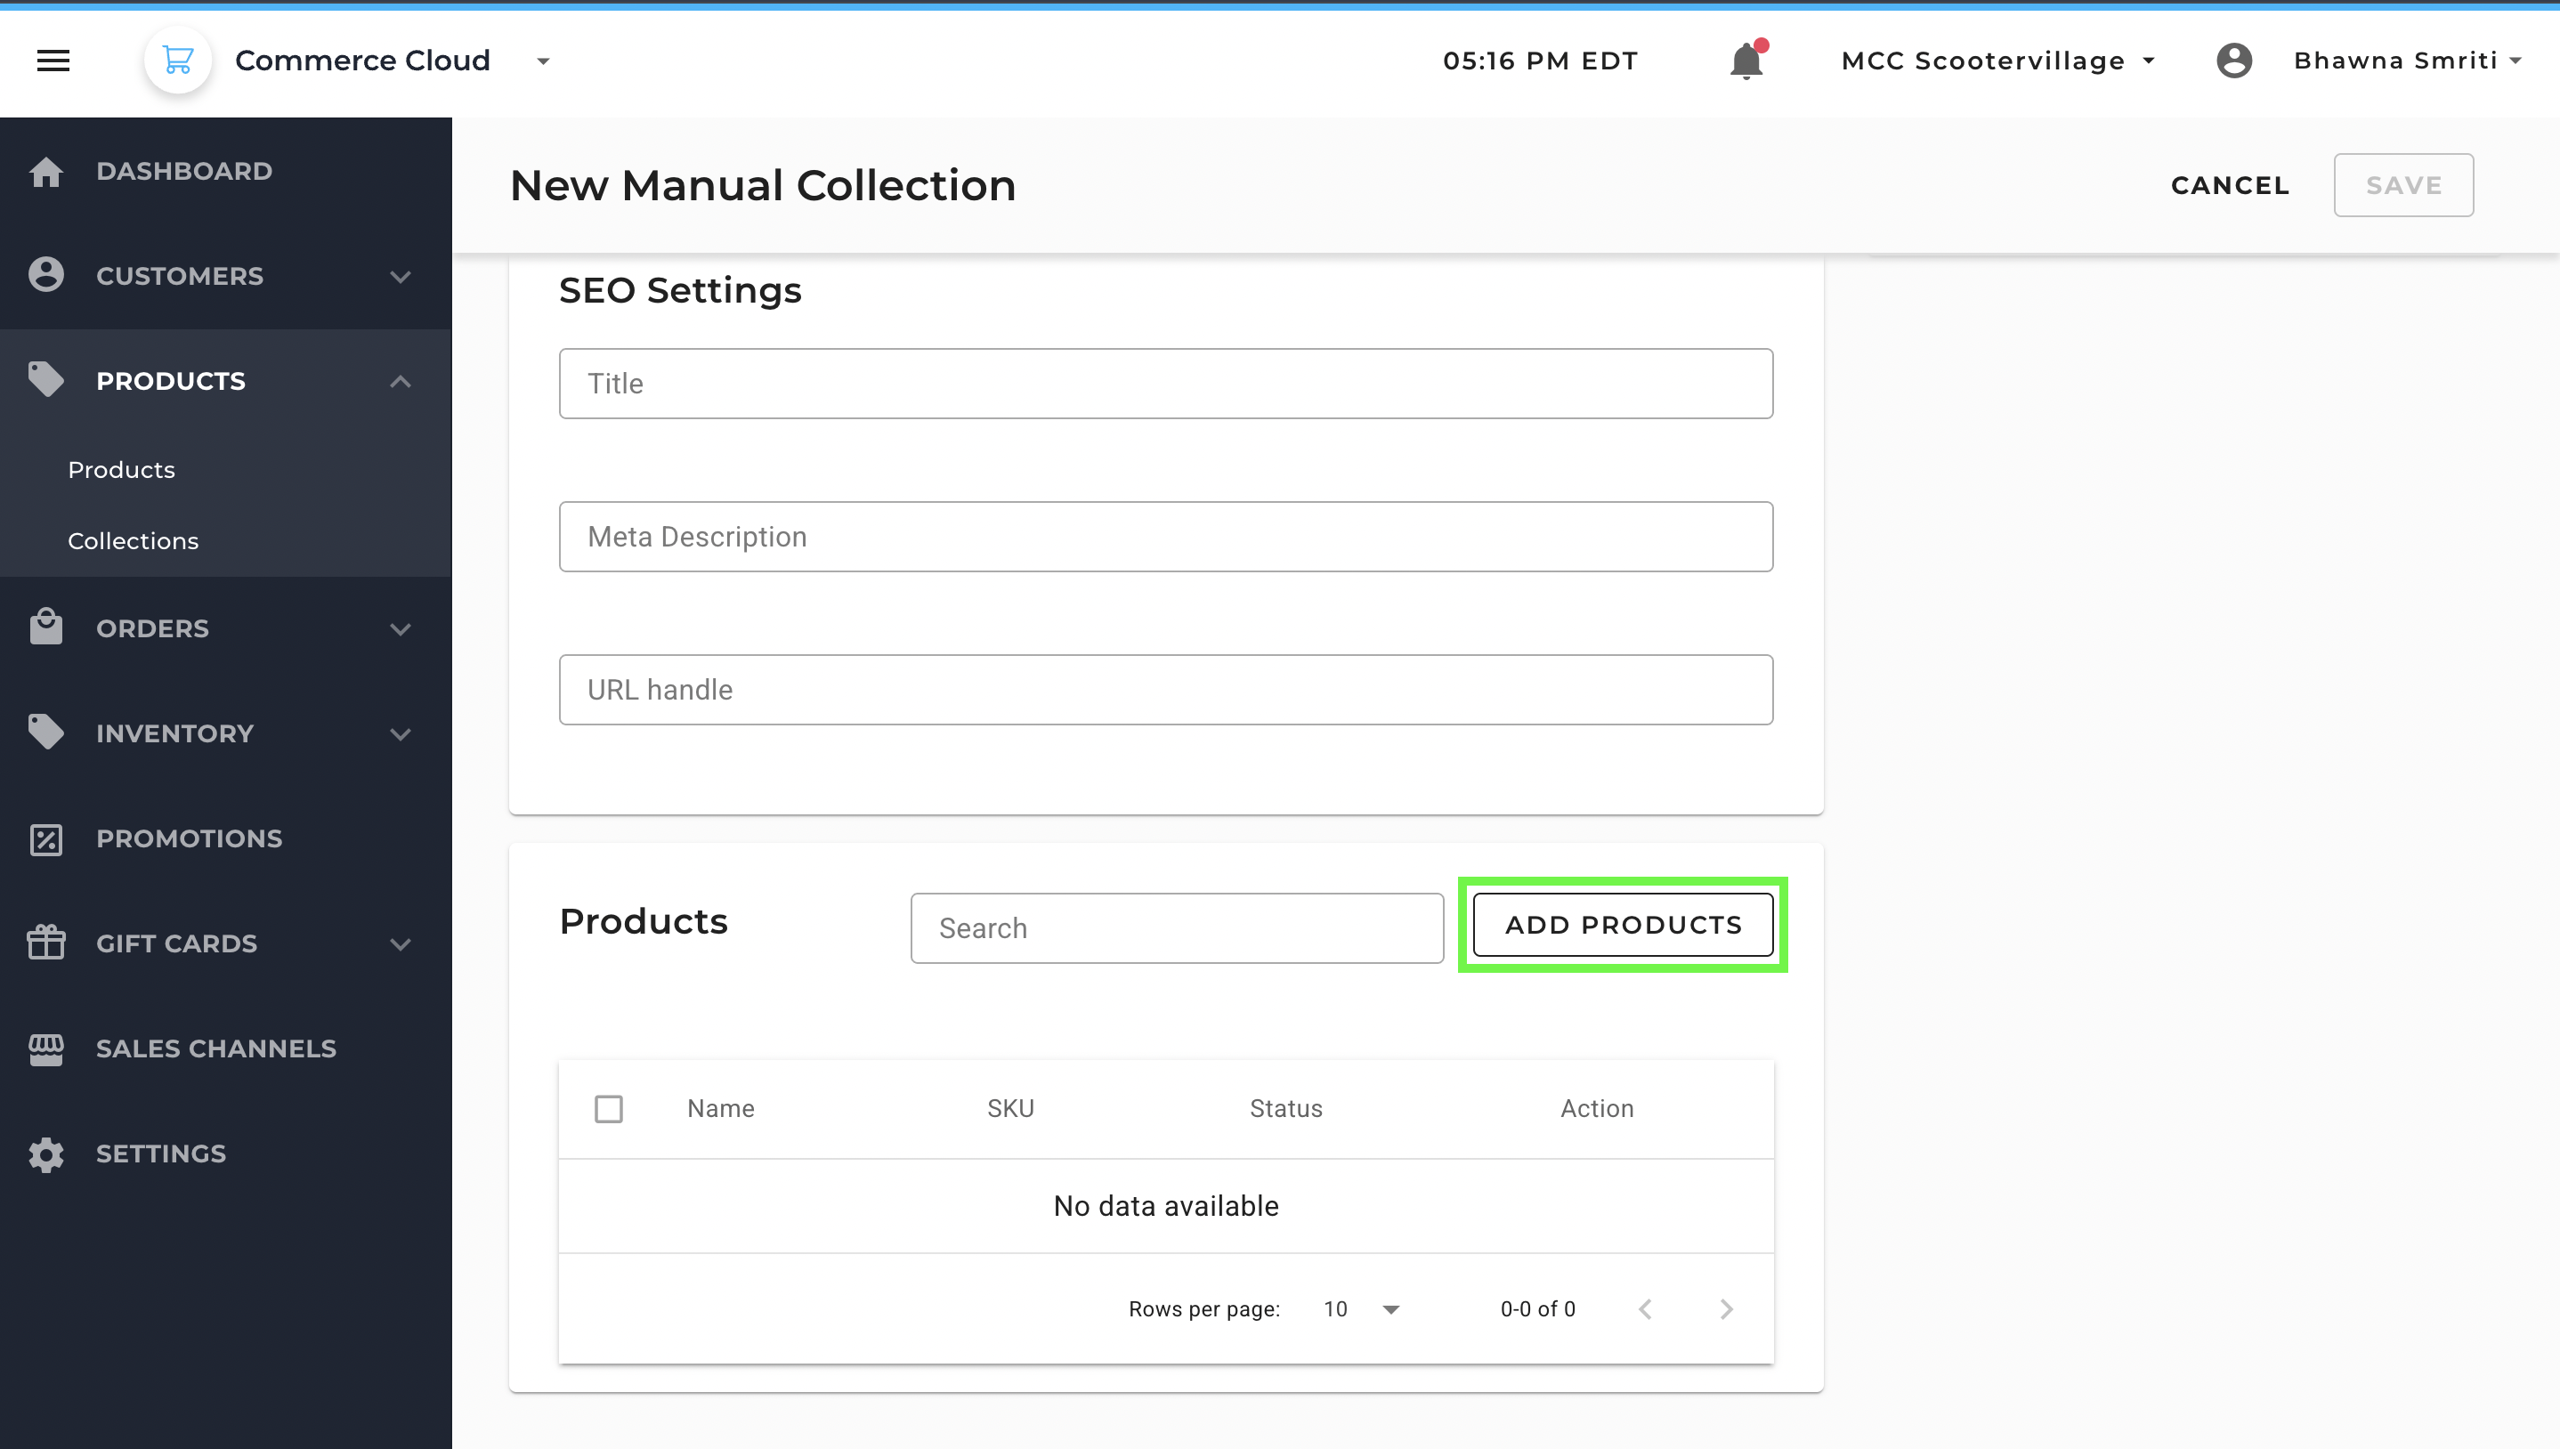
- Once you have added products, you can use the Search Option to find specific products among added ones.
- You can also use search option to remove products from the collection.
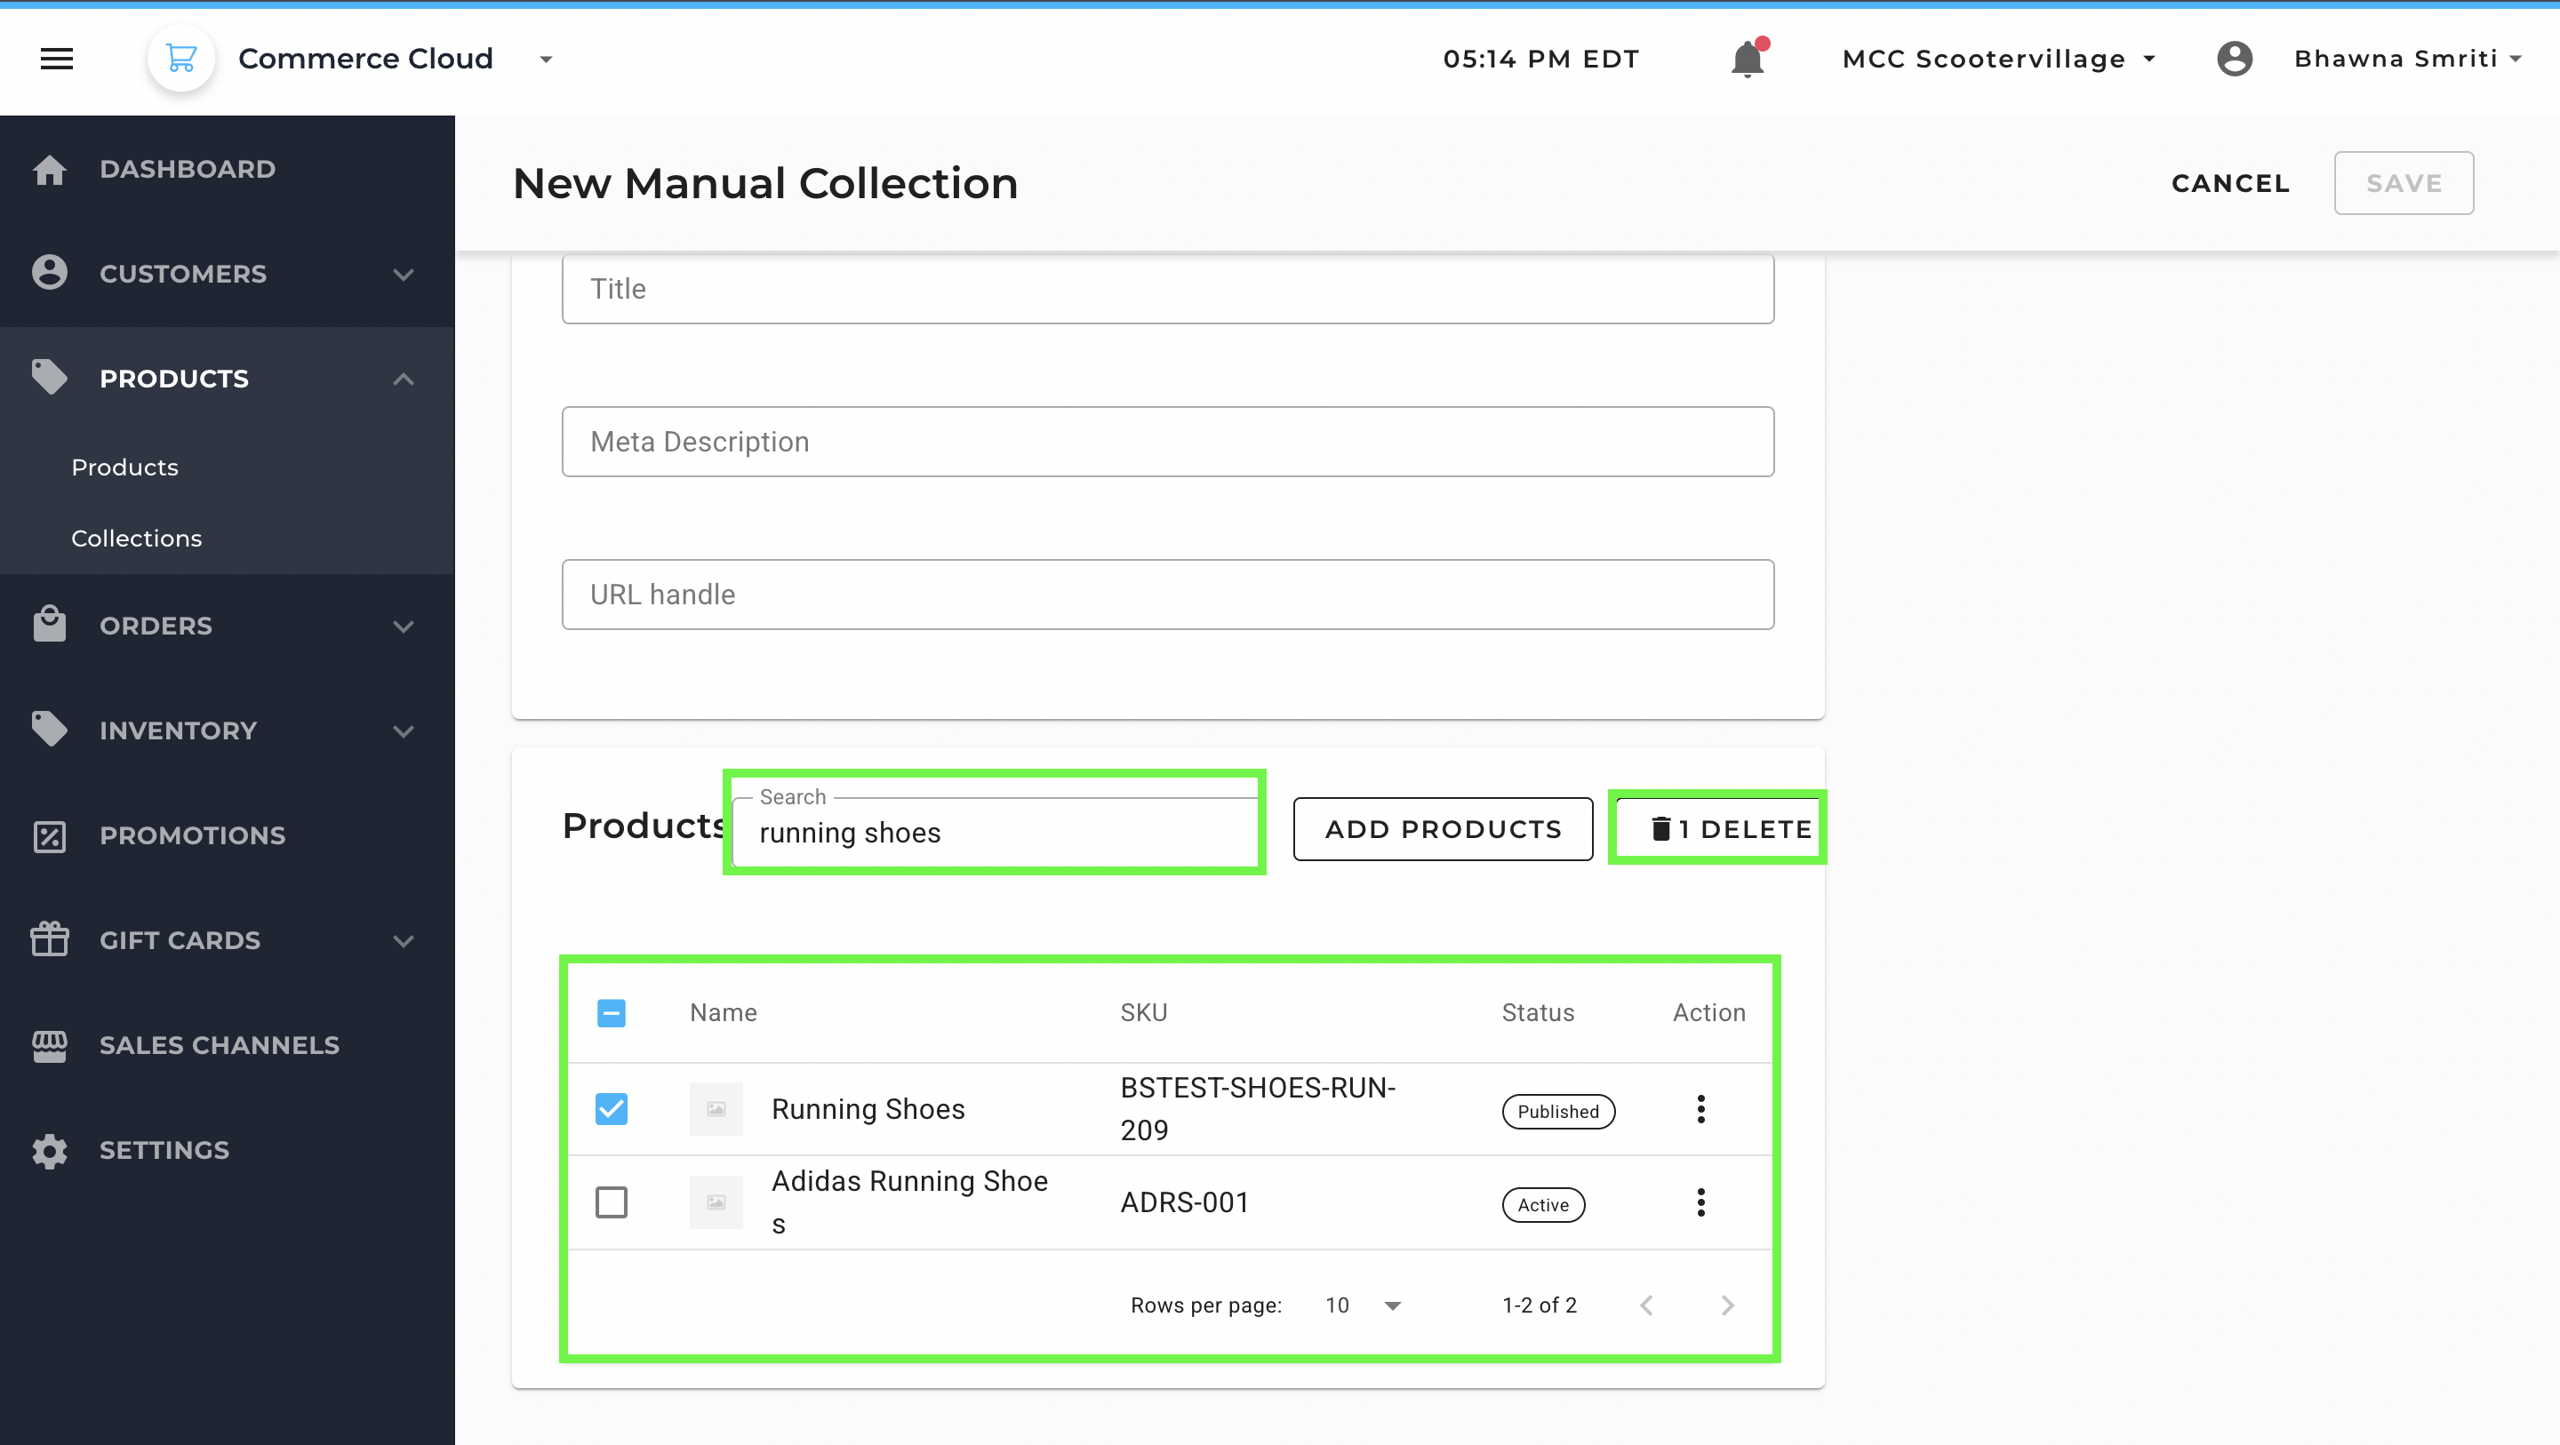
Step 6: Once all the products are added, click on Save to create collection.
Once the collection is saved, you will see the notification saying Collection Created successfully. Your New Collection will be visible under the collections tab.