The Sales Orders section gives you a complete view of all customer orders placed through various sales channels, such as your WebStore or third-party integrations. It displays real-time statuses related to payments, fulfillment, and order progress to help streamline order management.
To access:
- Go to the left-hand menu → Orders → Sales Orders
- You’ll land on the Sales Orders dashboard.
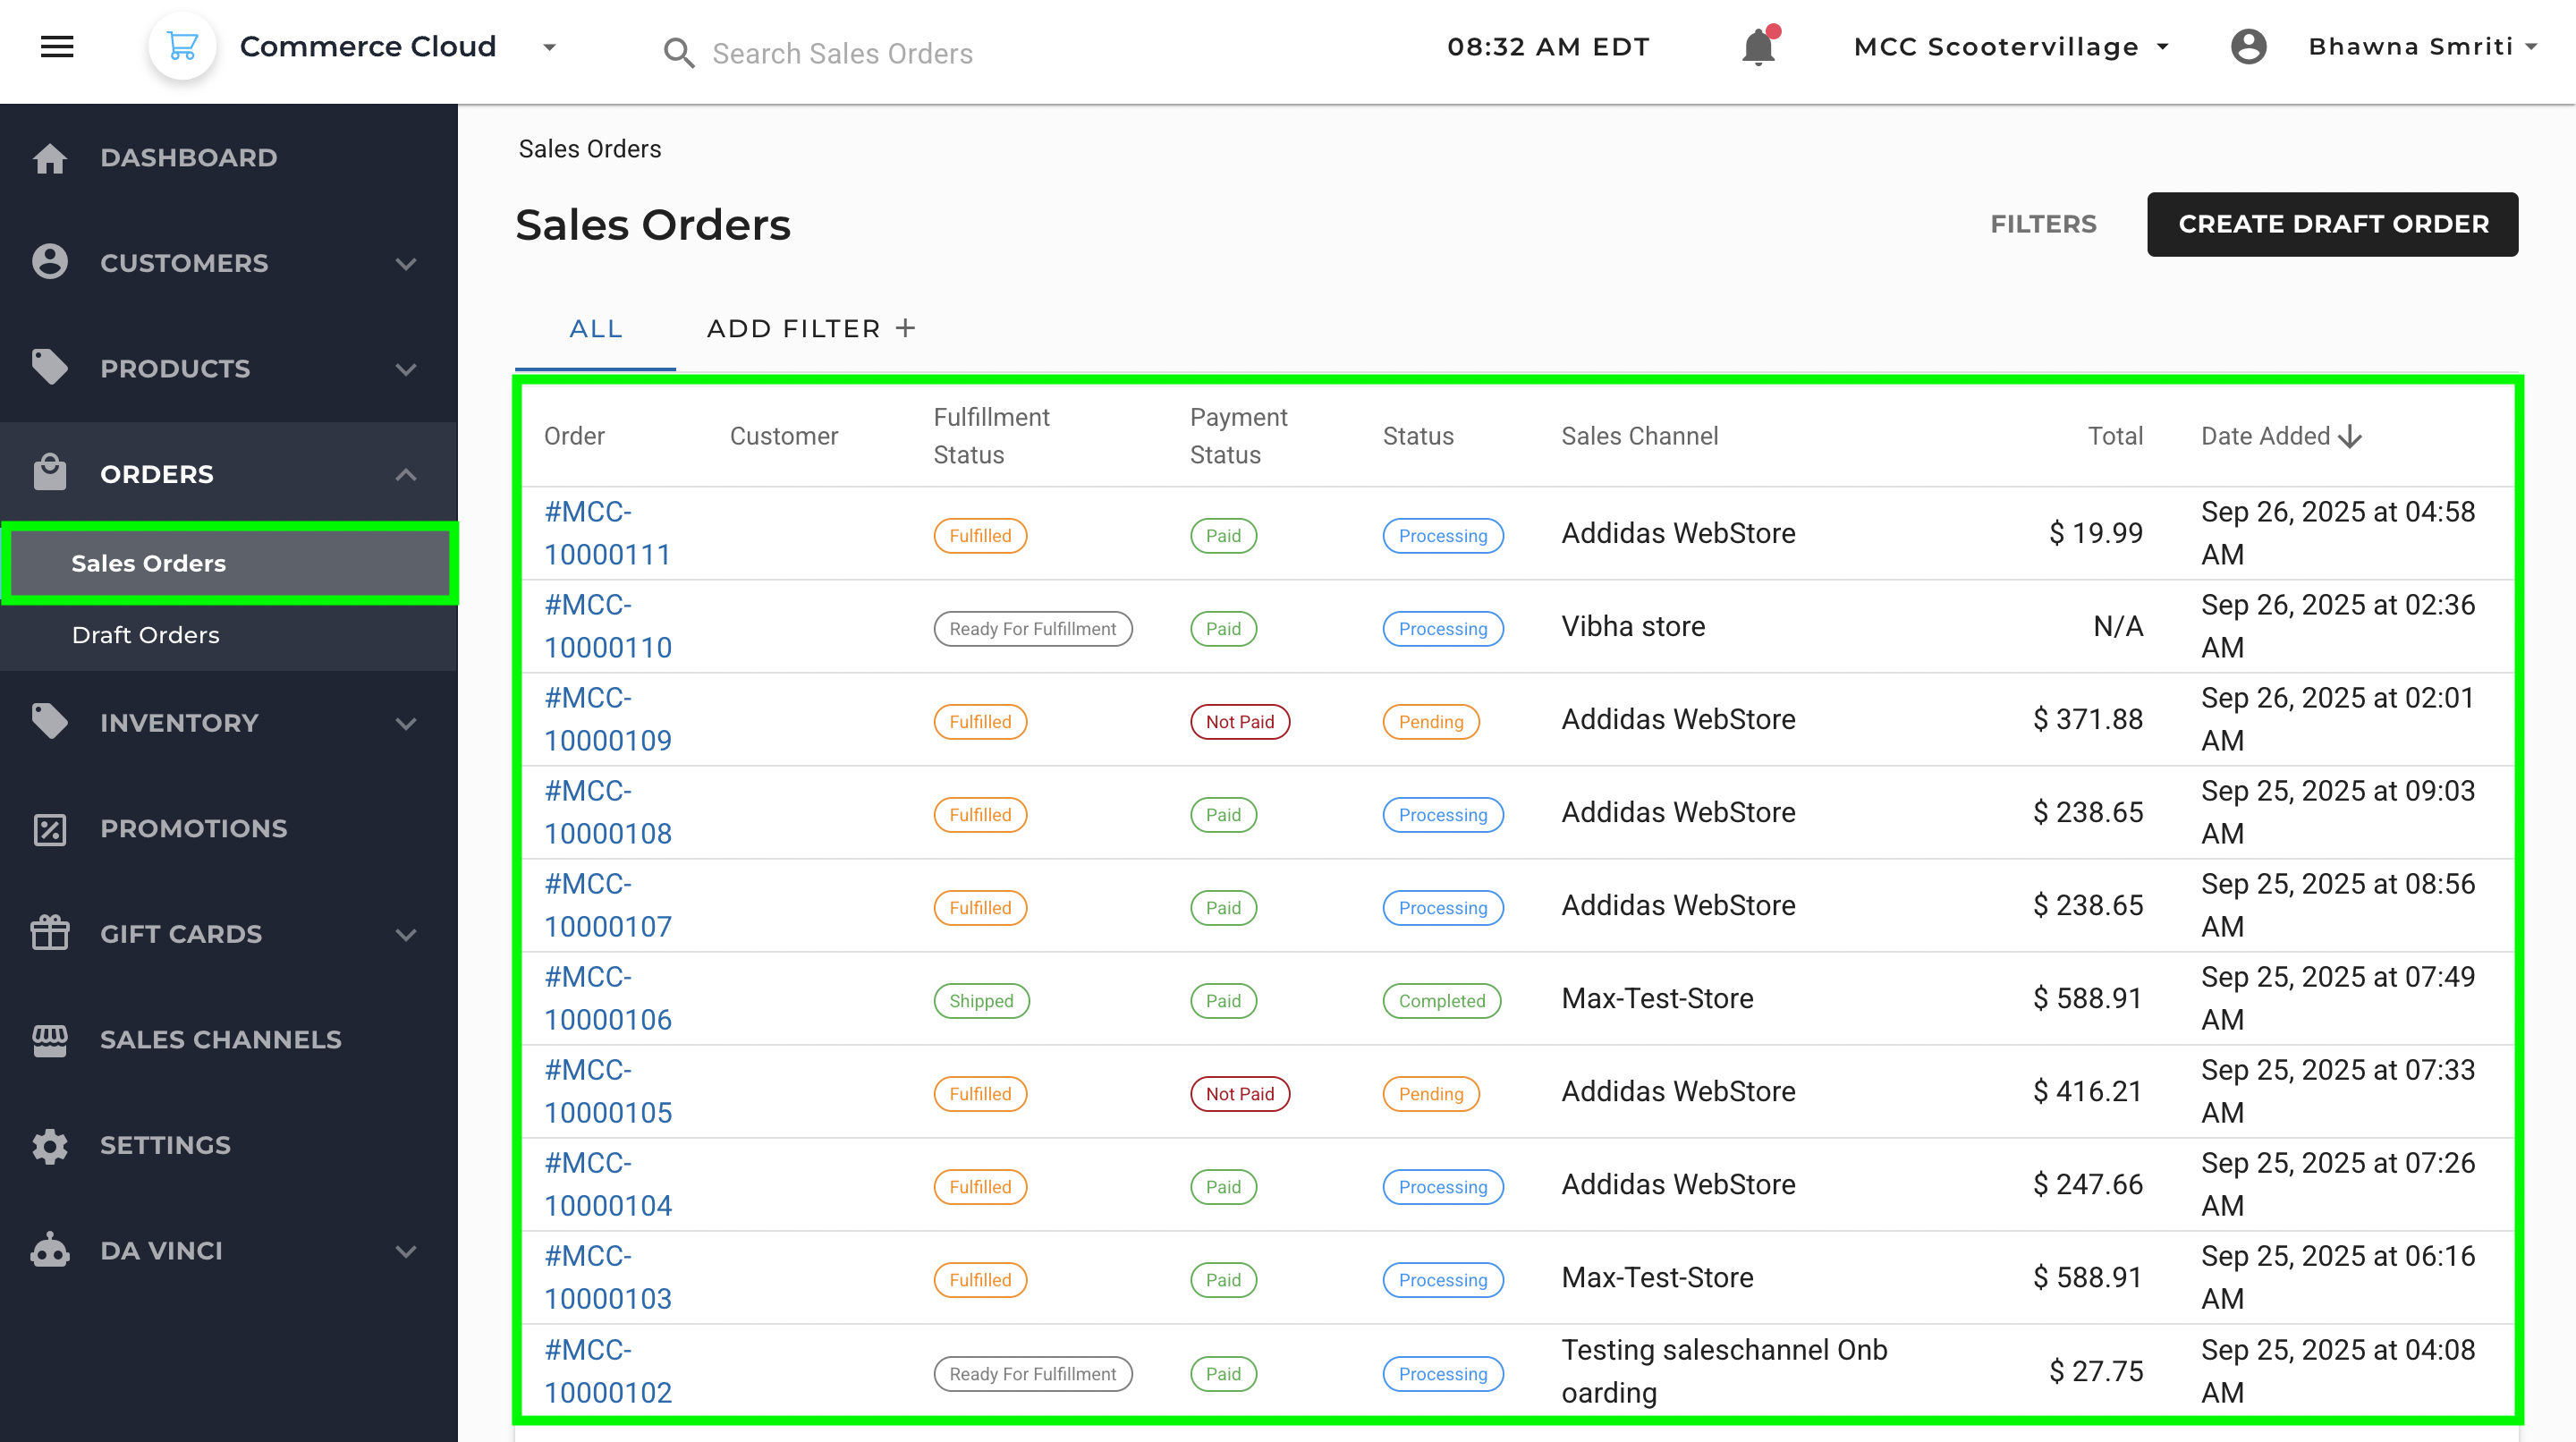
Sales Orders Dashboard Columns Explained
Column | Description |
|---|
Order | Unique order number. Clicking it opens detailed order view. |
Customer | Customer name or identifier who placed the order. |
Fulfillment Status | Indicates whether the order has been fulfilled, is ready for fulfillment, or is still pending. |
Payment Status | Shows if the order is paid, not paid, or partially paid. |
Status | Current lifecycle stage of the order (e.g., Processing, Pending, Completed). |
Sales Channel | The source of the order (e.g., WebStore, Test Store). |
Total | Total amount for the order. |
Date Added | Date and time when the order was created. |
Filtering & Sorting Orders
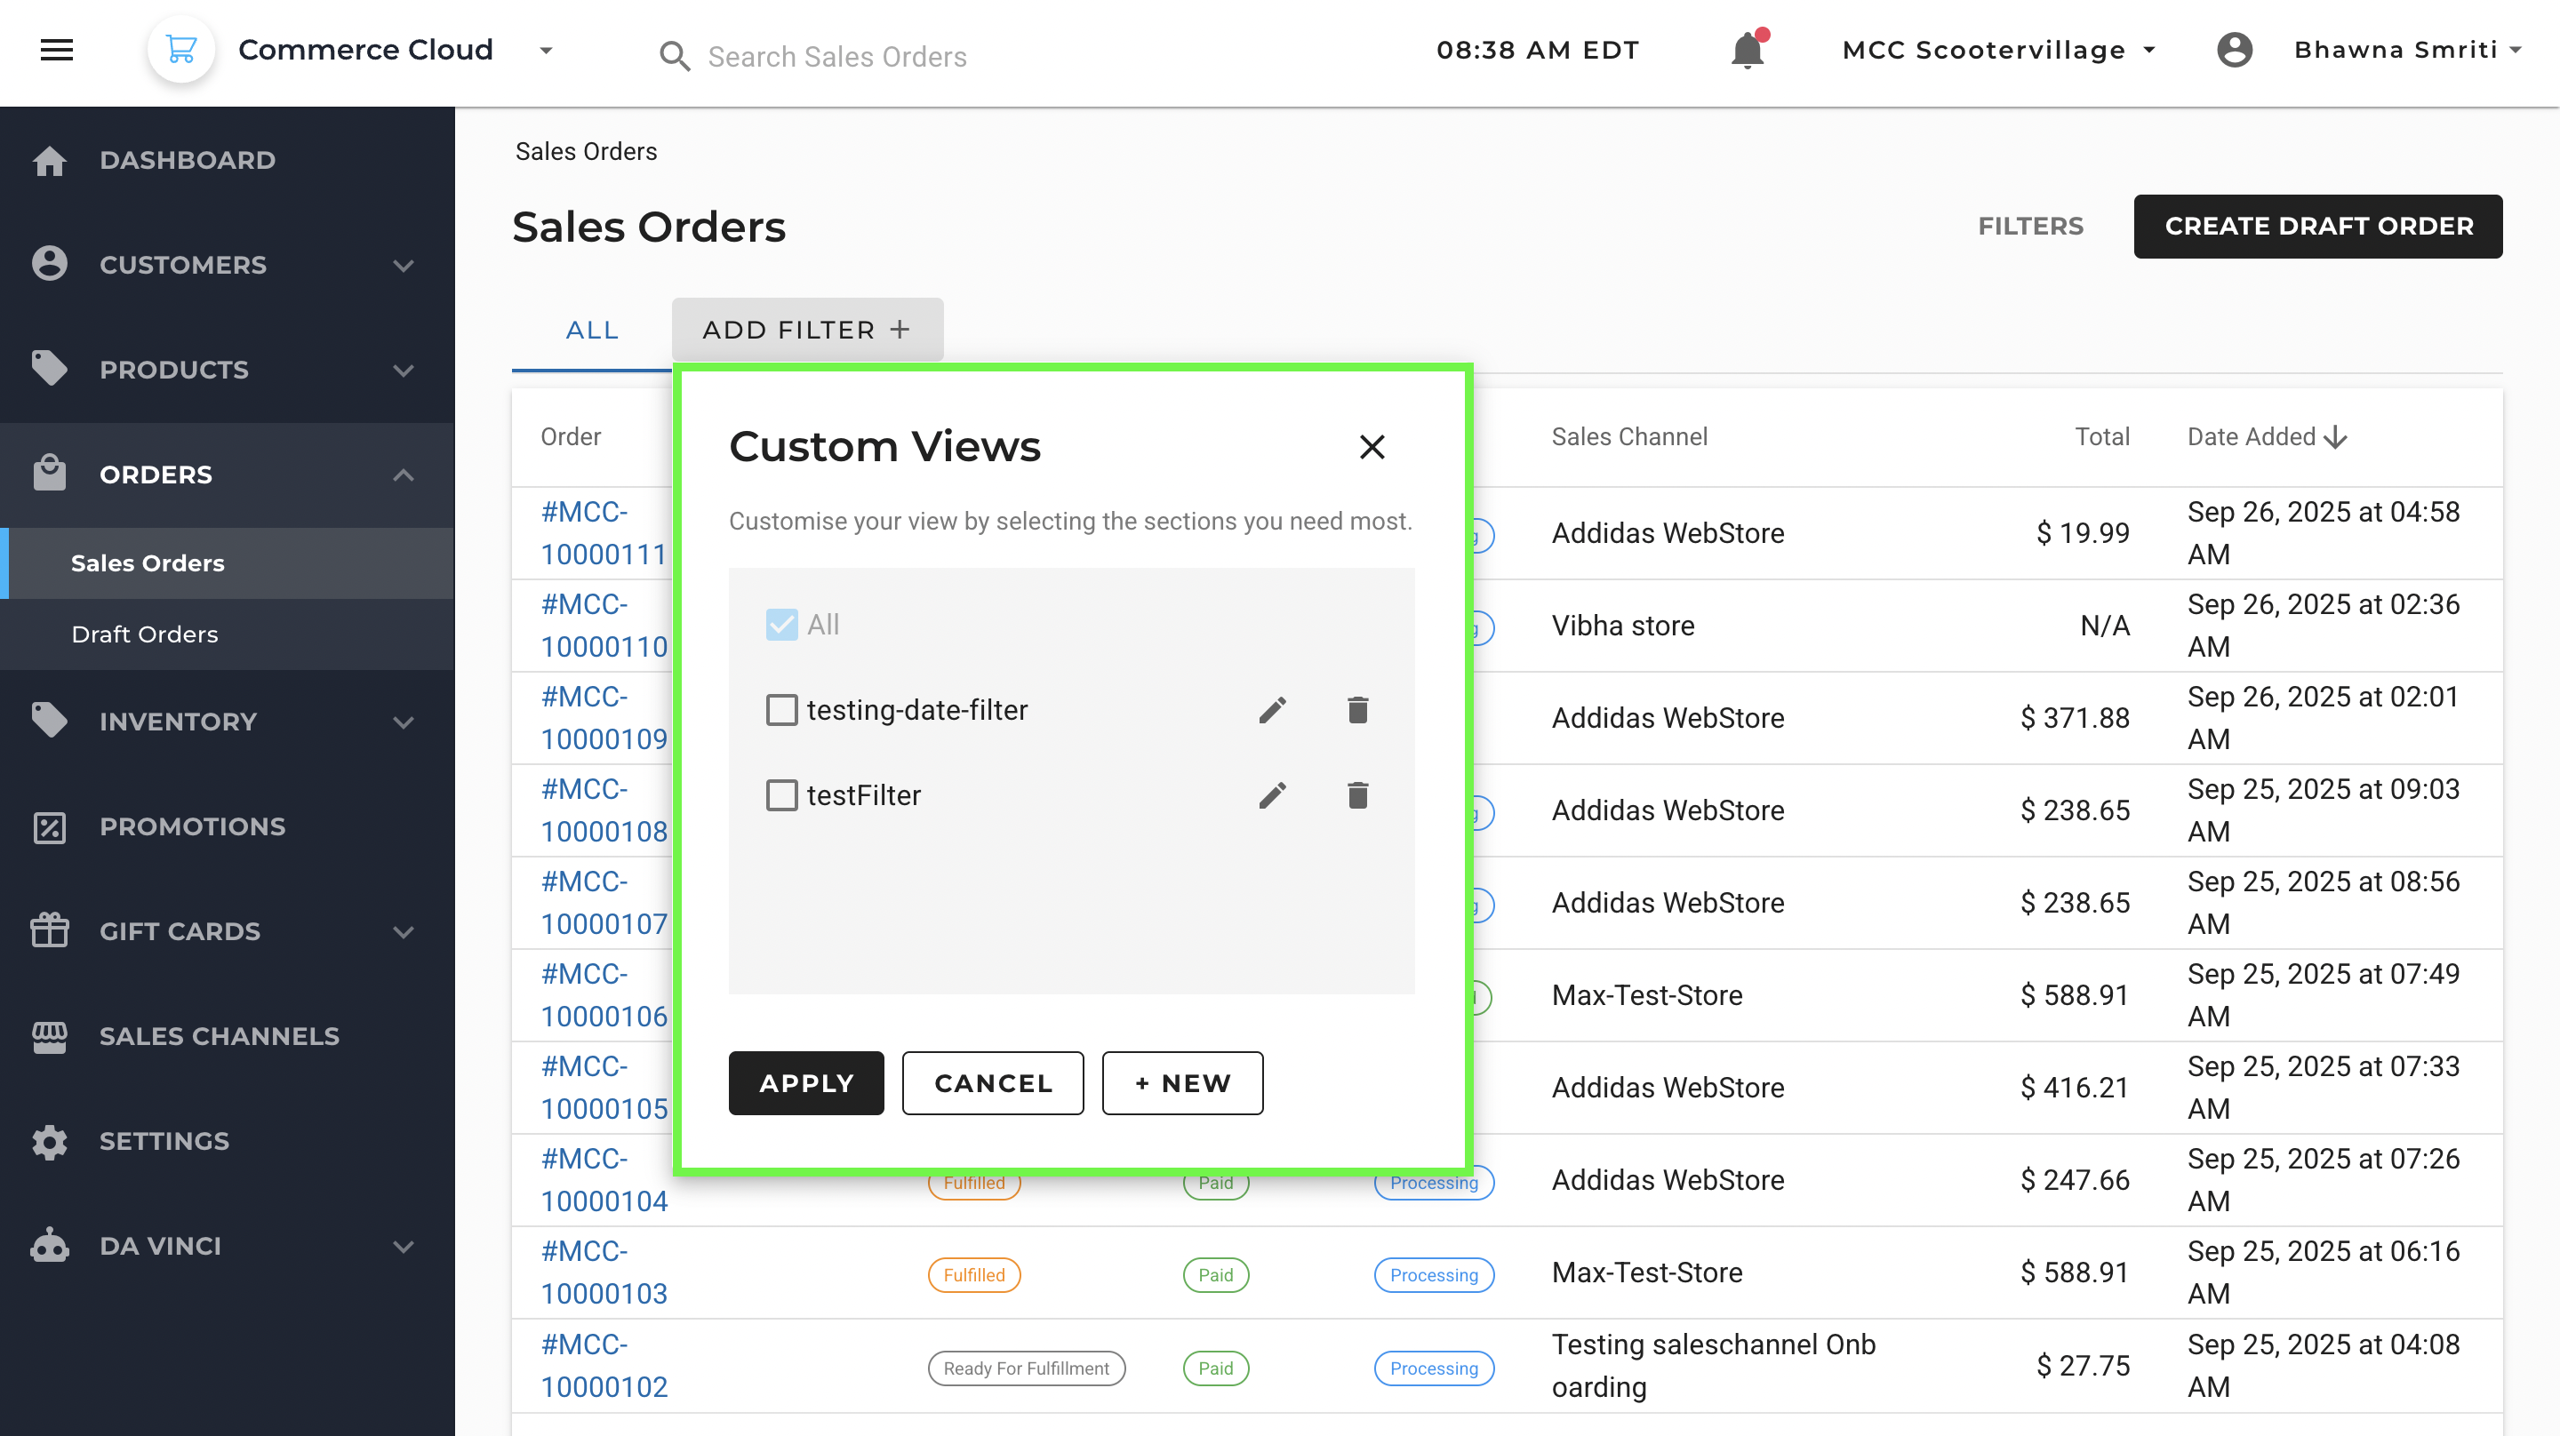
From the Sales Orders page, you can use Add Filter + to narrow results, located near the top of the screen. This opens the Custom Views panel, where you can use saved filter views.
Here, you can:
- Select from existing saved filters
- Edit or delete filters using the pencil 🖉 or trash 🗑️ icons
- Click + NEW to create a new custom filter view
You can also use the FILTERS options beside Create Draft Order to create a new filter.
Access Filter Options
Once you choose + NEW, you’ll be taken to the Filters panel — a section where you can define exactly what criteria should be used to display sales orders.
This panel allows you to narrow down your view to only those orders that match specific business needs or operational conditions.
You can now define filters based on:
- Status
- Payment Status
- Fulfillment Status
- Region
- Sales Channel
- Start Date / End Date
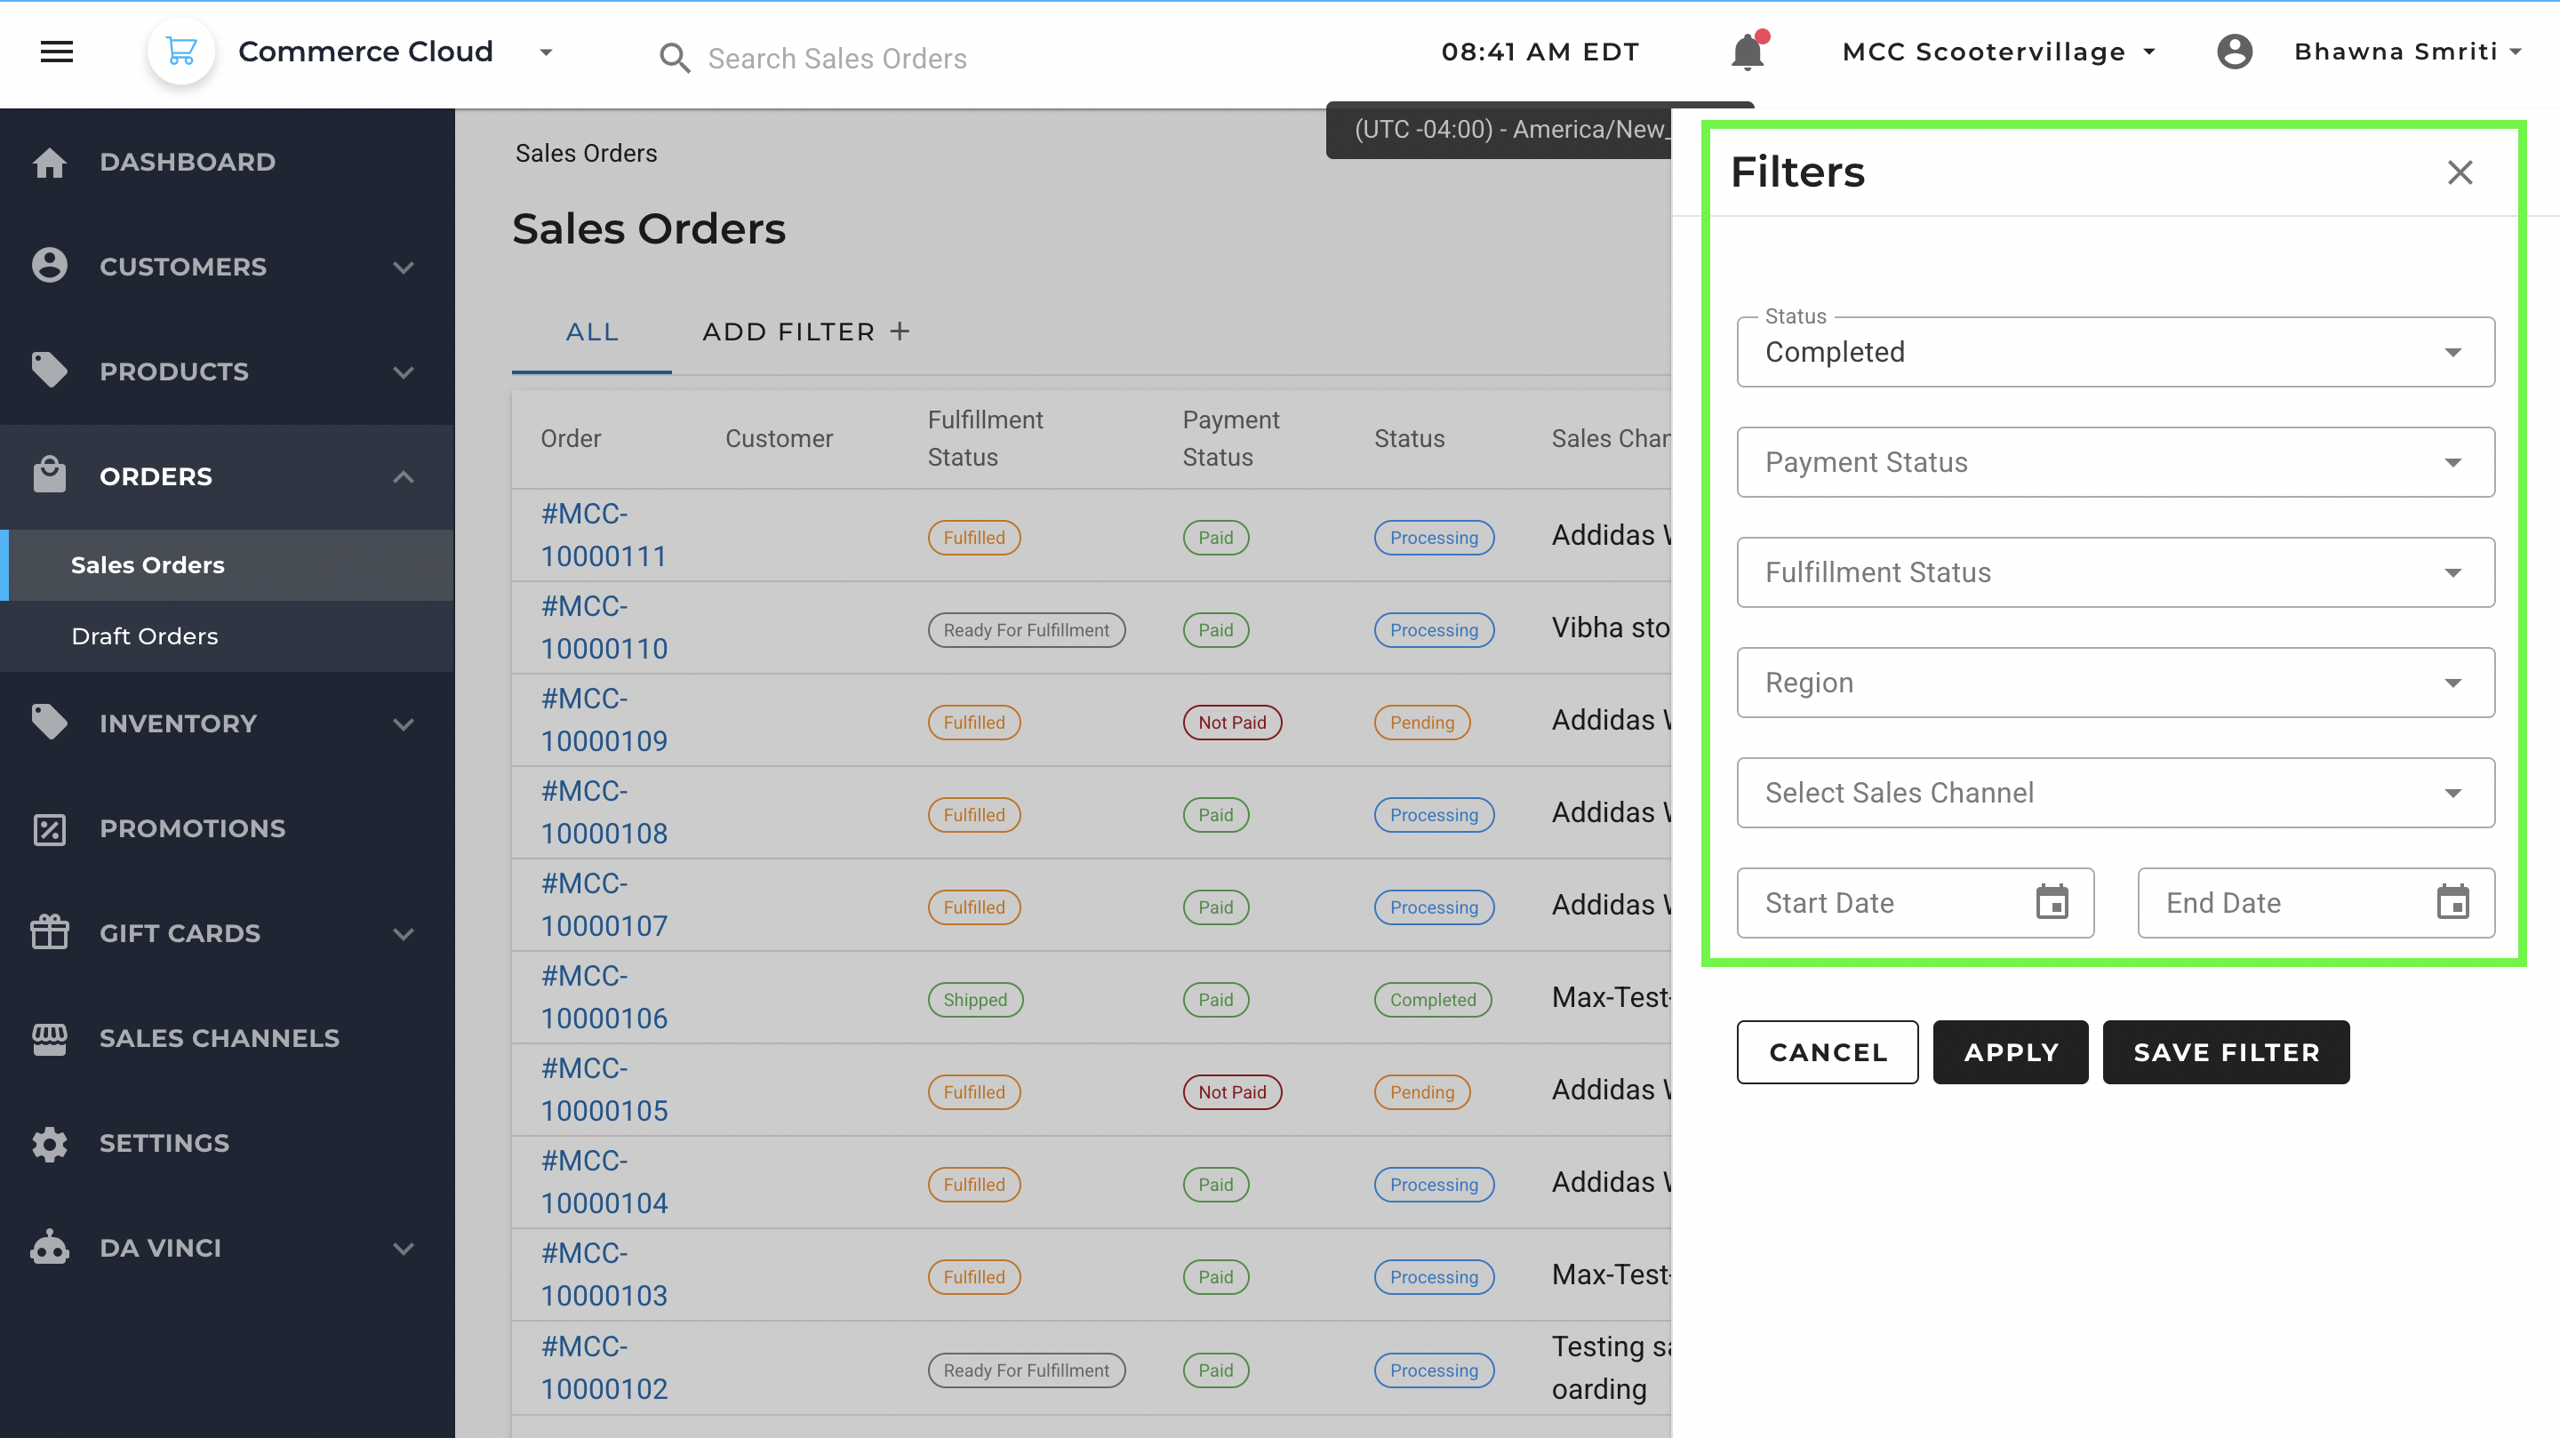
Use these filters to narrow down the order list based on specific conditions. After setting the filters, you can either:
- Apply them for one-time use, or
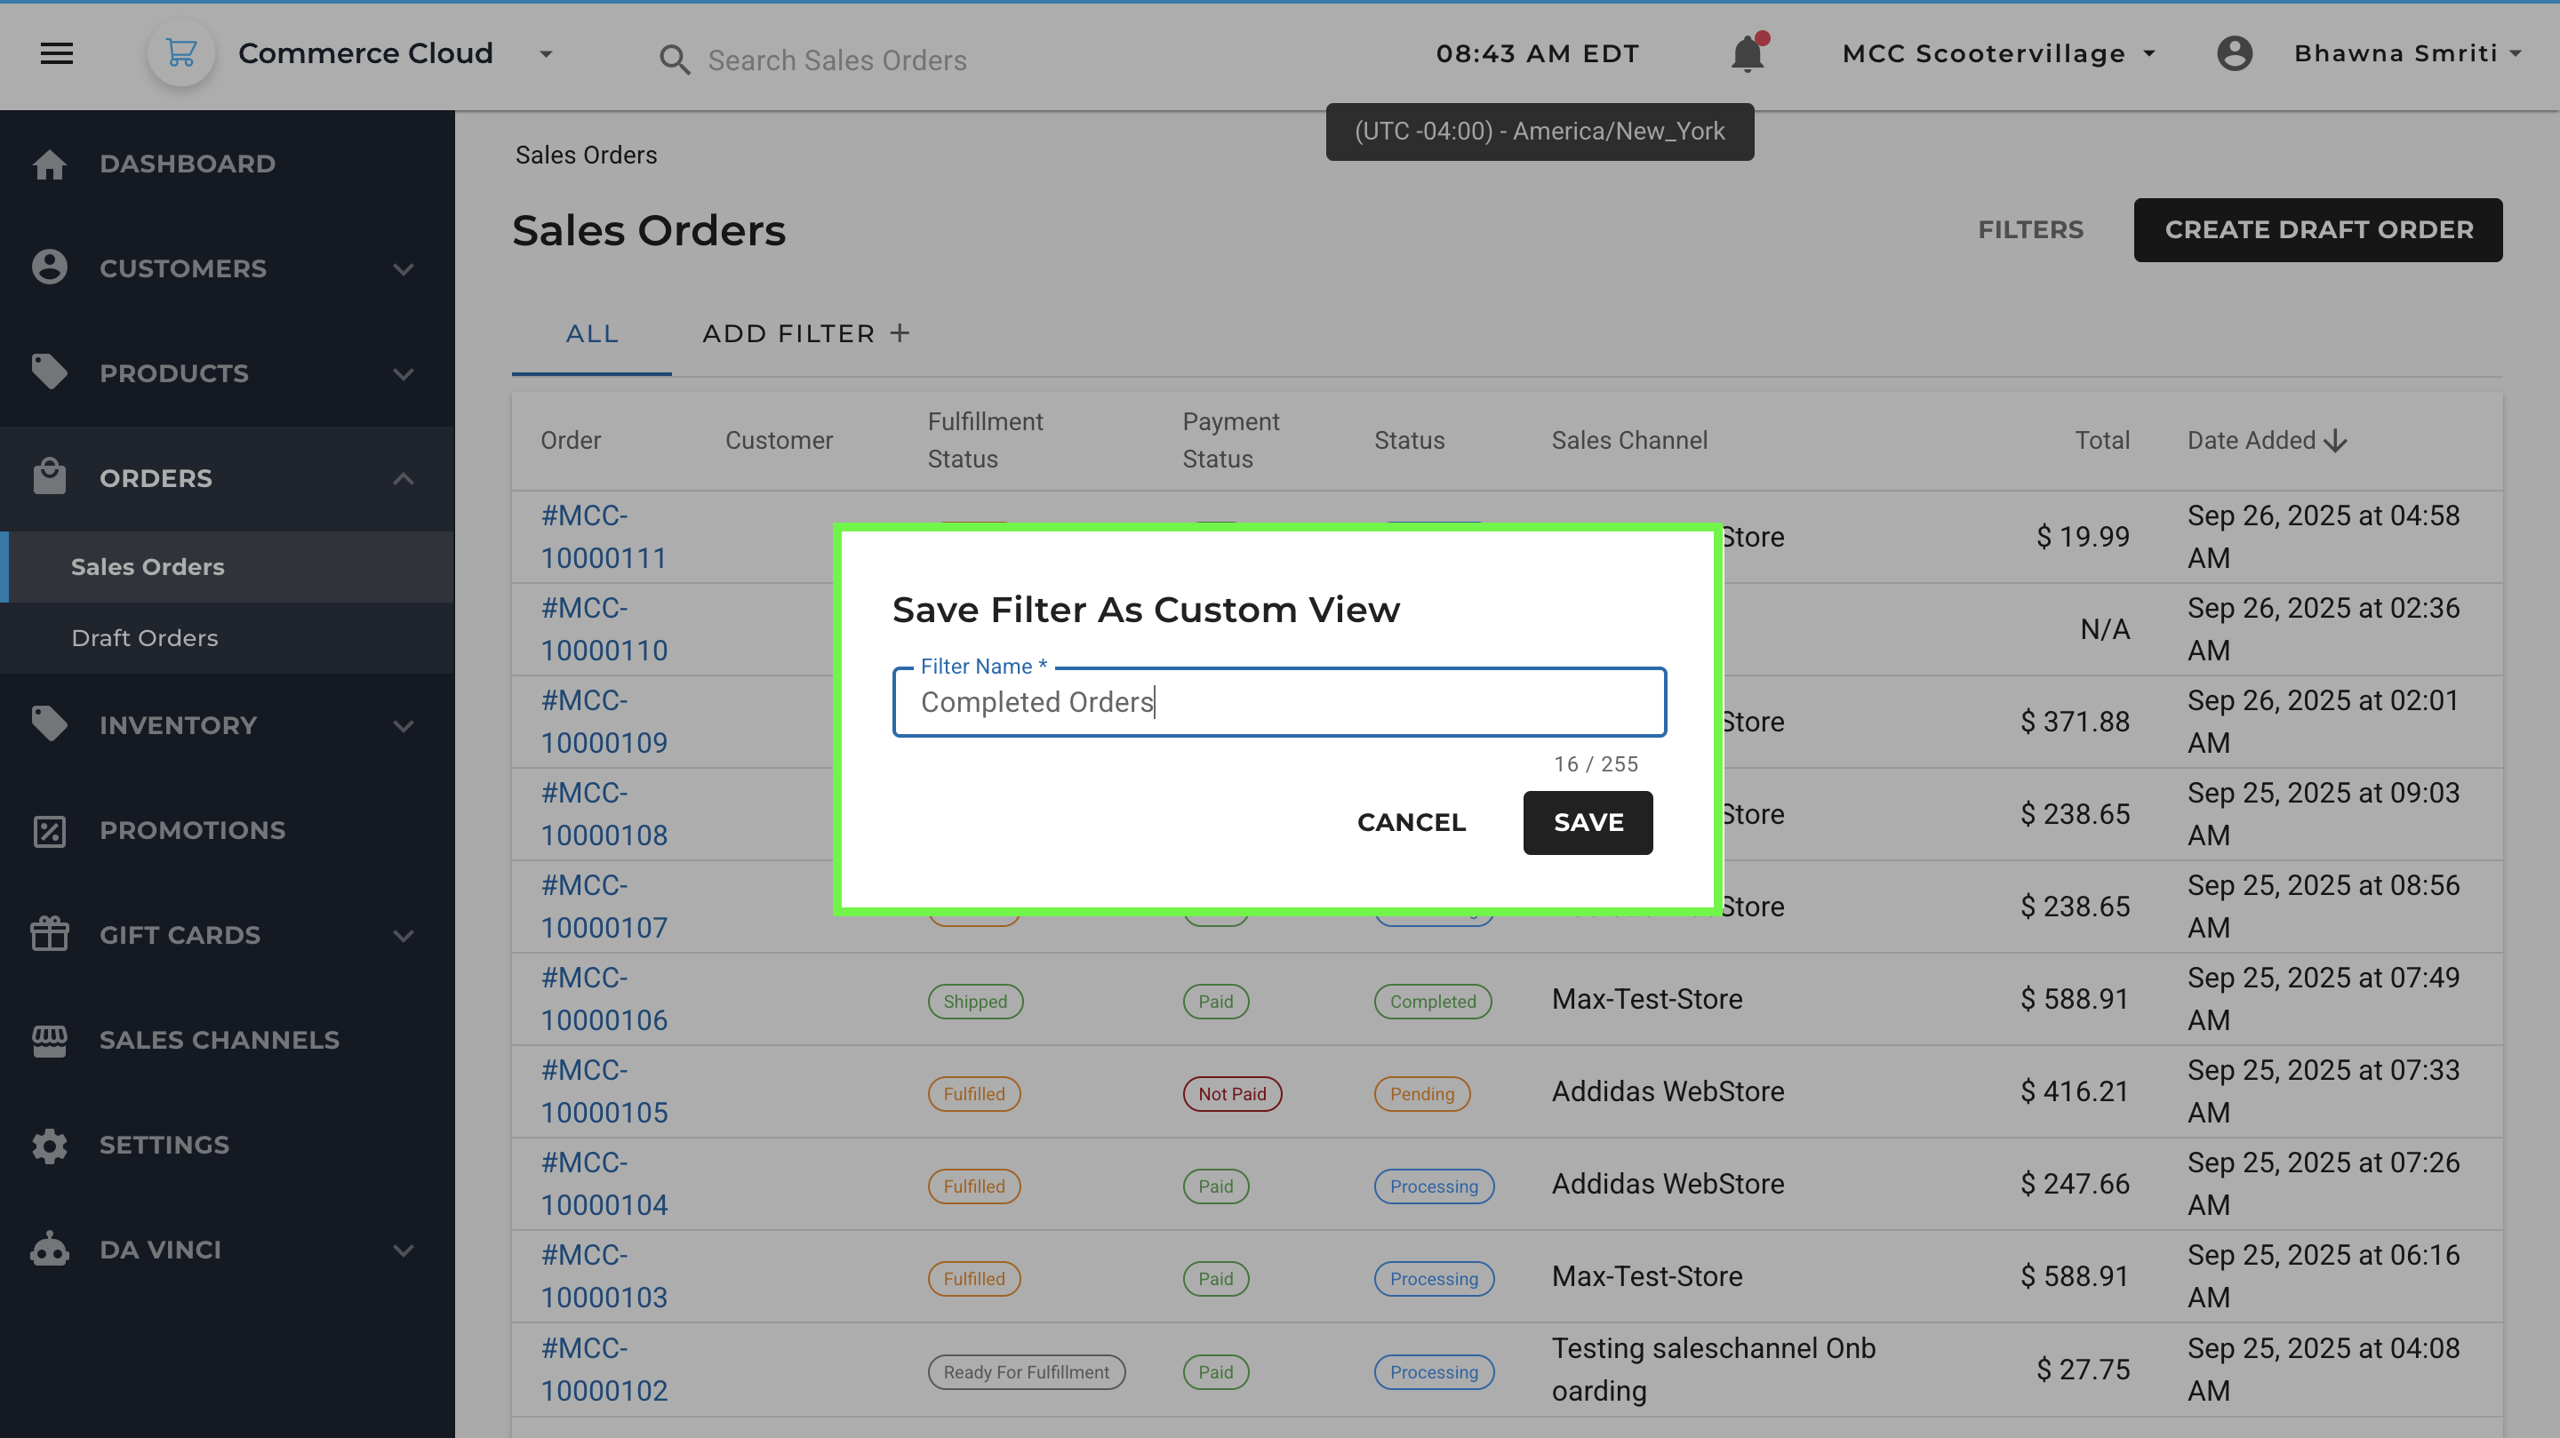
- Save Filter by naming them, to store them as a reusable view under Custom Views.

Once the filter is saved as Custom View, you will be redirected to the default view page and a notification will appear at the top for “View Created Successfully”.
After successful creation of the Custom view, the filter will be visible under the Custom View filters.