Reply Templates are predefined messages that an agent can create and utilize as a form of communication while replying to a ticket. Such automated responses help reduce messaging time and help in interacting with customers more effectively.
Creating reply templates is quite easy and hassle-free. You and other agents can create such responses and use them while replying to a client’s ticket.
Steps to Create a Reply Template
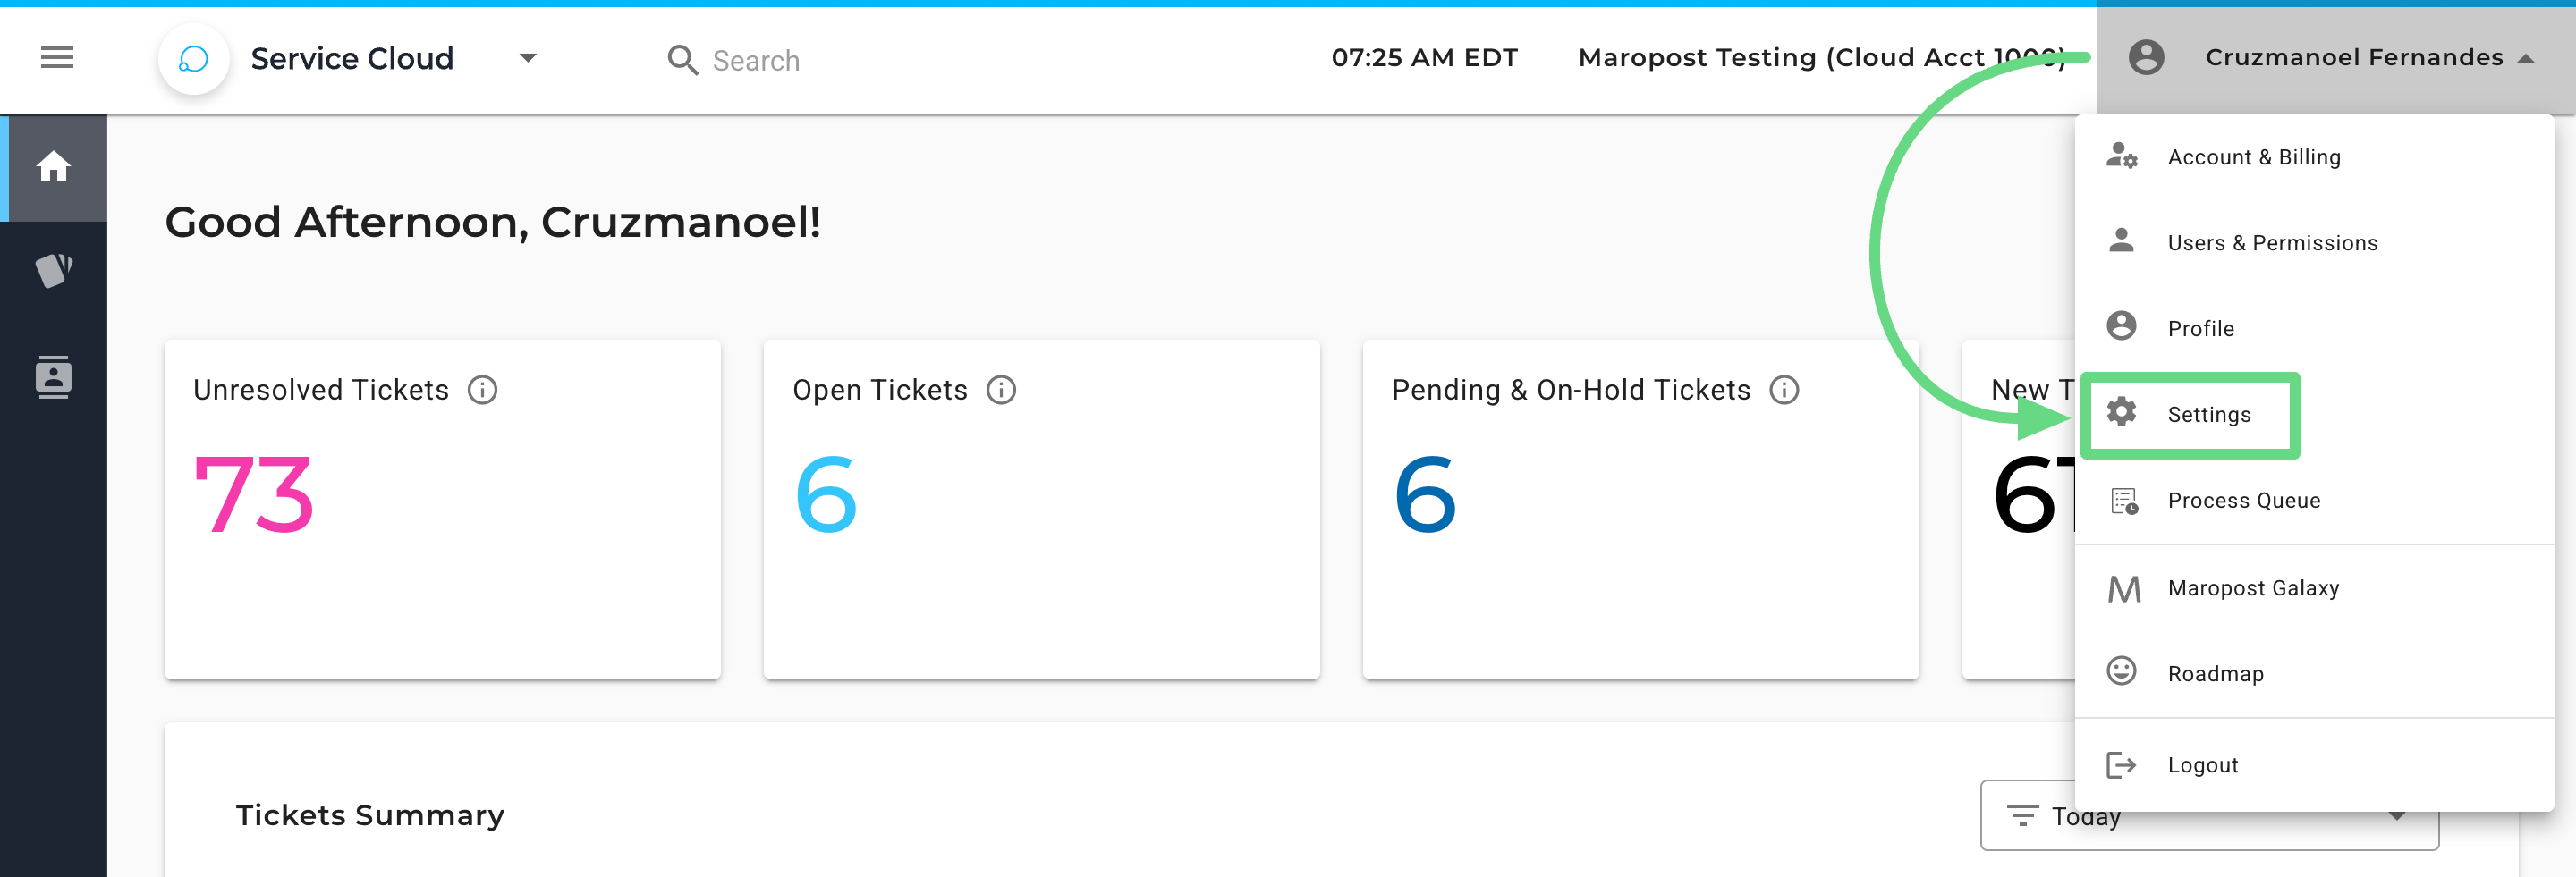
1. Log in to your Service Cloud account, then click the user profile menu at the top of the application bar and choose Settings.
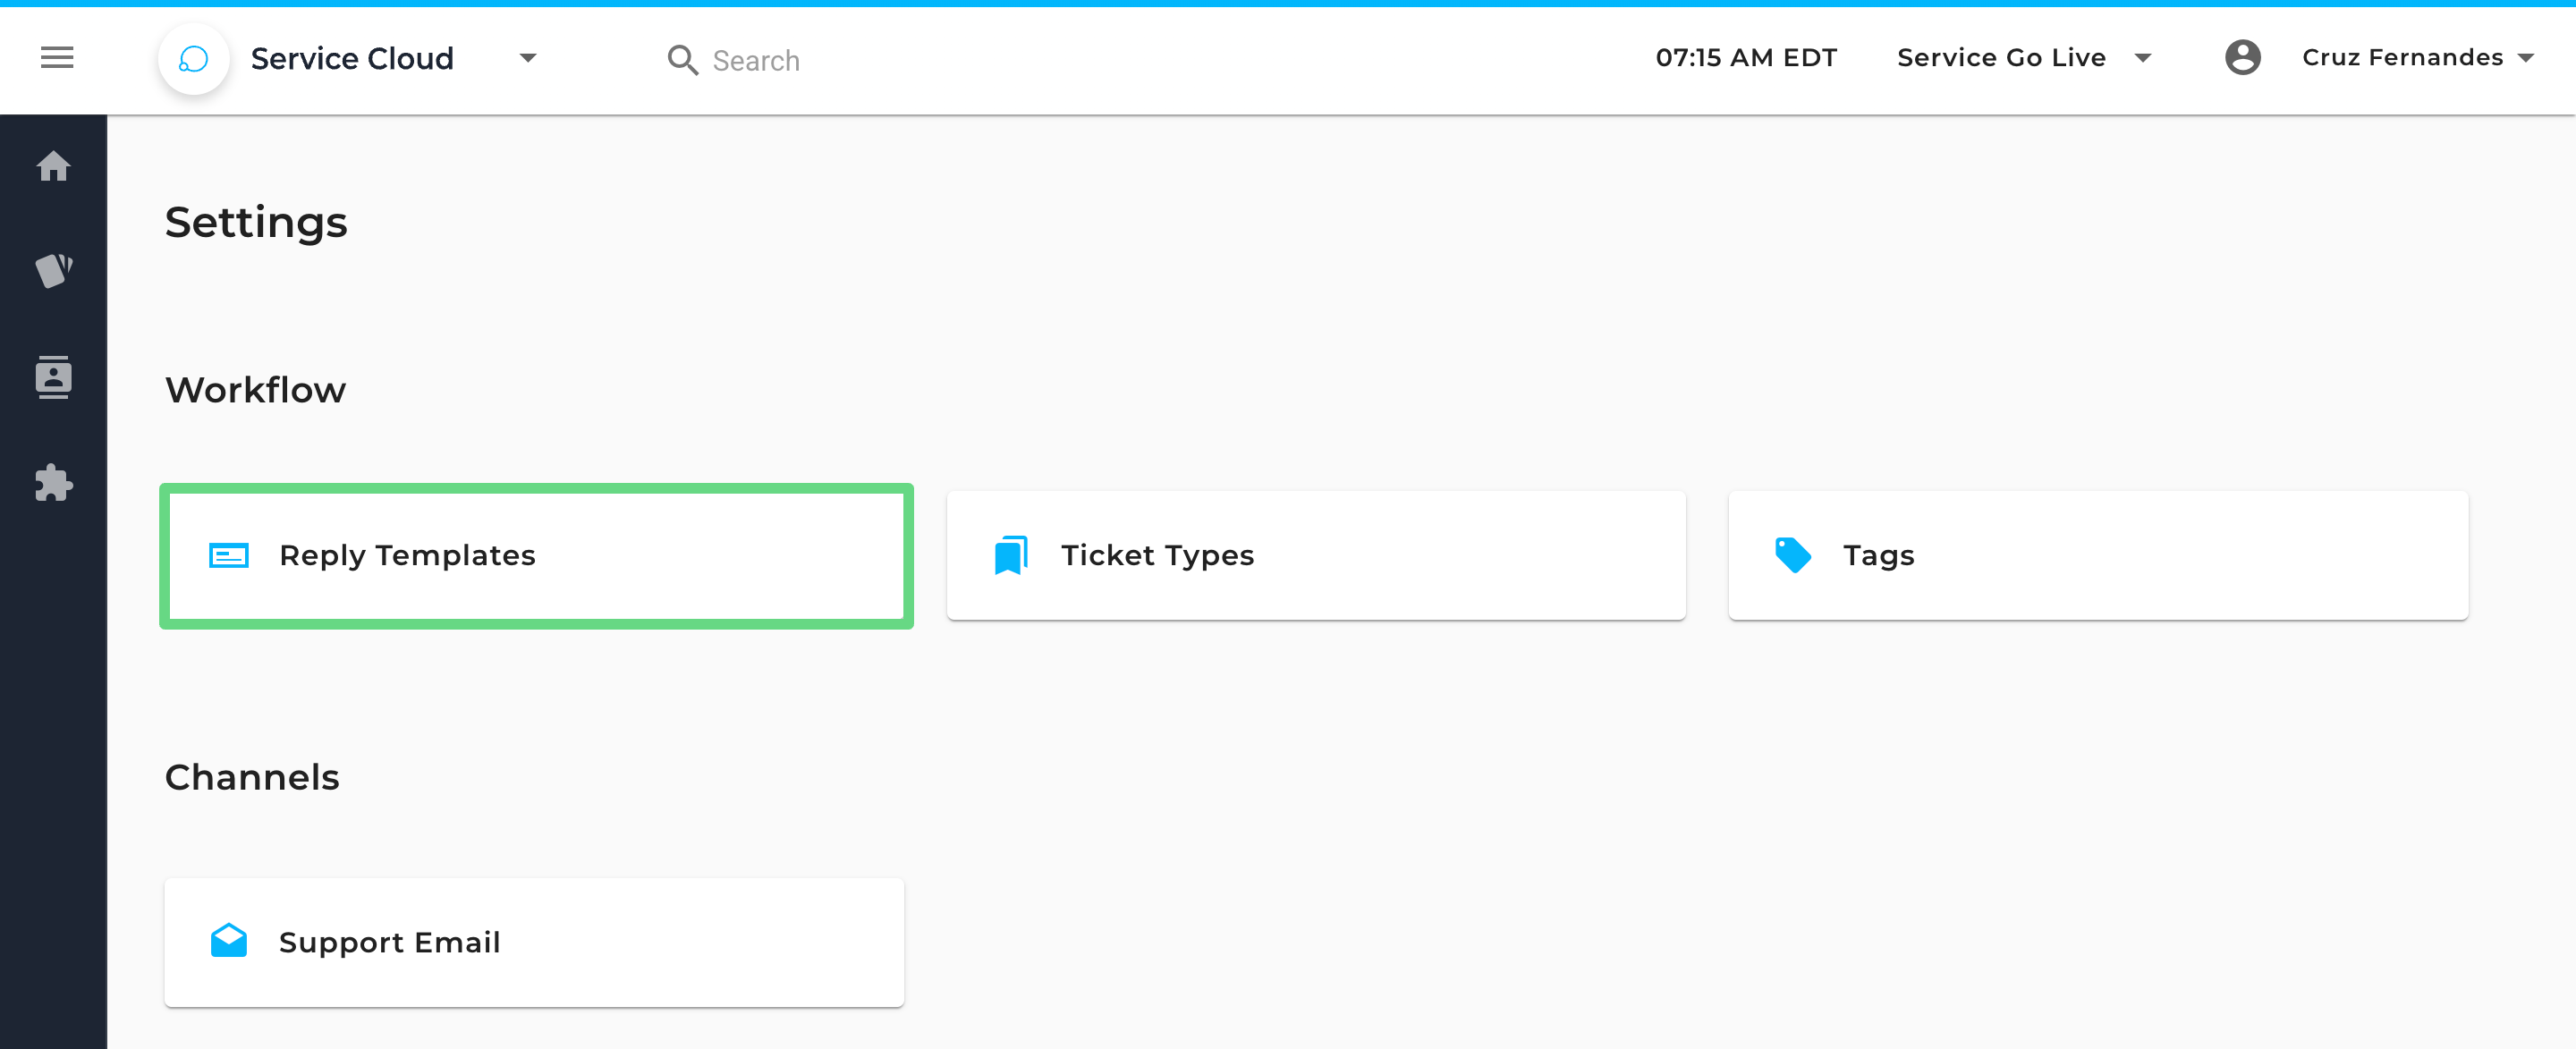
2. On the Settings page, select Reply Templates.
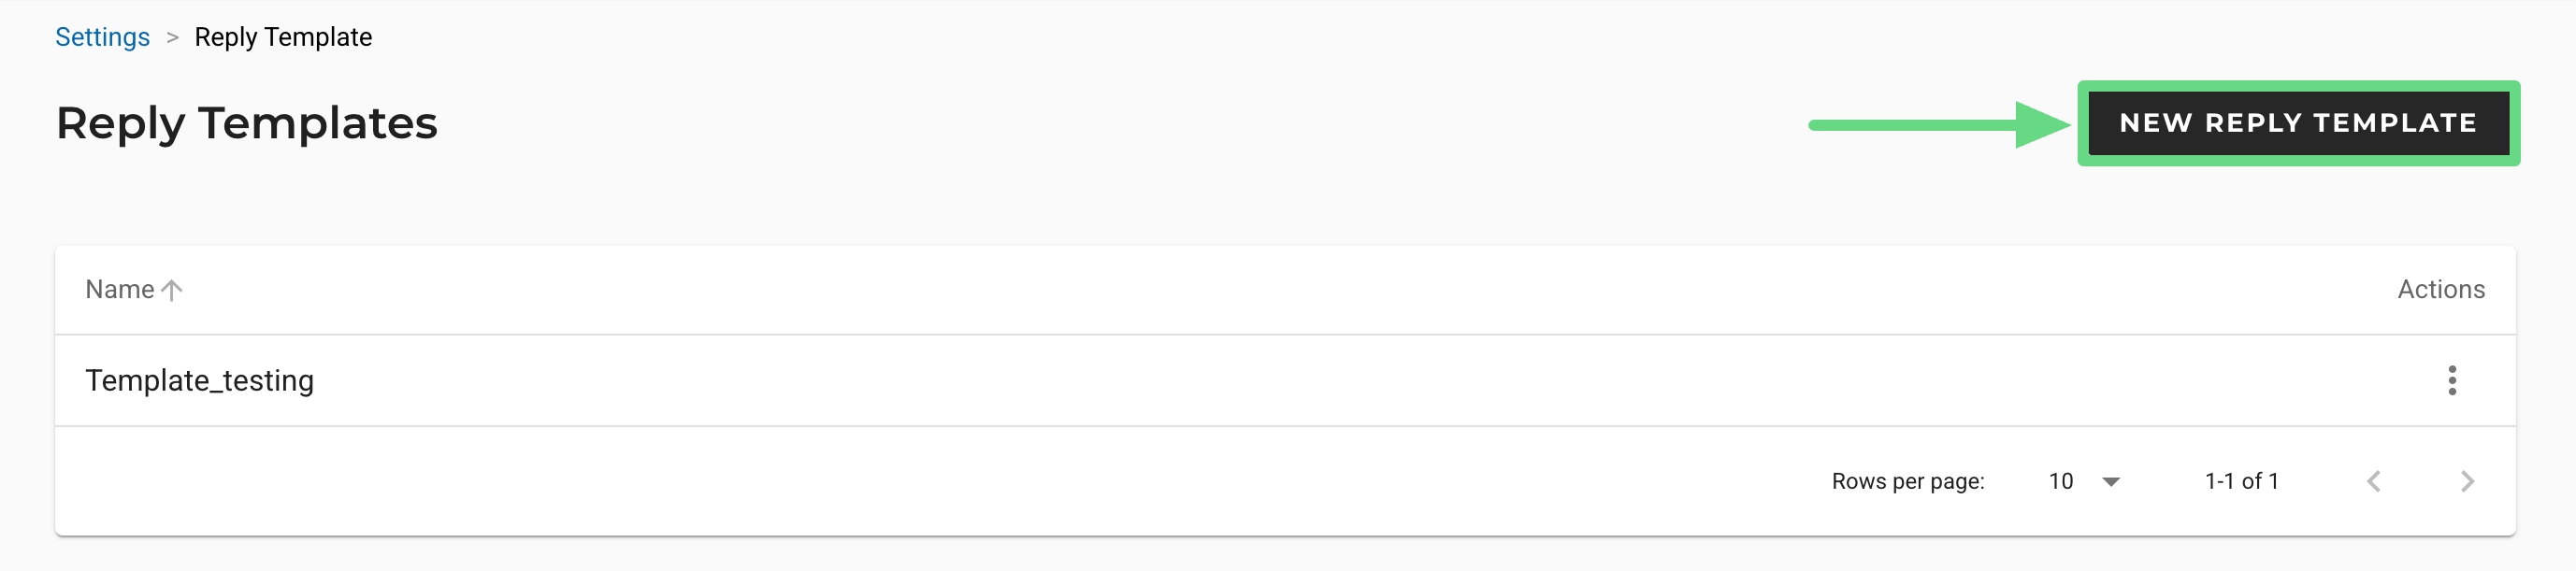
3. To create responses, click the New Reply Template.
4. Under the New Reply Template slider, enter the details that the replies will contain. Such templates will contain the following fields:
- Template Name: Enter a title for the new reply template.
- Response Message: Enter a pre-saved response that you and your agents can use while replying to a ticket.
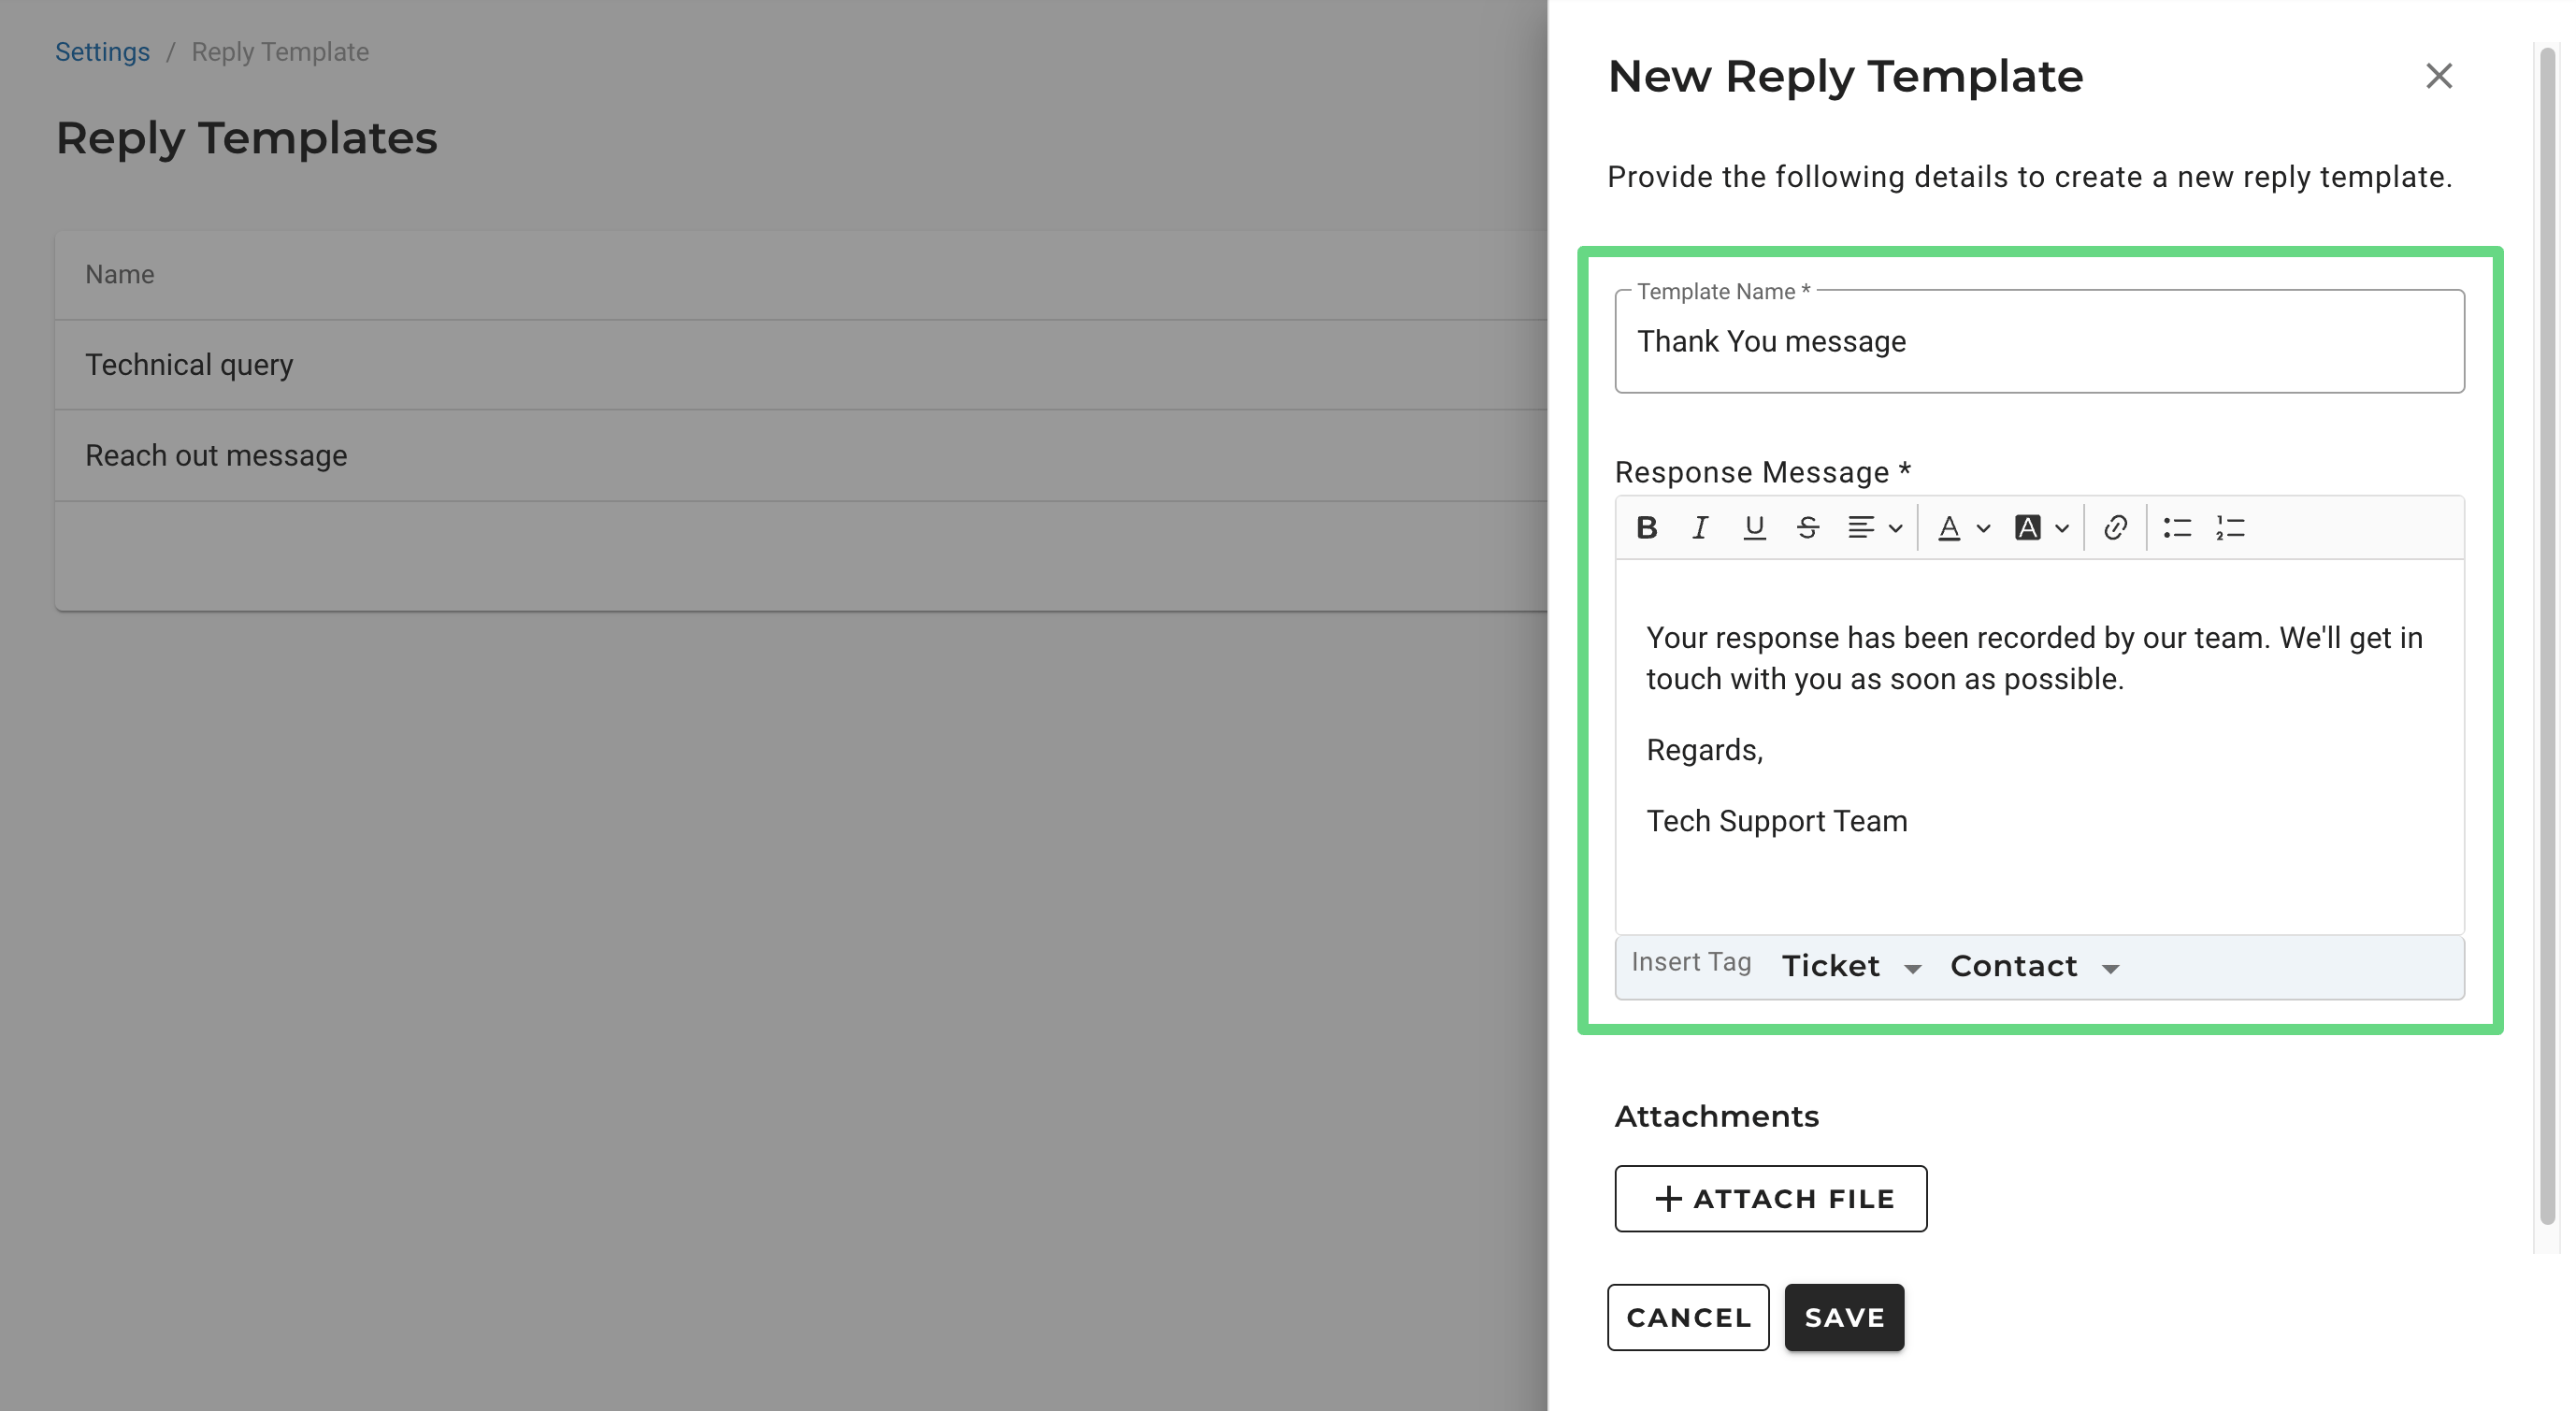
Note: Template title and Response Message are mandatory fields to be entered.
5. Optionally, you can use the Insert Tag drop-down field to include tags in the reply template. This is helpful since it adds more information and context to your tickets.

Note: Taglines include basic ticket and agent-related contact details that can be inserted into the pre-saved replies.
6. Additionally, agents can upload documents, images, or brochures with the help of the Attachment tool while creating a template.

Important Note: Attachments need to be uploaded in JPG, PNG, PDF, and DOC formats only.
7. Save your template.

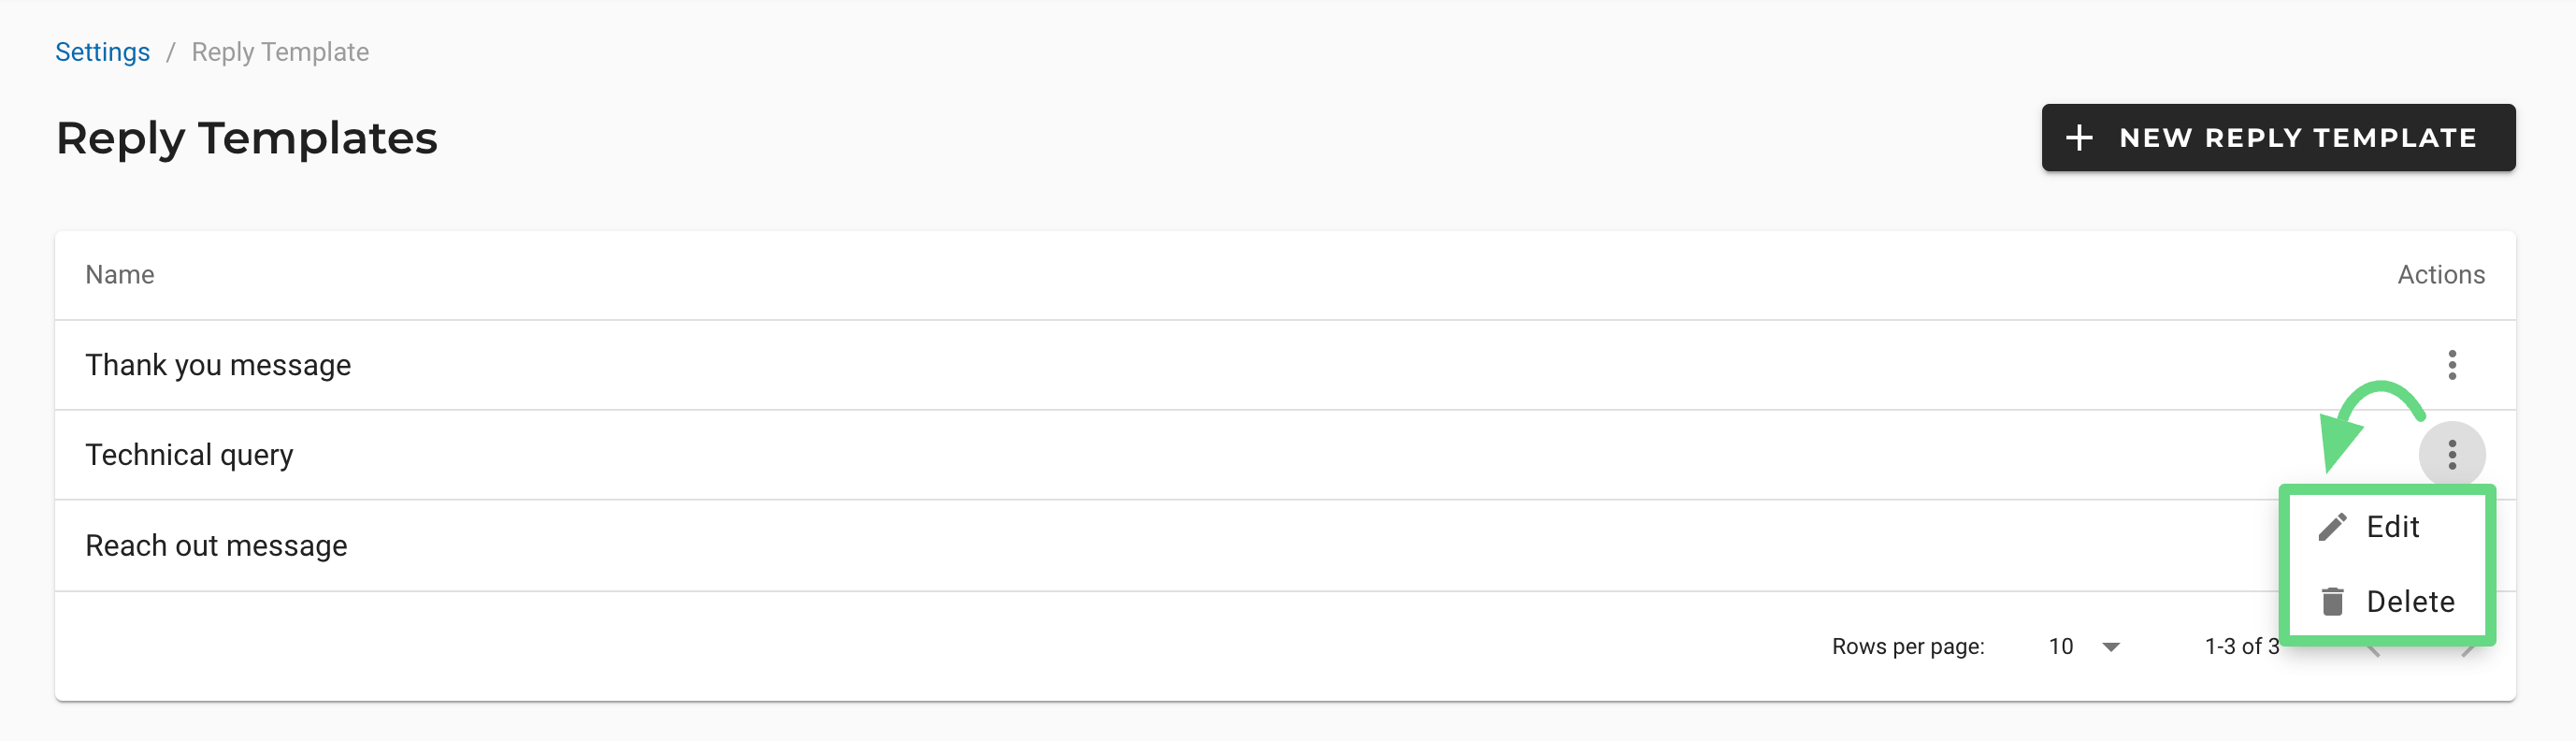
8. Agents can view their pre-saved responses on the Reply Templates Index page. The Service Cloud provides agents the option to either edit their saved templates or discard them.
Using Reply Templates
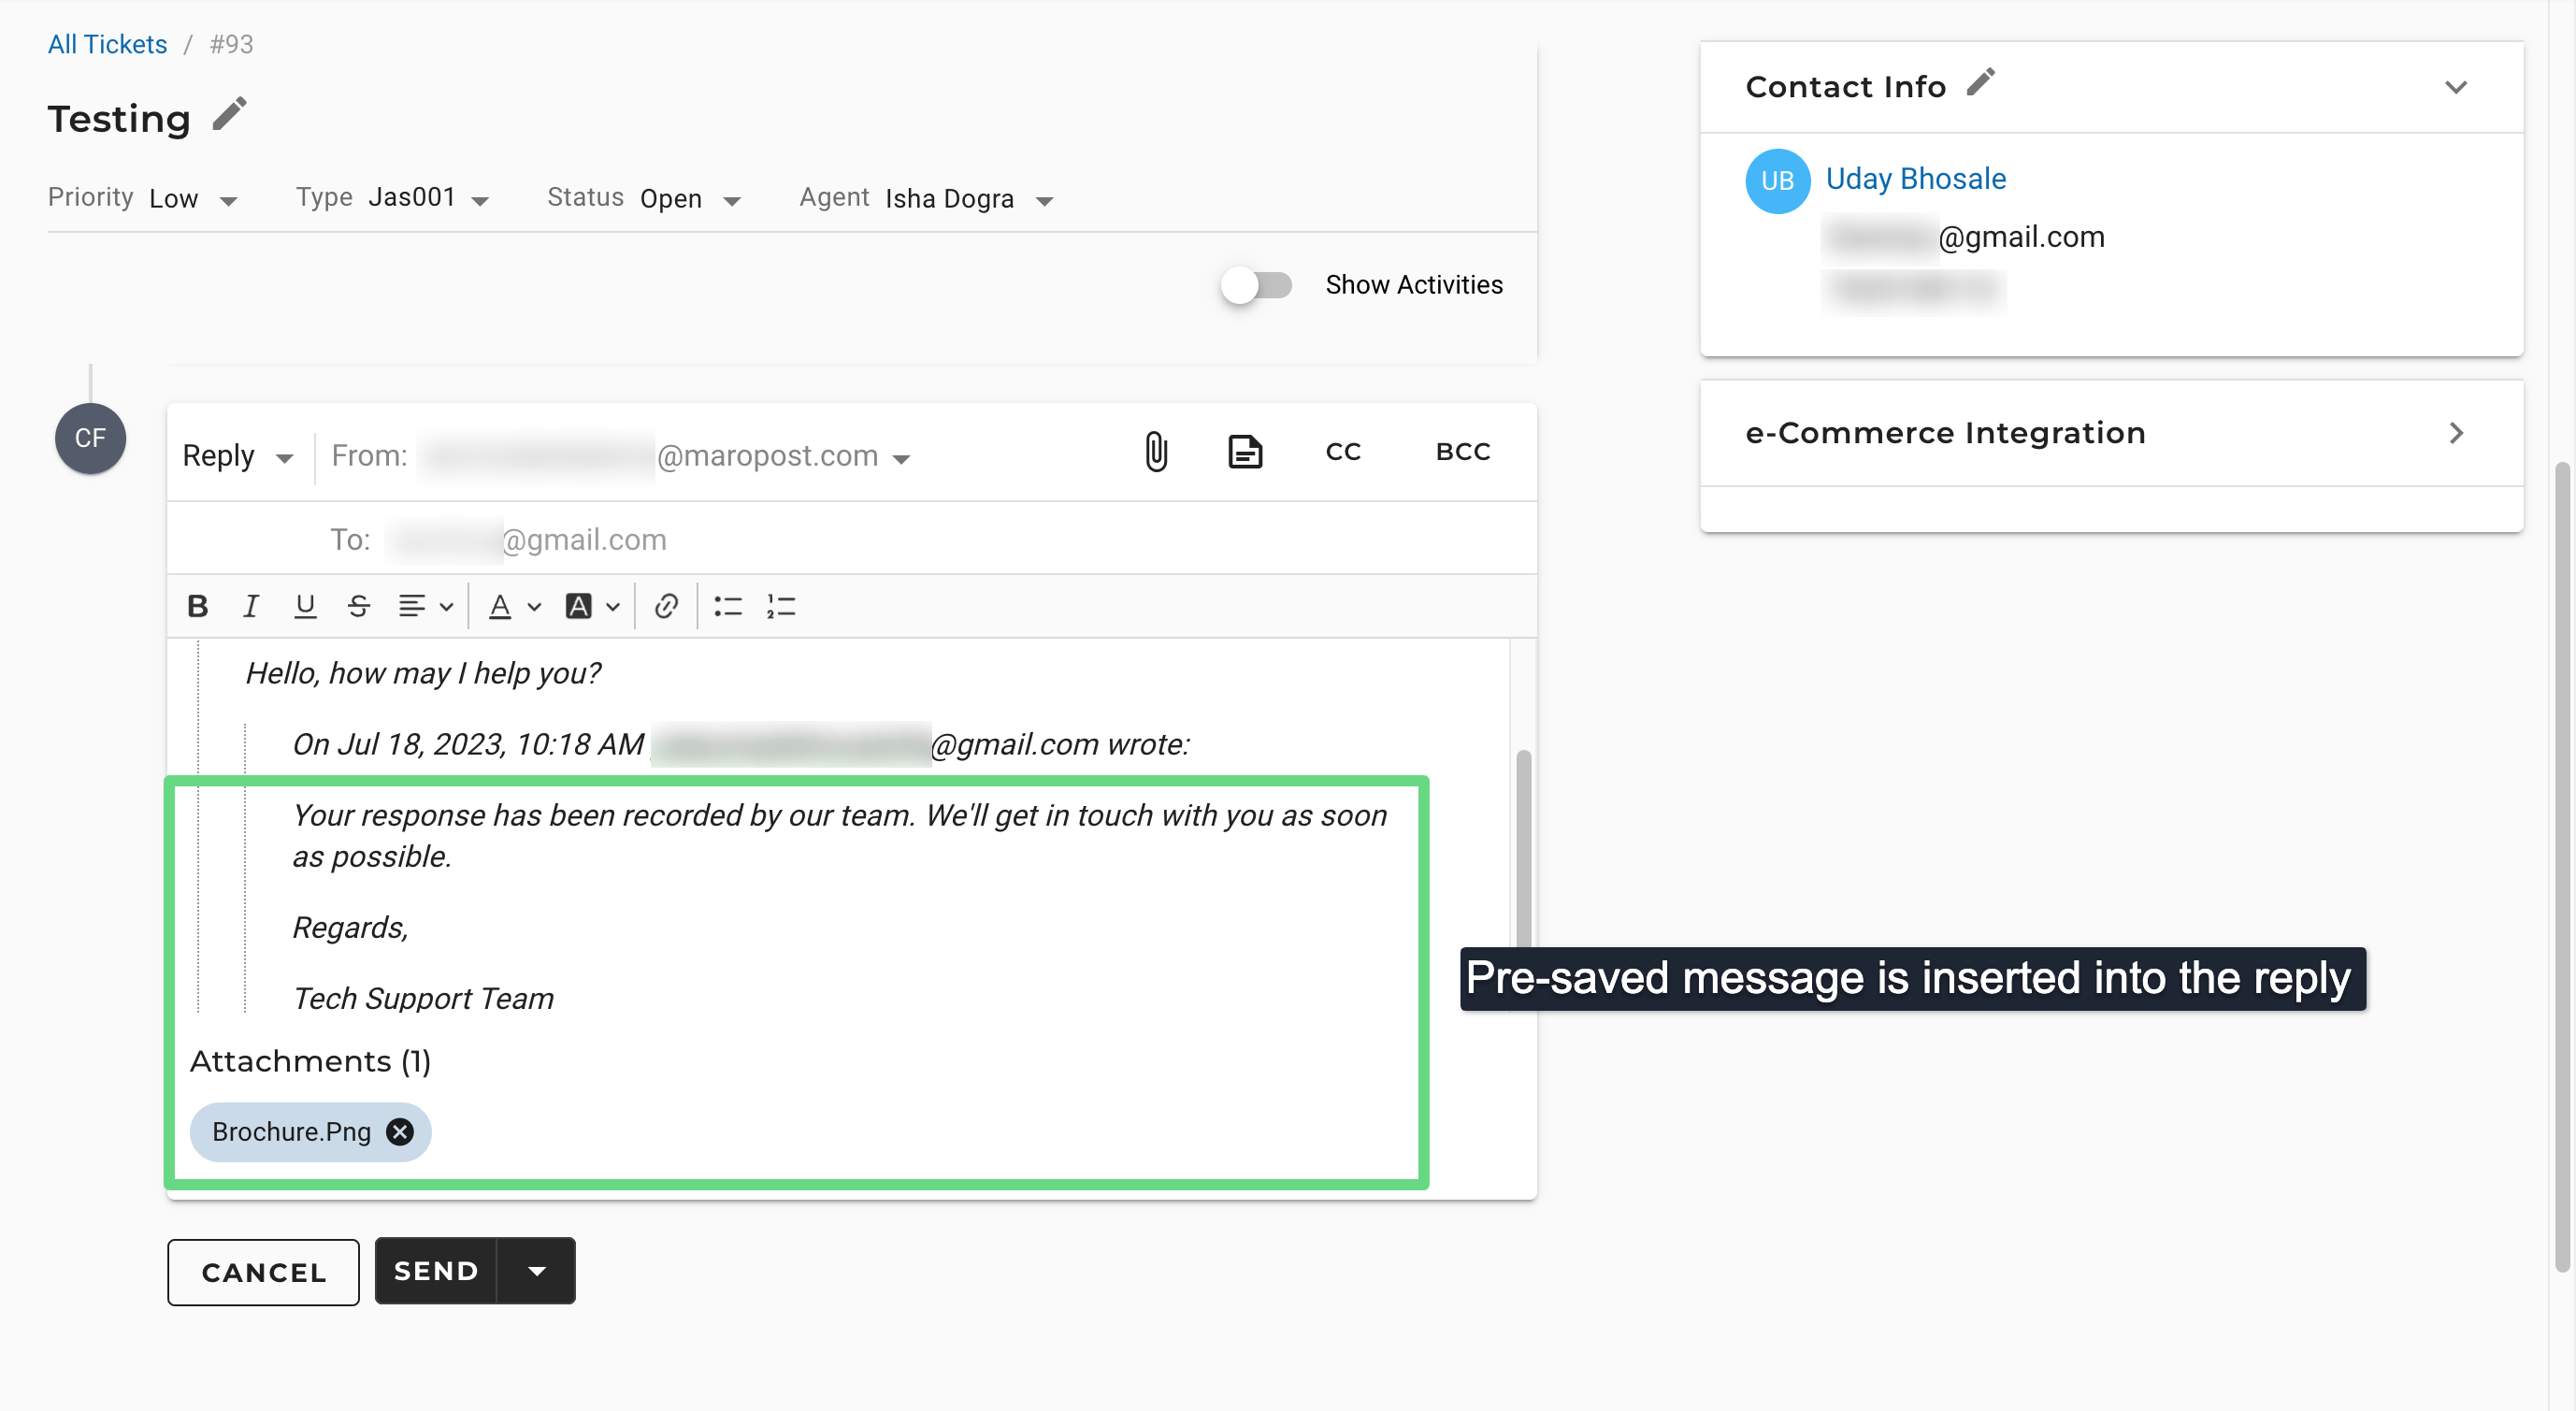
1. These templates are normally used by agents while they are replying to a ticket. Agents can simply click on the Reply Templates icon >> search and select a template from the list that is displayed >> and insert the response template into the reply to textbox.
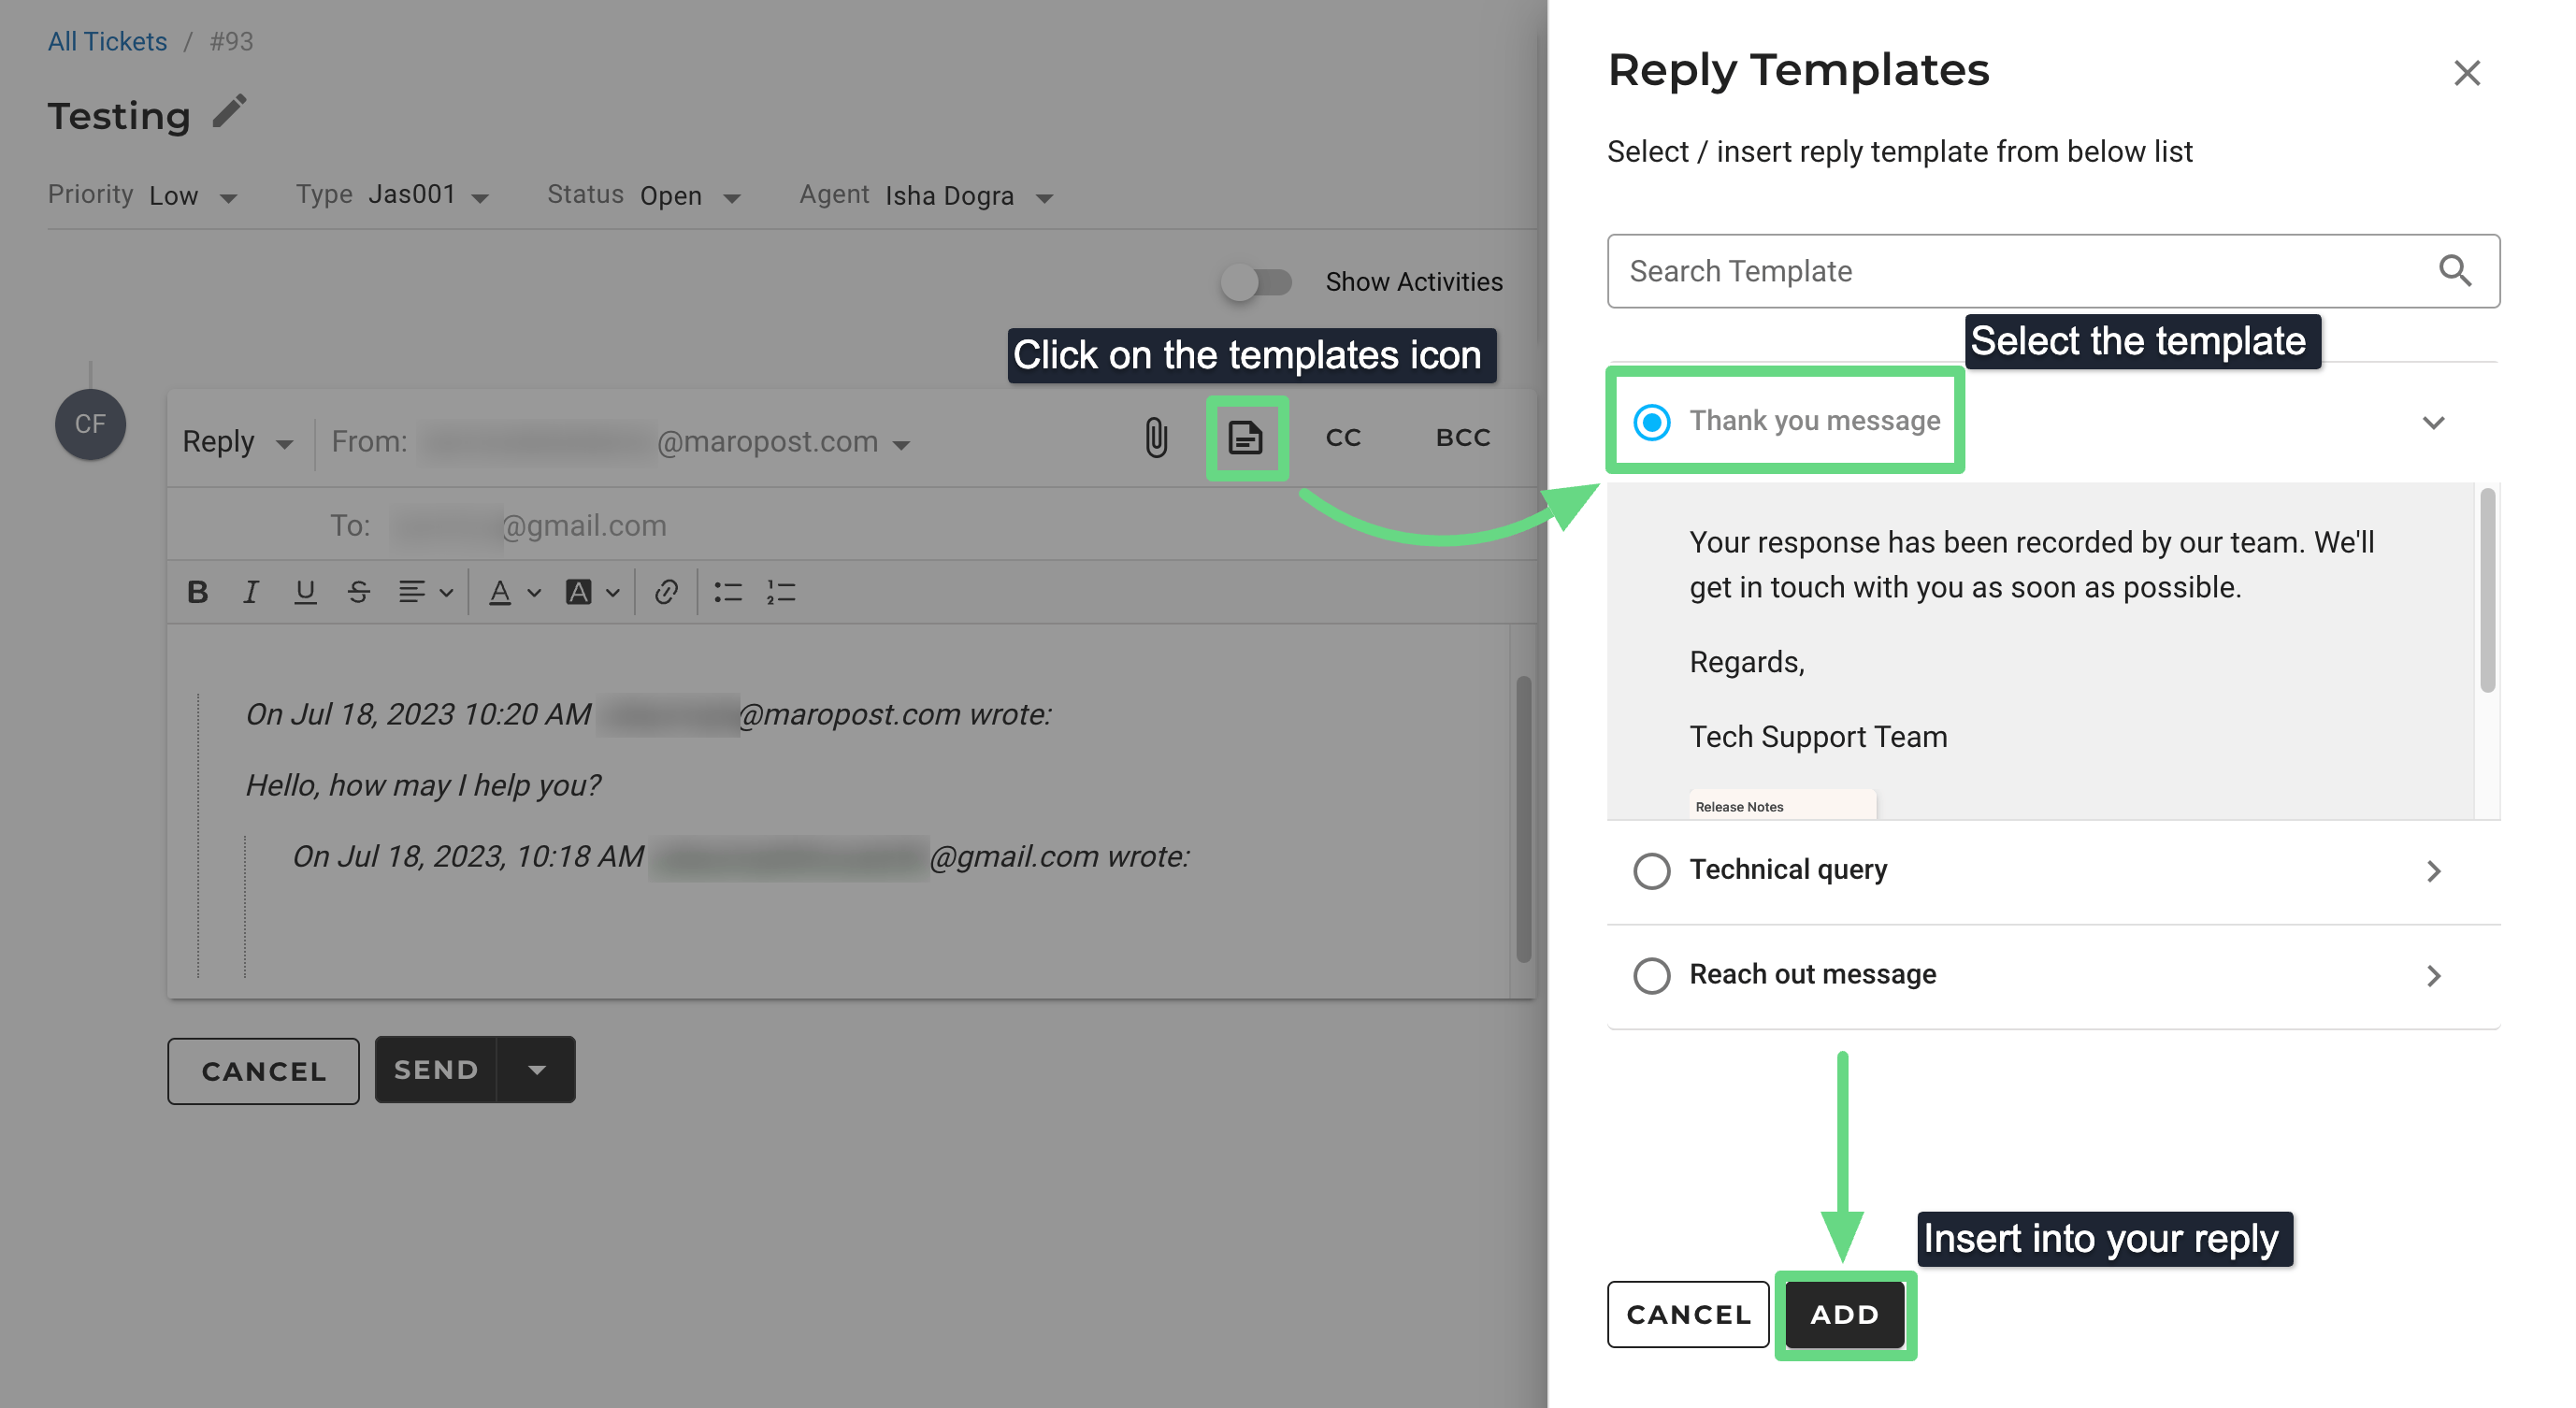
2. The pre-saved information and attachments will be displayed in your replies.