You can create tickets automatically from incoming customer emails or manually for phone and walk-in requests, ensuring every customer inquiry is properly tracked and managed. This helps maintain consistent service quality by capturing all customer interactions in a centralized system where agents can work on them efficiently.
Setting up automatic ticket creation from support email addresses streamlines your workflow and reduces manual data entry, while manual ticket creation ensures phone and walk-in requests receive the same level of attention. This unified approach to ticket management helps improve response time and ensures no customer inquiry falls through the cracks.
Service Cloud supports both automatic and manual ticket creation.
You can set up your email address in Service Cloud so that any incoming customer query or complaint is automatically created as a ticket. To learn about setting up your support email addresses, see Setting Up Support Email Addresses.
You can also create tickets manually for any walk-ins or over-the-phone requests by simply filling out a form.
Creating a Ticket Manually
To create a new ticket manually, follow the steps below:
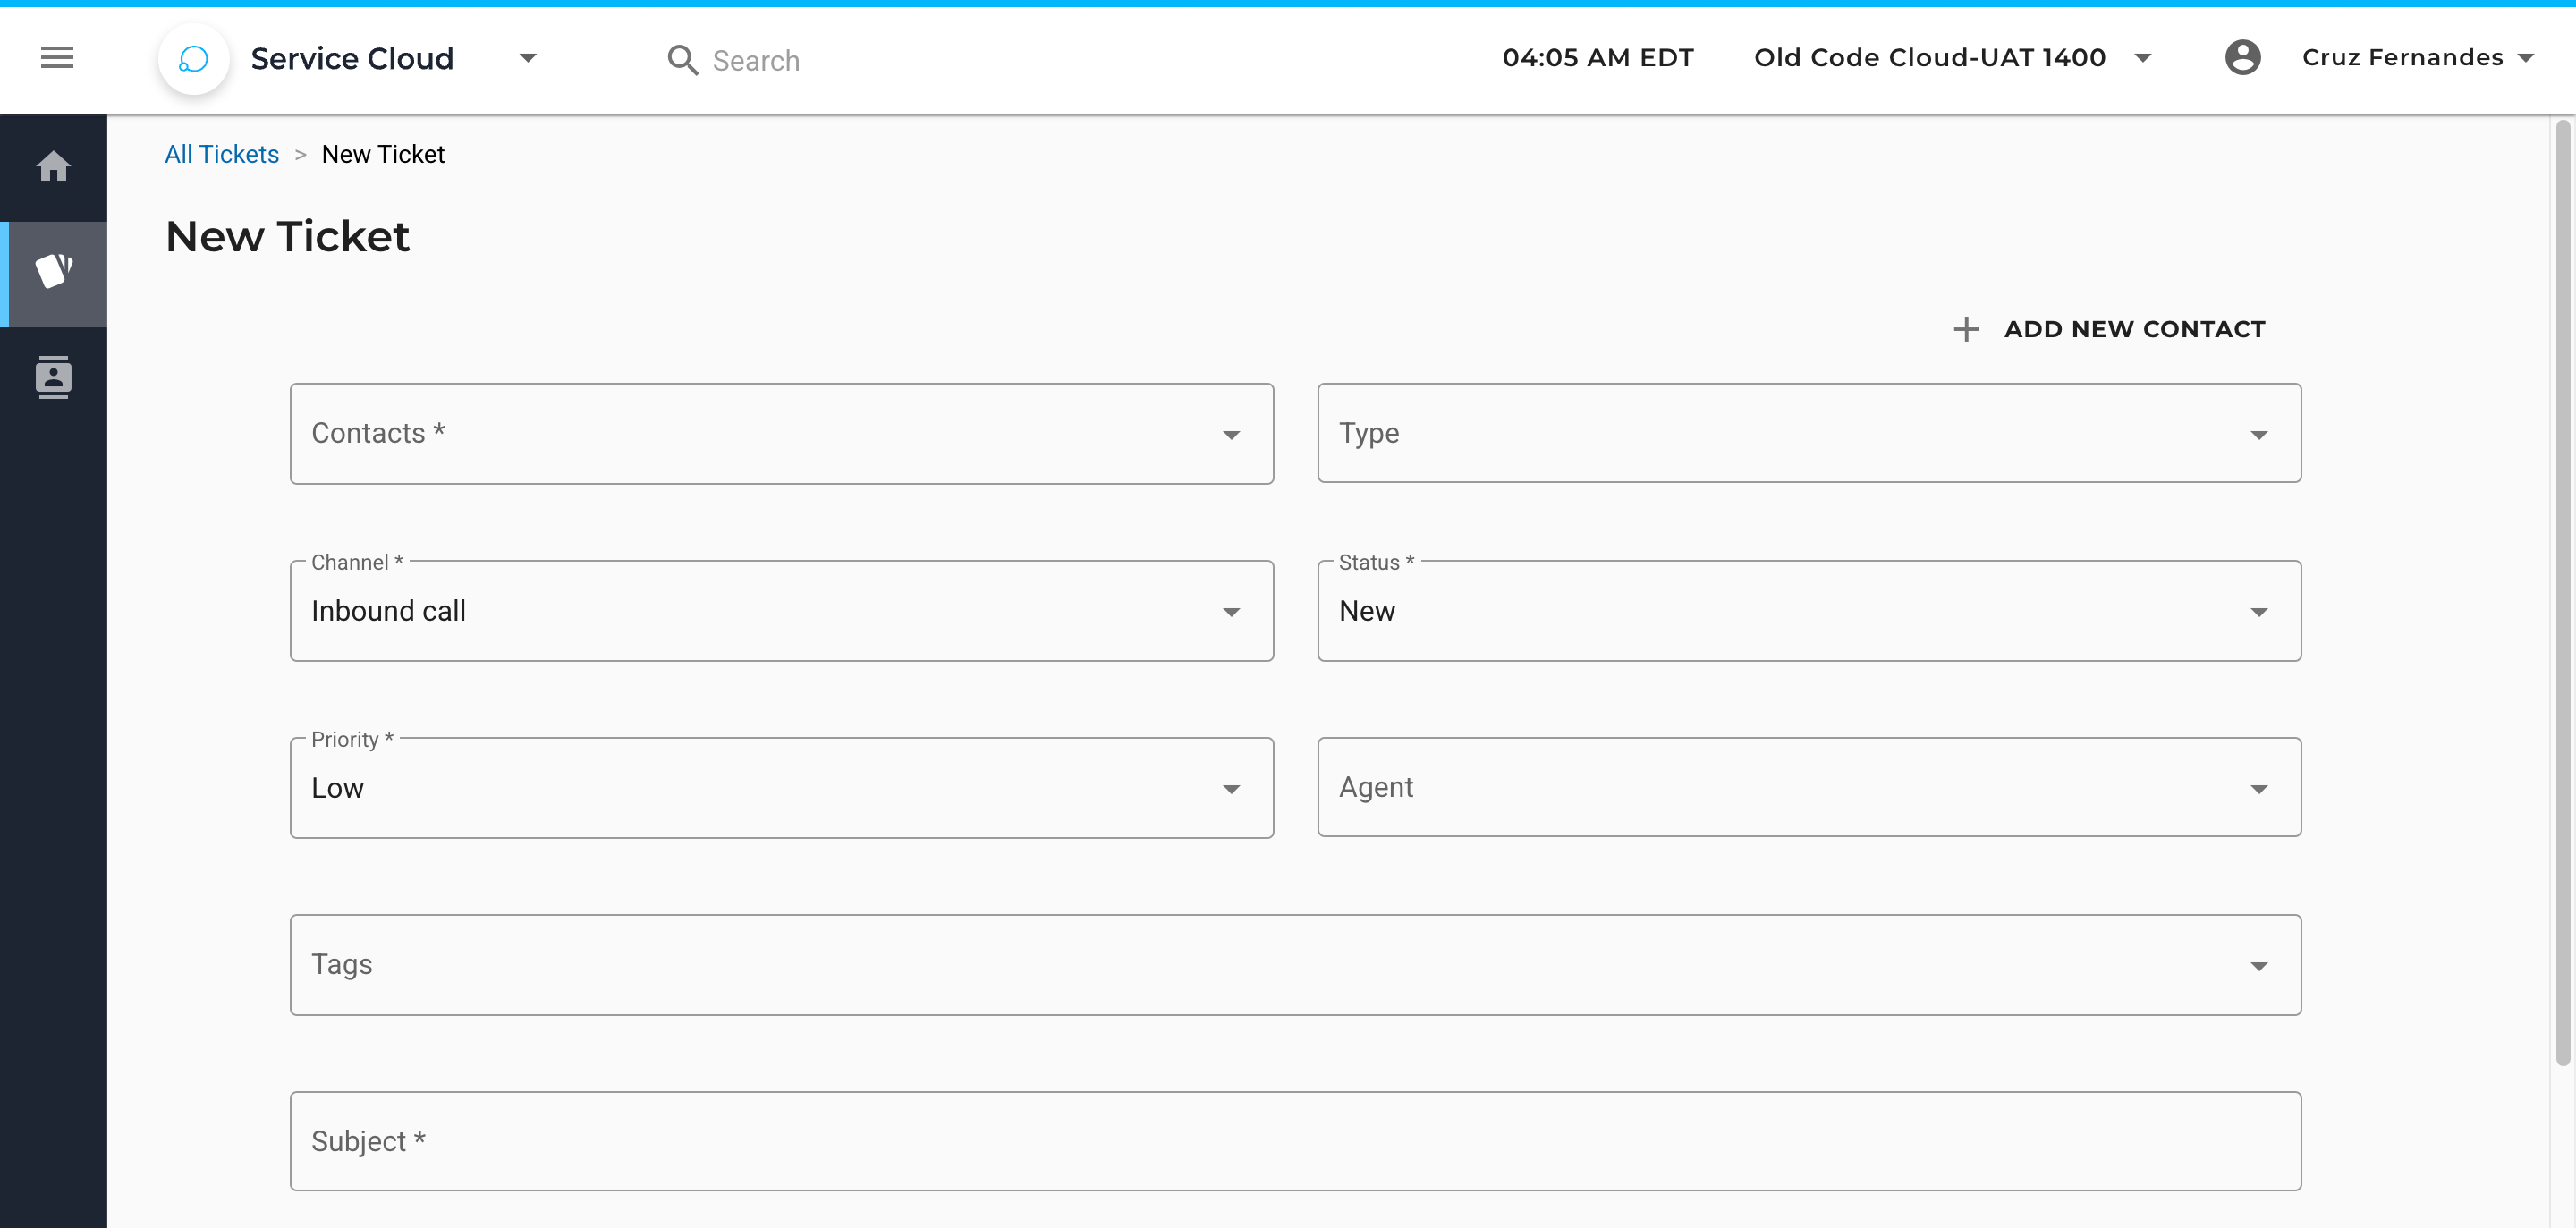
1. In Navigation, go to TICKETS. Then, on the Tickets page, from the NEW menu, select New Ticket.

2. On the New Ticket page, fill in the ticket details:
- Contacts: Select the customer from the list of contacts. If the customer is not available in the application, you can quickly add the contact using the Add New Contact button on the page.
- Type: Select a type for the ticket. Service Cloud provides a set of built-in ticket types and enables you to create custom ones.
- Channel: Select the channel through which you received the request. By default, the request received is via “Inbound call.”
- Status: Select the ticket status. By default, the ticket status is “New.”
- Priority: Select the ticket priority. By default, the ticket priority is “Low.”
- Agent: Select the service agent to assign the ticket.
- Tags: Choose an existing tag or create a new one from the dropdown to classify a particular ticket. You can assign multiple tags to a single ticket.
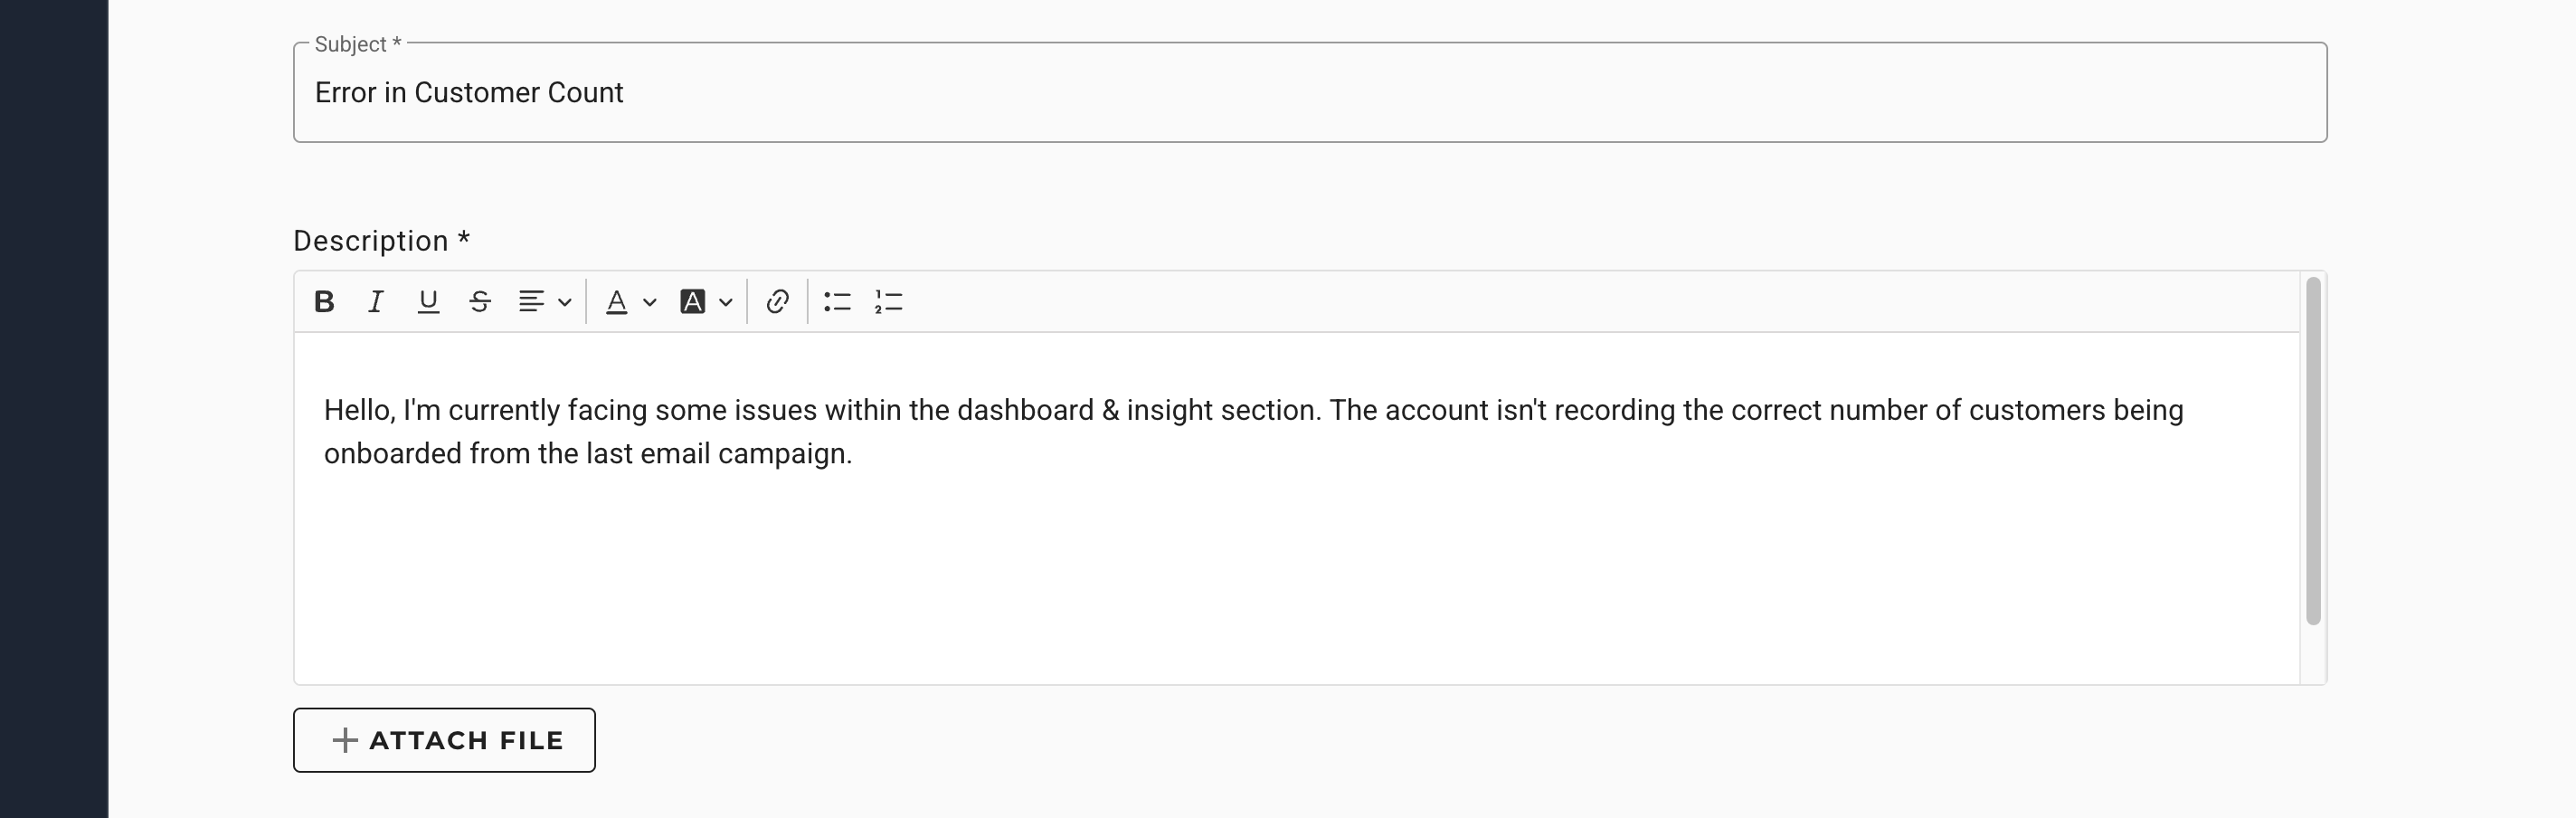
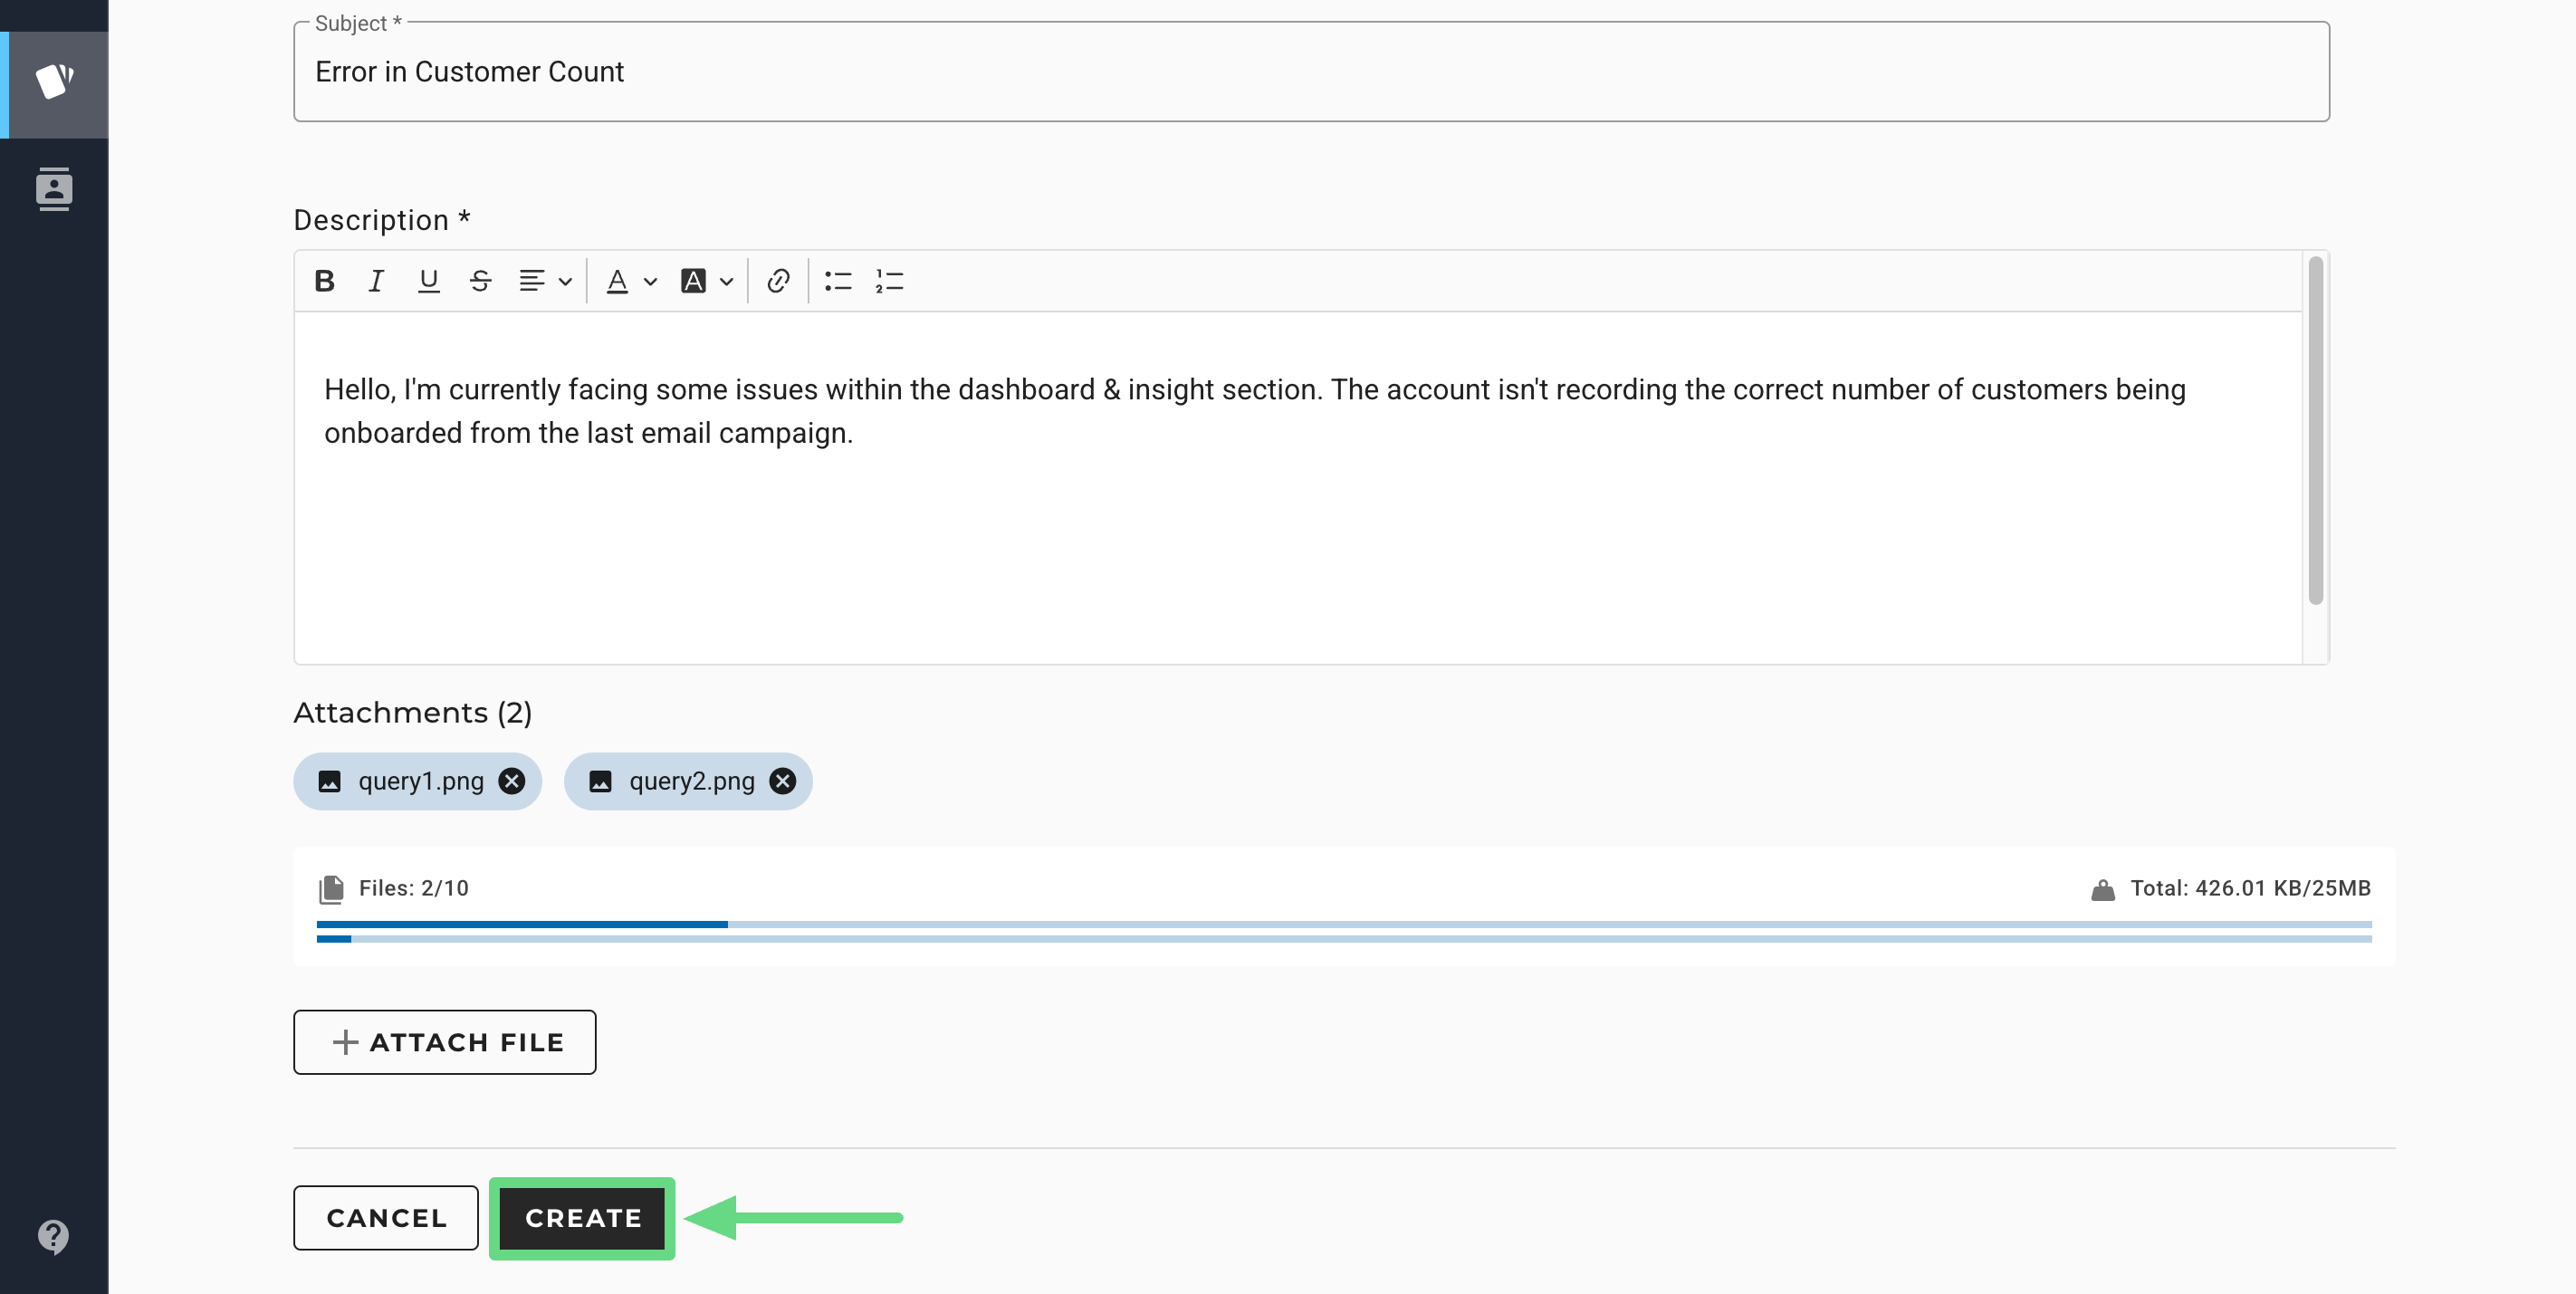
- Subject: Enter a subject for the ticket indicating what the inquiry or issue is about.
3. Add additional details regarding the query within the description field. Use tools such as fonts, alignment, bullets, links, etc. to format your content accordingly.
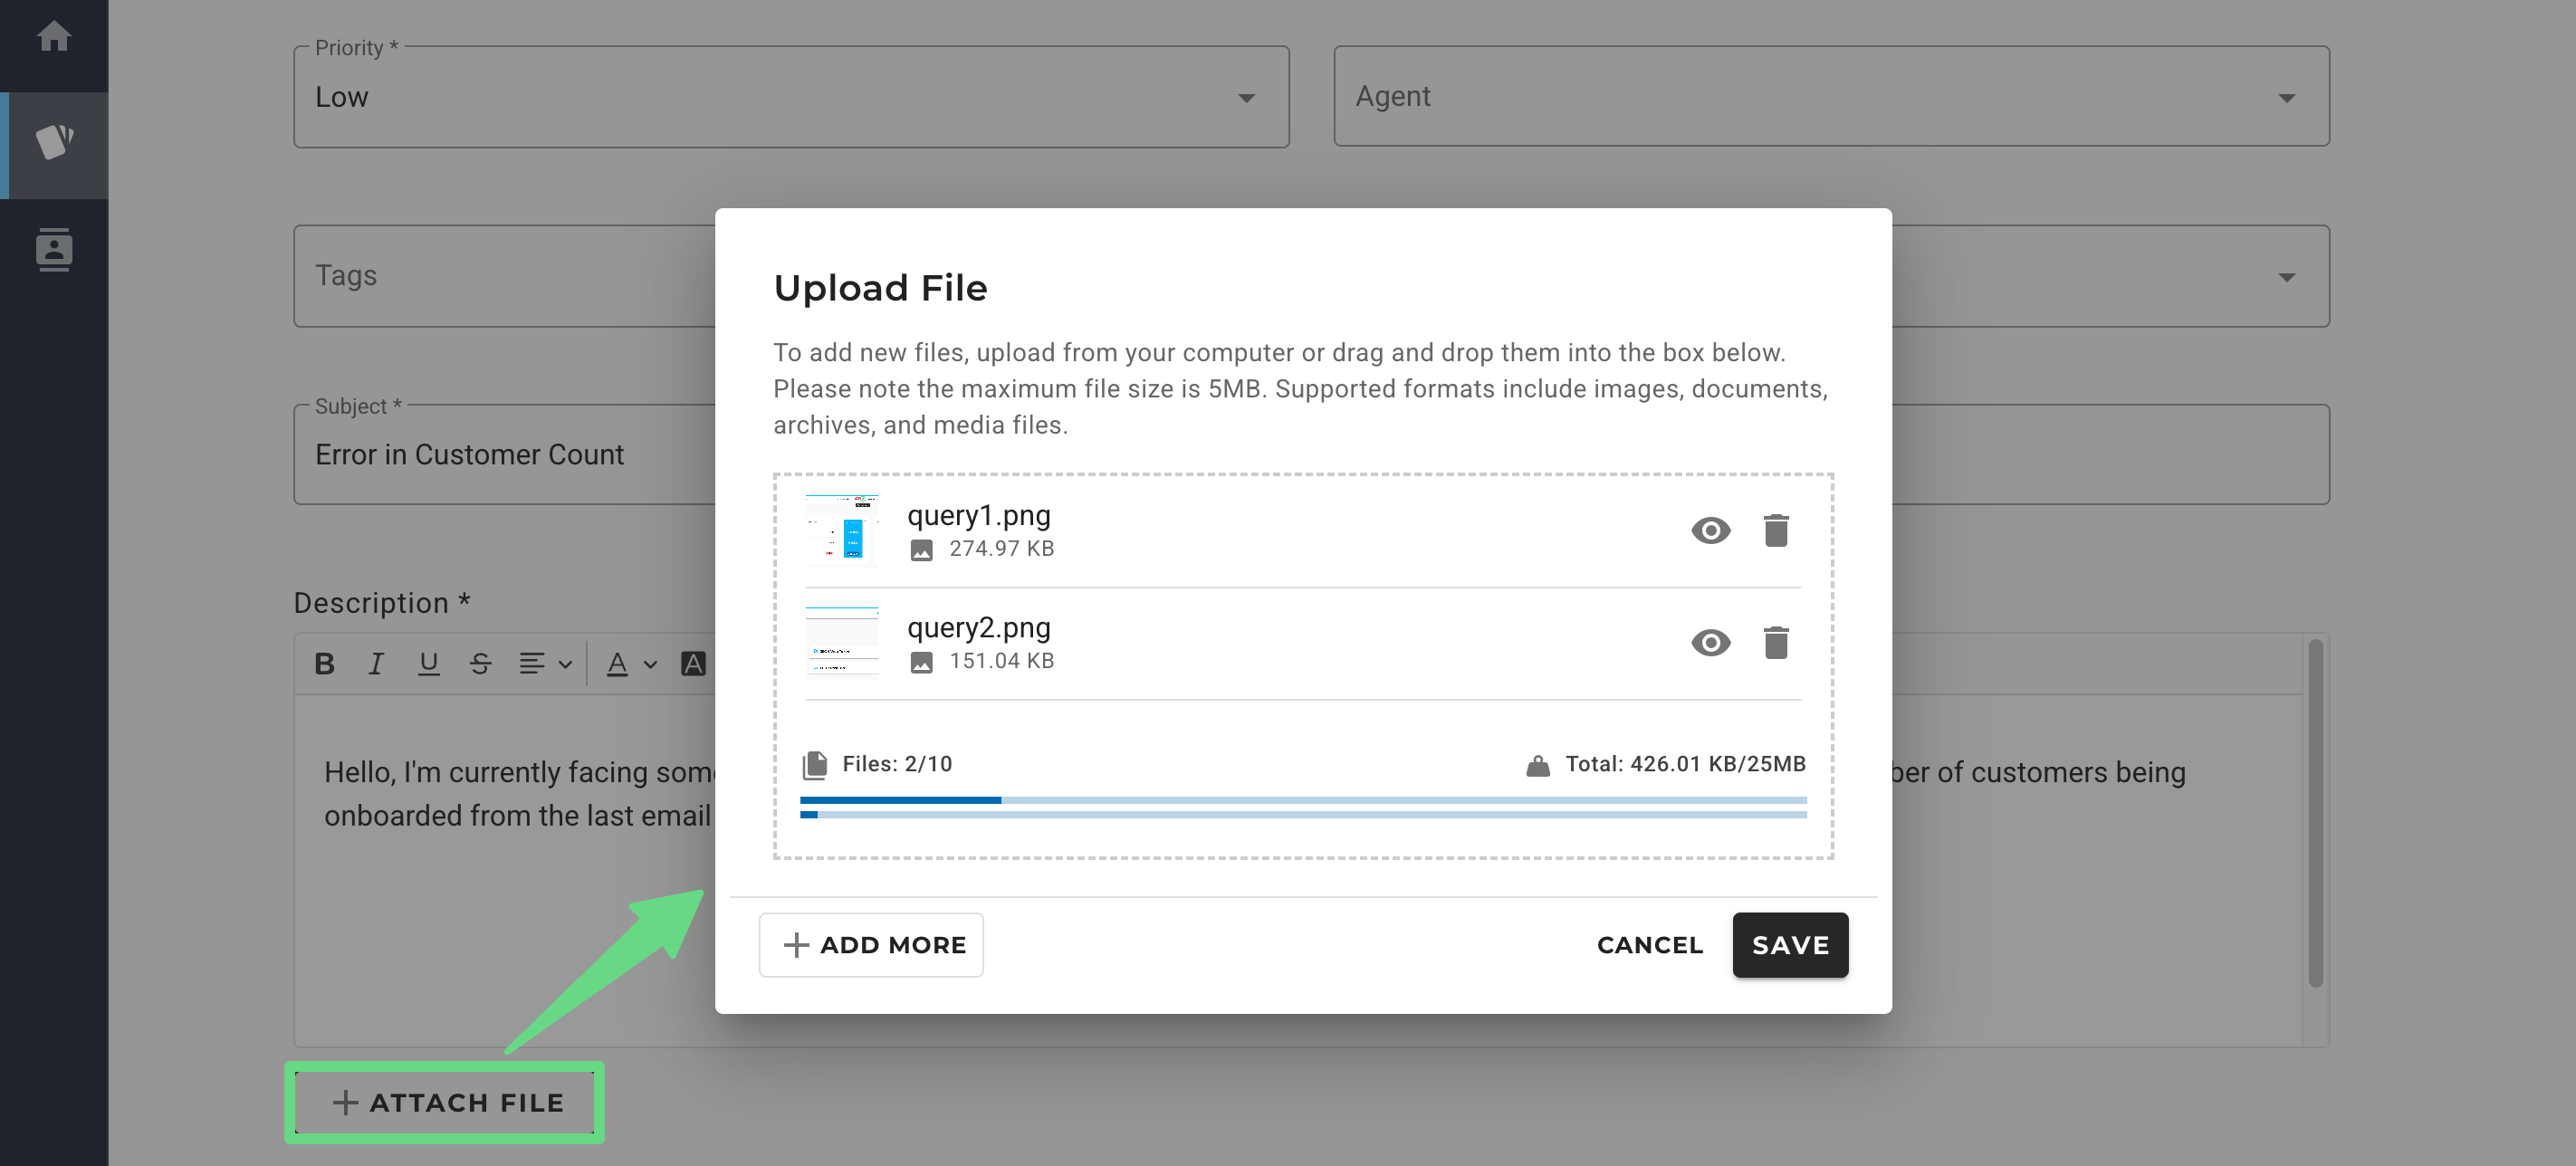
4. To upload supported file formats such as images, documents, archives, and media files, click on Attach File. Drag and drop the file from your device folder or click on Upload. The max file size permitted is 5 MB, and you can upload up to 10 files for every ticket. The uploaded files can be looked at and removed by clicking on the Preview and Delete icons.
5. Once you have finished filling out a ticket, click on Create. After the ticket is created, it appears on the Tickets page, where the assigned agent can start working on it.
Related Articles
Ticket Management:
Ticket Configuration:
Contact Management: