Any emails you receive at your support address must be forwarded to the Service Cloud so they can be registered as tickets. The forwarding email will be invisible to your customers.
To set up an email address for ticket creation, you must first set up the email address in Service Cloud and then complete the verification steps by copying and setting up the forwarding rules in your mailbox.
In this Article
Managing Support Email Addresses
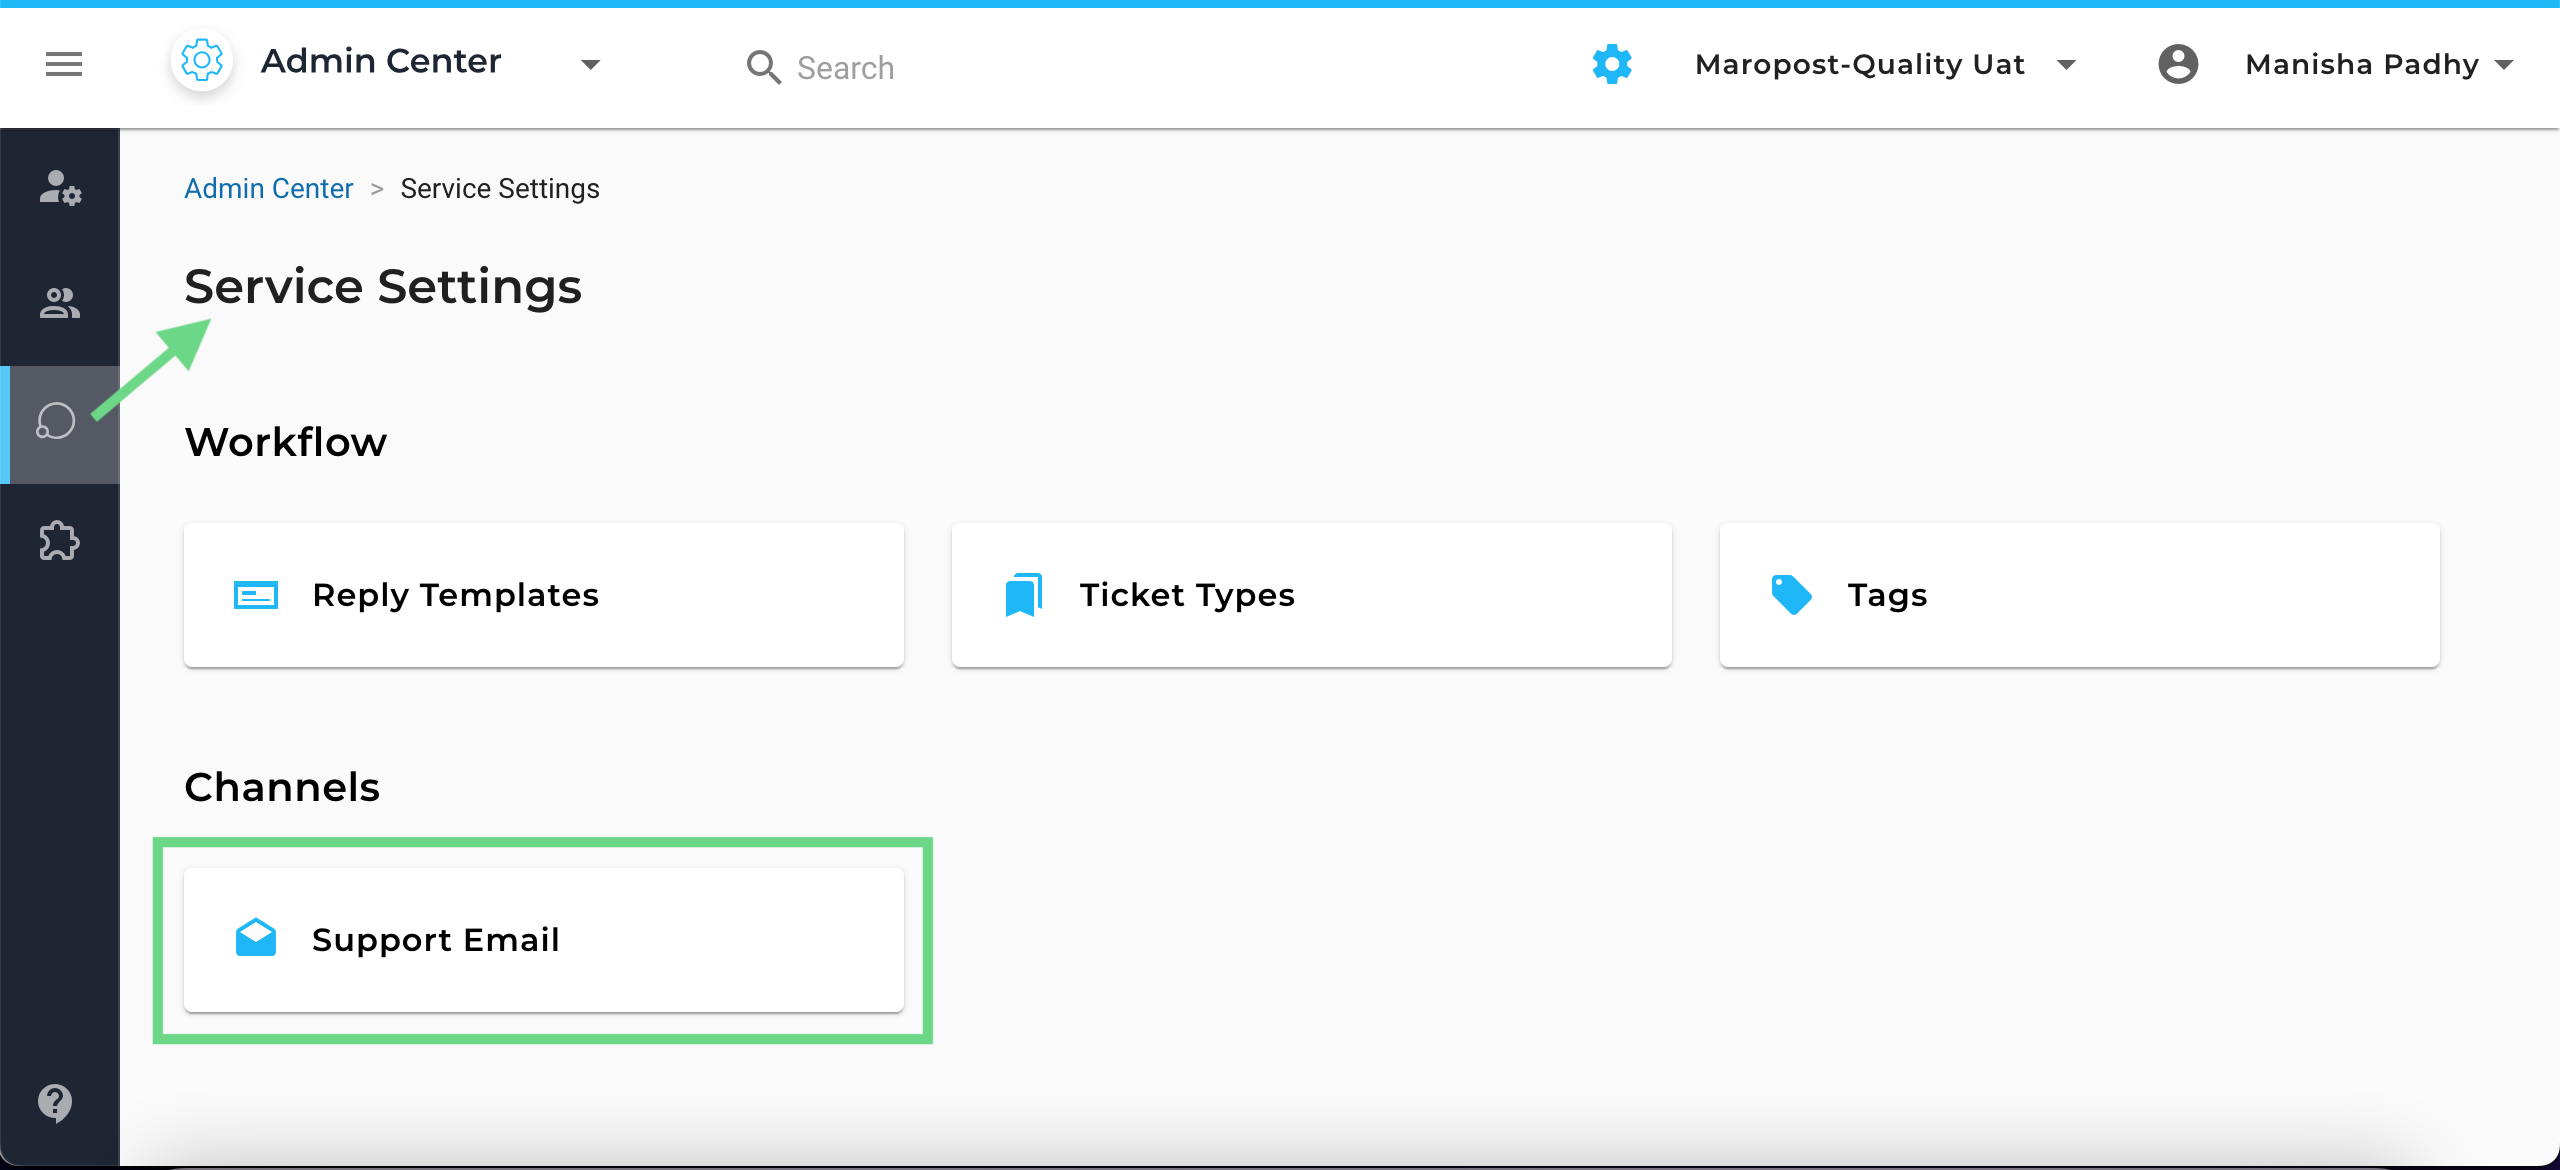
You can set up and manage the support email addresses on the Support Email Addresses page. To go to the page, click the Admin Center [ ] icon on the top bar of the application. Then, in the Admin Center, select Service Settings and click Support Email.

The Support Email Addresses page shows the support email addresses that have been previously added and also acts as the starting page to add a new support email address.
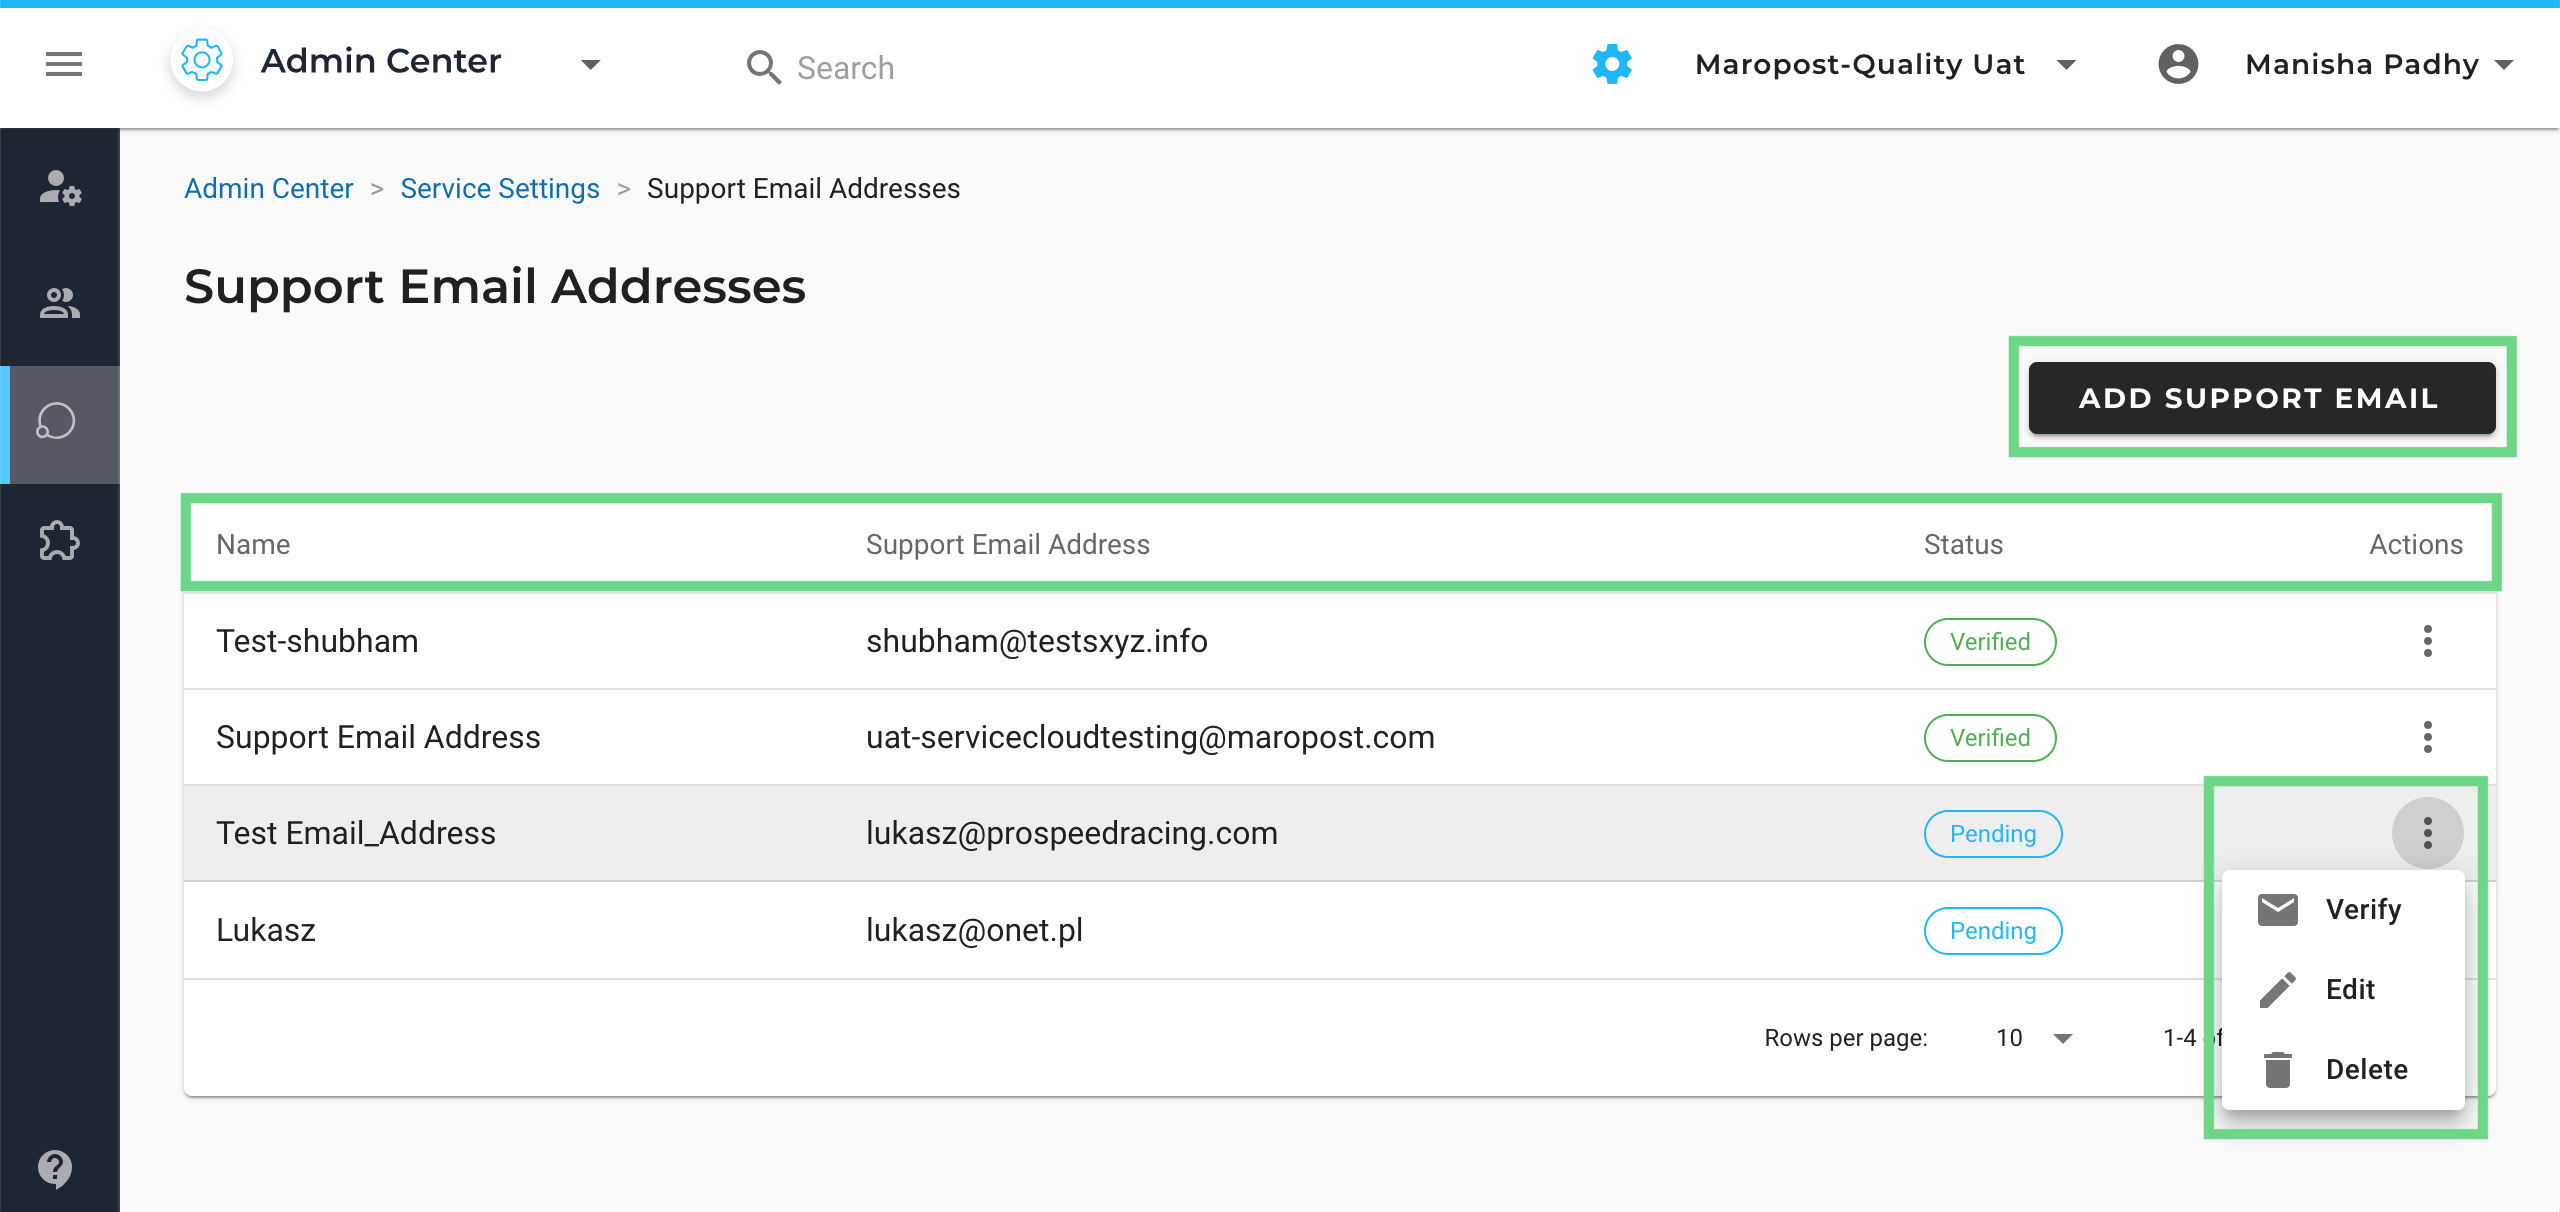
On the page, you'll find the following information and actions that will help you manage the support email addresses.
- Name: This is a reference to your support email.
- Support Email Address: It is the email that is configured with your Service Cloud account wherein all your client’s incoming emails are registered as tickets in the Service Cloud ticket queue.
- Status: It shows whether the support email has either been verified or is yet to be authenticated.
- Actions: Enables you to delete or modify the setup details of your support emails. For unverified emails, you'll also be able to see the information required for verification.
Setting Up Support Email Addresses
To set up a support email address successfully, you must first add the support email address in Service Cloud and then complete the verification process in your support email mailbox.
Add a Support Email Address
- Click the Admin Center [] icon on the top bar of the application. In Admin Center, select Service Settings from the left navigation, and then on the Service Settings page, click Support Email.
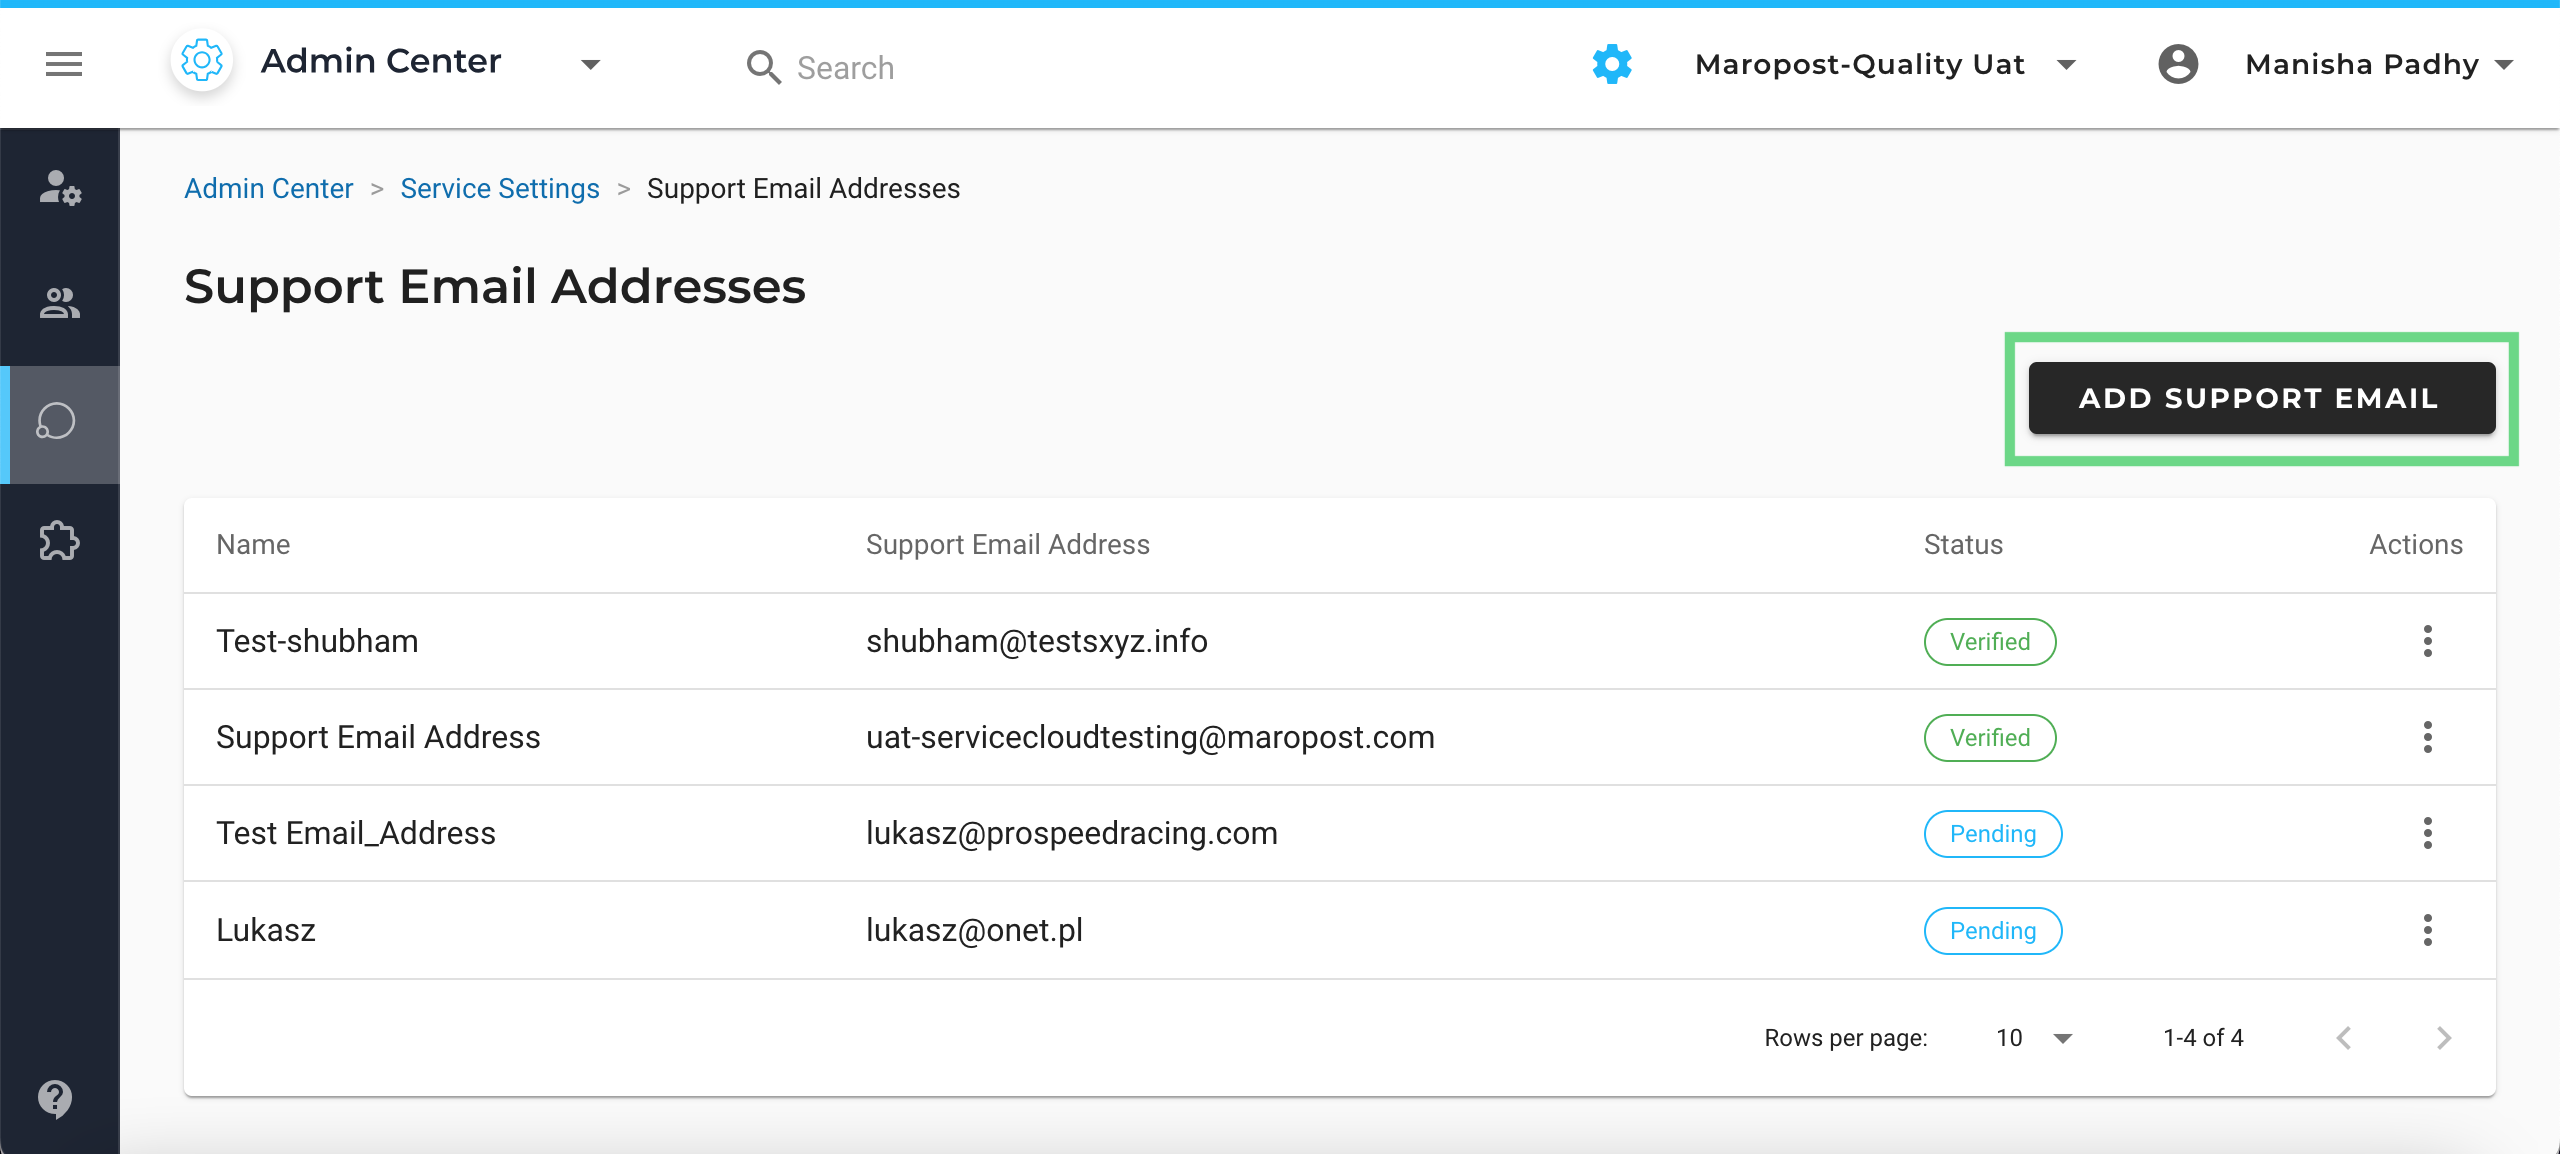
- Click ADD SUPPORT EMAIL.
- Enter a name for your support email address. Then, enter your support email address which is a mandatory field without which you cannot proceed further.

📋 Note: Make sure you enter genuine email addresses since they will need to be verified. Also, make sure you don’t enter duplicate email addresses as it is not allowed by the system.
- Once you have entered your support email ID, the Generate button gets activated. Click on the Generate button to create a new forwarding email address.
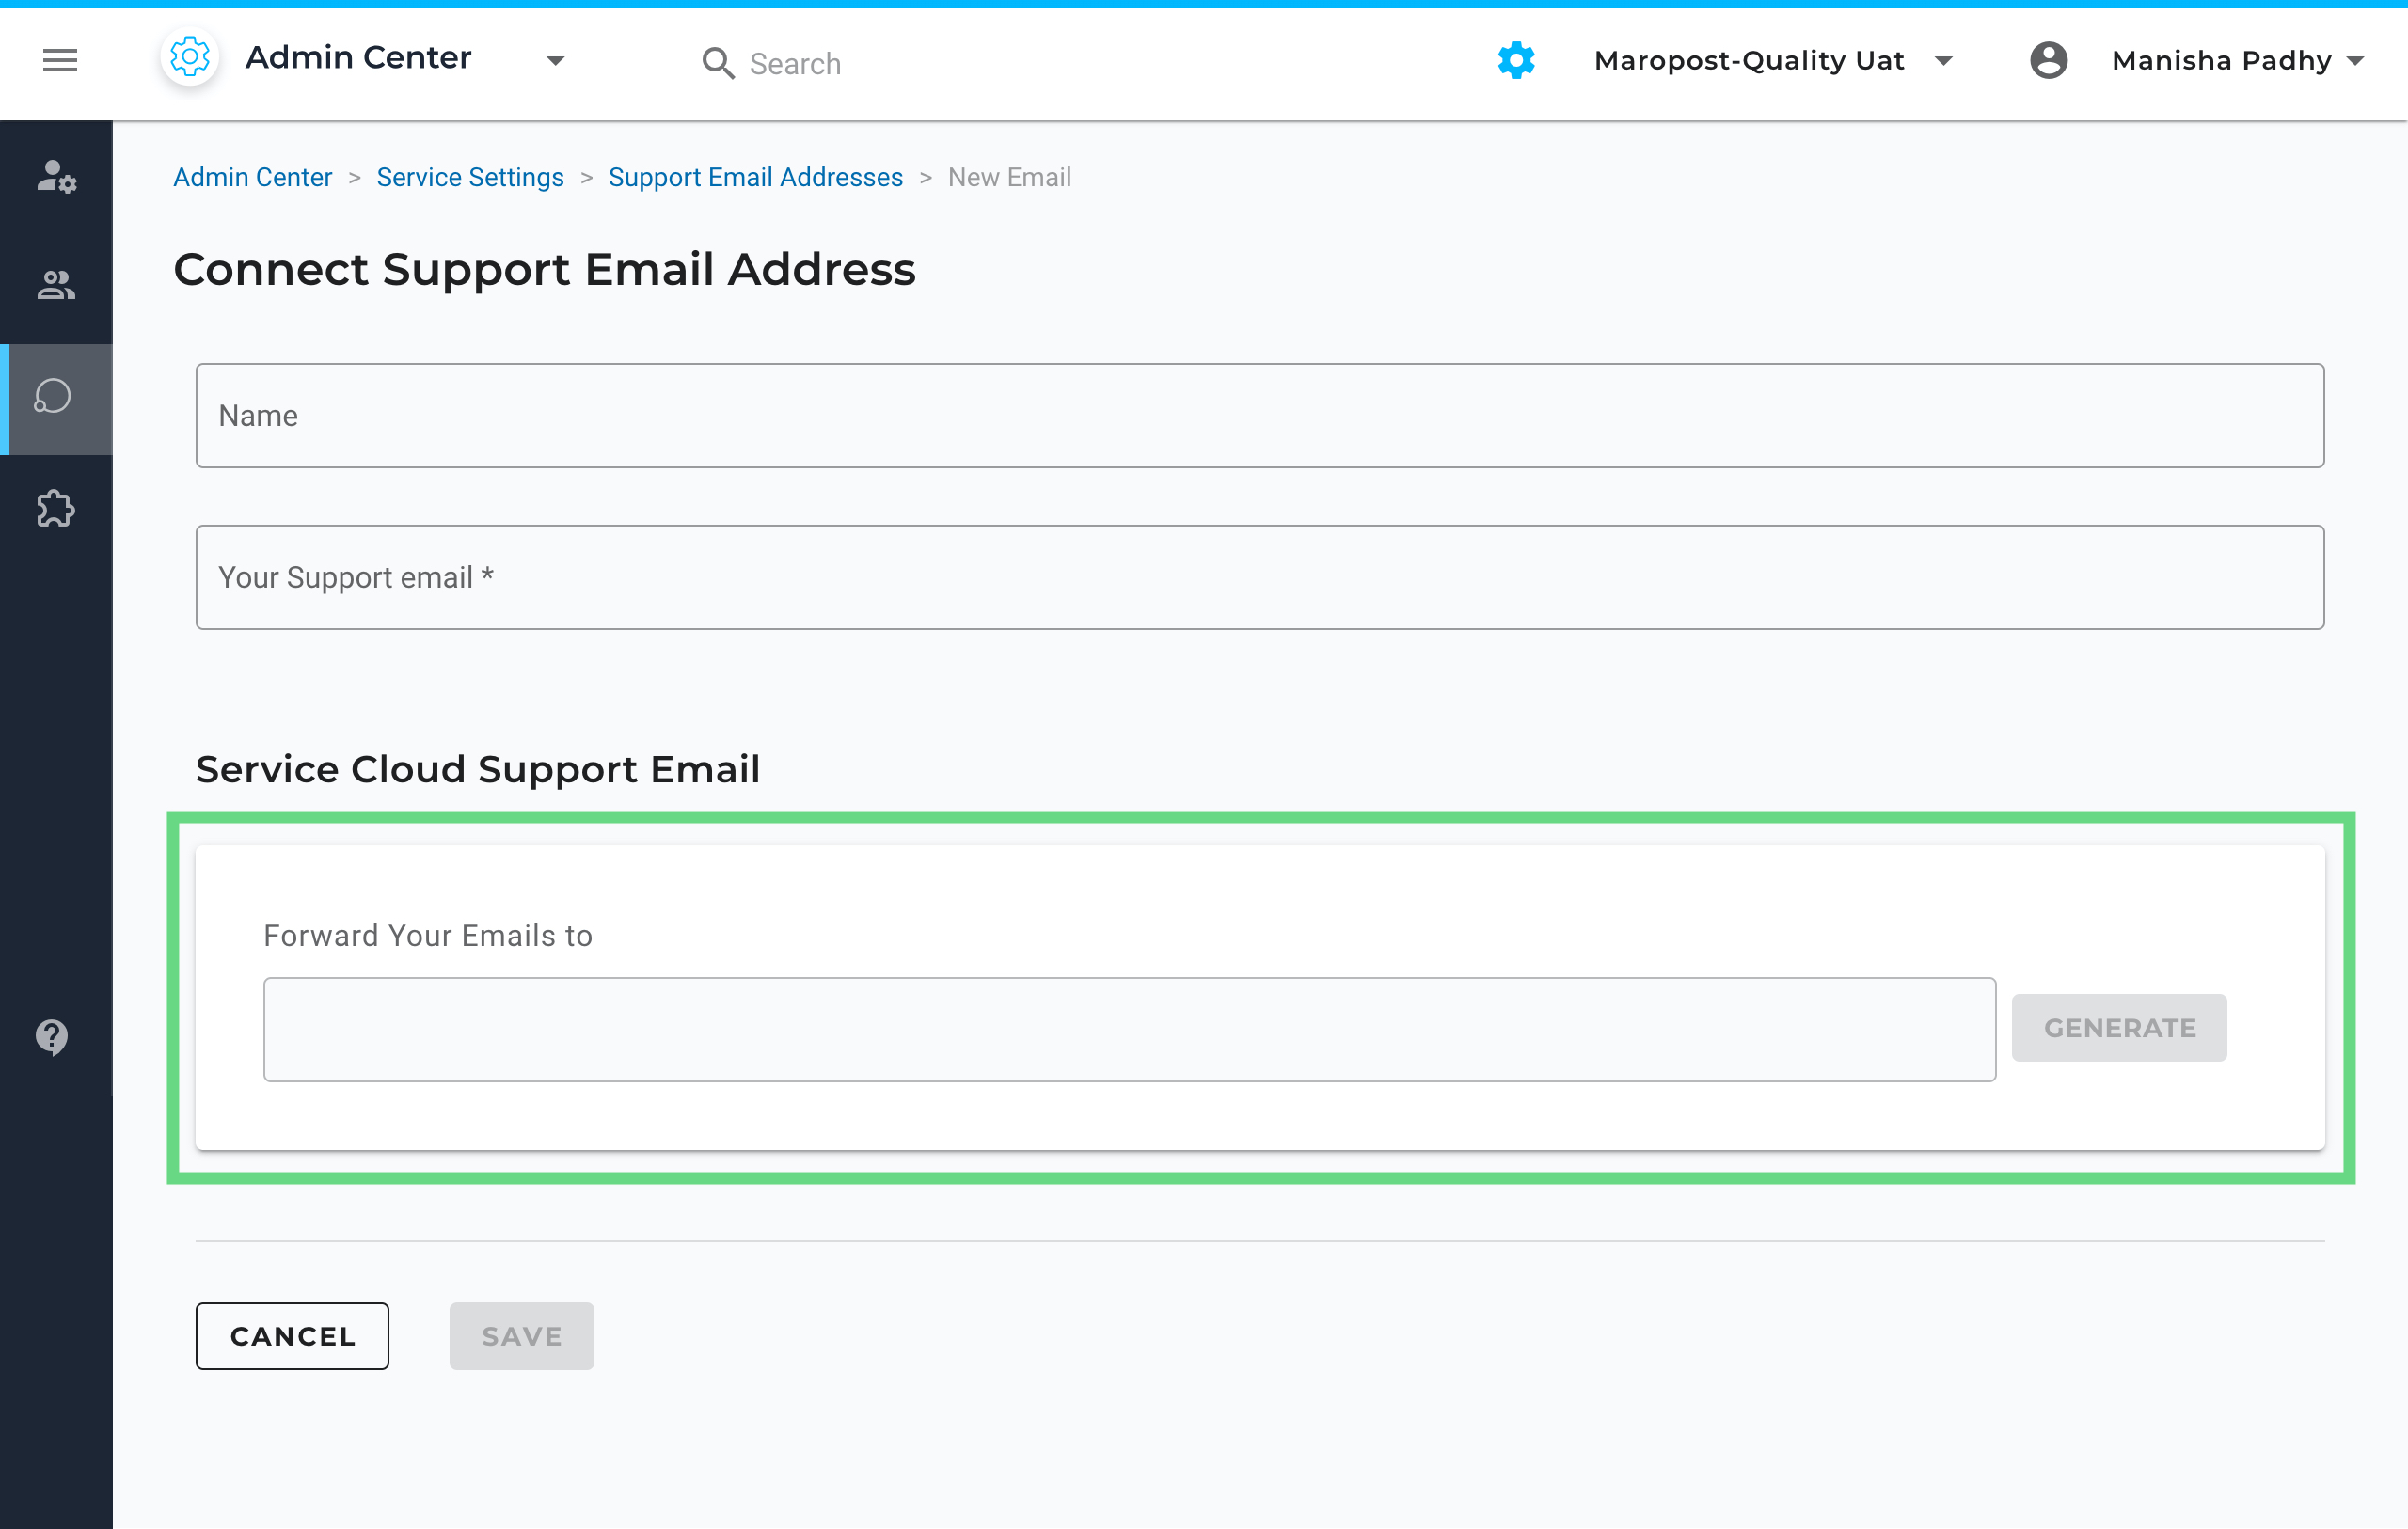
- Copy the forwarding email address that has been generated and click SAVE.
📋 Note: If you choose to do the verification later, you can retrieve the forwarding email address by selecting Verify from the Actions drop-down menu.
Once you're done setting up the support email in Service Cloud, you must verify it in your support email mailbox.
Verify a Support Email Address
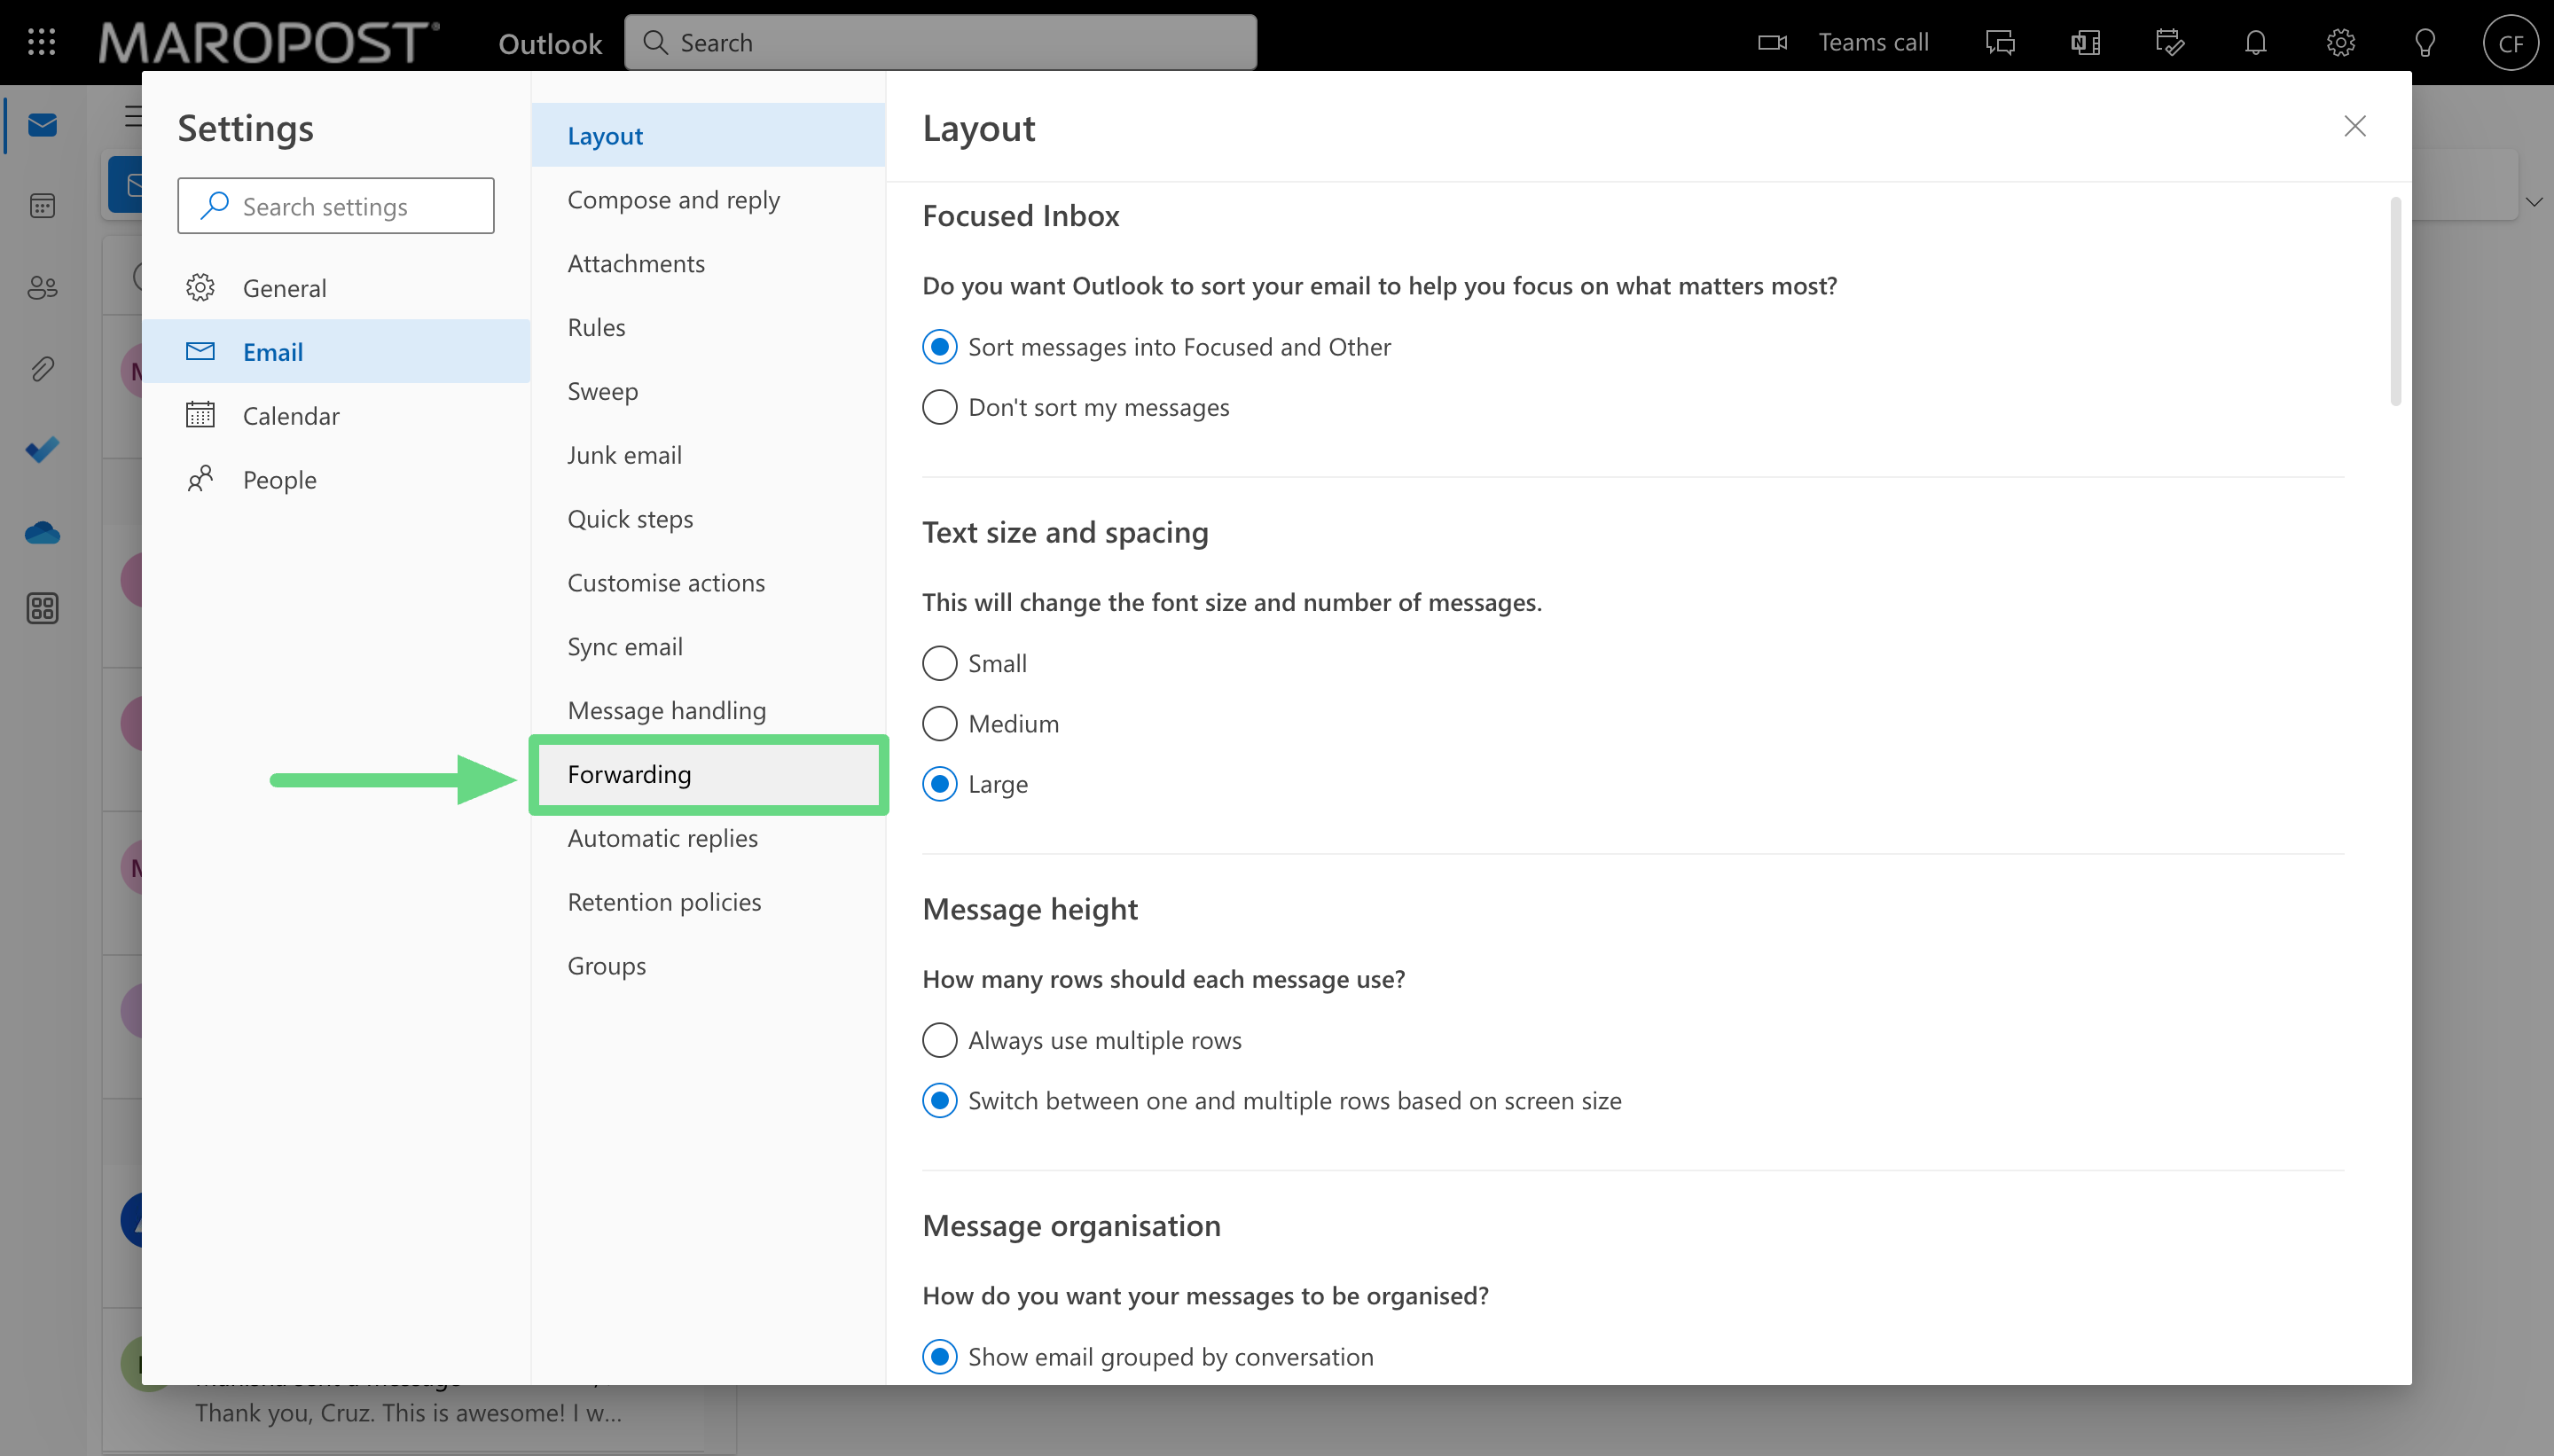
- With the forwarding email address that you have copied, sign in to your support email mailbox and click on the Settings option or its icon.
📋
Note: Only private mailboxes will be able to forward messages. For instance, you can enter the support address if your company has its own domain (like ‘
@maropost.com’). Public domain addresses like ‘
@yahoo.com’, ‘
@gmail.com’, etc. are not permitted.
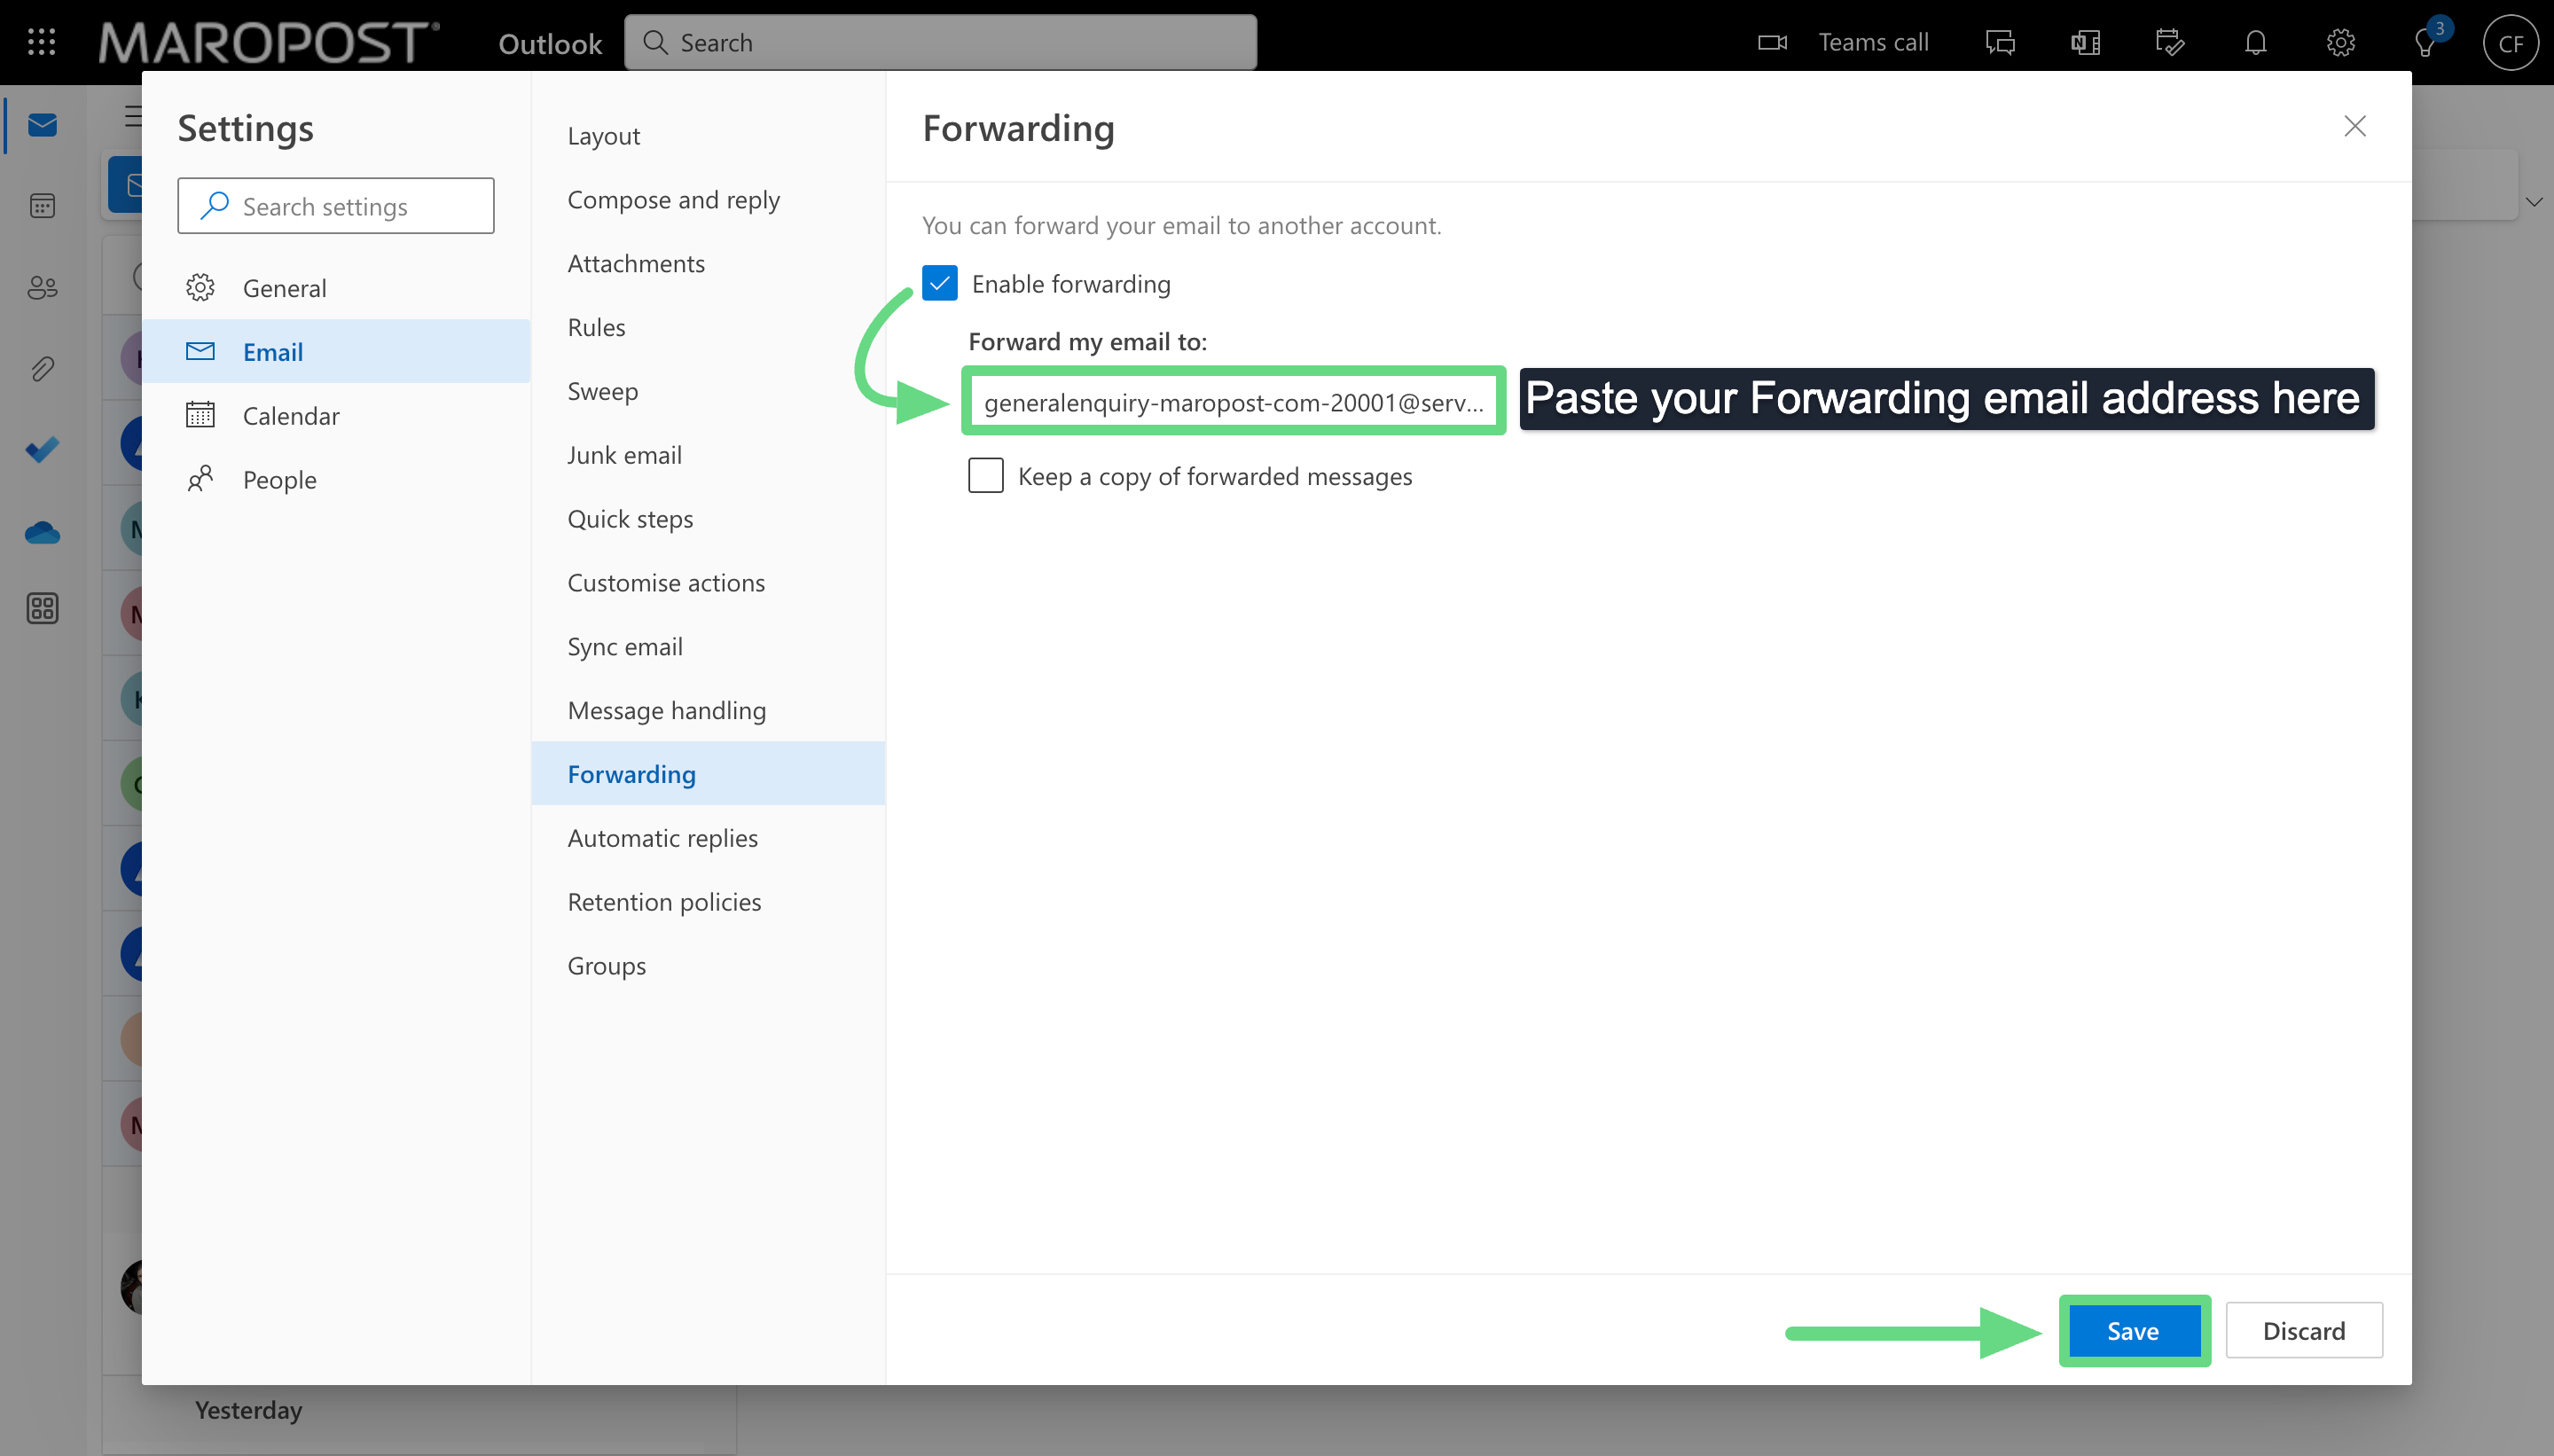
- Visit the Forwarding and POP / IMAP section.
- Select the forwarding checkbox. Paste the address and save the changes that you have made.
- Revisit your Service Cloud account and access the Support Email section. Choose an email whose verification is pending and select Verify from the Actions drop-down menu.

- On the Email Verification dialog box, click VERIFY.
 After you initiate the authentication process, the system sends a verification email. Once you have followed all the steps mentioned in the verification email, the setup process is complete.