Release Notes v3.2.0 - POS and Back OfficeRelease Date: 28/02/2019 | Version Note: v3.2.0
Following the release, if you are unable to see all back office menu icons please press the Control and F5 Keys simultaneously.
In this release we've delivered the ability to create Surcharges, introduced a new Stock Replenishment Minimum Order Quantity setting, and refreshed the look of the Income Report (along with various other improvements and resolutions).
A separate release of the Shopify Connector also introduced the ability to manage the sale of out-of-stock products directly from within Retail Express. Click here to view the Shopify Connector Release Notes.
In this release:
New Feature - Surcharges
You can now create custom Surcharges for use against payments in POS. These surcharges can be implemented as either a fixed amount or a percentage value, and assigned to one or more Payment Types.
Australian businesses - The Competition and Consumer Amendment (Payment Surcharges) Act 2016 bans businesses from charging excessive payment surcharges on credit, debit and prepaid card payments. For more information refer to the ACCC website.
Adding a new Surcharge
- To create/edit a Surcharge navigate to Settings > Surcharges
- To assign a Surcharge to a Payment Type navigate to Settings > POS Settings > Payment Surcharges
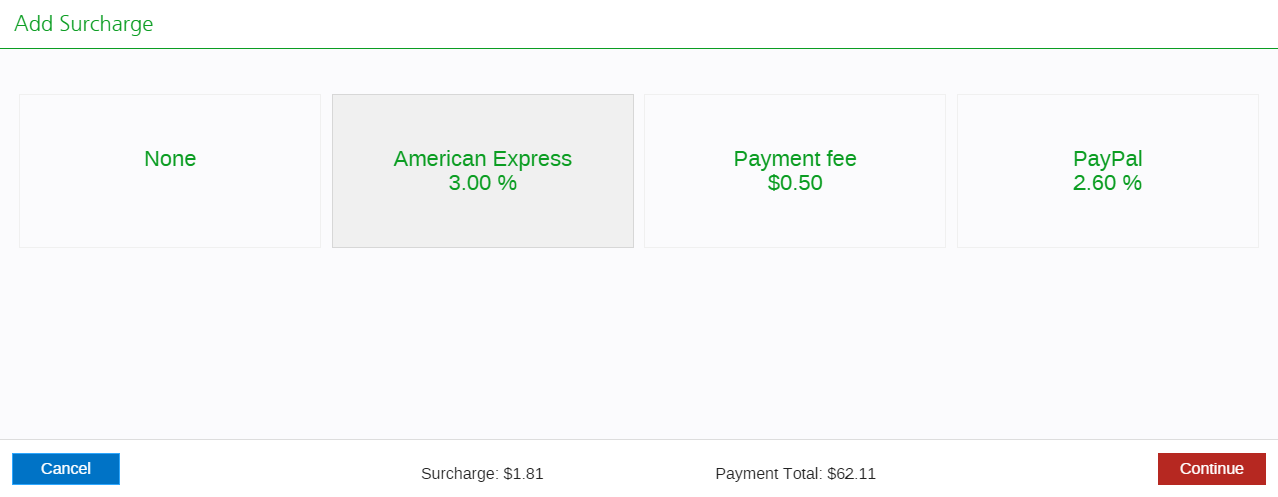
As staff process payments at POS they will be prompted to confirm the Surcharge, or if appropriate, select None to remove the Surcharge.
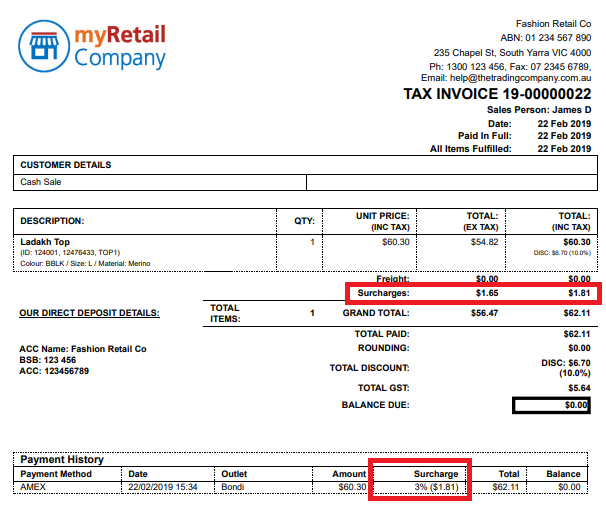
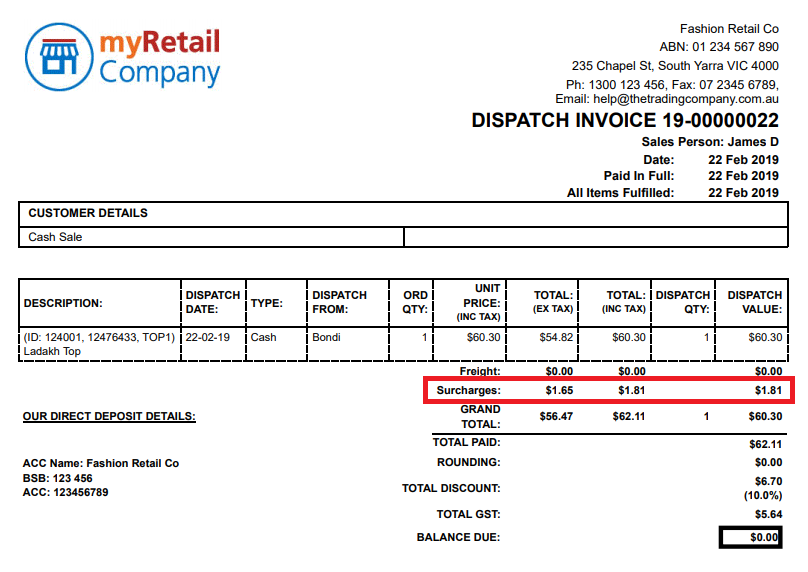
Surcharges are displayed on Receipts, Invoices and Dispatch documents.
To display the Surcharges on the Receipts an update to the Hardware Utility is required. Start the Hardware Utility and follow the prompts to install the update.
For detailed information on creating and editing Surcharges please see Settings - Surcharges.
Accounting Integrations:
If you are using an Accounting Integration with Retail Express you should be aware of the following:
- Xero:
- The integration will continue as normal until you create a Surcharge
- Once a Surcharge has been created you will need to configure and map a Surcharge GL account.
- If you have setup surcharges but don't configure a GL account in your Xero integration, an error will occur and your integration will be disabled until the GL account is setup
- Refer to the Xero Integration - Setup and FAQs article for more information
- MYOB - A surcharge account has been added to the setup file. If you would prefer to set this account up manually, it is an Income account with number 4-9995. Surcharges are included in the export file automatically; no further action is required.
Surcharges are not compatible with Accounting Link or Offline POS
Report updates
The following reports have been updated to display Surcharge information:
Surcharges will only be displayed if a Surcharge has been created in the system under Settings > Surcharges. Once created the Surcharge line will be displayed on the sales documents, regardless of whether there is a surcharge for the current order.
In order to display Surcharges on the Receipts you will need to update the Hardware Utility. Open the Hardware Utility, a message will be displayed to prompt the upgrade. Refer to the Hardware Utility Setup and FAQ article for more information.
Examples of the Surcharge line can be seen as per below:
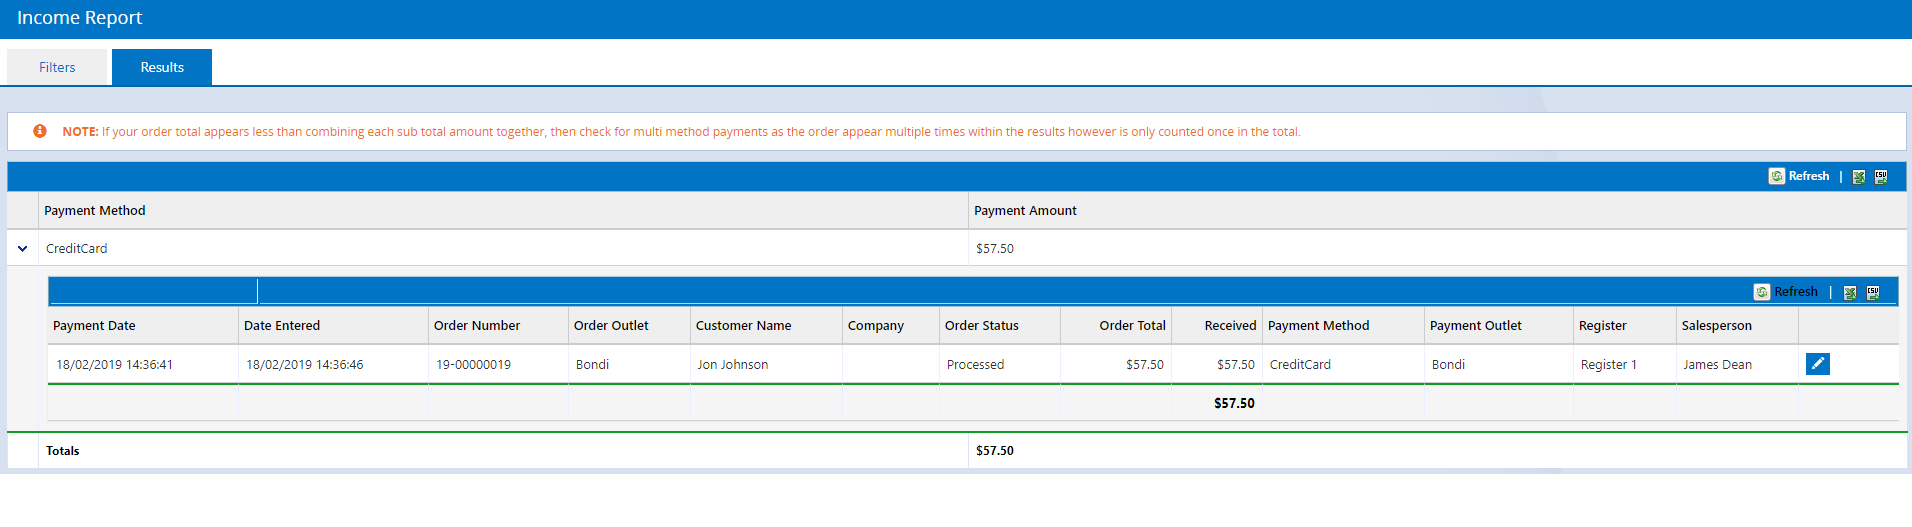
The Income Report doesn't have a dedicated Surcharges section, but it's worth noting that the values displayed include any surcharges associated with the payment.
In this release the Income Report has a fresh new look - see below for more information
The Financial Summary Report breaks down transactions into a format used for verification with accounting integrations. A new Surcharges section can be found within this report.

Click here for more information on the Financial Summary Report.
Surcharges can be seen on the Sales Report "Results" tab on both an Outlet level as well as for individual orders. Use the arrows on the left-hand side to expand each section.
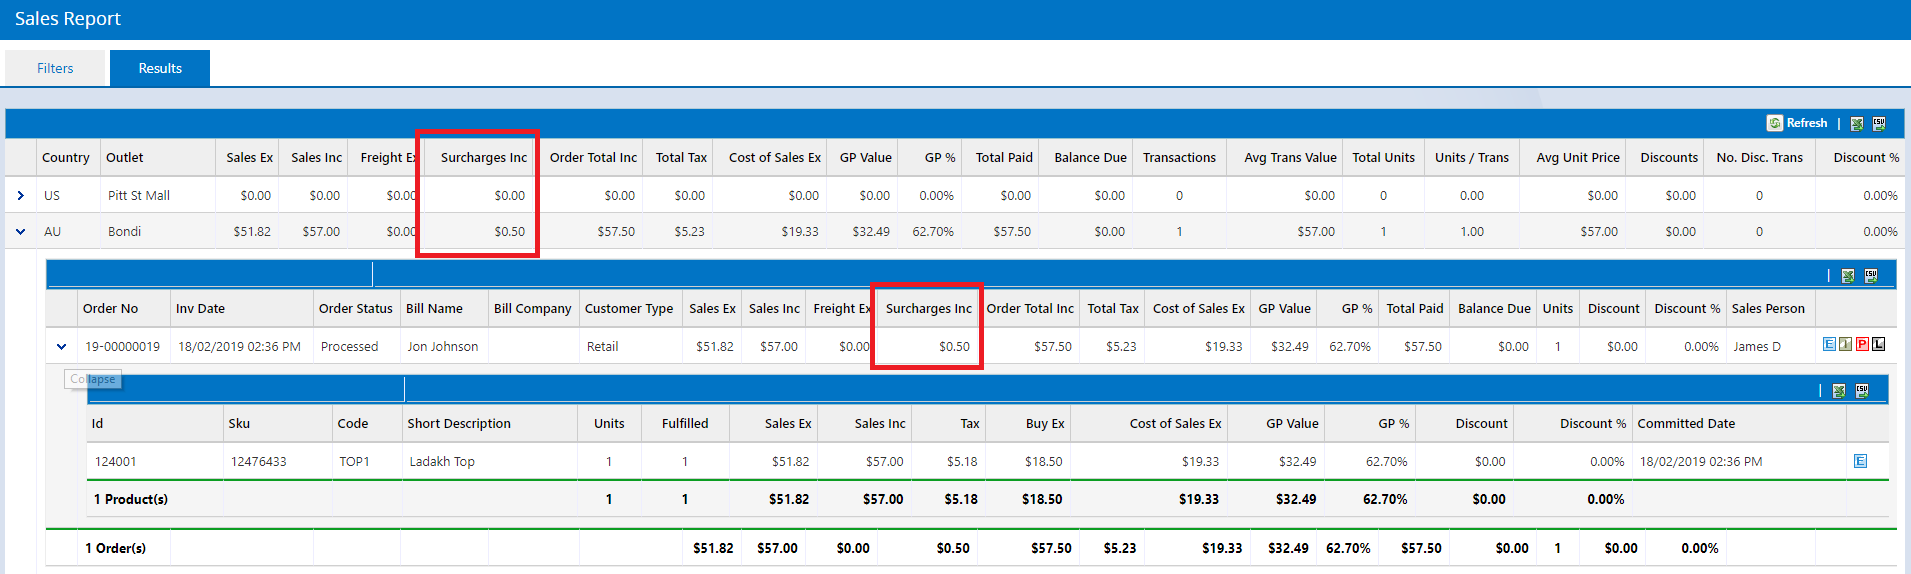
Click here for more information on the Sales Report.
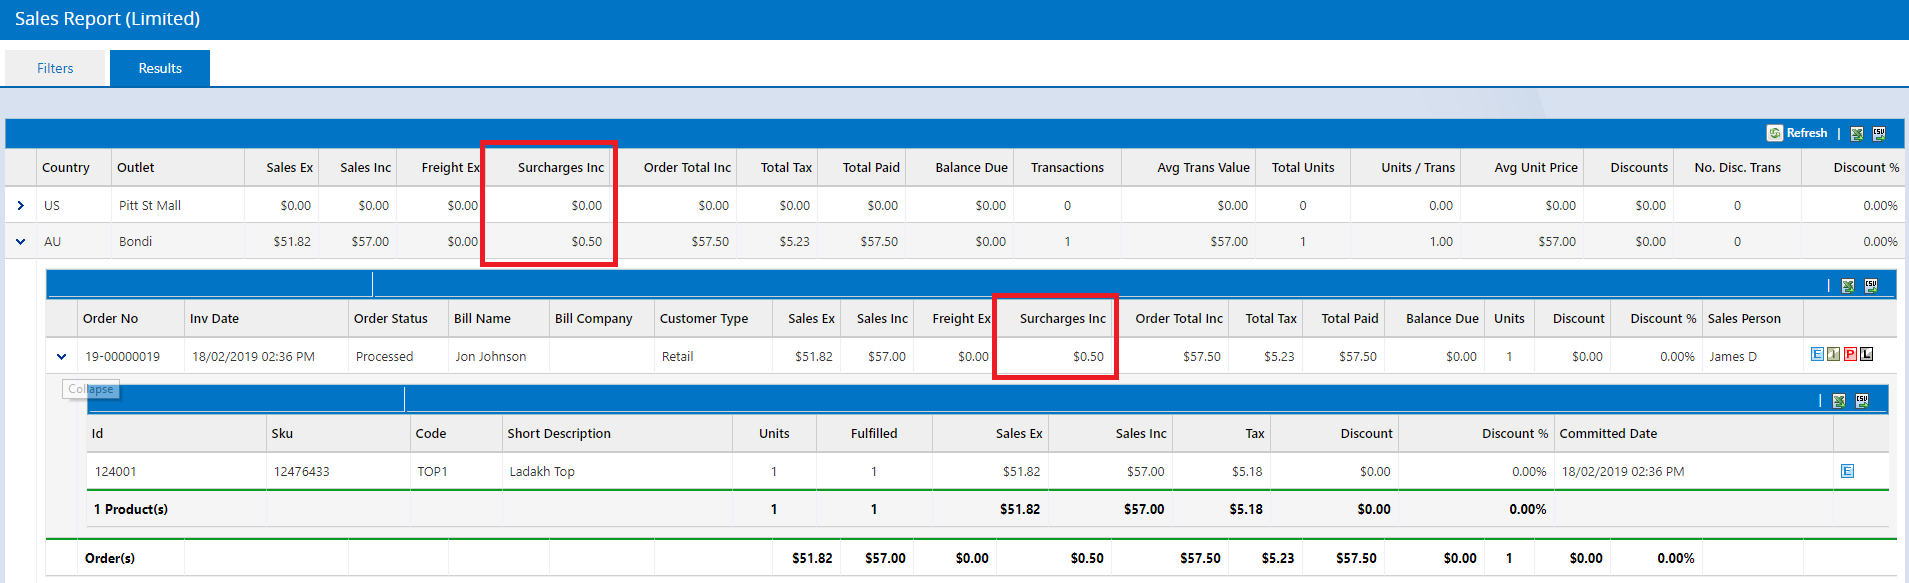
Similar to the Sales Report, the Sales Report (Limited) version reports on sales but without the cost or GP information.
Surcharges are visible on the Outlet level as well as the individual Order.
Return to top
New Feature - Stock Replenishment Minimum Replenishment Quantity
Stock Replenishment is the ability to calculate a reorder quantity to for your stock, based on either the products sold during a specific sales period, minimum stock levels or the rate at which the product is being sold (Run Rate). The stock reordering can be done through the use of either a Purchase Order or an Internal Transfer Order (to transfer stock from other Outlets).
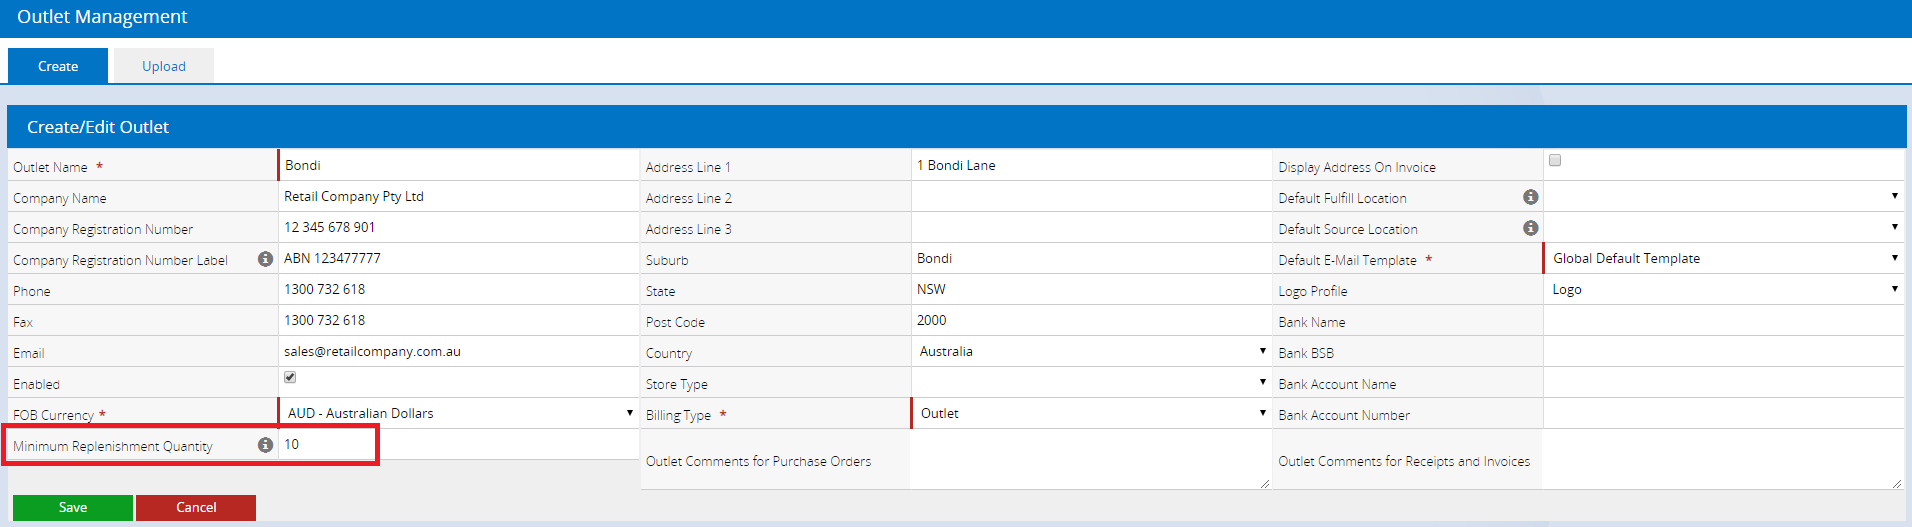
With this release a new feature allows you to set a Minimum Replenishment Quantity per Outlet for Stock Transfers. Once set, the system will only create Stock Transfers to that Outlet if the suggested Total Reorder Quantity is equal or greater than that value.
Using a Minimum Replenishment Quantity helps to avoid creating Internal Transfers that may not be cost effective when compared with ordering directly from a Supplier instead.
To set the Minimum Replenishment Quantity:
- Log into Retail Express
- Navigate to Settings > Locations/Outlets > Outlets
- Click on the Pencil icon to edit an Outlet
- Enter a Minimum Replenishment Quantity
- Click Save
For more information on the Stock Replenishment feature refer to Smart Replenishment via Stock Transfer andStock Replenishment via Purchase Orders
Return to top
New Behaviour - Income Report
The Income Report has received a makeover with a fresh new look and new features to make using this report even better.
You can access the Income Report via Reports > Finance Reports > Income Reports.
Expanding/Collapsing sections
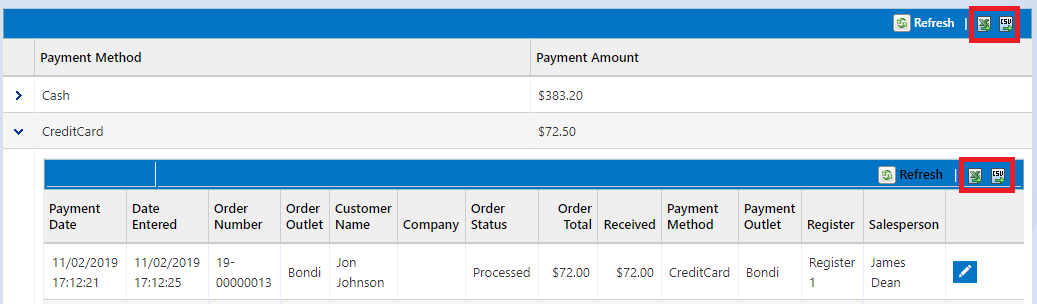
When viewing the Results tab, results are initially collapsed into groups based on the Payment Method (if the "Group and Subtotal option has been enabled on the Filters tab). Groups can be expanded/collapsed by clicking on the arrows for each line; once expanded the invoices for that Payment Type are displayed.
Sorting Invoices
To sort invoices click on the column heading. An arrow will be displayed under the column heading to indicate either Ascending or Descending order (no arrow means it has returned to the default sort order).
Export
Invoices can be exported to Excel or CSV by clicking on the icons within the report, either by individual Payment Method or all Invoices:
For more information on the Income Report please see Reports - Income Report.
Return to top
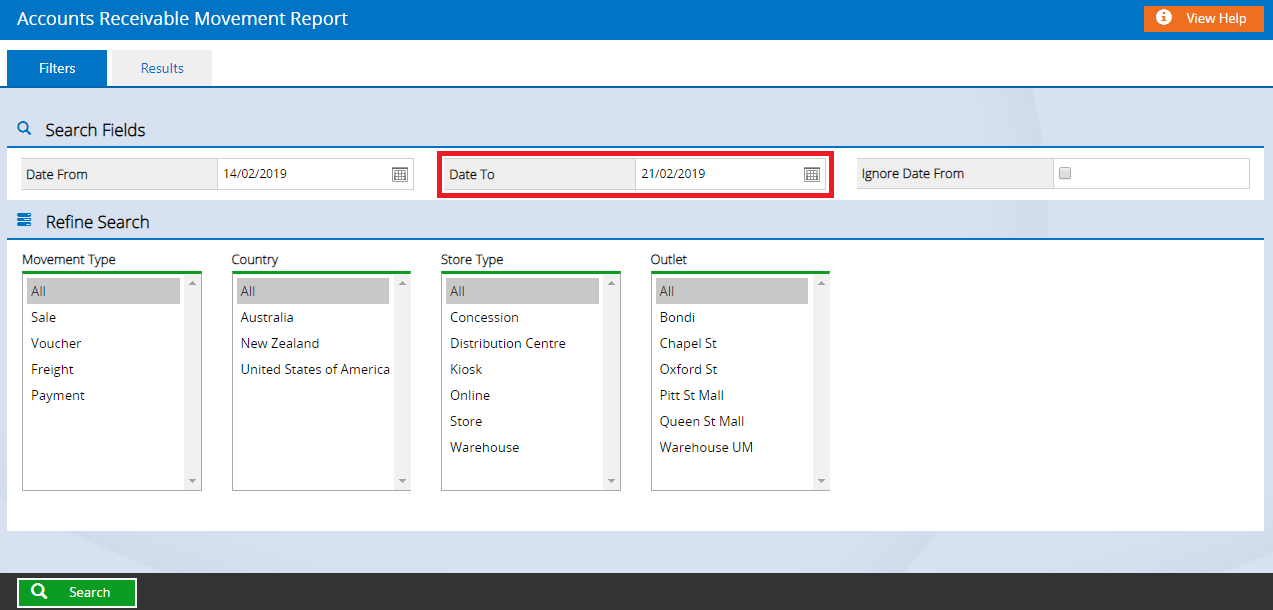
New Behaviour - Accounting reports "Date To" selection limit
Several reports available in the Accounting menu have been updated to limit the maximum "Date To" date available to the previous day. For example, if the current date is the 22nd of February, the most current date available to select would be the 21st of February. This is to prevent any errors or confusion with viewing and reporting on incomplete data.
These reports are as follows:
- Accounts Receivable Balances Report
- Accounts Receivable Movement Report
- Financial Summary Report
- Fulfilled Sales Report
- Layby Balances Report
- Layby Movement Report
Return to top
Improvements
Below is a list of improvements included in the latest Maintenance Release:
Resolutions
Below is a list of resolutions included in the latest Maintenance Release:
Multibuy | The Multibuy Qualifying Products search results are now paged correctly |
Stock Replenishment | The description of the security permissions have been updated to clarify what access they provide |
Customer Manager | Recently added Last Updated date filter now applies to export as well as search |
ITO Report | On the Filters window when a valid From date has been selected the red border "warning" line disappears from the side of the field |
Product Sales Report | The report can now be run successfully for Products with a large number of characters in the Supplier SKU |
Product Sales Report | The Product Sales Report can now be exported into an Excel format (in addition to CSV). |
Want more information? Find related articles here:
