Overview
This release note covers the notable features released in the past week and thereby includes release items from 20th April, 22nd April, and 27th April.
New Features
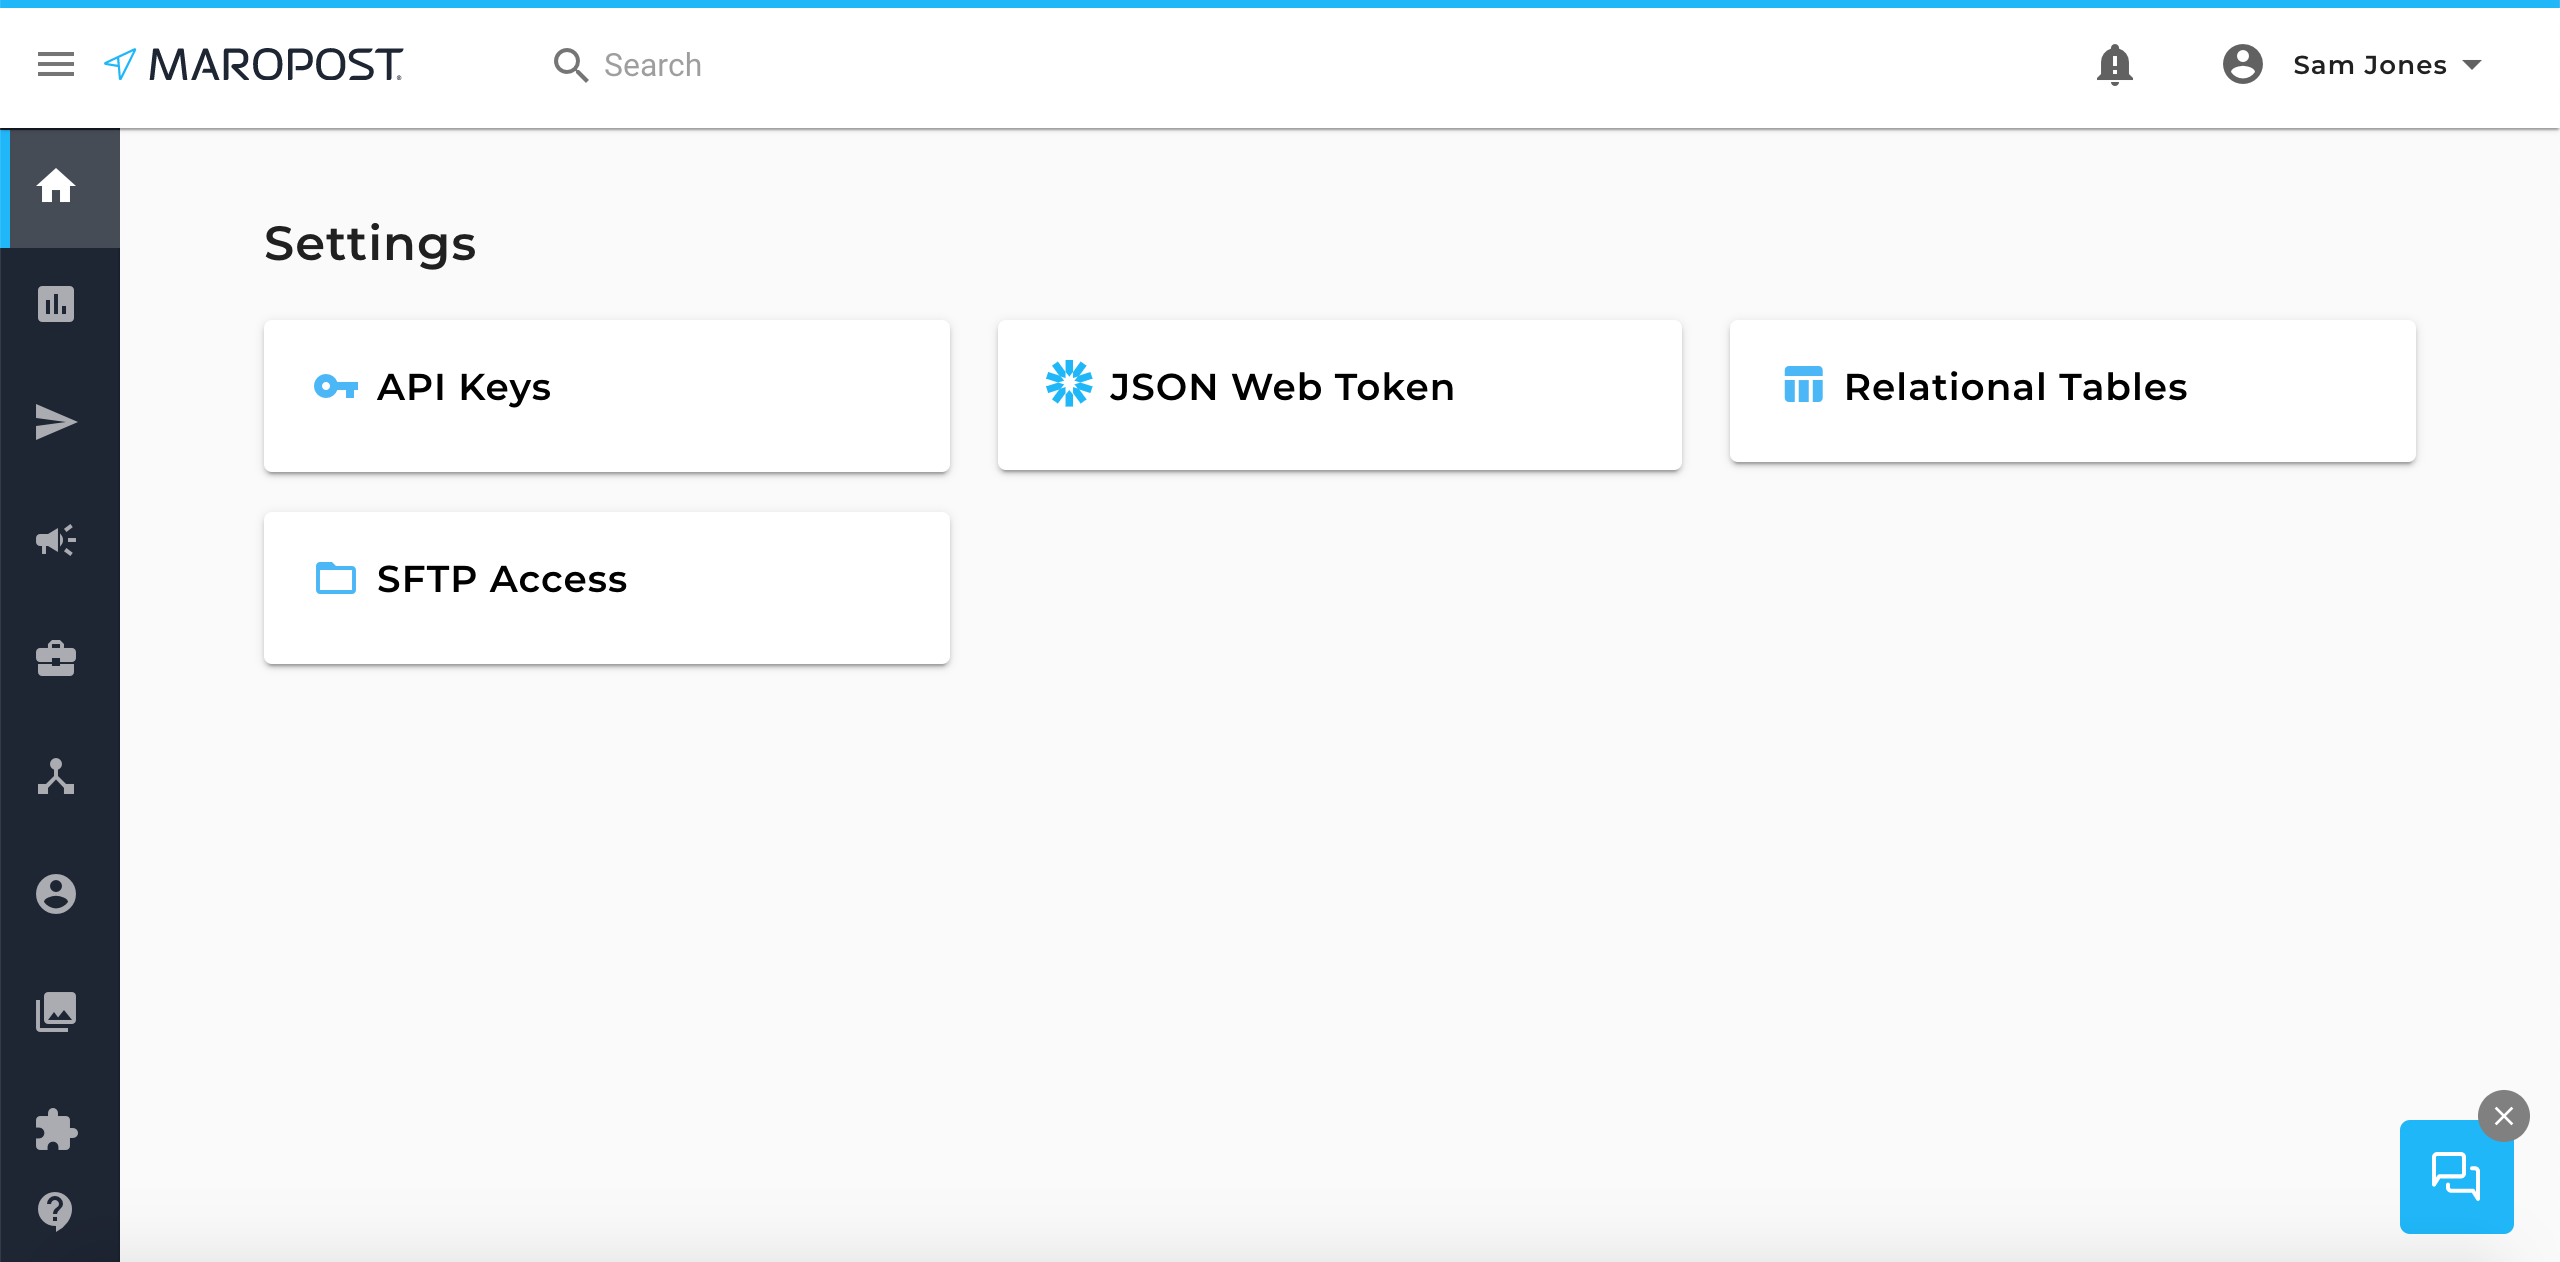
Introduced the Settings Page
Various application-related setup tasks are now grouped under and accessible on the Settings page. The following items, earlier available on the Connections page, have been moved to the Settings page:
- API Keys – Create and manage the API keys. For more information, see API Keys.
- JSON Web Token (JWT) – Generate and find the JWT. For more information, see JSON Web Tokens (JWTs).
- Relational Tables – Find information to set up access for your MySQL client. For more information, see Relational Tables Access.
- SFTP Access – Find information to set up access for your FTP client. For more information, see SFTP Access.
Navigation: Click your username on the top-right corner of the application and then from the drop-down menu, select Settings.
Enhancements
Added Functionalities in Neto Integration
You can now import historical data from Neto to Maropost when creating an integration. To learn about the Neto integration, see Integration with Neto.
The 'Sync historical data' check box is available on the Integration Settings dialog box; enabled only when adding a new connection. If the check box is selected, the historical customer and order data from Neto is synched to Maropost when the integration is created.

The Actions drop-down menu now contains the delete option enabling you to delete the Neto integrations that are not useful to you anymore.

Revamped SMS Dashboard
The SMS campaign dashboard has been revamped for better usability and experience. You can now find the campaign details and analytical data at a glance, neatly categorized into the following sections:
- Message Preview
- Campaign Performance Insights
- Campaign Details
To learn more about the SMS campaigns, see SMS Campaigns.

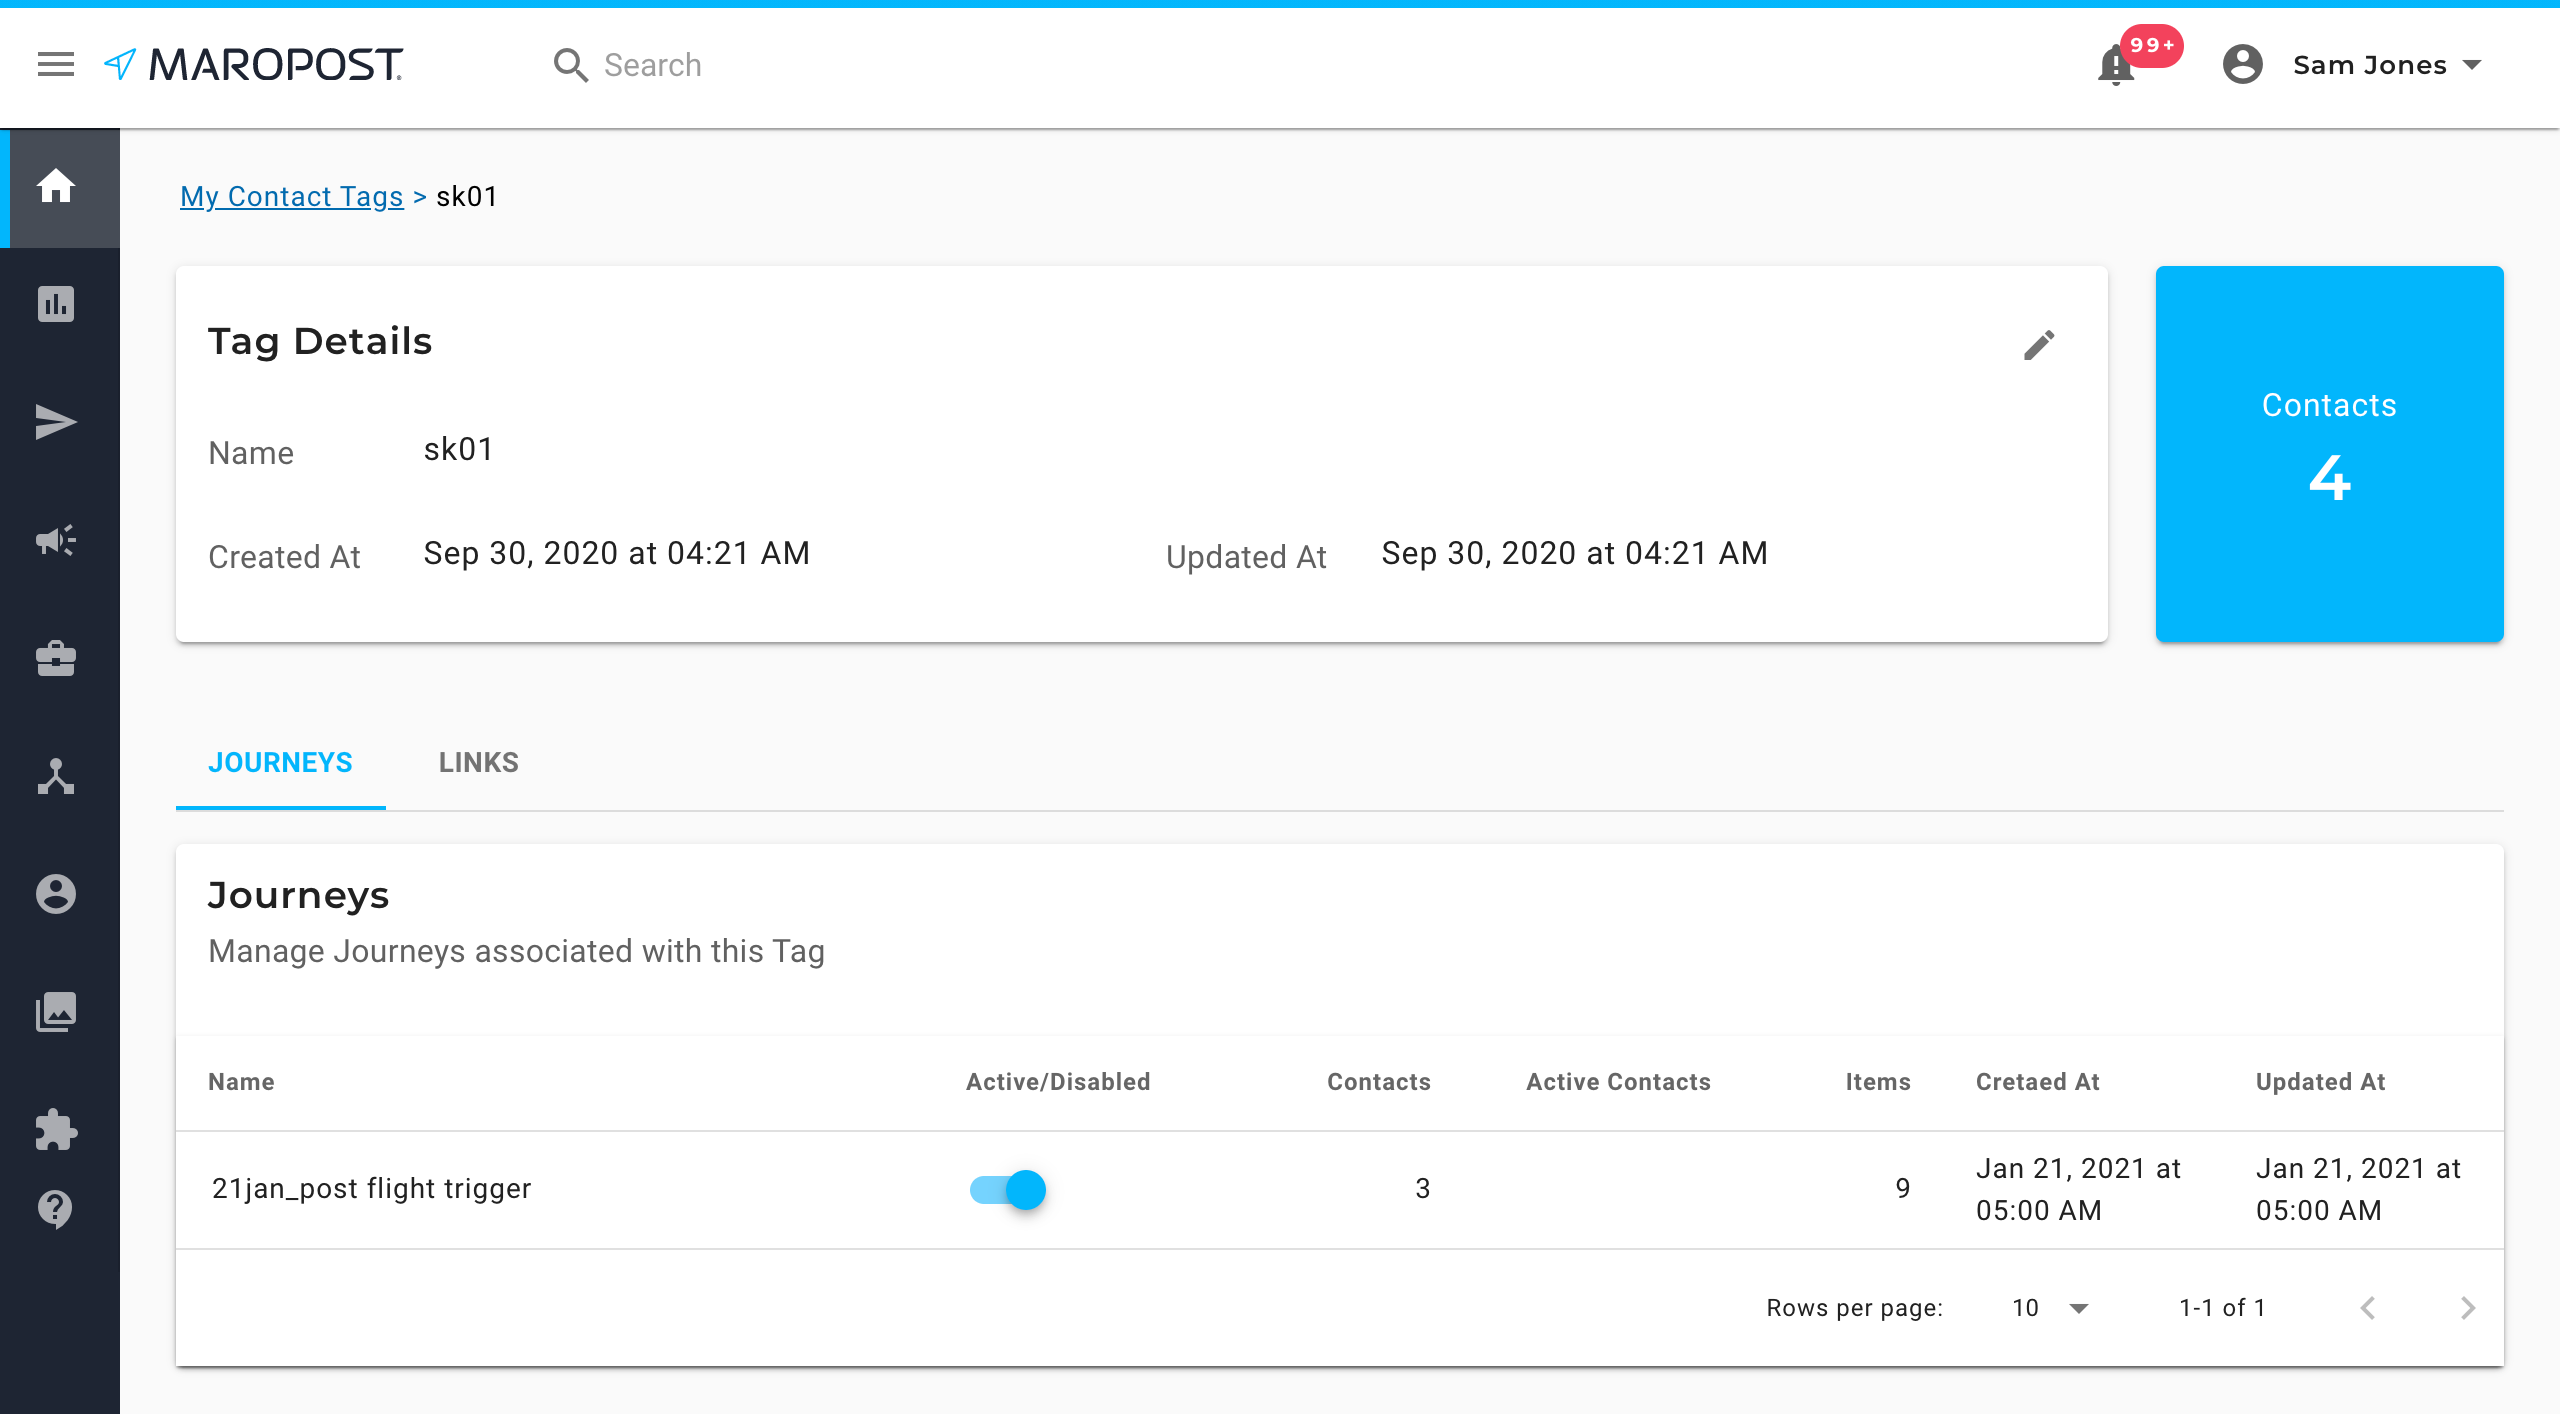
Journey Information in Contact Tags
You’ll now be able to see all the Journeys associated with a Contact tag enabling you to easily identify which Contact tag is used to trigger which Journey. To learn about Contact tags, see Contact Tags.
Navigation: On the Contact Tags index page, click the Contact tag name to go to the Tag Details page. This page shows the tag details and lists out the Journeys associated with the tag.