OVERVIEW
In this release, we introduced several UI and feature improvements in support of our vision of building a unified platform that is successful at catering to all your business needs.
For details, read on!
ENHANCEMENTS
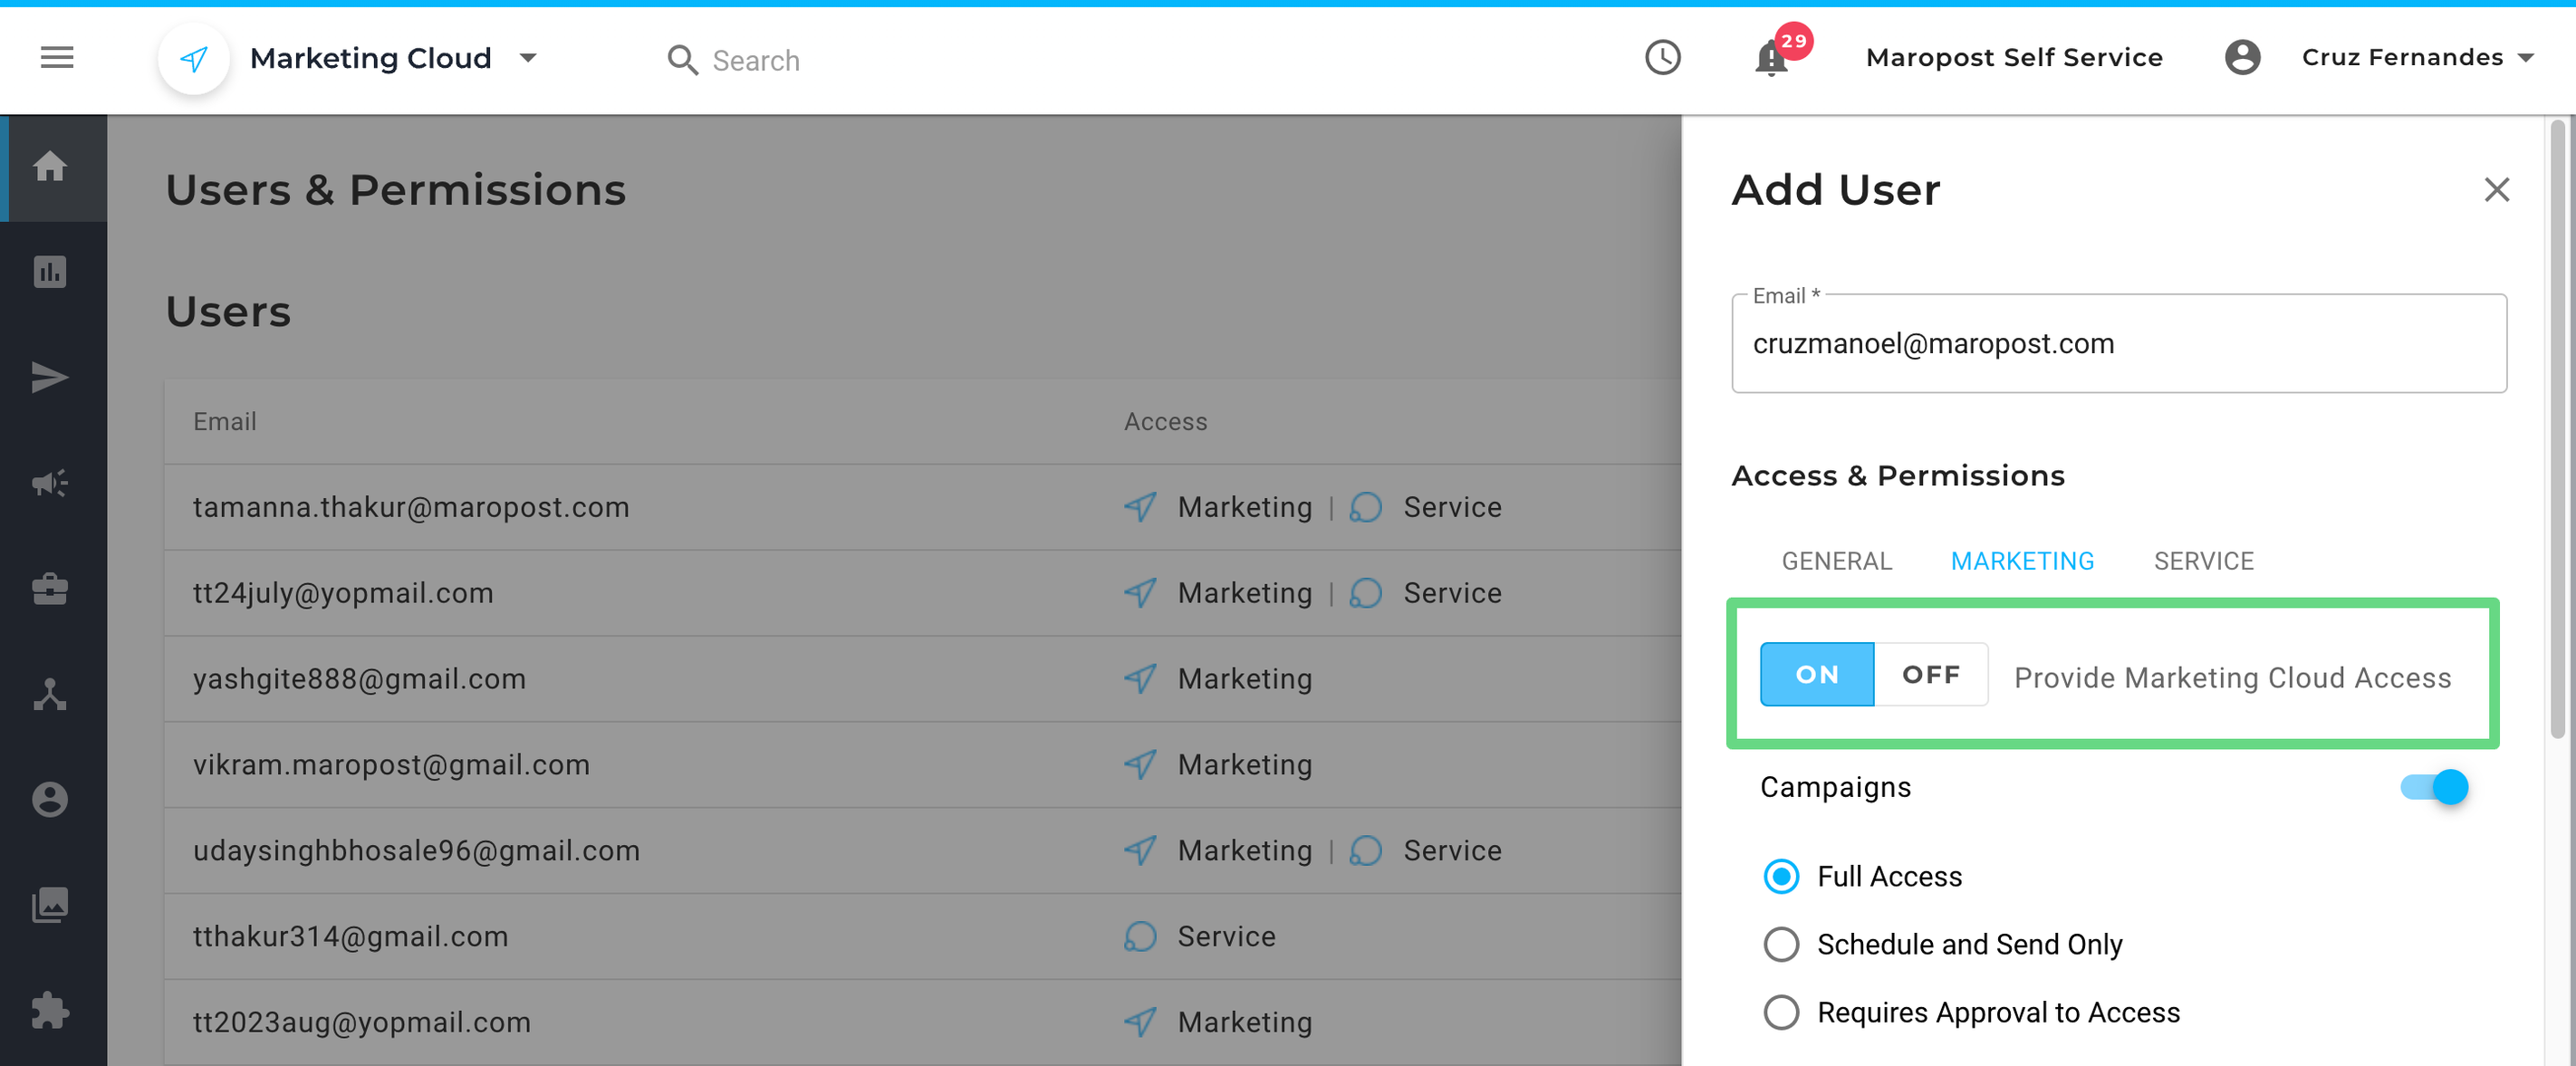
Improved the Users and Permissions Feature
We’ve introduced various UI changes that simplify how you manage user access and permissions across various features (and products). To learn about the Users and Permissions in detail, see Managing Users and Permissions in Marketing Cloud.
Some of the notable changes are:
- Navigation Changes and Refreshed Layout: The Users and Permissions page has been revamped so there are subtle changes to the overall layout of the page.
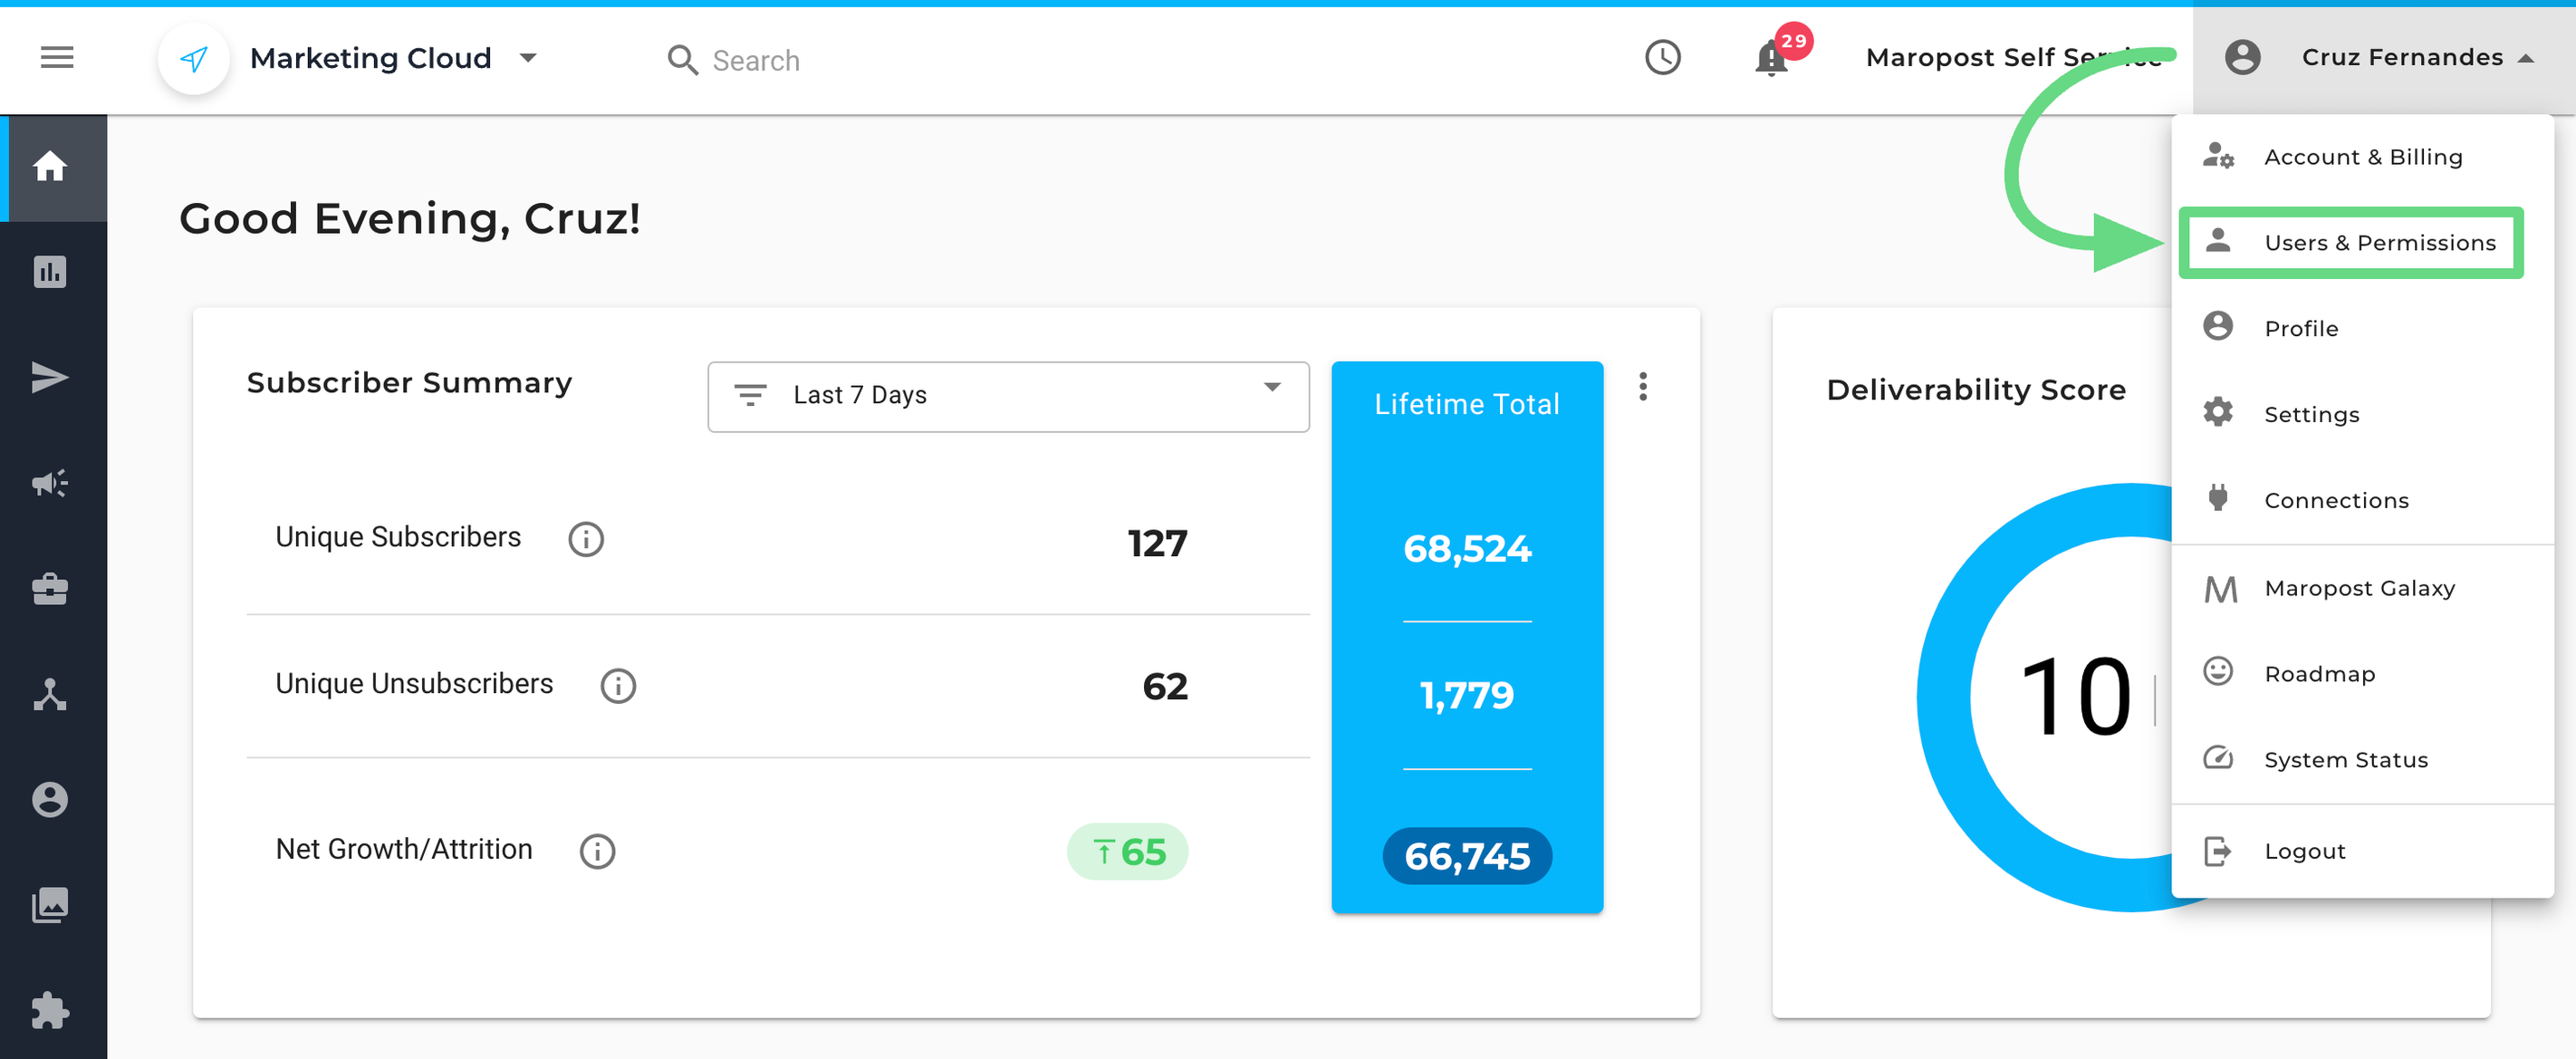
- Setup a Primary Contact: You now have the option to set any user as the primary contact for any communication with Maropost.
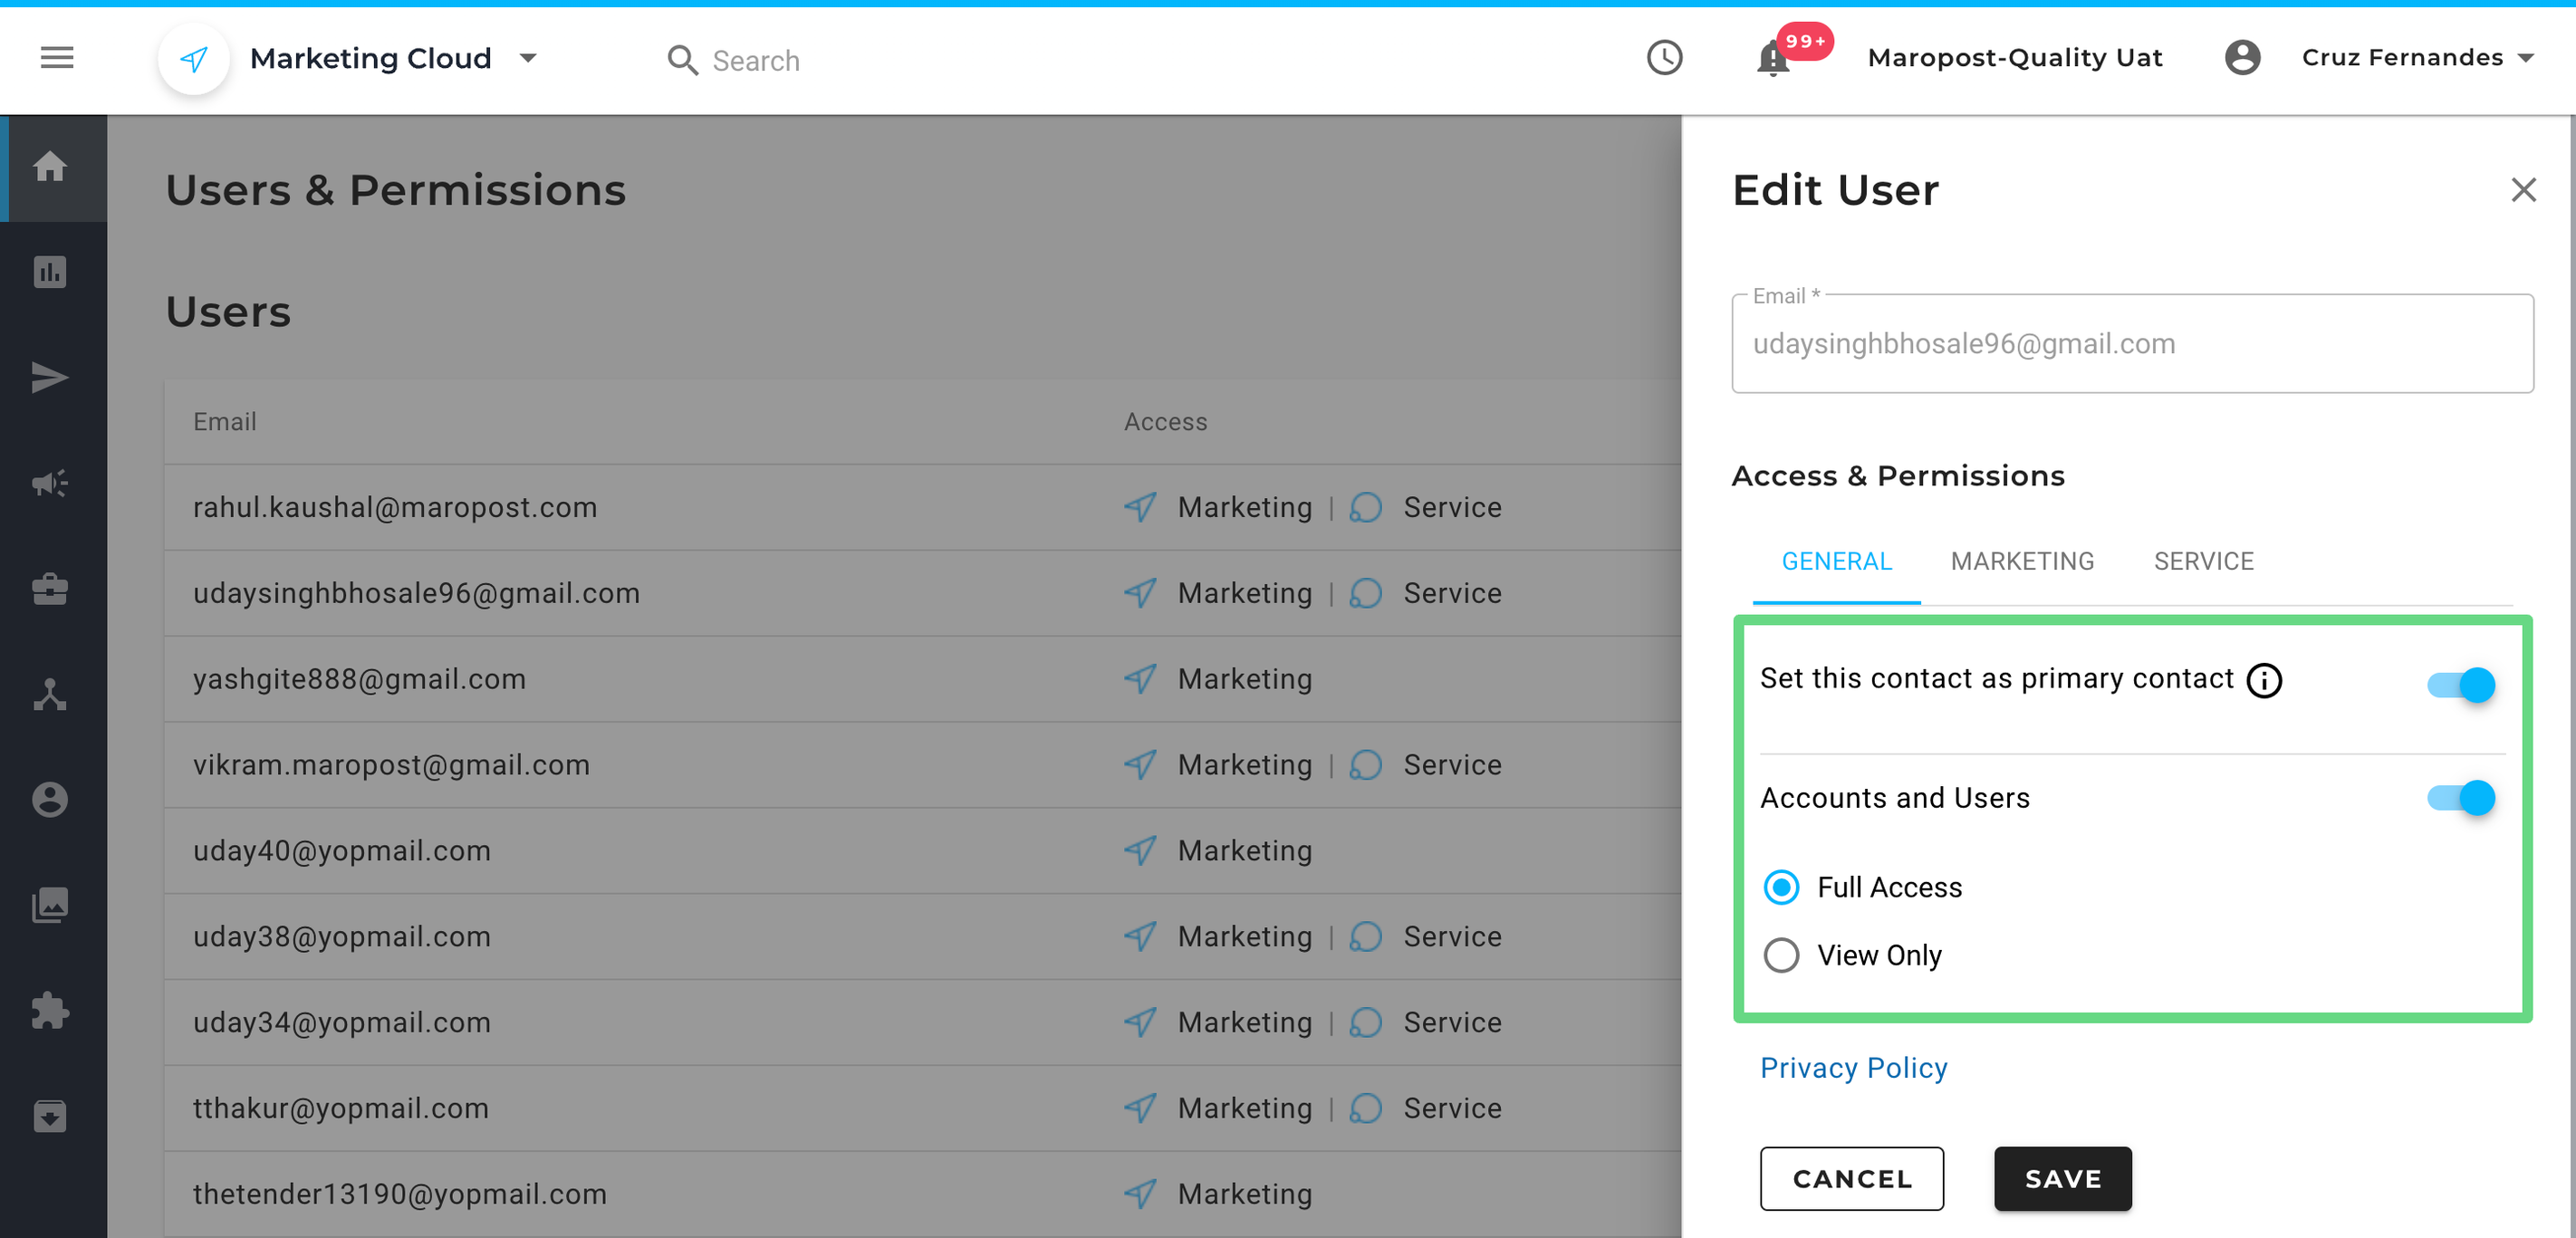
- Control the Access & Permissions: You can now grant/revoke user access to Marketing Cloud entirely by simply switching the On/Off Access buttons. You can also control complete access to a specific feature using the feature toggle and also provide partial access to the specific functionalities using the radio buttons.
Introduced Usage Tab in Account & Billing
We’ve introduced a new tab – USAGE – on the Account & Billing page where you can see your current plan usage. The usage metrics for email and SMS are displayed in the form of graphs and can be filtered based on monthly and yearly data.
For more information, see Managing Account and Billing Information.

Contact Overview Enhancements
We’ve introduced new tabs showing drill-down reports for the customer engagement cards on the Contact Overview page. The customer engagement cards are displayed on the OVERVIEW tab and the specific details can be viewed on the CAMPAIGNS and ORDERS tabs.
For more information, see Viewing a Contact Overview.

Create New Contacts Enhancements
We’ve improved the user interface for adding a new contact. The clearer design and segregated fields allow for convenience and error-free entry when filling out the contact information.
On the Total Contacts page (Email Contact Lists page > Actions drop-down menu > View Contacts), click NEW CONTACT.

